

learn how to do Decorative vinile to easily renovate any room or smooth surface, be it a wall, glass, tiles, furniture, doors, etc. The Decorative vinile it is easy to install as it does not require any type of special installation, you just have to be careful so that there are no bubbles left (discover how to apply the vinyl without bubbles HERE) and so that it does not break or spoil when it has small details.
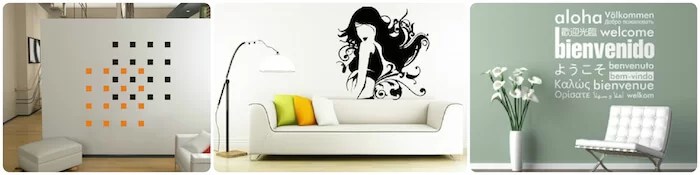
There are many models and designs on the market. decorative vinyl that adapt perfectly to the type of room or place in which we want to place it, as well as the style of decoration and personality of each one. Among the most common designs we can find decorative vinyl with geometric shapes, or silhouettes of objects and animals or those that contain a text.
We can also find a wide variety of prices, the cheapest are around 15 or 20 euros, but when they are large they can easily exceed 60 euros. In the cases in which the decorative vinyl that we like is monochromatic and with a design that does not have too many complications, we can encourage ourselves to do it. It is simpler than it seems and we will save a lot of money.
For this we will need the following materials:
- The design print what we want on a sheet of paper. It is important that the design is printed upside down, for this we can choose the “flip horizontally” or “invert” option of any image editing program. If the design is quite large, we will have to print it in different parts so that it fits on several pages and then assemble it as if it were a puzzle.
- A self adhesive vinyl roll of the desired color. It is advisable to assess whether it is cheaper to choose a pre-cut roll or to buy cut vinyl, normally the latter option is usually more profitable when the design is large.
- Scissors and cutter. It will be convenient for us to use normal scissors to cut out the large pieces and small curved scissors (like the ones for nails), to outline and cut out the small details. To cut straight lines it is better to use a cutter with the help of a ruler and for curved lines we can use a round object that we have at home (a plate, for example).
- Masking tape or painter’s tape. With small pieces of masking tape we will fix the design to the vinyl to be able to trace it, if we did it with zeal, that could break the drawing when we took it off and it is not convenient for us if it is a motif that we are going to repeat several times.
- Pen, pencil or marker to trace the design. The important thing is that it is a color that contrasts with the paper surface of the vinyl (which is normally white).
Once we have all the materials and the chosen design, we must follow the Next steps:
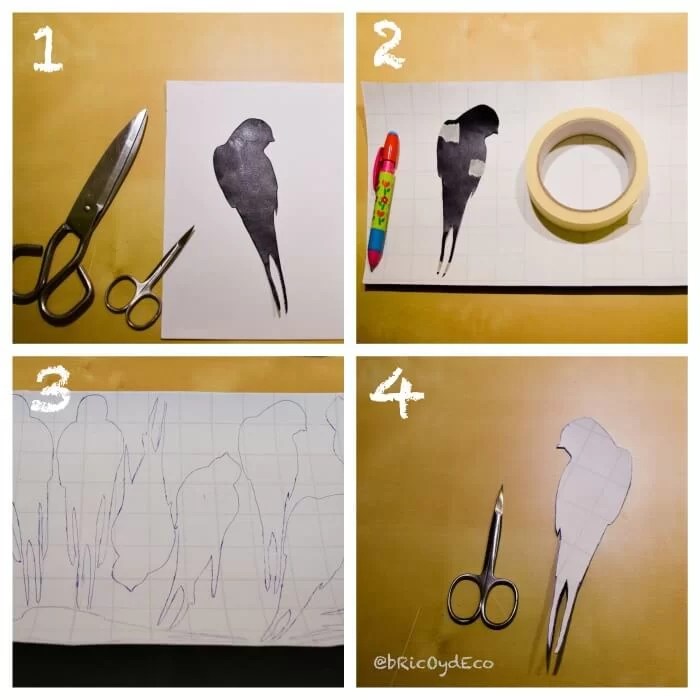
- print and cut every element of the design. I have chosen a bird design that is so fashionable lately but it can be done with any silhouette: letters, buildings, geometric drawings, animals, etc.
- set the silhouettes to the back of the self-adhesive vinyl with small pieces of masking tape so that it does not move when tracing it. Once we have traced the entire silhouette, we can carefully remove the bodybuilder’s tape and trace those parts that had not been marked.
- carefully we go tracing the entire silhouette of the design on the back of the self-adhesive vinyl (the paper part). If the design consists of several elements, the ideal is to trace them together to make the most of the self-adhesive vinyl.
- Once the design is traced, we only have carefully cut and paste our decorative vinyl in the place we have chosen.
Isn’t it complicated? With a little patience and skill when cutting we can get a Decorative vinyl with a totally professional look and for very little money. In the following image you can see a detail of my vinyl of birds, a design like this can be found for about 15 or 20 euros, while a roll of black vinyl is around 4 euros and I had more than half left over.

Do you have decorative vinyl at home? Have you been encouraged to make your own? Some time ago I already made one for the kitchen that you can see HERE, now I have encouraged myself with the one with the birds and I can assure you that I don’t think it will be the last one I do.
UPDATE
Do not miss this video tutorial to install decorative vinyl.


