

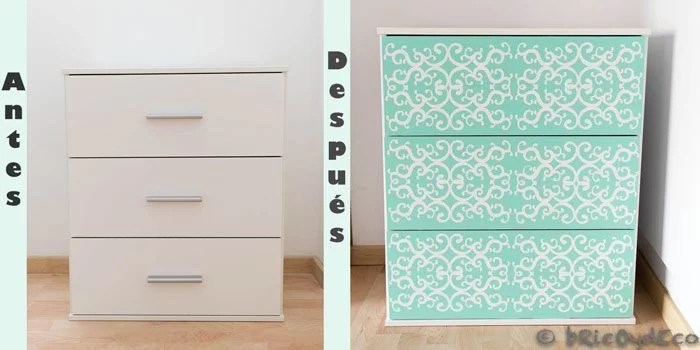
The self adhesive vinyl It is an inexpensive material with which we can easily tune up and renovate furniture in record time. Its placement does not require previous experience, although it is clear that with a little practice we can achieve truly surprising results, in fact you just have to see the before and after covering a simple melamine chest of drawers with vinyl to check.
The flat, unmolded surfaces of melamine furniture are best suited for cover with vinyl. If you’re tired of the color of your kitchen or cabinet doors, self-adhesive vinyl is a quick and fairly inexpensive way to give them a 180-degree turn. Here are some examples:
Cover the doors of a closet with vinyl (you can see the step by step in this link)

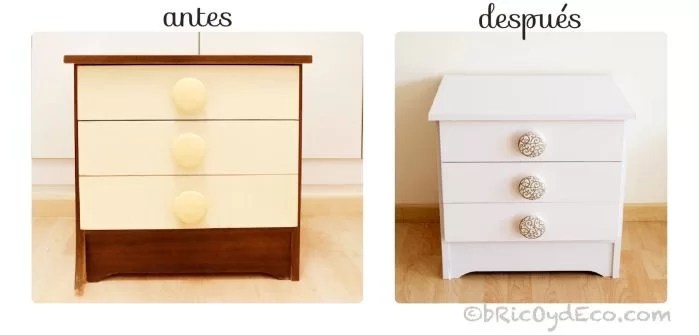
Cover a melamima piece of furniture with vinyl (you can see the step-by-step at this link).
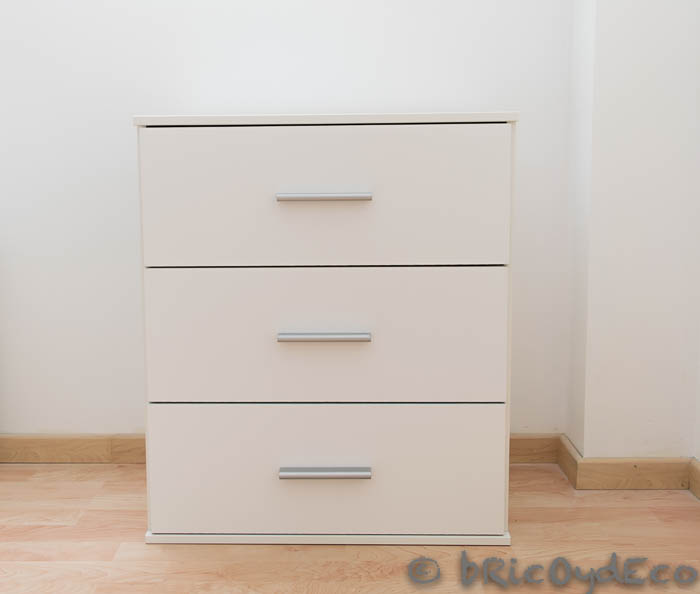
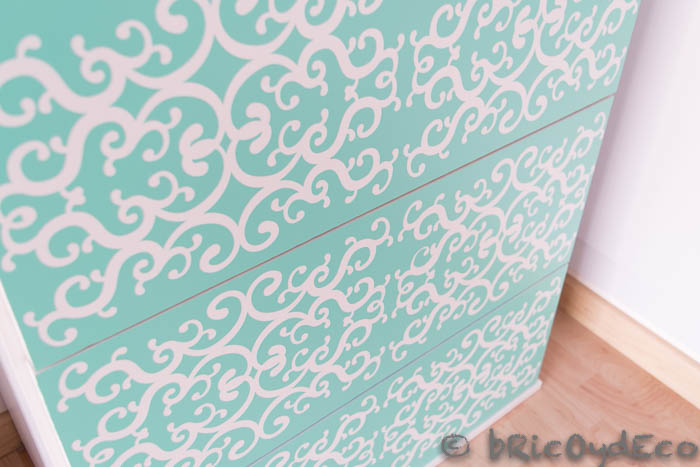
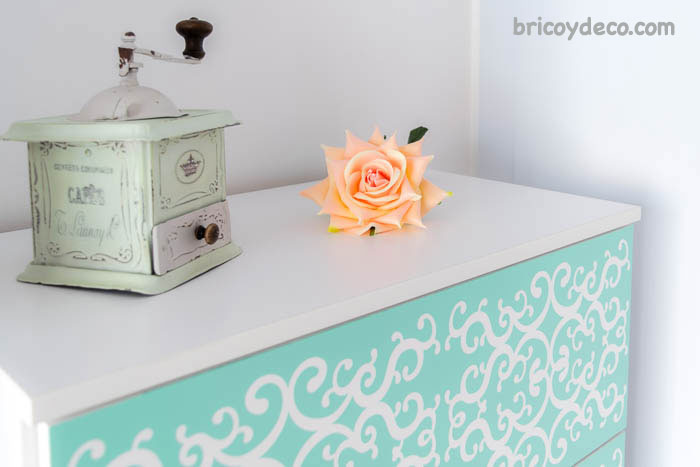
Sometimes it is not necessary to cover the entire piece of furniture to update it, simply adding a detail or covering part of it can achieve very good results. In this specific case, the only thing that has been covered has been the fronts of a melamine chest of drawers that, although it was in good condition, had nothing that made it stand out or that differentiated it from a simple chest of drawers.
To update and renew this dresser I have used the following materials:
– self adhesive vinyl matte mint green (can be purchased by the meter at Vinilosametros).
– Masking tape or painter.
– Cutter (normal and precision for crafts).
First of all, what we have to do is remove the handles of the dresser or chest of drawers and measure the front of the drawer (in my case 58 centimeters long by 22 centimeters high). To work more comfortably, it is convenient to completely remove the drawer, although in my case it was attached to the side guides and I worked without removing it completely, only opening it.
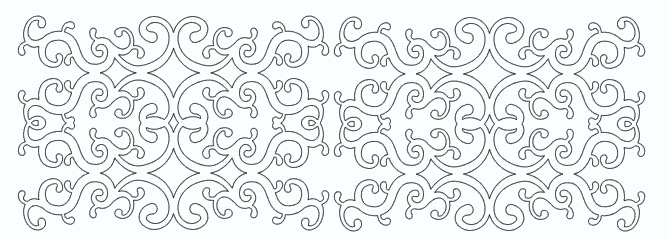
Once we have the measurements, we will cut a rectangle of vinyl that has a couple of centimeters more than the drawer on each side, that is, in my case 2+58+2 = 62 centimeters long and 2+22+2 = 26 centimeters high. Then we will select the drawing or template that we want to transfer to the vinyl that can be traced on the vinyl, or printed directly on the back of the paper (you can see how to make a decorative vinyl in this link).
In this particular case I have used the following design that I have previously cut with a cutting machine:
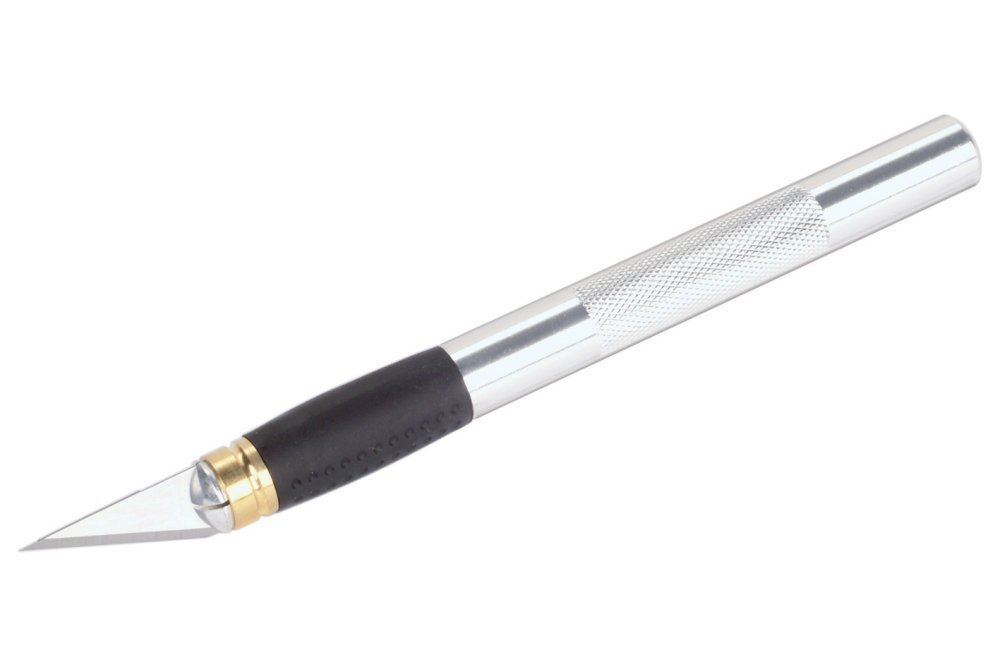
If you don’t have a cutting machine you can use a precision cutter like the one in the following image to punch out the drawing and remove the part of the vinyl that we want to discard:
I assure you that an overly complicated design is not necessary to obtain a good result, you can even help yourself with stencil templates to make your personalized drawing.
Once we have transferred the design to vinyl, we must discard or take off the part that we are not going to adhere at the front of the drawer:
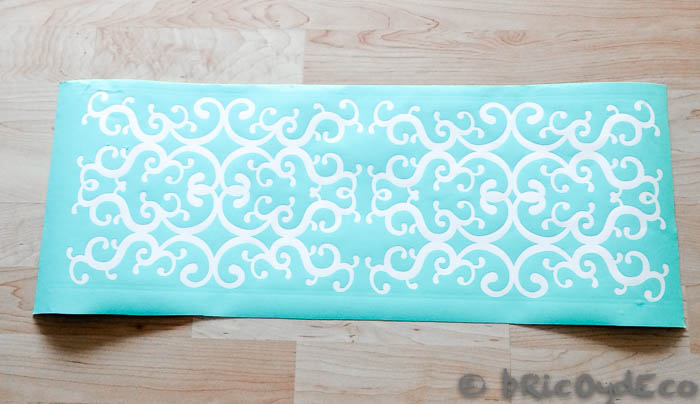
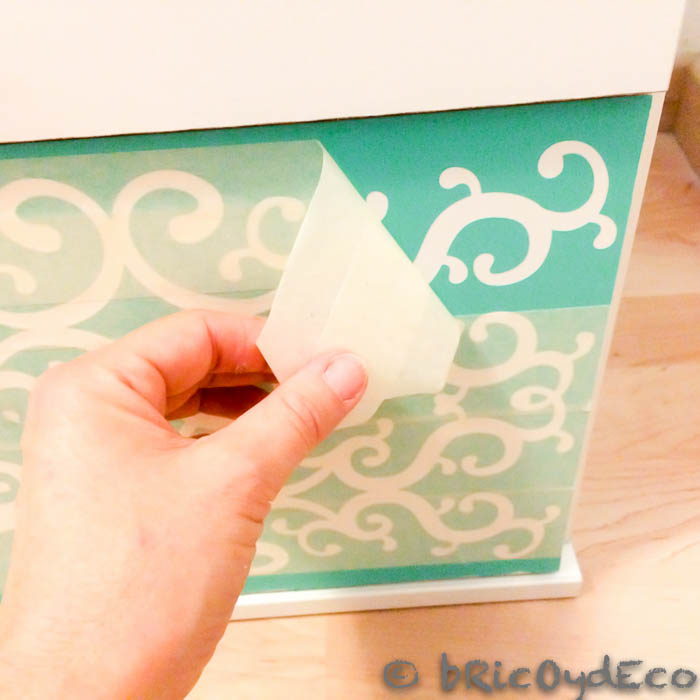
For facilitate the placement of die-cut vinyl on the furniture we will glue some bodybuilder’s or painter’s tape, in this way when we take off the removable paper from the vinyl, the drawing will remain intact. It is convenient that we wear down the adhesive of the bodybuilder tape a little so that it is not too complicated to detach it from the vinyl.
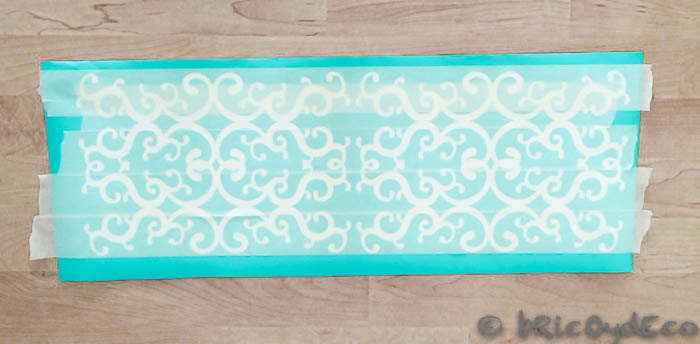
The next step will be take off one side of about 3 or 4 centimeters to help us center and place the vinyl on the surface to which we want to adhere it (in this case the front of the drawer). As you can see, the die-cut part is also adhered to the bodybuilder’s tape and does not deform as we peel off the paper.
Once we have centered the vinyl, with one hand we will place it and with the other we will remove the paper from the rear. The advantage of using die-cut vinyl is that it is very difficult for air bubbles to remain as these are easily removed by die-cutting.
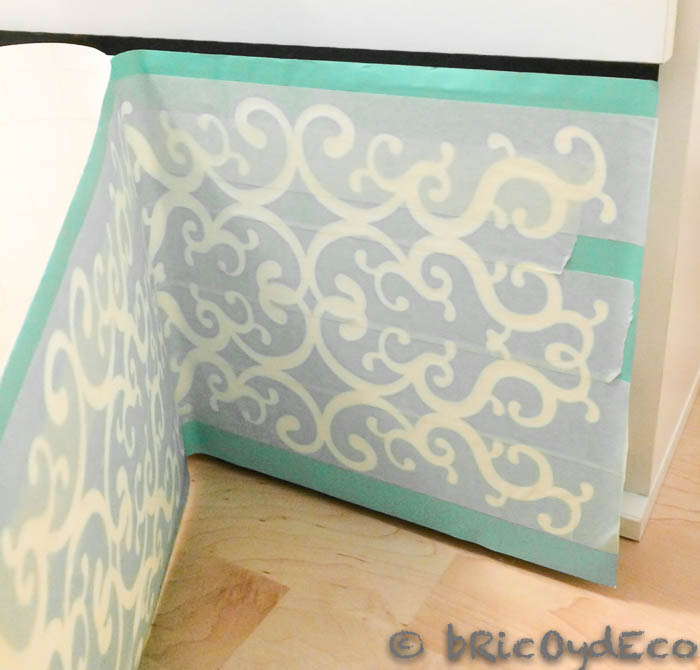
Then we will only have to remove the masking tape very carefully and cut the excess part of the sides of the drawer with a cutter.
It is not a difficult or complicated job but it does require patience and care both when cutting the drawing and when placing it, however the final result I think is well worth it:
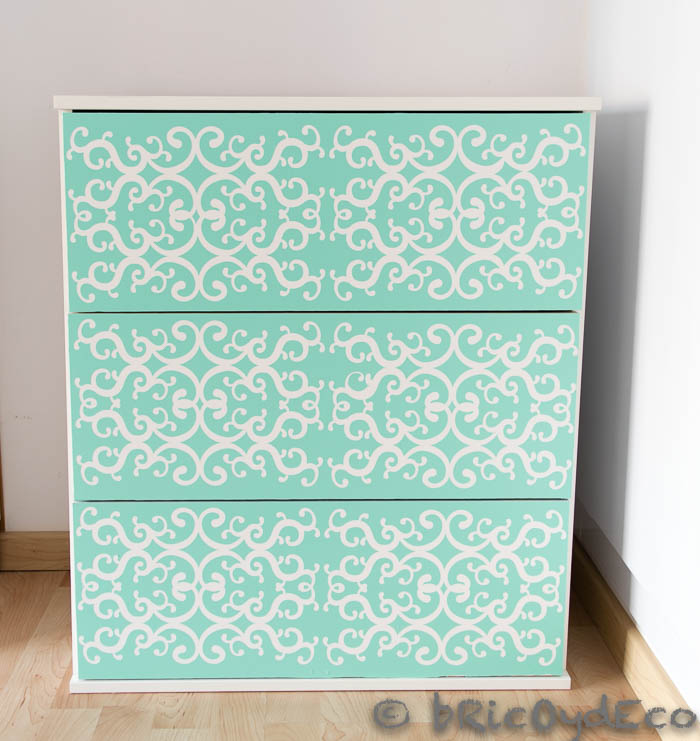
Finally, we would only have to replace the handles that we already had or new ones, although in my case I have dispensed with them since the drawers can be easily opened from the sides.
Bearing in mind that the price of a meter of self-adhesive vinyl 122 cm wide is 8.5 euros, and that to cover the fronts of the drawers of this chest of drawers with vinyl I needed less than half, it can be said that I managed to update and renew a simple white melamine chest of drawers for 4 pesos (or €4).
what did you think of this before and after covering a melamine dresser with vinyl? Seeing her, no one would say that she was the same, right? You have already seen that updating, renovating or adapting melamine furniture to a new space is not so difficult and can also be very cheap. You have no excuses, not new… I renew!!!
You can see many more DIY and decoration ideas at Thank you very much for commenting and sharing!


