

If you like geometric decoration as much as I do, you can’t miss this tutorial to decorate with hexagons lined with mirror vinyl. You will learn how to make a wall mural to personalize any corner.
The hexagonal shapes are still a trend in decoration. We can find them in different objects such as:
- modular shelves
- Mirrors
- Lamps
- Textiles and carpets
- Painted paper
- Floors and coatings, etc.
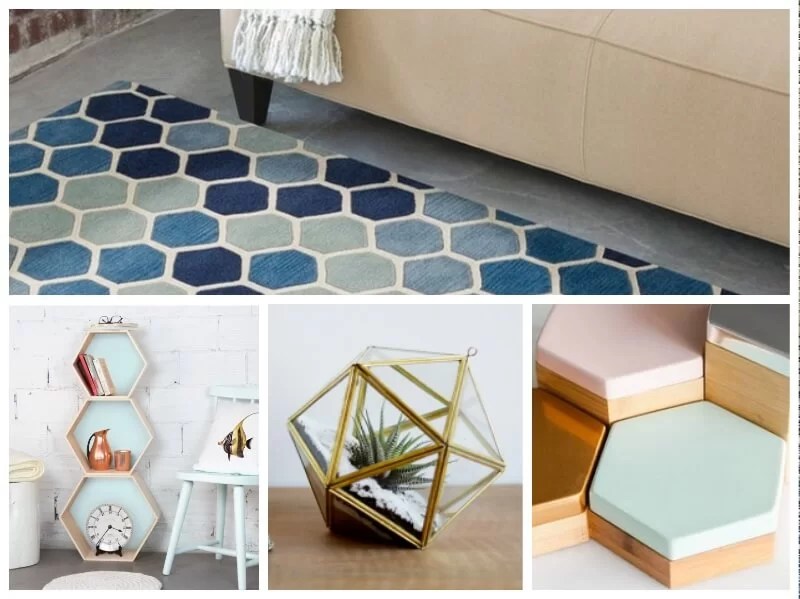
They are normally used to decorate spaces with a retro air, as well as in a Nordic style. If pastel and metallic colors are also contrasted (gold, silver, copper), we will achieve a very current combination. You can find more inspiration about geometric decoration in this link.
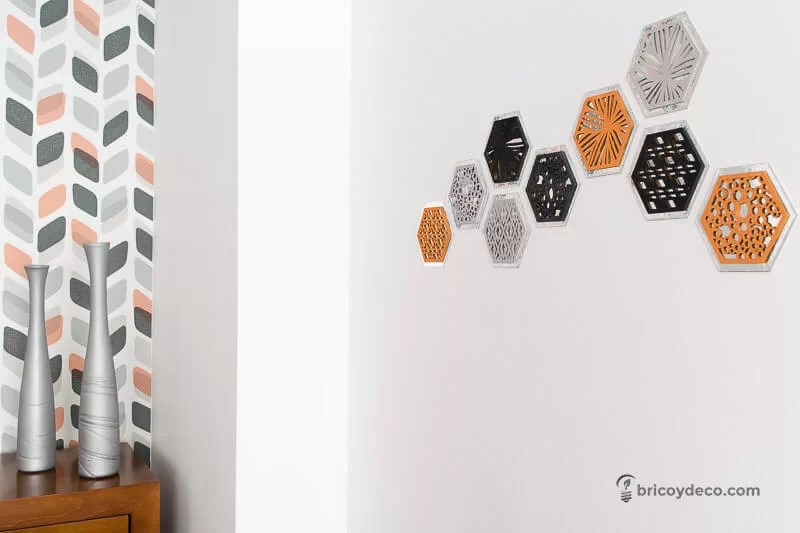
For this reason, I thought it would be a good idea to incorporate them into my living room by creating a decorative mural with hexagons covered with mirror vinyl.
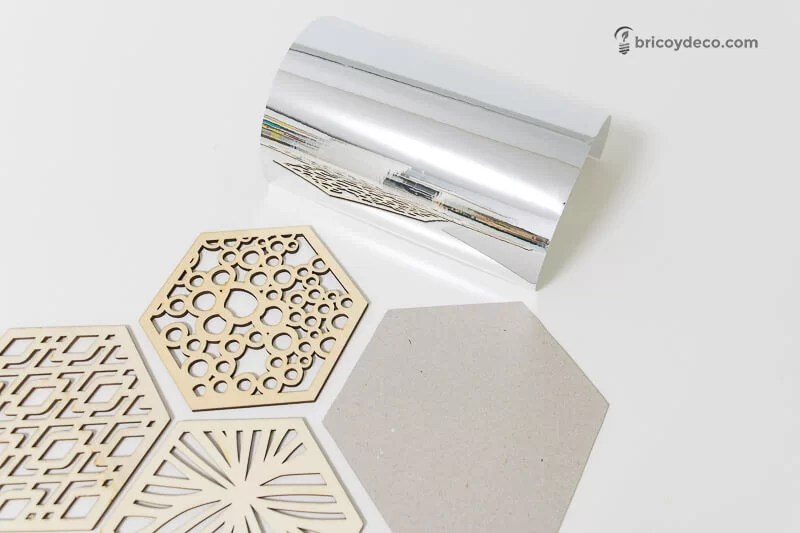
Materials to make your own decorative hexagons
- Cardboard for covers. It is normally used to make notebooks. Its main advantage is that it is thick enough to form a consistent hexagon, but can be easily cut with scissors or a cutter.
- Mirror vinyl. Mirror or chrome effect vinyl is capable of reflecting your image.
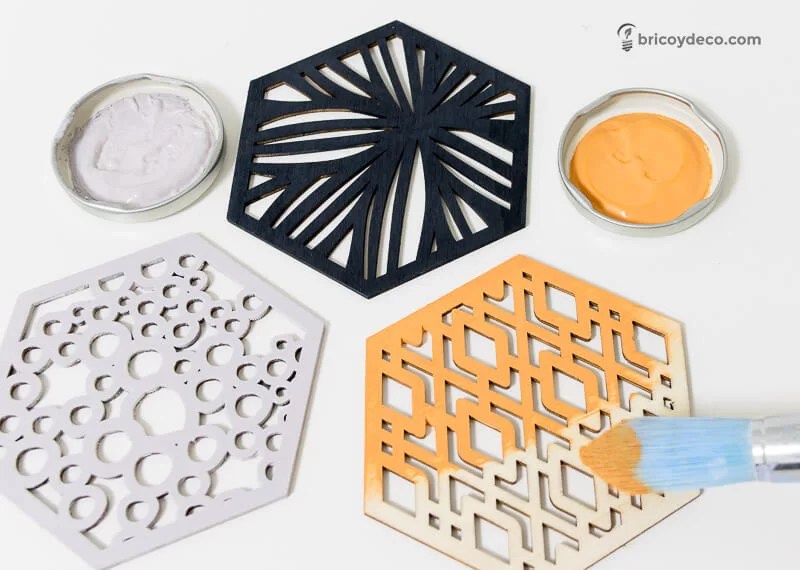
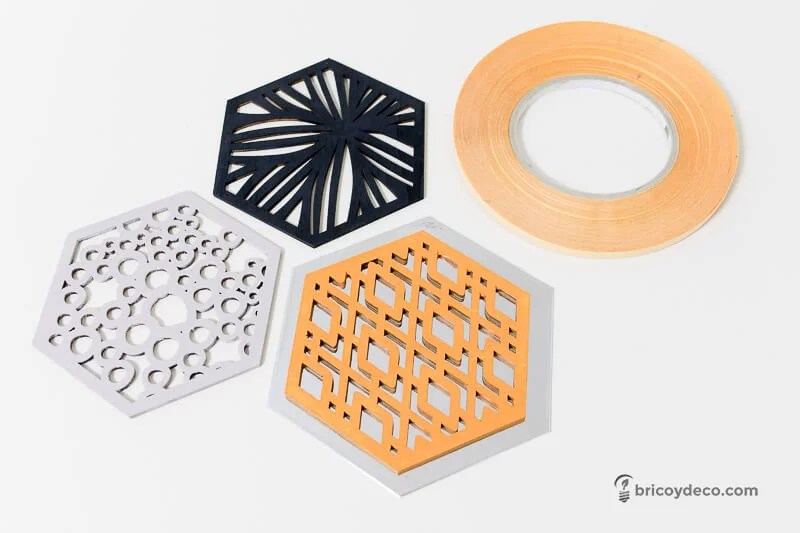
- Wooden die-cut hexagons.
- Chalk Paint or chalk paint.
- Double-sided tape, scissors or cutter, spatula, brush…
How to make a mural with hexagons covered with vinyl step by step
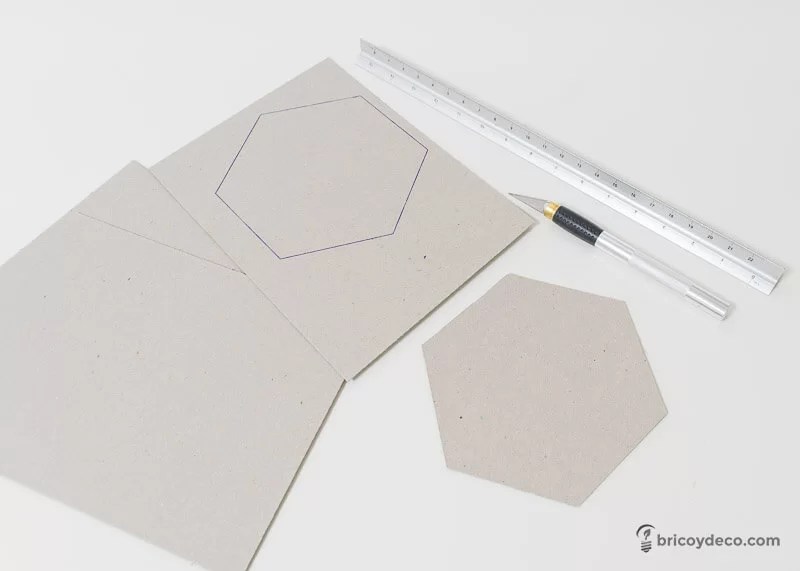
First, the hexagons are drawn on the cardboard for covers and cut out with scissors or a cutter.
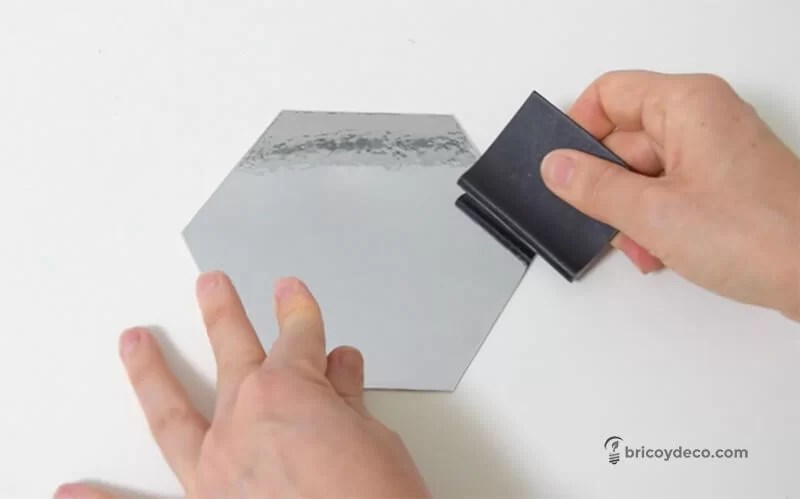
Next, the hexagons are covered with mirror vinyl. To do this, follow these steps:
- Peel off the protective paper from the vinyl.
- Put the sticky side up.
- Drop the cardboard hexagon on top and press.
- Trim all the edges to form the tabs.
- Adhere to the back of the cardboard.
- With a spatula go over all the edges and front.
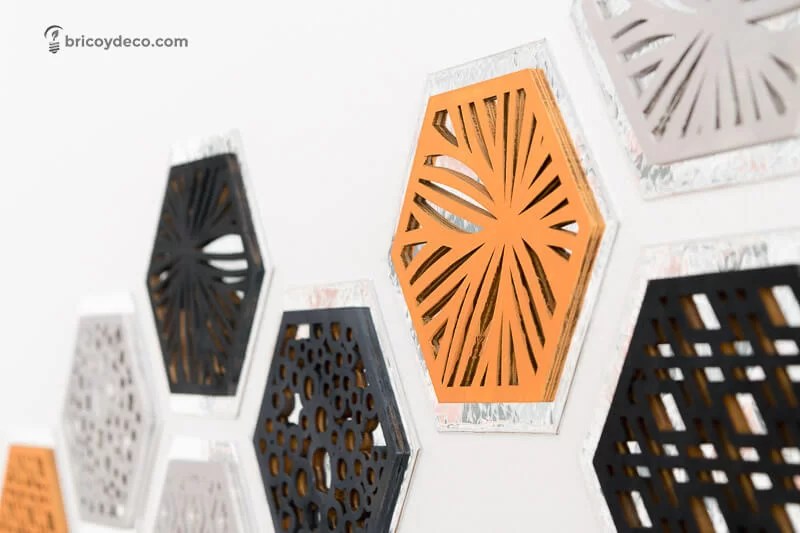
The next step is to paint the wooden die-cut hexagons with chalk paint. I have chosen the colors that best combined with my living room. Keep in mind that gray and white colors will stand out less on mirror vinyl.
Finally, the die-cut hexagons that have been lined with vinyl are adhered, using double-sided adhesive tape.
In the following video tutorial you can see the whole process step by step:
DIY Hexagon Wall Mural
After following all the previous steps, only fix the hexagons to the wall to create a decorative mural. To do this, it is most convenient to use double-sided tape since this way you can easily take them off the day you want to change the decoration.
The mirror vinyl makes everything that may be in front of it be reflected. It also provides a greater sense of depth to the pieces of wood that have been adhered to it.
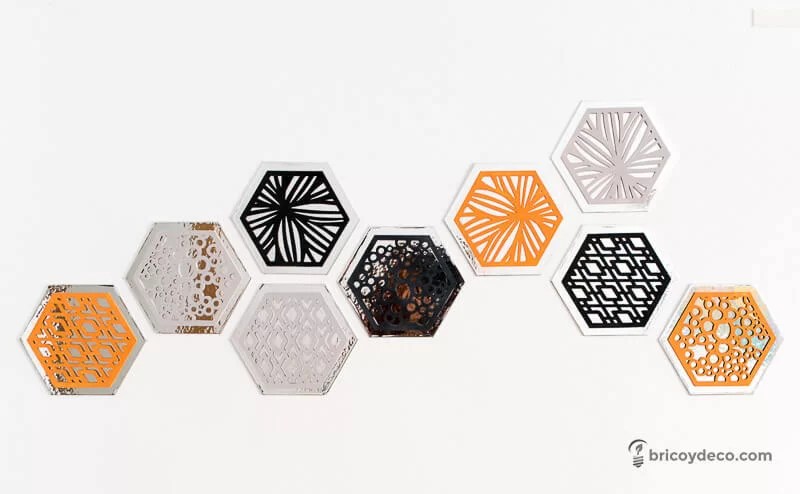
When distributing the pieces, a multitude of compositions can be created:
- They can be placed together or leave a small frame between them as in this case.
- You can group them by colors or by model.
- Another option is to distribute randomly as I have done.
- The size of the mural is adaptable since it is possible to place the pieces more compactly on top of each other, or expanded.
What do you think of this idea? decorate with hexagons lined with mirror vinyl? In just a few hours you can create your own wall mural with geometric motifs to give any corner of your home a retro or Nordic look.
If you liked this post, you can see more video tutorials and DIY ideas at .


