

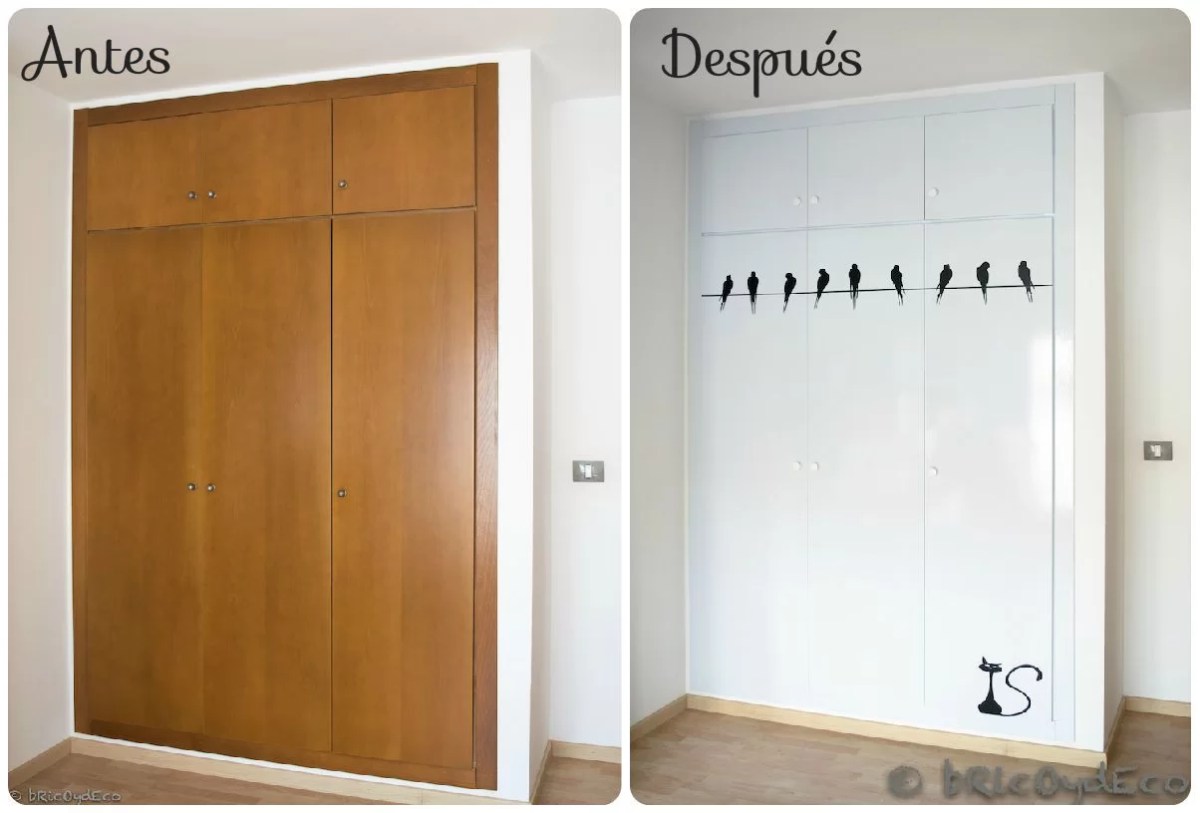
Seeing on the internet the impressive changes in kitchens after lining the cabinet doors with self adhesive vinyl I said to myself, why not try it with the doors of a built-in wardrobe? Said and done, here you have the before and after a cabinet lined with self-adhesive vinyl.
The truth is that these vacations have given a lot of themselves, not only have I taken the opportunity to travel and rest, but I have also put into practice several projects that I had pending and that I will show you little by little. One of them was the renovate wardrobe doors that came “as standard” with the flat and that I never liked them very much.
Some time ago I painted the closet doors in another room (to see the result click here), but it was only two doors and this one has six, which means more money to paint and more time to finish it. After considering several options, I opted for cover the doors with self-adhesive vinyl since, in addition to being economical, it allowed me to change the appearance of the doors in one day by not having to wait for the drying between layers and layers of paint.
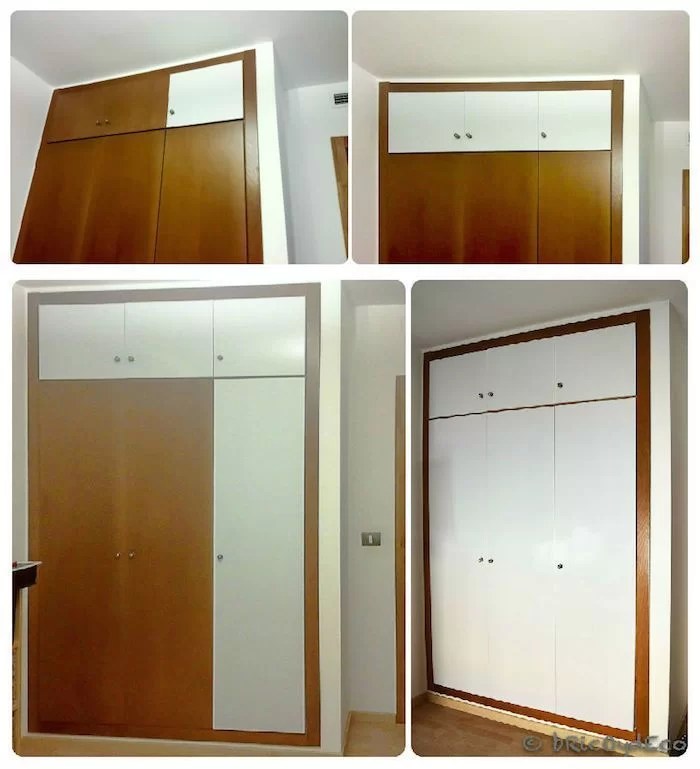
For cover cabinet doors with self-adhesive vinyl the best thing is to disassemble them and go doing them one by one. In this way it can also be done in several days so that it is not so heavy. In the following image you can see the process:
 As you can see the doors were flat, without any kind of moldings, but being a large surface, it is convenient to moisten the surface so that there are no bubbles when placing the self adhesive vinyl (click here to know in detail how to install self-adhesive vinyl without bubbles). If you want to place the vinyl on a door with moldings, we must use hot air (from a hair dryer, for example), so that the vinyl adapts better to the molding.
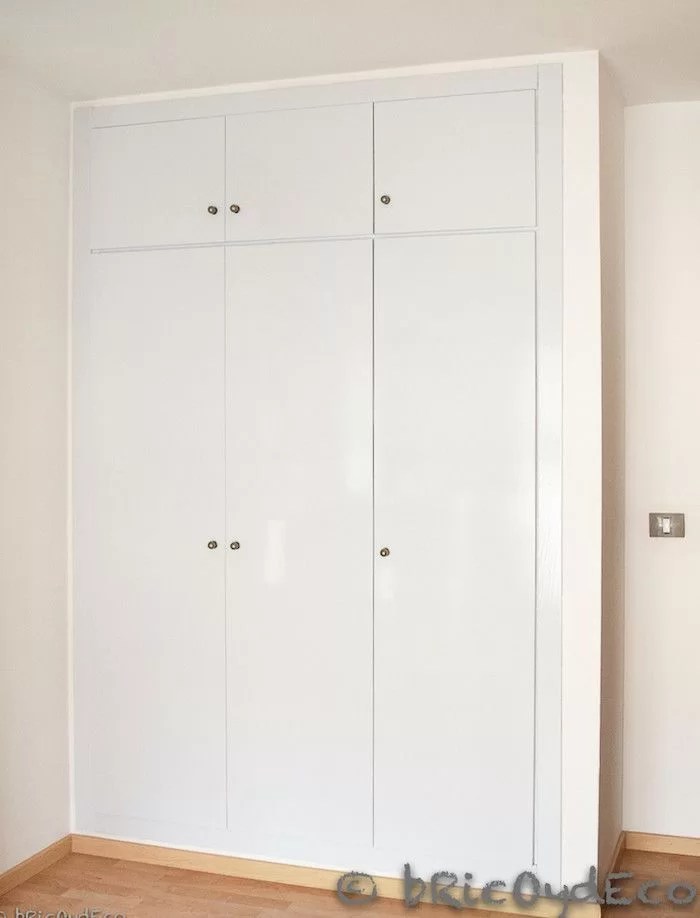
After finishing cover with self-adhesive vinyl all the doors, I had to remove them again to cover the cabinet frame flashing, so I recommend lining the flashing first and then the doors (and not the other way around like I did). In the following image you can see how the wardrobe was all lined.
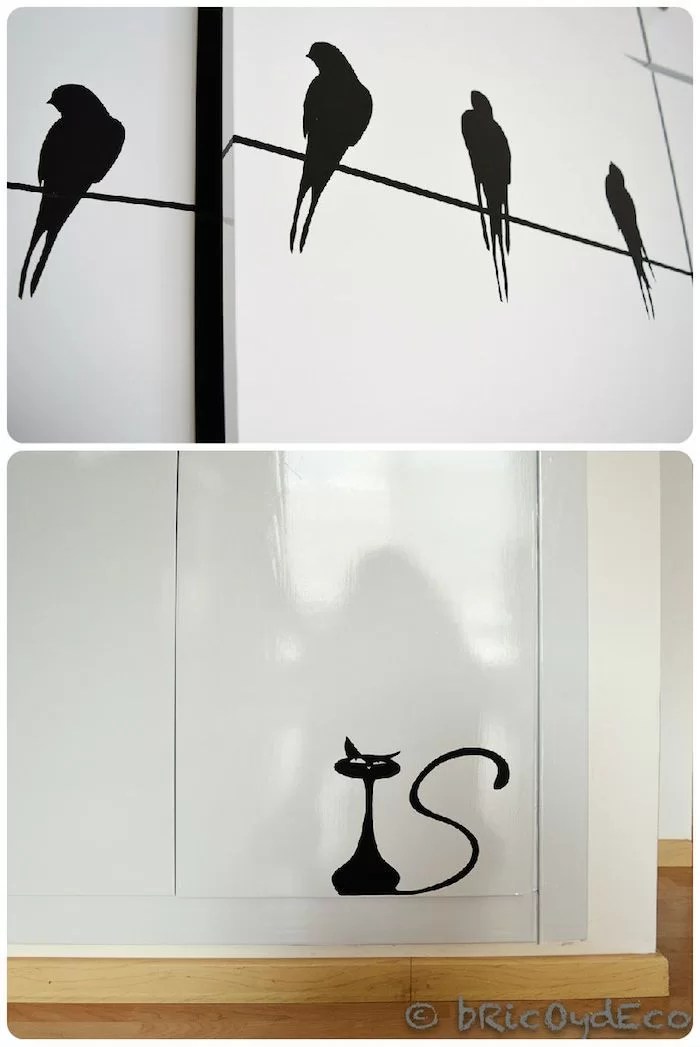
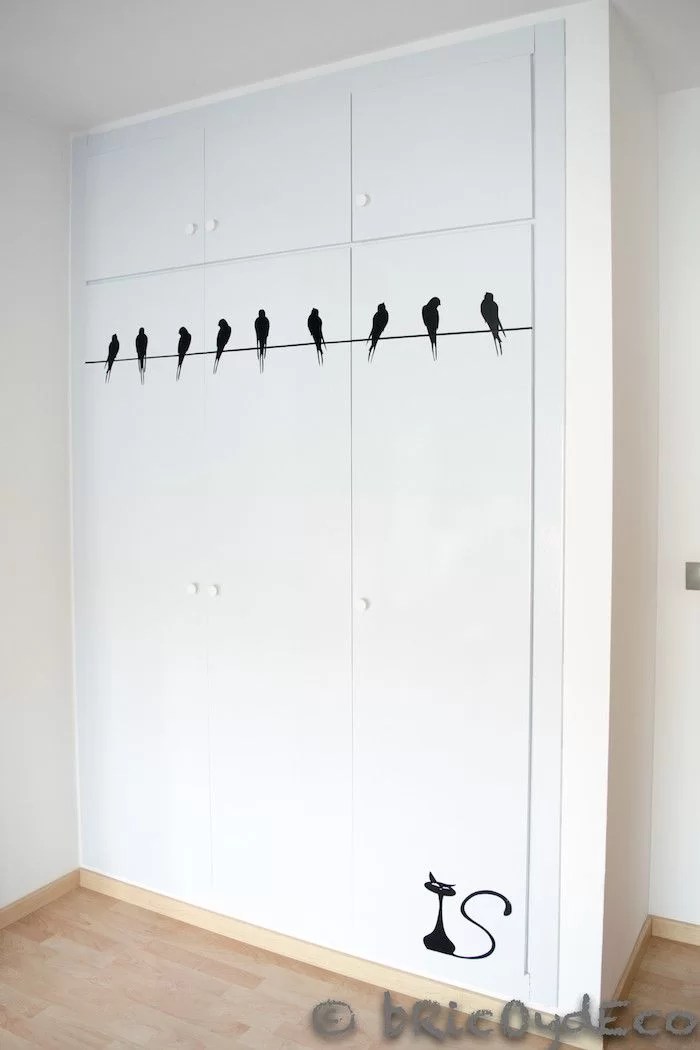
I already had the wardrobe with the gloss white doors as I wanted but it was a bit bland, so I made some black vinyl to brighten it up a bit. I came up with a composition with some birds on a cable (click here to see the step by step) and a funny cat that looked at them with dark intentions. In the following image you can see the two vinyls in detail.
Finally I changed the knobs for white ones so that they would go unnoticed and the doors would look more like a mural and not like a closet. Seeing this before and after, who would have thought it was the same wardrobe, right?
To cover the doors of this wardrobe I used about 7 meters of gloss white self-adhesive vinyl at 2.5 euros per meter (front of the door and sides), plus 1 meter of black vinyl for the details and the knobs cost me 1, 5 euros each, so for less than 30 euros I have managed to give a modern and decorative look to a wardrobe that was very ordinary. What did you think of this tuning? Do you dare with yours?


