
I always encourage you to refer me your DIY projects inspired by the ideas that you have seen on the blog, that is why I was very happy when Isabel told me that she had changed the curtain in her kitchen for a translucent vinyl decorated by herself.
I don’t know if you will remember the tutorial I did a few months ago on how to install electrostatic vinyl on window glass (you can see it HERE). In it I told you that it was a simple, economical and decorative way to preserve privacy without losing any light.
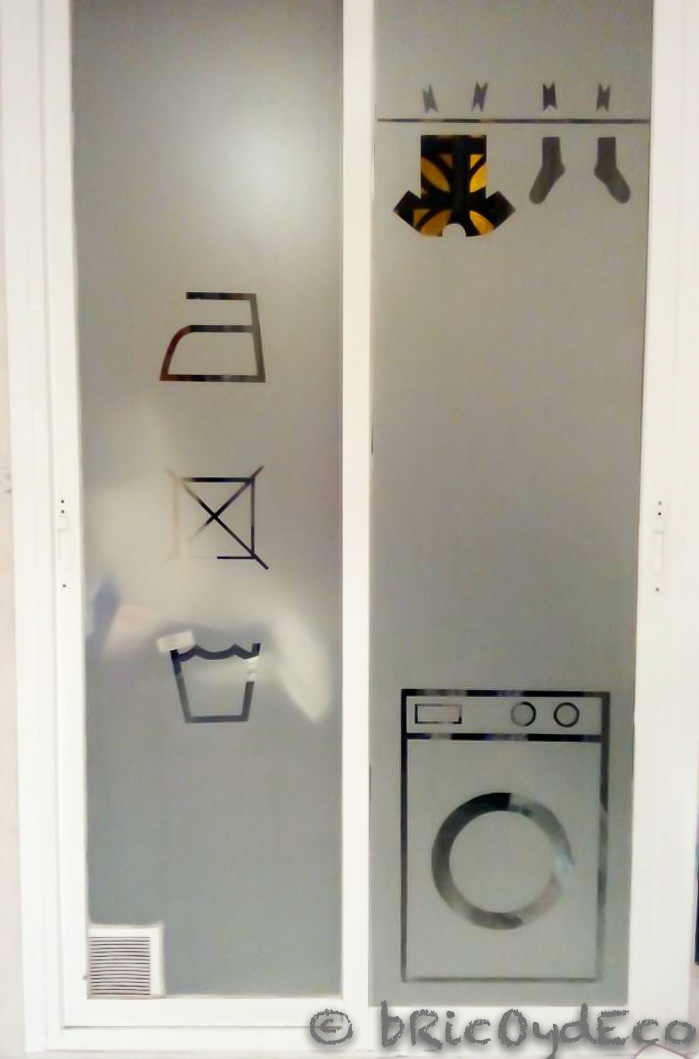
We are used to seeing this type of vinyl in shops and offices, but they are also very useful in the home, for example on glass doors that lead to laundry rooms (as was the case with Isabel and mine), or for shower screens. , for windows that overlook small patios (bye-bye to the gossipy neighbor!) or even to hide those mirrors on the cupboard doors that were so popular a few years ago.

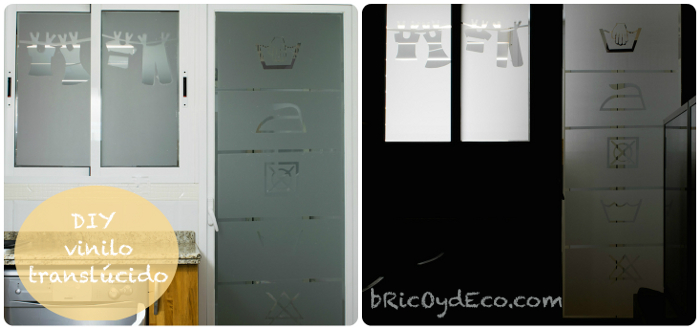
Isabel told me that when she saw how the electrostatic vinyl had turned out on my kitchen window and door, she had been encouraged to do hers, that it hadn’t turned out 100% perfect but that she was happy with the result. For her (and for anyone who develops a personal project) it has been a great satisfaction to have placed this electrostatic vinyl herself.
Of course it won’t be perfect but looking at the photo anyone would say so since the effect is unbeatable. He has managed to personalize his kitchen, he has gotten rid of the curtain that also did not fit well on the door and has not subtracted any light.
I take advantage of this entry to leave you a updated summary of the steps to follow to place an electrostatic vinyl since when I did the tutorial I had not discovered the trick to trace drawings on different materials without marking them with a pen, pencil or marker:
– Step 1: clean the glass with burning alcohol
– Step 2: decorate the vinyl For this we can print the drawing we want on self-adhesive vinyl, stick it on the electrostatic vinyl and cut it out with scissors. In this way it will be easier and more precise to cut it than as I told you a few months ago.
– Step 3 – Spray Water with a drop of soap on the glass or glass.
– Step 4: Peel off the protective foil.
– Step 5: apply the vinyl with the help of a spatula.
The only step that changes is number 2. Bearing in mind that it is difficult to write on electrostatic vinyl, the trick of printing the drawing on self-adhesive vinyl and cutting it out later is not even obvious in this case.
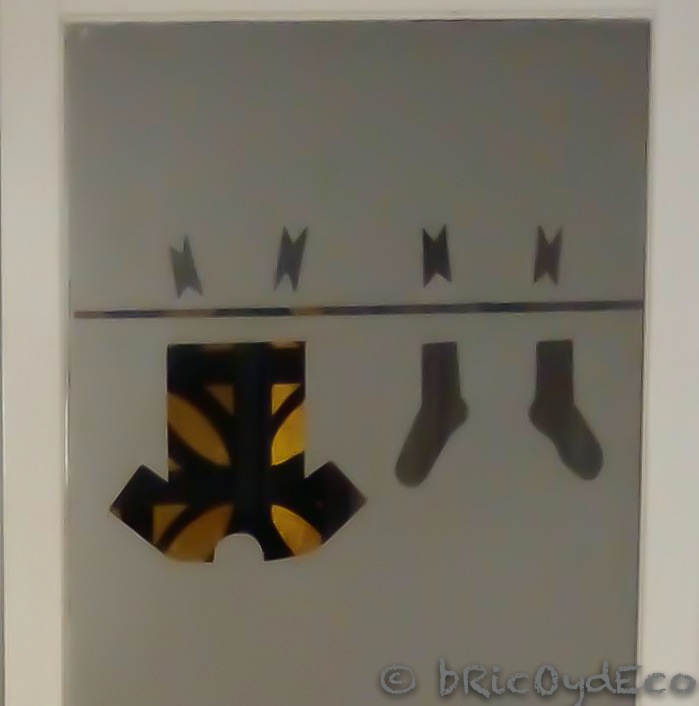
In the following image you can see an updated photo of my electrostatic vinyl. It has survived these months the sabotage attempt of one of my cats that began to detach part of the symbol of not using bleach, but it was solved with a little water on the glass and the vinyl re-adhered perfectly (“accidentally” to the cat a little water splashed on it and it has taken away the desire to play with the symbols of the bleach :p ).
There are many reasons to encourage us to make our own DIY projects. Sometimes I read comments from readers who don’t dare to do them for fear of not knowing how to do it correctly or screwing up, but it’s all about getting involved, in fact neither Isabel nor I had ever placed an electrostatic vinyl and now we have one personalized to our liking. If you don’t try, you will never discover it, and maybe you are missing the opportunity to get to know a part of you that you didn’t know, a hidden talent, that there are, there are…
For this Christmas I plan to do a series of tutorials with DIY projects to give away. A personalized gift made by ourselves says something very special to the person who receives it, since we are not only giving them a detail, but also part of our time and dedication, something that is valued on the rise in these times of stress in which We are always running everywhere.
Are you going to dare to make your own DIY projects? Isabel was encouraged and you have already seen the good result, I hope you do the same with the Christmas gift ideas that I have prepared for you and if you also send me the photo, I will be happy to publish it 🙂
If you liked this entry, I would appreciate it if you would post it on your social networks.


