

The decoration with decoupage It is not an exclusive technique of the vintage style, but it adapts to any style. For this reason I wanted to be inspired by urban art or Graffiti Art to decorate a pocket tray with decoupage.
Decoupage decoration is a technique that was developed in Europe during the Middle Ages and the Renaissance. It can be used with practically any type of paper and on multiple surfaces such as wood, cardboard, metal, glass, ceramics, etc.
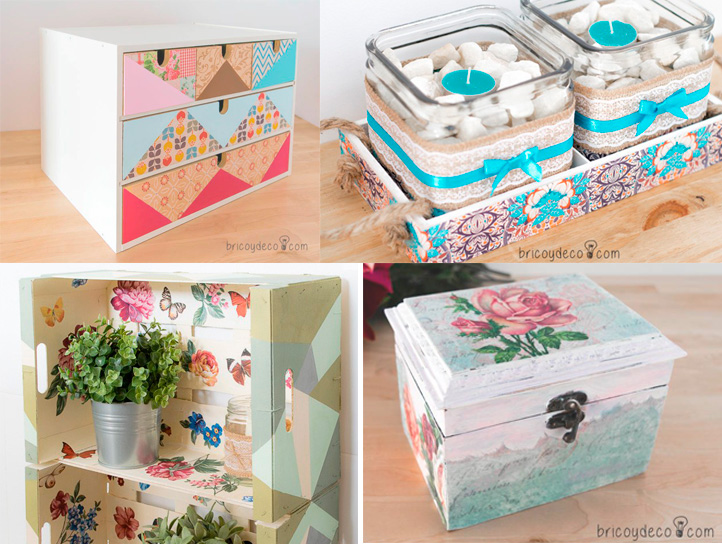
In particular, it is a technique that I love and I use quite frequently (in this link you can see some of my works decorated with decoupage). On this occasion, I have decorated a pocket tray with paint and decoupage, but I wanted to give it a innovative look:
- It is inspired by Graffiti Art as a contemporary and urban artistic expression of mural painting.
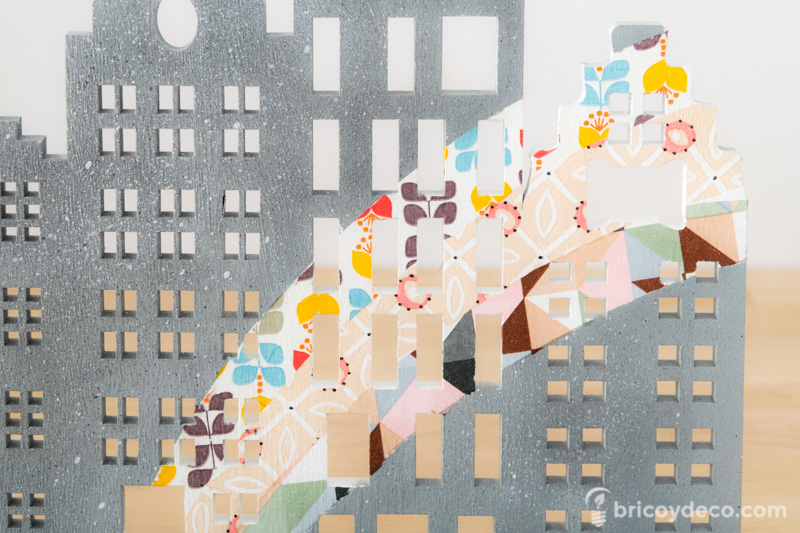
- The motifs on the napkins are not cut out to decorate the surface, but rather adapt to the shape to be represented (in this case a rainbow).
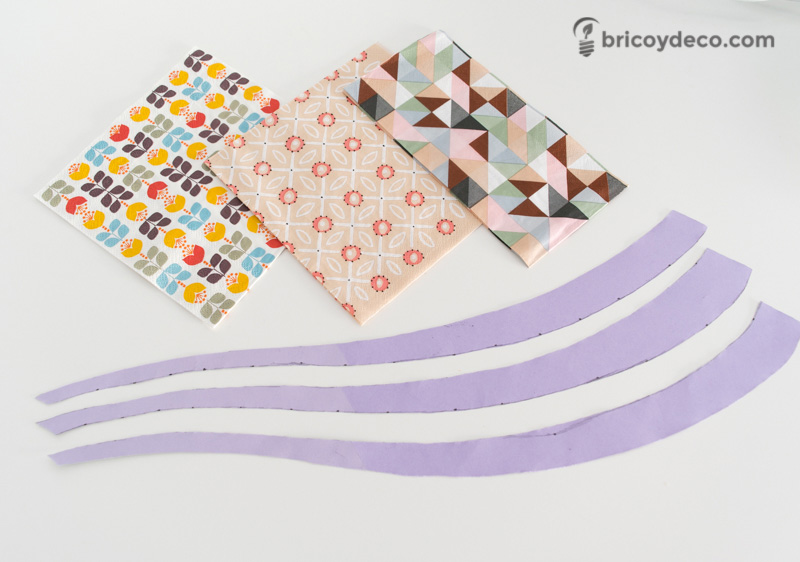
- Napkins with different prints are combined, inspired by the patchwork technique.
Materials to decorate a pocket tray with decoupage
The materials that I have used to make this pocket tray decorated with decoupage and paint have been the following:
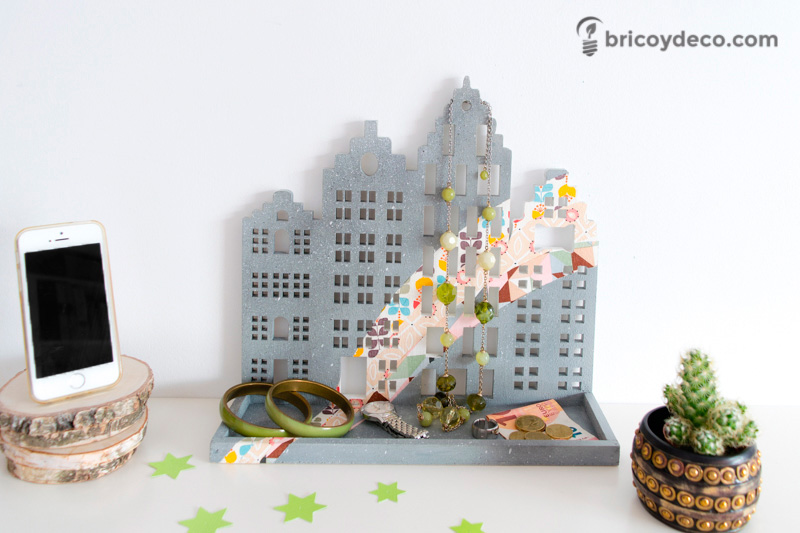
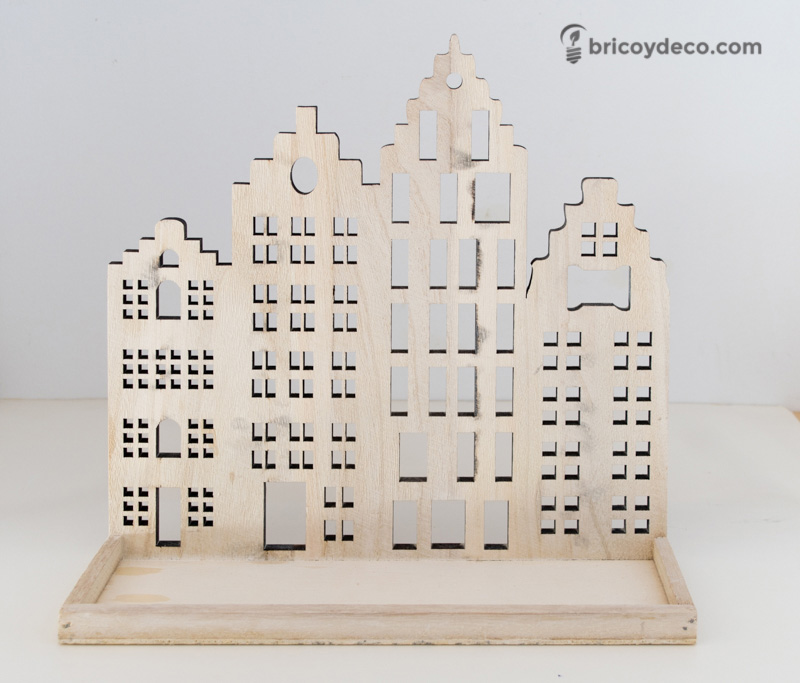
- Wooden support with silhouette of buildings and tray to deposit objects.
- Paper napkins with different patterns.
- Adhesive vinyl (can be purchased at this link).
- Off-white, ash gray and lead black spray Chalk Paint (you can buy it at this link).
- Special decoupage glue for napkins (can be found at this link).
- Removable or repositionable spray adhesive.
- Cardboard.
- Cutter or stiletto (you have it at this link).
- Pencil, scissors and brush
Step by step paint the pocket tray
First, the wooden support is sanded to smooth the surface and improve the grip of the paint.
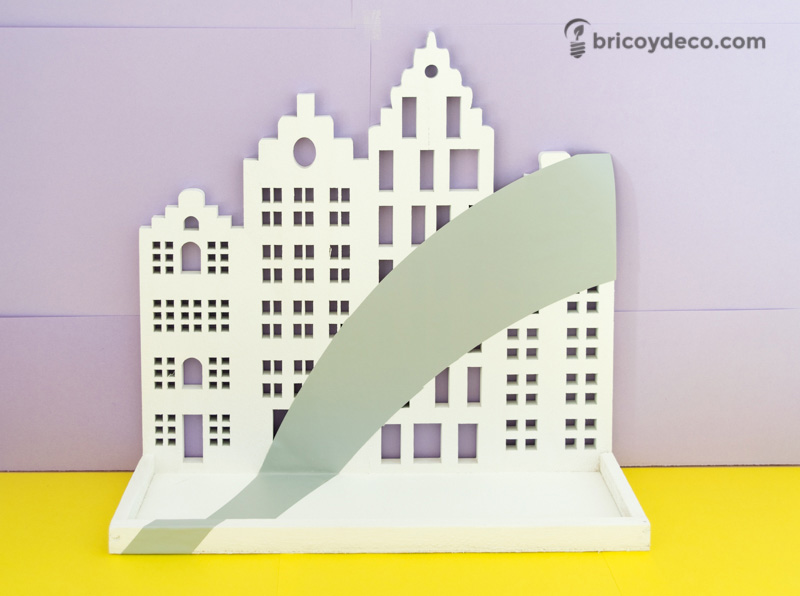
The support is then painted with white spray Chalk Paint and waited for it to dry completely.

Normally in 10 minutes it will be dry but I recommend waiting half an hour since the next step is to stick adhesive vinyl. If the paint has not adhered well to the surface, we run the risk of dragging it when taking off the adhesive vinyl.
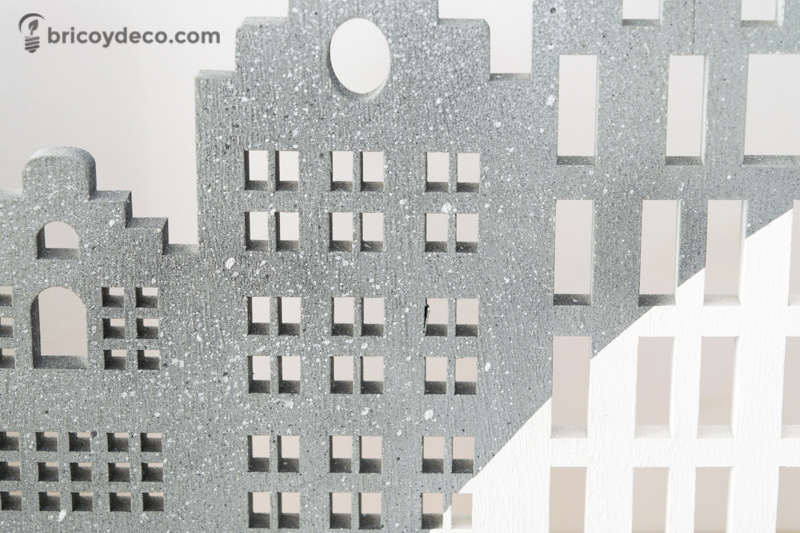
On the other hand, as the paper of the napkins is translucent and the buildings are going to be painted simulating gray granite, the napkins should be adhered to a white background to highlight their pattern and color.
Adhesive vinyl is ideal for protecting large areas or areas with a certain shape (in this case a rainbow), as it adapts perfectly to any object and can be easily removed.
First, the rainbow will be traced on the vinyl’s protective paper, then it will be cut and pasted on the support.
It is then painted with ash gray Chalk Paint spray and, after about 15 minutes, it is sprayed from quite a distance with lead black and off-white Chalk Paint spray to create different shades.
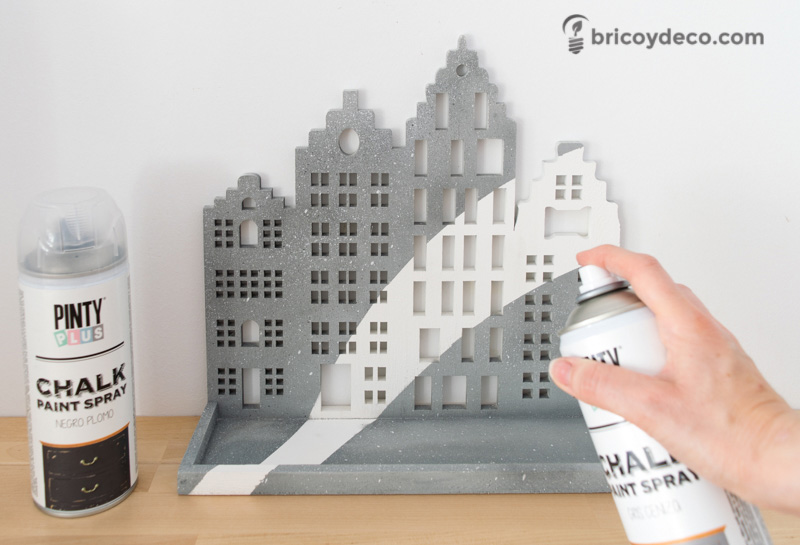
Pressing the valve without reaching the end makes the paint splash in order to obtain the granite effect. Finally, the protective vinyl is removed.
Step by step decoration with decoupage
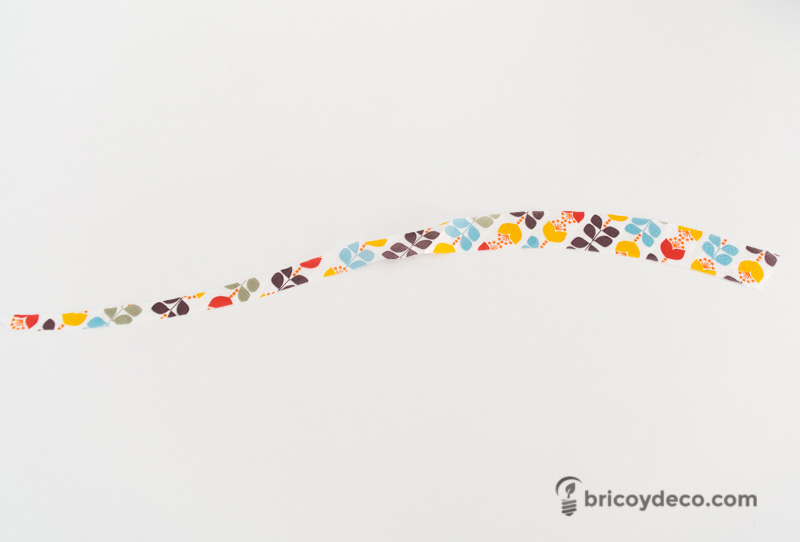
To make the rainbow of patterns that will illuminate and add color to the composition, you must first draw the template with the three stripes that will make up the rainbow.
Next, each template is traced on the non-printed layer of the napkins so as not to mark the printed part with the pencil.
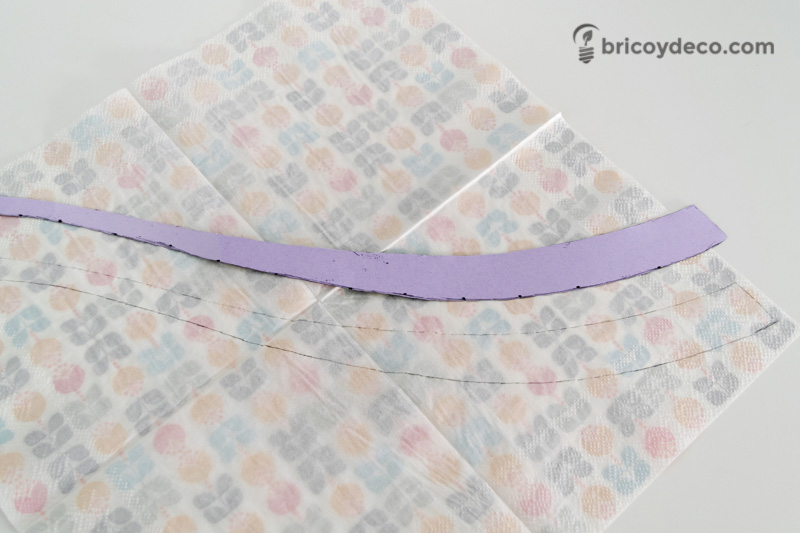
After cutting the traced silhouette, the blank layers of the napkins are removed (there are usually two).
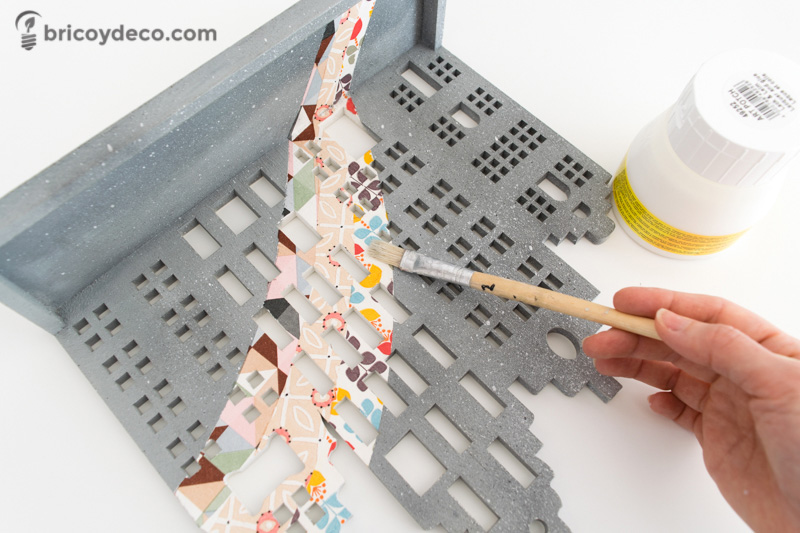
Now comes the part where a little patience and dexterity is required. To stick the napkins you can use decoupage glue but since you have to work quite precisely, my advice is to spray the back of the napkin with repositionable adhesive.
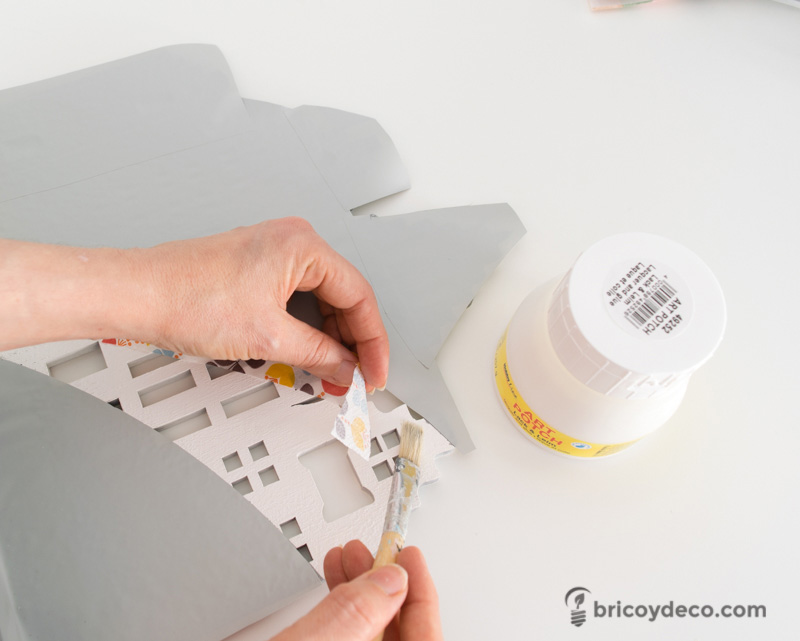
In this way we can stick and unstick to rectify the position of the napkin if necessary, as well as prevent the different patterns from overlapping.
I also recommend laying out the rainbow stripes starting with the one on top, followed by the middle stripe and the one on the bottom side.

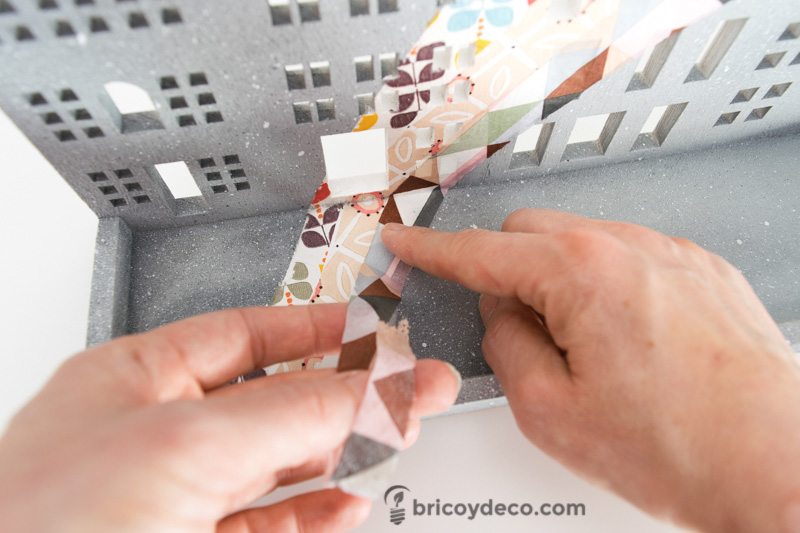
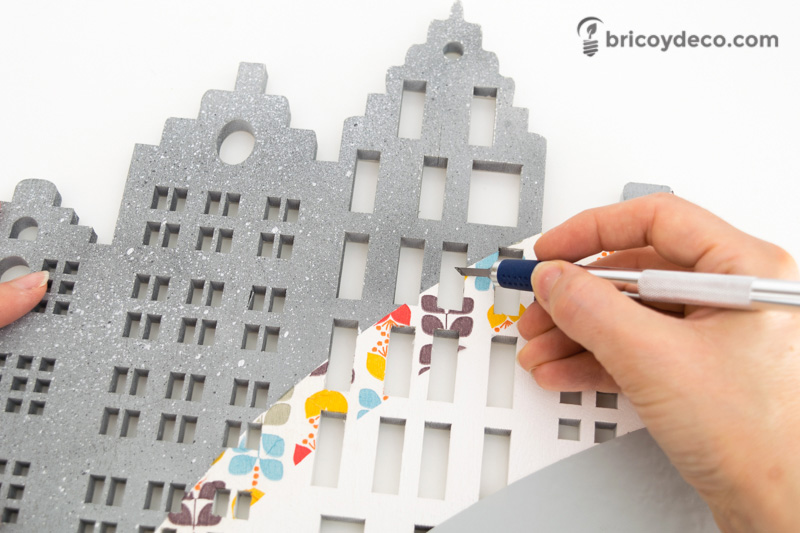
With a cutter or stiletto, the excess part will be cut both on the sides and on the windows.
Finally, with the decoupage glue, the napkin and the paint are varnished, in this way the fixation is improved while the work is protected.
After all these steps, this is how this pocket tray looks, inspired by the Graffiti Art and decorated with decoupage.
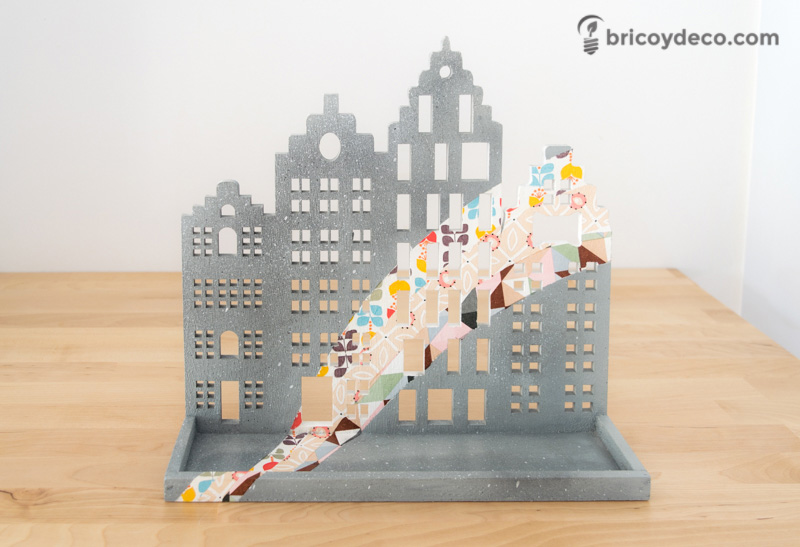
Paper napkins combine patterns that are on trend, such as geometric patterns, and turn the pocket tray into a practical and decorative object. In addition, the rainbow of patterns bring light and life to the gray granite “mass”.
With this DIY project I wanted to show how you can innovate with a decorative technique with hundreds of years of history such as decoupage, in addition to creating a very particular version of Graffiti Art.
You like the decoration with decoupage? Have you ever used this technique? What do you think of my new DIY project? I hope it inspires you and gives you ideas when decorating with decoupage.
If you liked this post, you can find many more step-by-step tutorials and DIY projects at .


