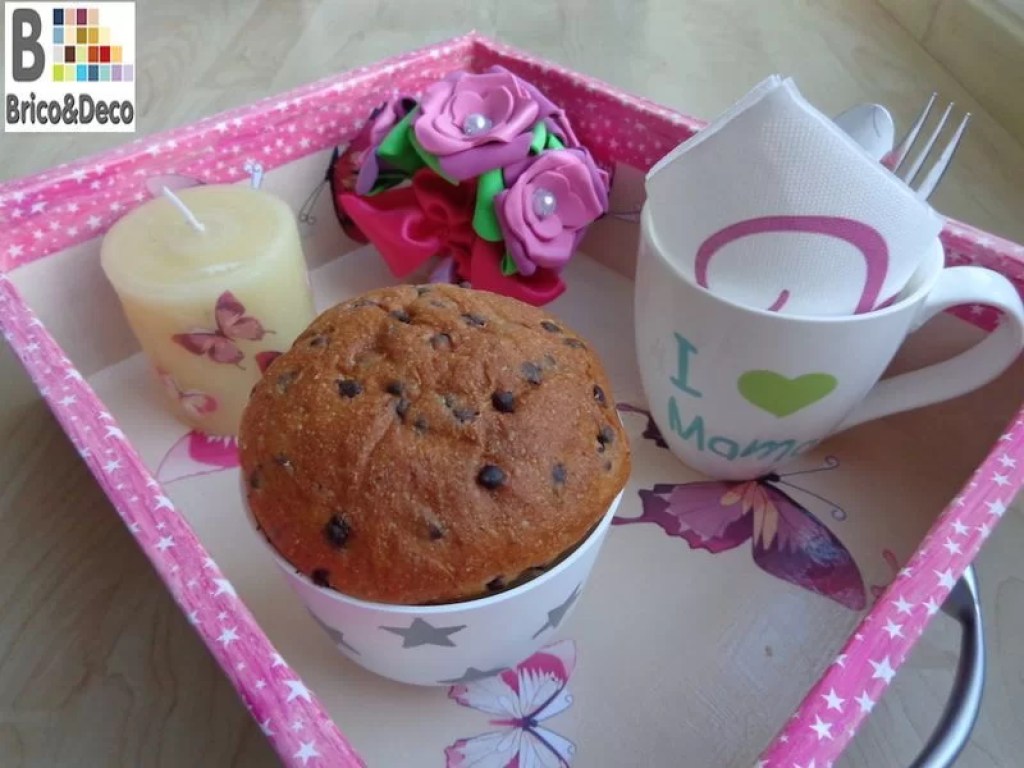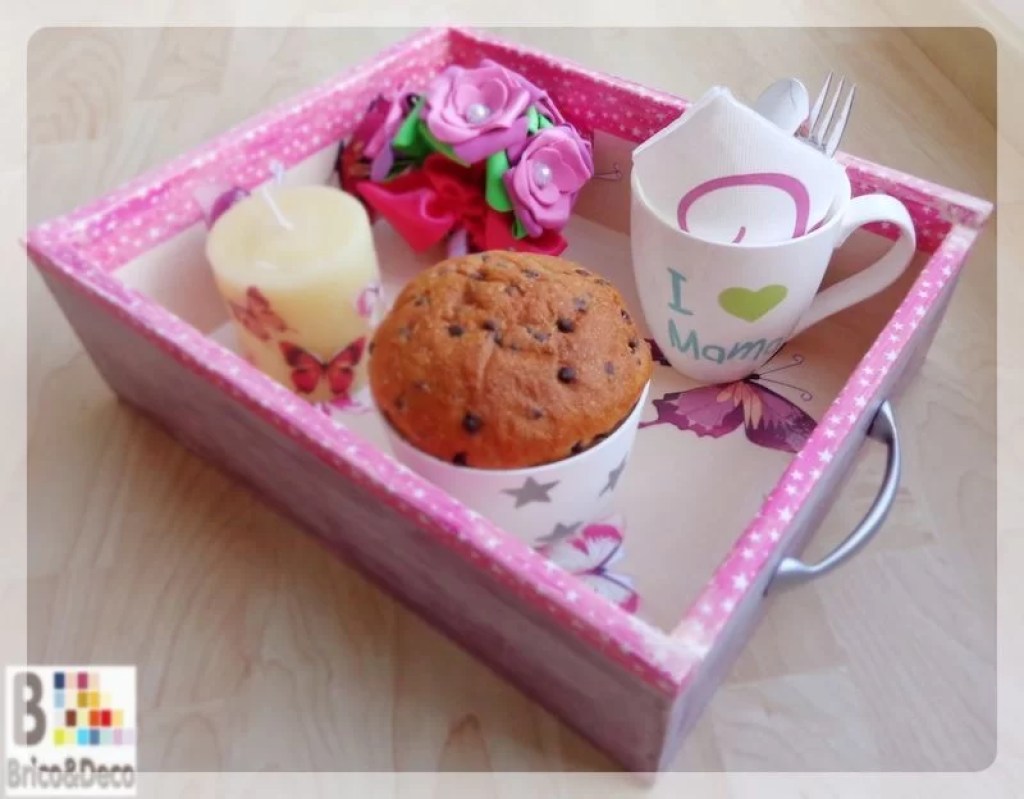
A few days ago I showed you how to transform a box of wine into a breakfast tray for Mother’s Day and today I’m going to show you some Handicrafts for mother’s day and with which we can complete the breakfast tray. Because if there is only one mother, why not make her something as special and unique as herself?
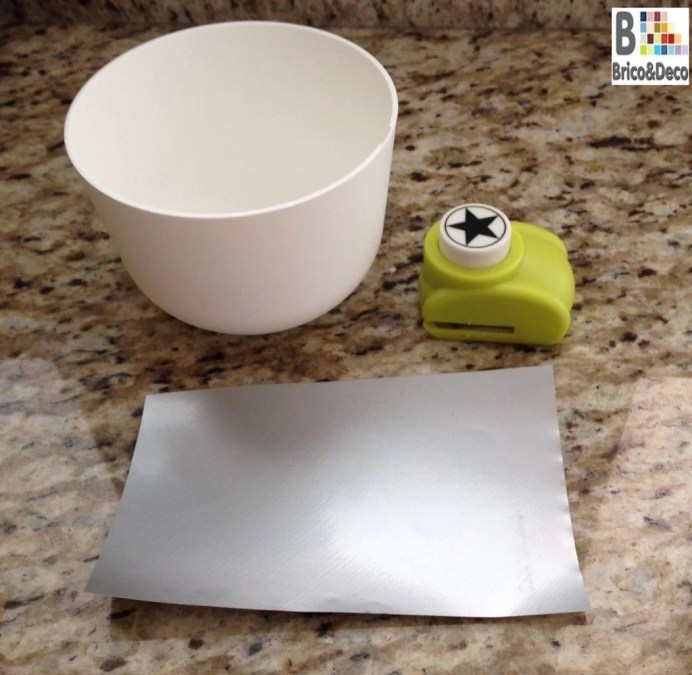
flower pot with stars
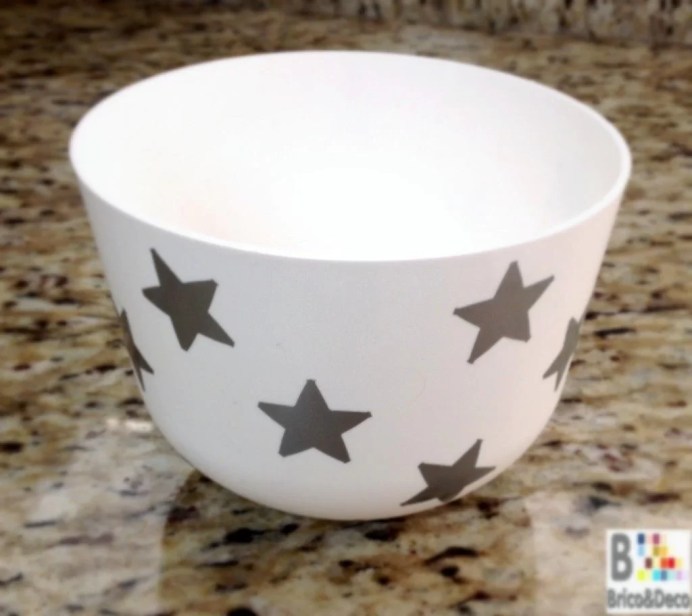
I’m going to start with the simplest and fastest craft to make, a flower pot decorated with stars. In this case I used a plastic bowl, a piece of silver self-adhesive vinyl and a star-shaped punch.
With the die cutter we will make stars on the self-adhesive vinyl.
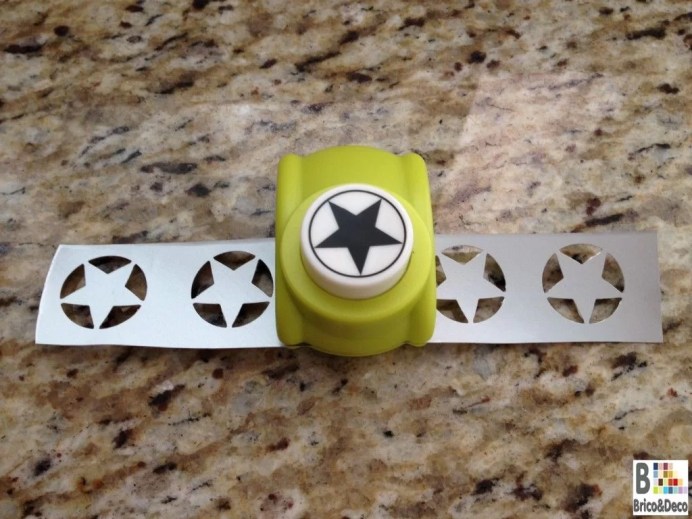
Then we will finish cutting out the stars and we will stick them to the flower pot. The final result is quite colorful, also when we place the planter on the tray we can fill it with chocolates, cookies or a cupcake, our mother will surely love it.
Candle with decoupage
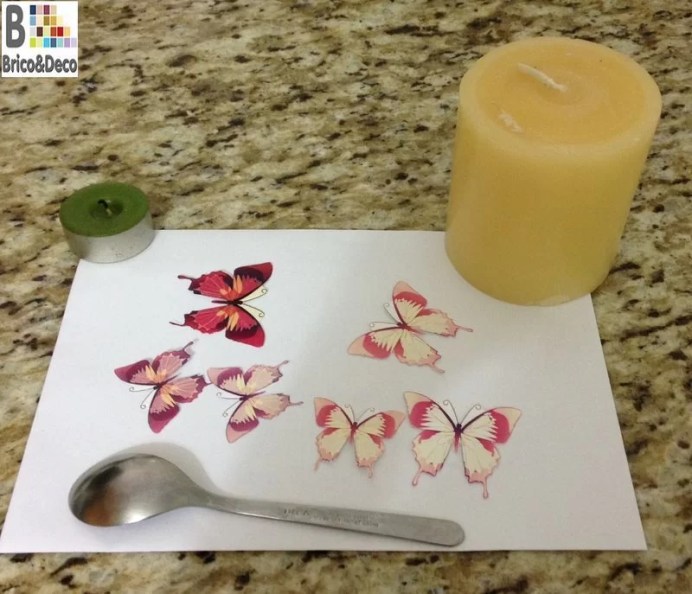
to do this candle with decoupage We need an oil lamp, a candle or lighter, a small spoon and paper cutouts of some image that we like, I have used the butterflies that were left over from the decoupage of the tray.
The steps are simple but you have to do them carefully. First, we will heat the spoon with a candle or lighter on the inside and then we will place it on top of the candle on the outside, as seen in the photo.
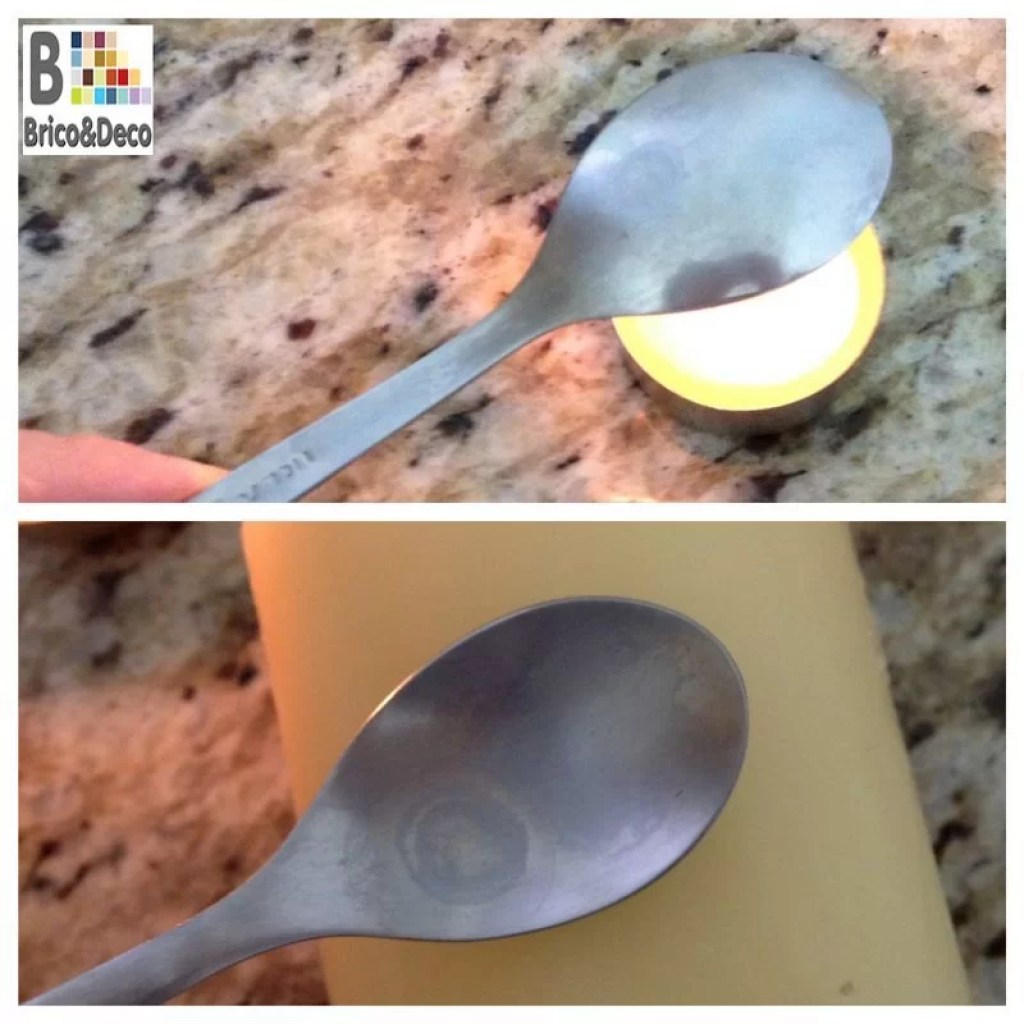
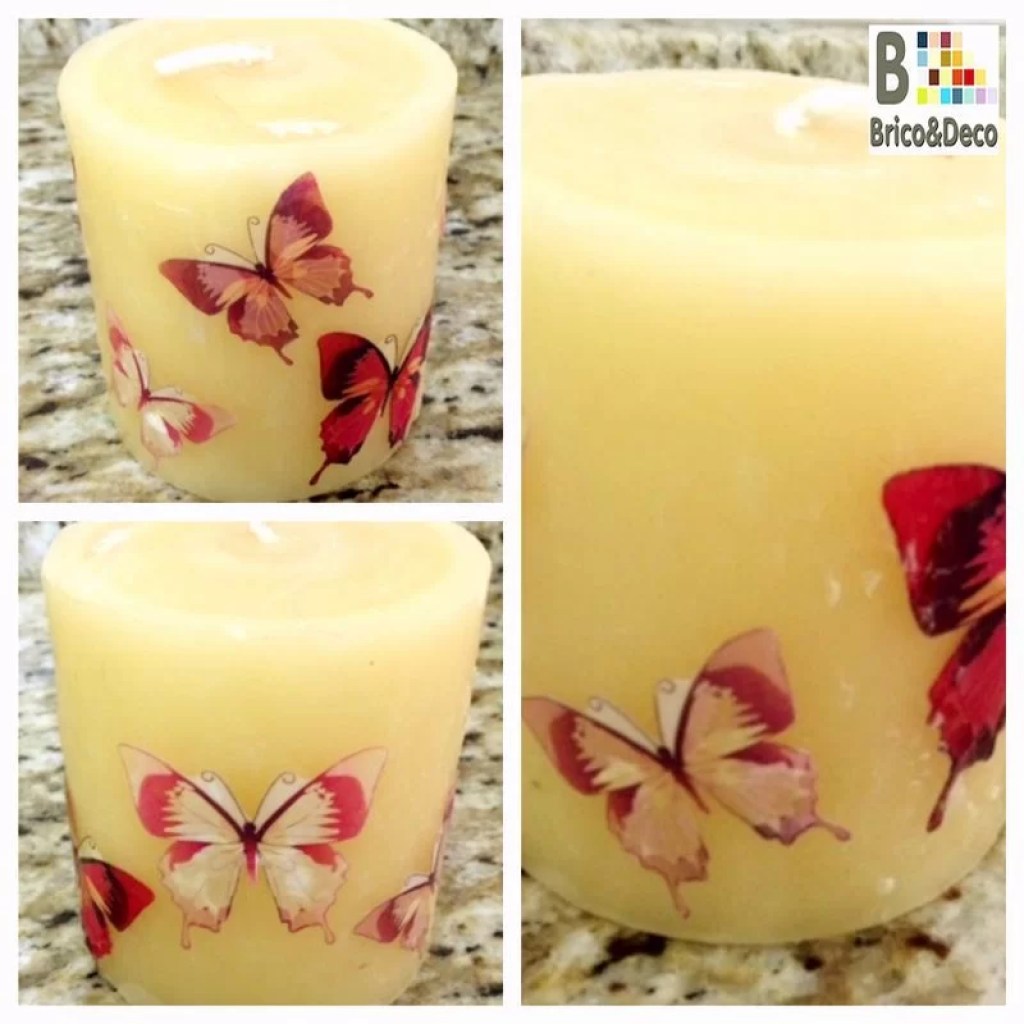
In this way, the wax of the candle will melt enough so that we can place the cutout on top and it will stick. Using circular movements, we pass the hot spoon over the paper cutout until the melted wax completely covers it (we will see how the paper shines slightly). Once the wax hardens again we will obtain the following result.
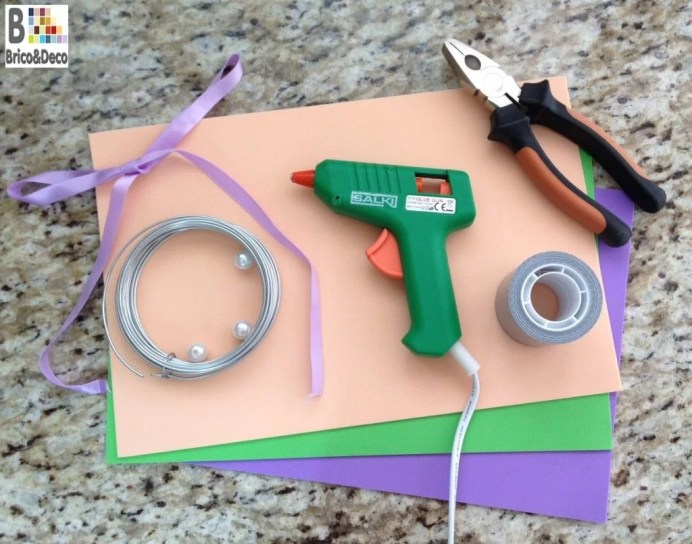
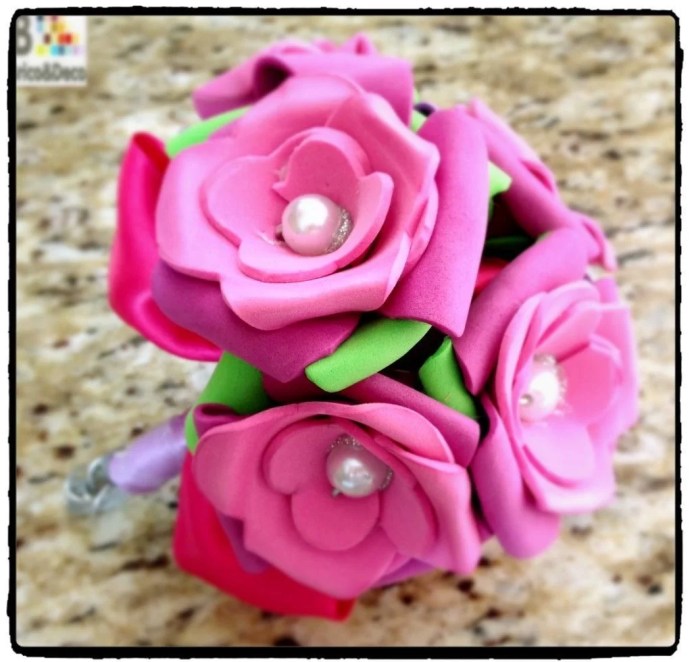
Bouquet of eva rubber roses
This last craft is the most laborious of all but without a doubt the final result is worth it. to do this bouquet of eva rubber roses We need EVA foam of the colors we want to use, a silicone gun, wire, pliers, a satin bow, jewelry pearls and adhesive tape.
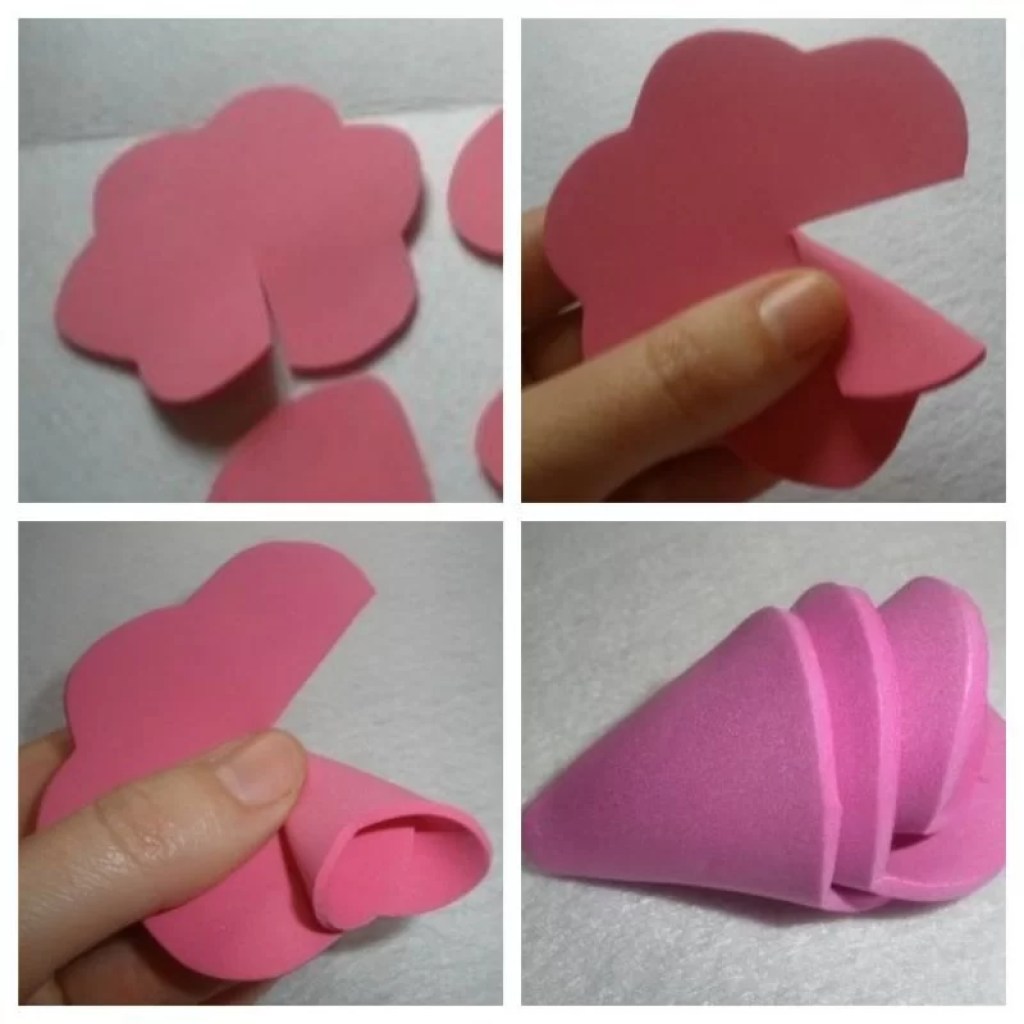
First of all we have to draw the flowers and the petals on the eva rubber sheet. When we cut the flowers, we will make a cut towards the center to be able to roll it up on itself, so that it remains as a kind of cocoon. We will seal the side with the silicone gun.
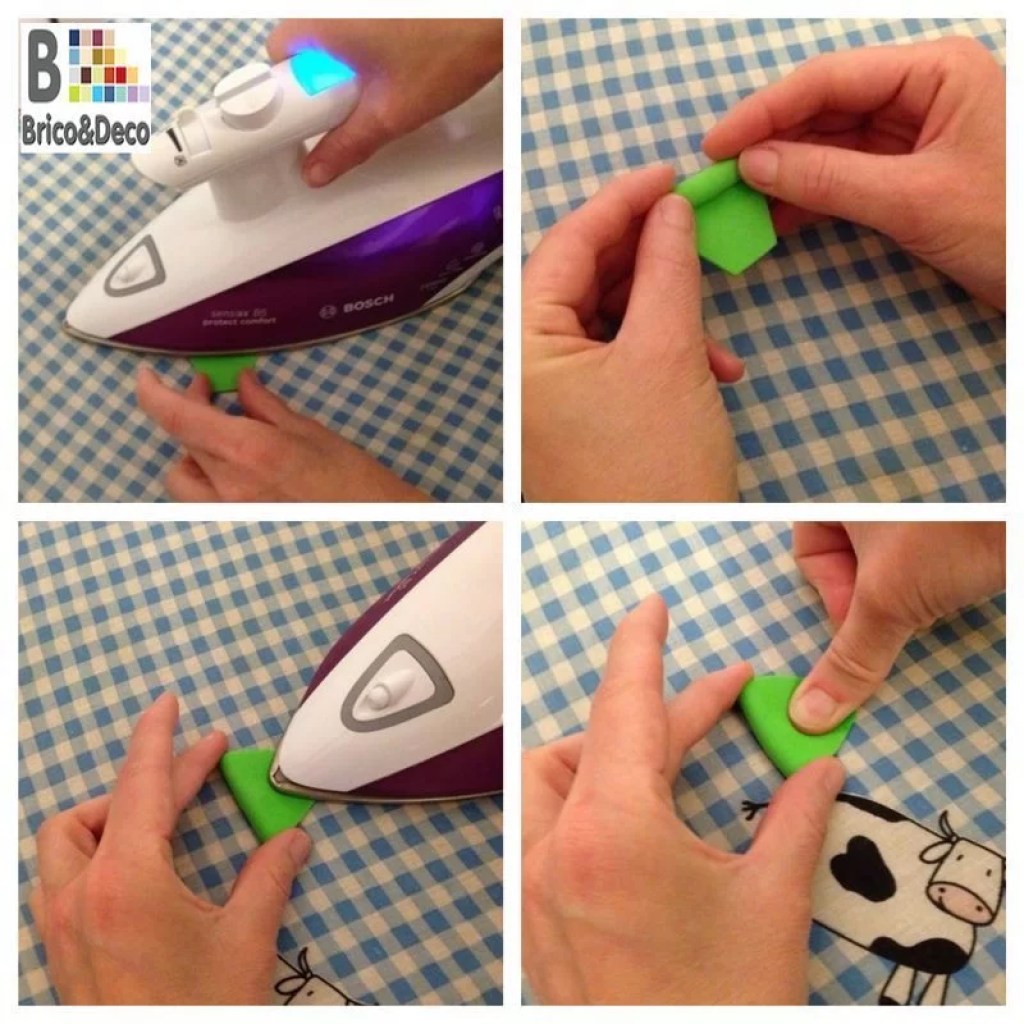
For the petals and leaves we will also need the iron which we will place on the horizontal half of the petal. Next, we will slightly roll up and place the tip of the iron on the rest of the petal. With the finger we will press it to give it a rounded shape.
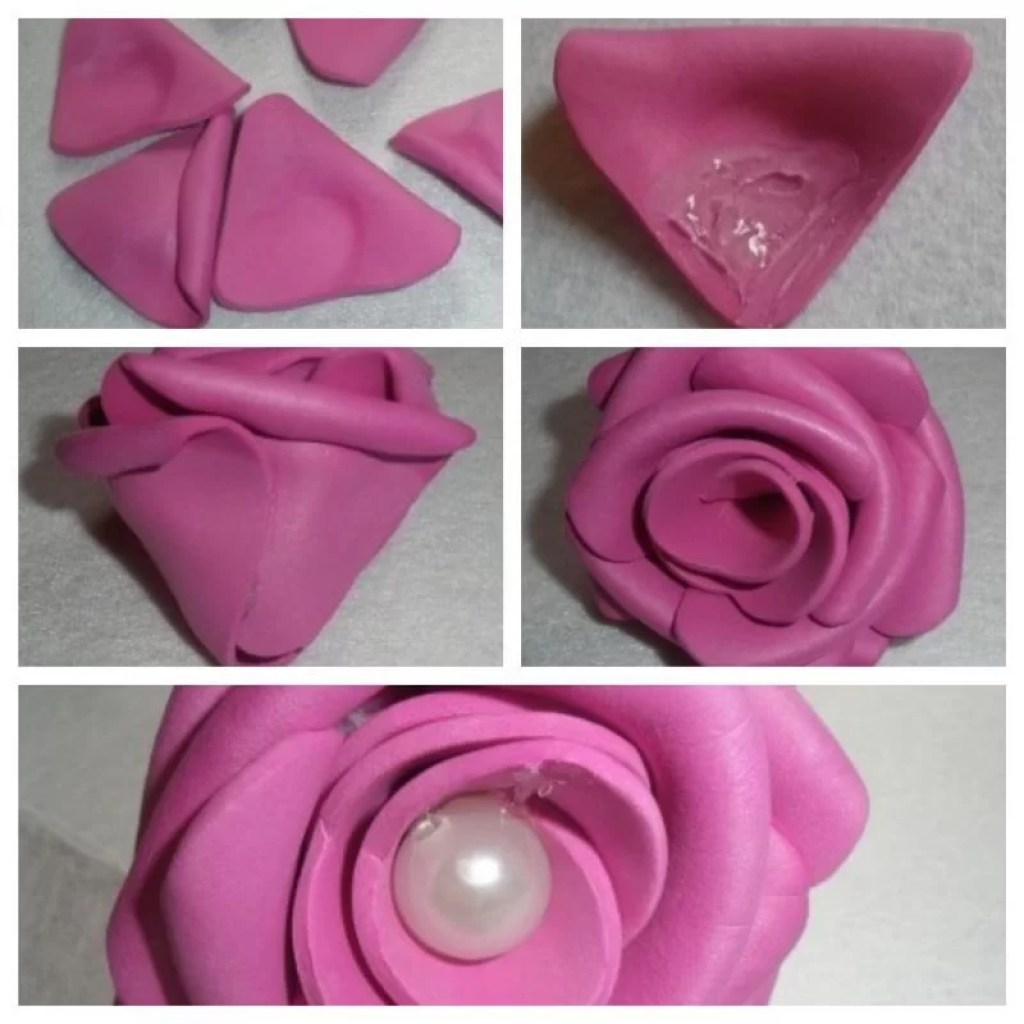
We will be placing the petals around the cocoon that we had made before until we get the desired size for the flower. Then we will introduce the wire and the pearl, sealing everything with silicone. For the part of the pearl I have used silicone with glitter, in this way we give a more glamorous touch to the bouquet.
Once we have all the flowers, we will join them with adhesive tape (I have used silver insulating tape), and we will cover the handle with a satin ribbon. In the next photo you can see the final result.

With these little details we can complete our breakfast tray as gift for Mother’s Day. Surely it makes her feel unique and special, after all, she is the best mother in the world for a reason.