


In my last post I showed you how I had personalized a small table for the television using a pine wood board that I had stained and waxed. In order not to make it too long, I told you that I would do a separate tutorial so that you could see the whole process, so as promised, here is the step by step to apply a wax finish to a raw wood board.
I am going to indicate two ways to do it, the first is by staining and waxing the wood and the second by applying colored wax to the unstained wood. Keep in mind that this tutorial is for wood that is untreated, in the event that the wood that we want to wax is already treated with varnish or paint, it will be necessary to sand it thoroughly or apply a stripping product. If it is dyed and we want to reduce the color, the most economical thing is to use bleach.
Case 1: Stain and wax the wood
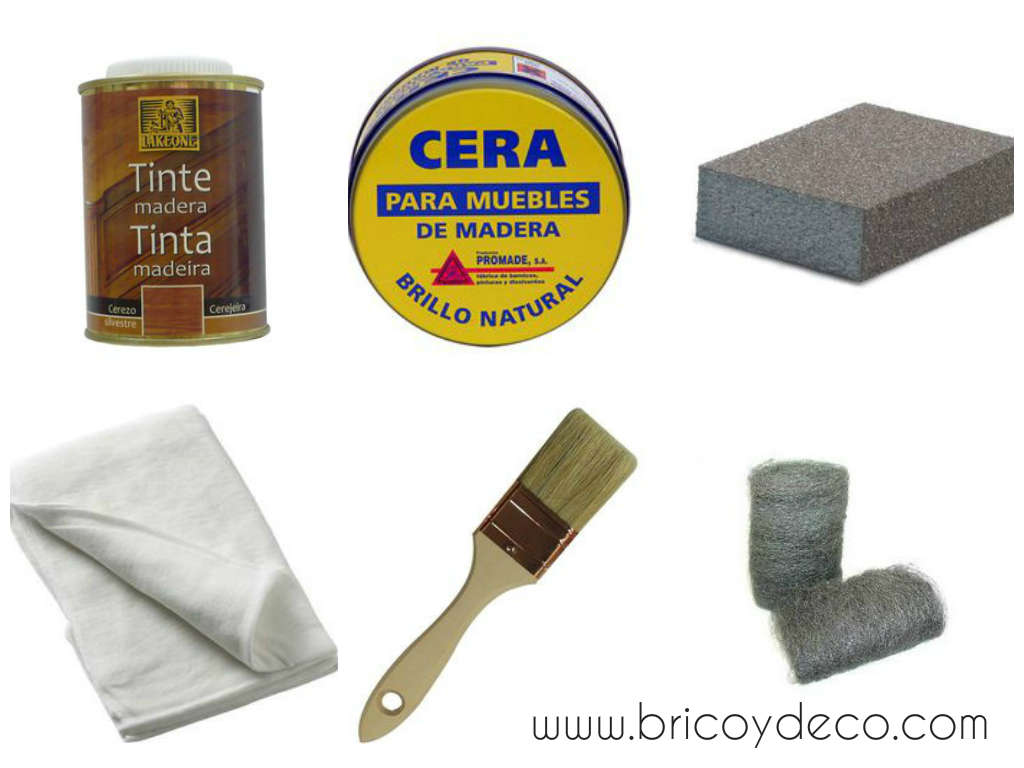
This is the option I chose to treat the wood that I placed on top of the TV cabinet and the materials I used were the following:
– wood stain. The stain can be water-based or solvent-based, depending on the base in which it is diluted. Normally, water-based stain marks the grain more, but it also swells the wood pore a little. Solvent-based stain dries faster.
– colorless wax. In the market we can find cream, liquid and spray wax, the one I used was cream.
– Medium grit and fine grit sandpaper, better if it is a heel since it is more comfortable. An electric sander can also be used.
– cotton rags, it is important that it does not leave residues (old t-shirts work very well). We must use a cloth for each step (one to stain, one to wax and one to polish), although they can also be replaced by a brush to stain and a wristband or ultrafine steel wool (0000) to wax and polish.
The steps to follow will be the following:
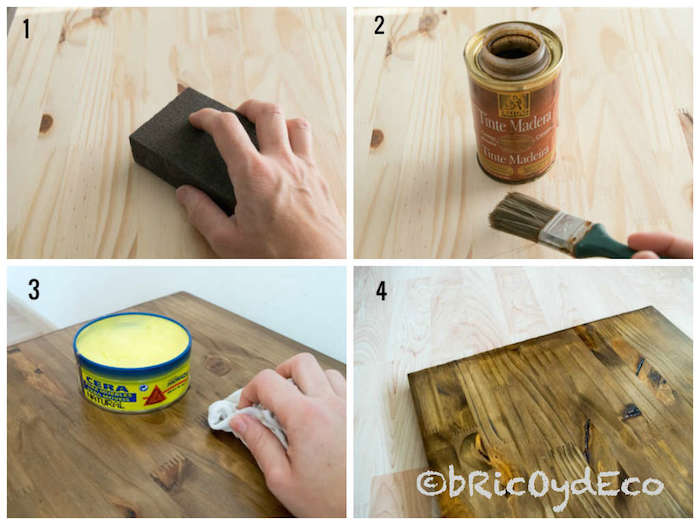
1st.- Sand. I know that nobody likes sanding and it raises dust, but It is essential for a good final result, In addition, sanding opens the pore of the wood and the product penetrates better.
We must start with a medium grain sandpaper and give it several passes until the wood is without “hair” and totally smooth to the touch. After sanding, the surface must be cleaned to remove any traces of dust.
2nd.- To dye. The stain can be applied directly or reduced (in water or solvent depending on the base), for this we will use a cloth and extend it in the direction of the wood grain, although it can also be applied with a brush or wristband.
If you apply the stain with a brush, you must bear in mind that you have to pass the brush only once in the same pass, do not overlap the brushstrokes since each pass of stain darkens the wood more and it will not be uniform. You should also pass a cloth once you have finished with the brush to remove excess product.
On the other hand, we must bear in mind that the dye lightens once it dries, so we can apply several layers until we achieve the desired color. To finish, I like to give it a pass with fine-grain sandpaper once the dye has completely dried.
3rd.- give wax. With a wristband or cotton cloth we will give a layer of wax to the wood. The wax must be distributed evenly, in the direction of the wood grain and spreading it so that there are no accumulations. Let it dry for 20 or 30 minutes so that the wood absorbs the product.
4th.- polish wax. With a cotton cloth that does not leave residues or extra-fine steel wool we will polish the wax, to do this we will rub vigorously until it shines. We will let it dry for the time recommended by the manufacturer and we will wax again and polish it up to a minimum of three coats (I gave it five).
Case 2: wax the wood with colored wax
HERE THE PHOTO OF THE FINISHED WOOD
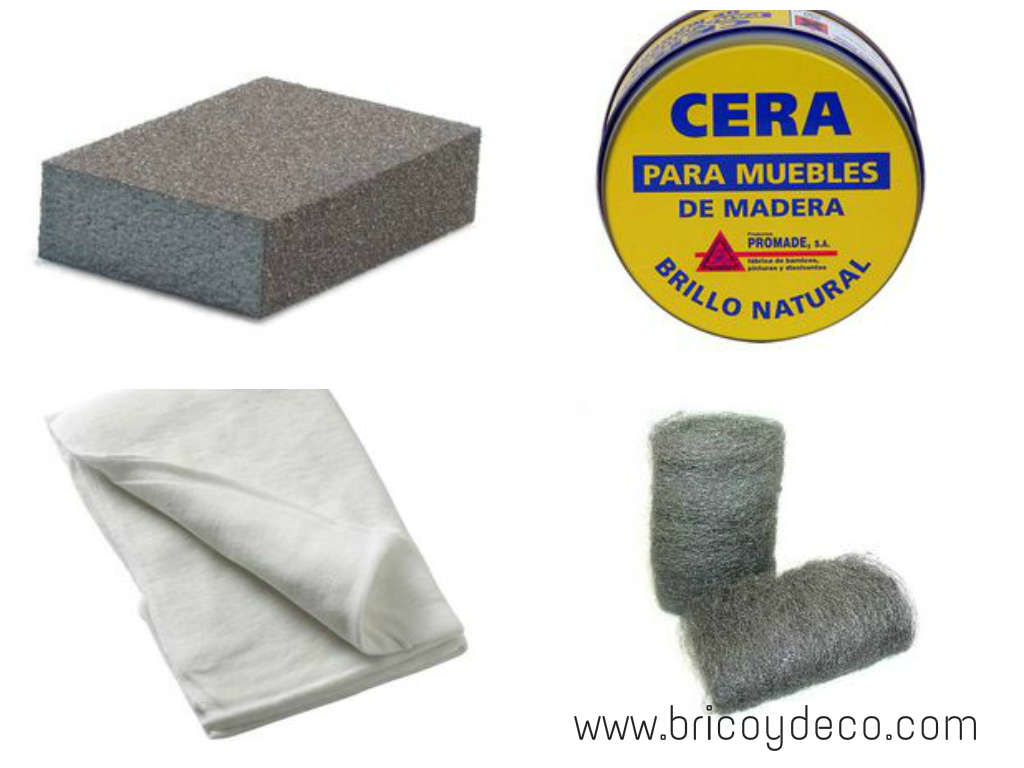
This option is the one I used with the wood that was left over from the board that I used for the television table. The materials I used are:
– colored wax. In the market we can find cream and liquid colored wax, the one I used was walnut colored cream.
–Medium grit sandpaper block or electric sander.
– cotton rags (one for each step) or also a wristband or ultrafine steel wool (0000).
The steps to follow will be the following:
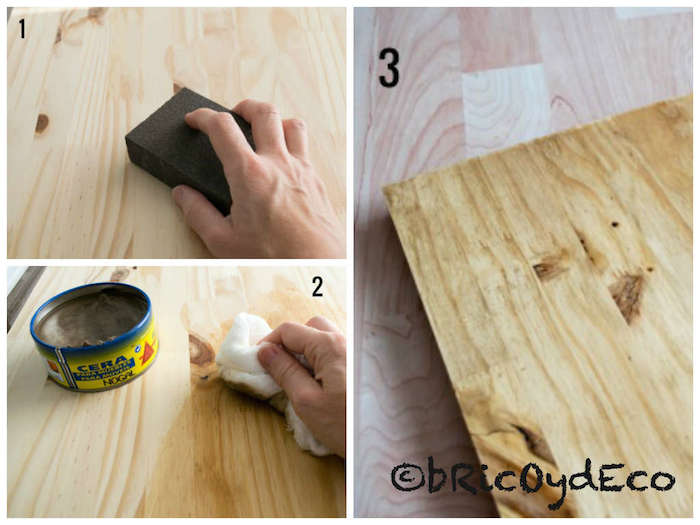
1st.- Sand. As in the previous case, we are not going to get rid of sanding.
2nd.- give wax. With the wristband or cotton cloth we will give a layer of wax to the wood evenly and in the direction of the grain. Let dry about 20 or 30 minutes.
3rd.- polish wax. This does not change either, you have to rub with a rag or steel wool to get the shine out of the wax.
In the case of colored waxthe tone rises very little by little, depending on the finish we want to give the wood (more or less intense), we will have to give a number of layers, although there will come a time when the wood will not absorb any more color (from the 3rd or 4th layer more or less).
If you have already achieved the desired color with the first layer of colored wax, you can give the rest of the layers with colorless wax. In this case I gave him 4 coats of colored wax and the last one with colorless wax.
How could you have seen the result is different depending on whether or not we dye the wood previously. If we stain the wood we can give it different finishes: lighten it once it has been stained to give it an aged appearance or apply a very diluted color, for example.
On the other hand, with the colored wax we tone the wood without darkening it too much, also with this finish it is the one with which the grain is best appreciated.
Therefore, if we want to darken the wood, age it or apply some type of technique, we will stain it before waxing it. But if what we want is to protect and give shine to the wood and give it a very natural tone, we will directly use colored wax.
I hope this Step by Step be useful to you apply a wax finish to wood. In particular, it is a type of finish that I love, it gives a very natural shine.
If you liked this post, please share it on your social networks.


