

In my last entry I told you that I had been encouraged to try textile vinyl to decorate some cushions and that I had been very satisfied with the result. Now that you have seen the possibilities it has when it comes to decorating, I leave you this Step by Step on how to apply textile vinyl ourselves at homewithout the need for a transfer plate or other special machinery.
To begin with, you should know that there are two types of textile vinyl: cutting and printing. The cut textile vinyl is a monochrome vinyl that is cut to the desired shape and adhered to the fabric, while on the textile vinyl printing You can print a drawing or photograph to later adhere it to the fabric.
In this tutorial I have used textile vinyl for cutting since it has a wide range of solid colors that are very beautiful once they are transferred to the fabric. To achieve the same result with printed textile vinyl you need a photo quality printer and a high resolution image.
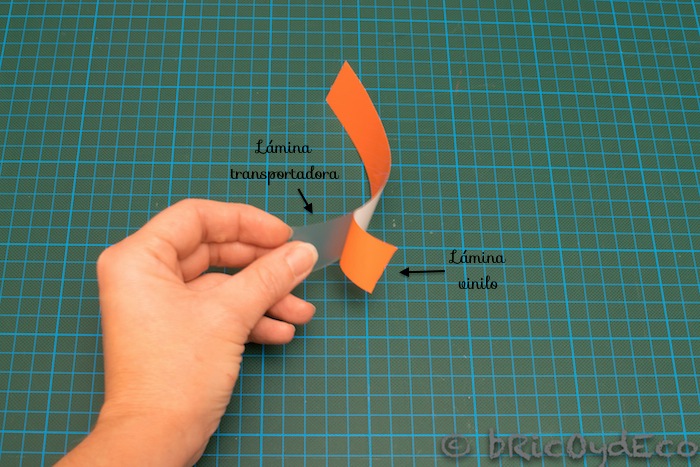
The textile vinyl for cutting consists of a matt colored face to which a hot-melt adhesive has been applied, and another glossy face with a silicone or carrier sheet on which heat will be applied and which will be removed once the vinyl is adhere to the fabric.
In the following image you can see the carrier sheet and textile vinyl in orange (the part that can be seen in white is the one that has the hot melt adhesive).
Keep in mind that textile vinyl can be applied on cotton, polyester, acrylic fabrics and their mixtures. For stretch or lycra fabrics, there is a special stretch vinyl that adapts to the fabric when stretched.
Materials needed to apply the textile vinyl
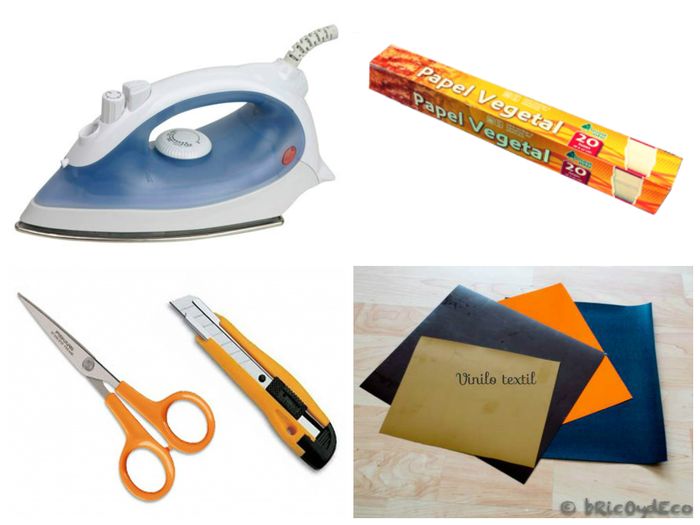
The materials that we will need to apply the textile vinyl at home are:
- textile vinyl. The one I have used is from Vinilosametros, it has a width of 50 centimeters and the meters you need.
- Iron. Any household iron for clothes will work.
- baking paper. I have used the vegetable paper for the oven that they sell in Mercadona and that already comes in pre-cut sheets.
- Scissors or cutter to cut the drawing.
- Optional: cutting plotter or die cutter and self-adhesive vinyl to trace the design or permanent marker.
What we should know before applying textile vinyl
Once we have all the materials, there are a number of factors that we must take into account before applying the textile vinyl:
1º.- Cut the textile vinyl
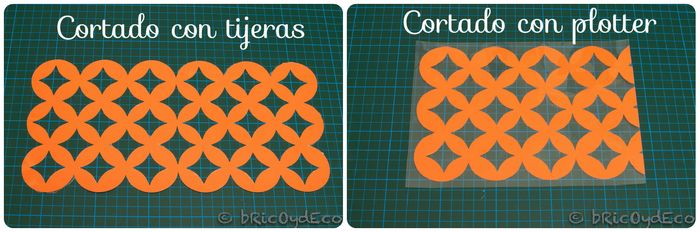
There are two ways to cut textile vinyl: by machine with a cutting plotter or die-cutter, or by hand with scissors or a cutter.
If we have a cutting plotter, the first thing we will do is invert the drawing that we want to transfer to the fabric since the cut in the textile vinyl is made on the reverse (the part that is going to be adhered to the fabric).
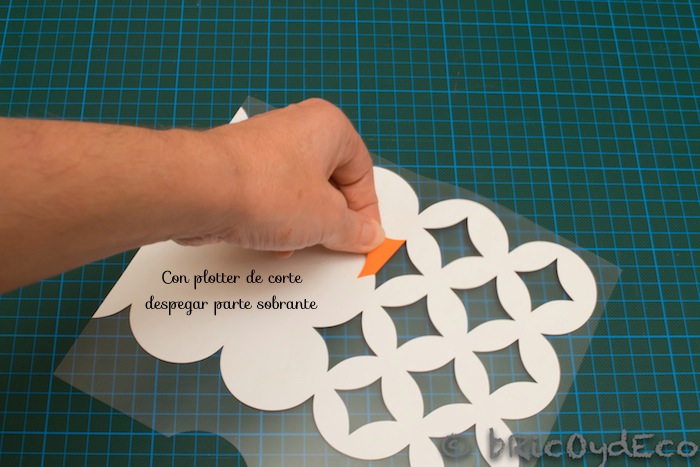
The blade must be adjusted so that it only cuts the matte part of the vinyl and not the carrier sheet, since once the cut is made we will have to take off the excess.
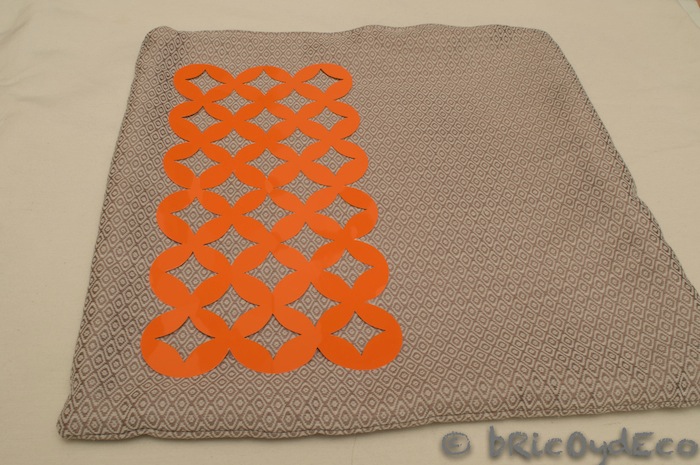
In the following image you can see how I am taking off the part that is left over after having cut the drawing with a die cutter.
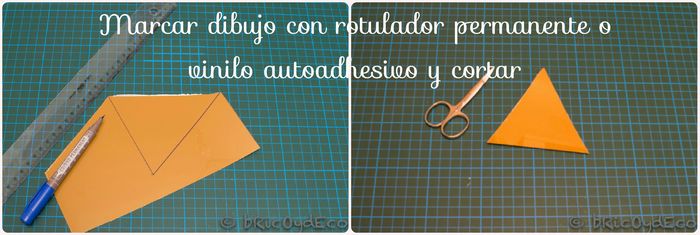
Without a cutting plotter, a multitude of designs can also be made as long as we are careful when cutting. To do this we will need to trace the drawing on the textile vinyl carrier sheet with a permanent marker. Another option is to use the trick of printing the drawing on self-adhesive vinyl, cut it out and paste it on the carrier sheet of the textile vinyl to cut it later.
In the following image you can see how I have drawn a triangle with a permanent marker on the carrier sheet of the textile vinyl, and later I have cut it with scissors.
Whether we use a die-cutter or cut the textile vinyl with scissors, it is convenient that let’s not throw away the leftover part since in the event that any part of the textile vinyl breaks when removing the carrier sheet, it can be solved by placing a “patch” of textile vinyl of the same color on top.
2º.- Apply heat to the textile vinyl
Textile vinyl is transferred to fabric with a household iron but it is very important that the steam outlet is at zero or at a minimum and that the heat we apply is dry.
We must place the thermostat of the iron at about 150 degrees but if you do not have a thermostat you can put it in the option for wool or in the 2 points, which is what I did and it worked for me. In any case, you can always do a test, if you see that the carrier sheet shrinks, it means that you are applying too much heat or for longer than necessary.
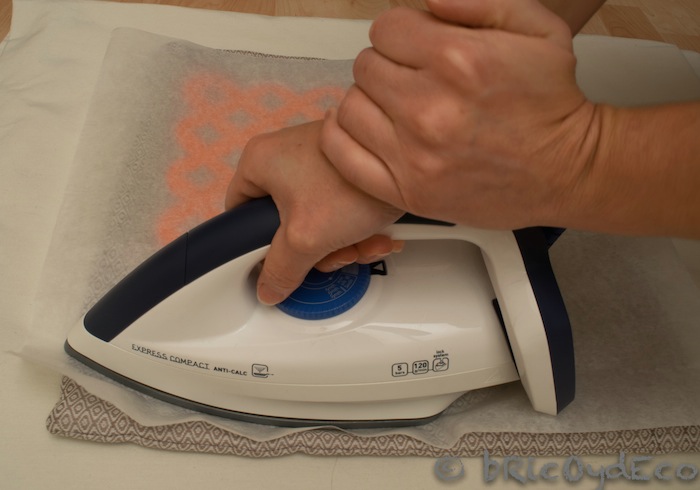
Another very important point is that the heat must be applied by pressing down and not moving the iron to the sides as if we were ironing. That is, we place the iron on top of the drawing and press down hard for about 15 seconds without moving it anywhere. A trick that I use to avoid loading the ironing board when pressing is to put the fabric with the textile vinyl on the floor, using a folded sheet to protect the floor and the fabric on top, in this way I also use the weight of the body to exert pressure on top of the textile vinyl.
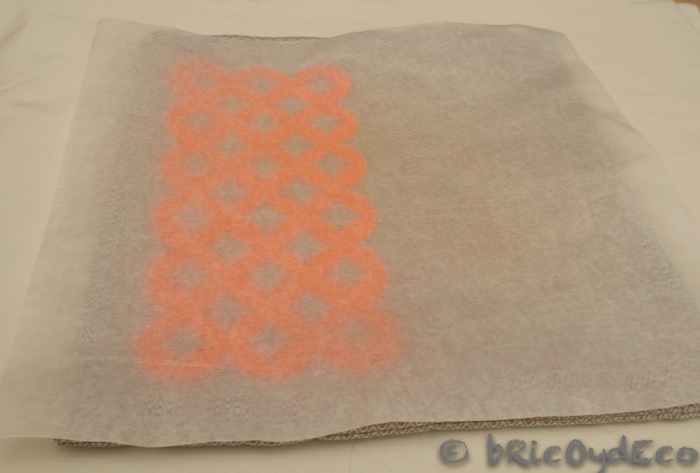
On the other hand, although the carrier sheet withstands the heat of the iron, I personally prefer to put parchment paper or parchment paper on top since if we overdo it over time or apply too much heat, we will not damage the vinyl.
3º.- Remove the conveyor sheet
It is not necessary to wait for the carrier sheet to cool down completely to remove it, if we wait a minute it will be enough. It must be removed little by little and carefully, if we see that the textile vinyl rises it is because we have not adhered it well and we will have to repeat the operation of applying heat.
4º.- Washing and subsequent ironing
Once the textile vinyl has been transferred, the fabric can be washed in the washing machine, but it should not be done before 48 hours, since this way we will be certain that the vinyl has been fixed correctly.
We must wash the fabric inside out and at a maximum of 30 degrees. In case it serves as a guide, I washed one of the cushions a week after applying the textile vinyl, in the program for synthetic clothing, at 20 degrees and 800 revolutions per minute.
When we go to iron the fabric, we should do it inside out.
Step by step: how to apply textile vinyl
Once all the previous warnings and considerations have been made, I leave you the step by step how to apply textile vinyl:
1st.- Cut textile vinyl. Remember that depending on the design it will be necessary to invert the drawing before cutting it. In the drawing that I used for the tutorial it was not necessary, but it is very important in the case of letters or words.
2nd.- iron the fabric so that it catches a little heat, in this way the textile vinyl will adhere better and there will be less chance of it moving before placing the iron on it.

3rd.- Place the textile vinyl on the fabric always with the carrier sheet (shiny part) facing up. If you have doubts about which part of the carrier sheet you can peel off the corner a bit to find out (the carrier sheet is transparent).
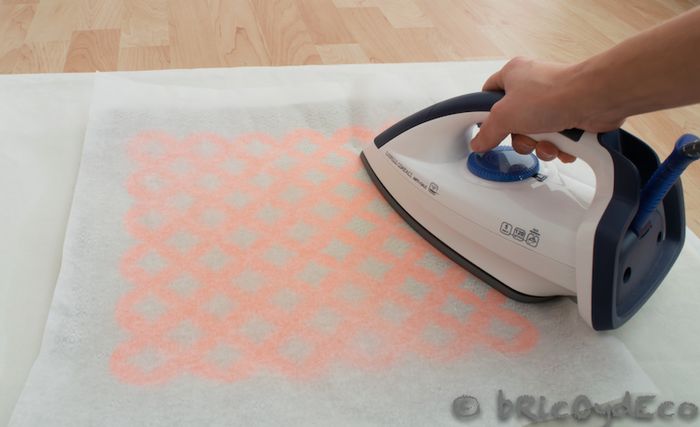
4th.- Place parchment paper or from the oven on top of the textile vinyl. The parchment paper will be essential when we remove the carrier sheet and have to re-apply the iron, either because we are making a design with several parts, or because we are going to place different colors on top of each other.
5th.- press with the iron for about 15 seconds, without steam, at a temperature of 150 degrees (two-point thermostat), pressing down (remember not to move the iron sideways). When the drawings are larger than the sole of the plate (which will be the most common), you have to press and lift the plate to change position until the entire surface of the drawing is covered.
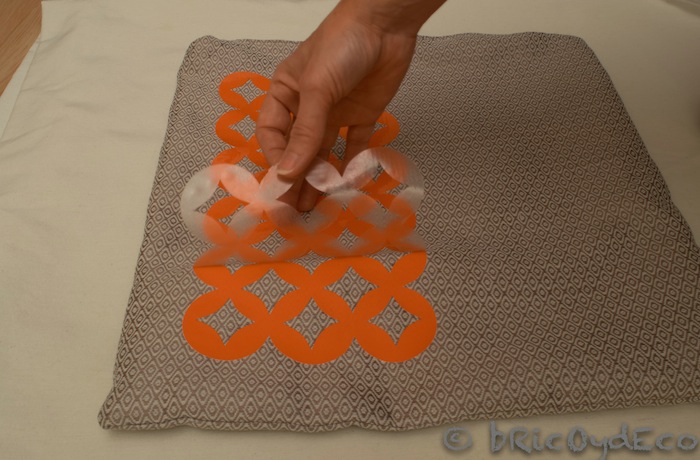
6th.- Remove carrier sheet after a minute and carefully. The carrier sheet can be reused, in fact it is very good to save a piece in case we have to correct any imperfection.
7th.- Reposition the parchment paper on the textile vinyl and press again with the iron another 15 seconds. In theory it is not necessary but it will ensure that the textile vinyl is perfectly fixed to the fabric.
After following all these steps we will have our personalized cushion with textile vinyl.
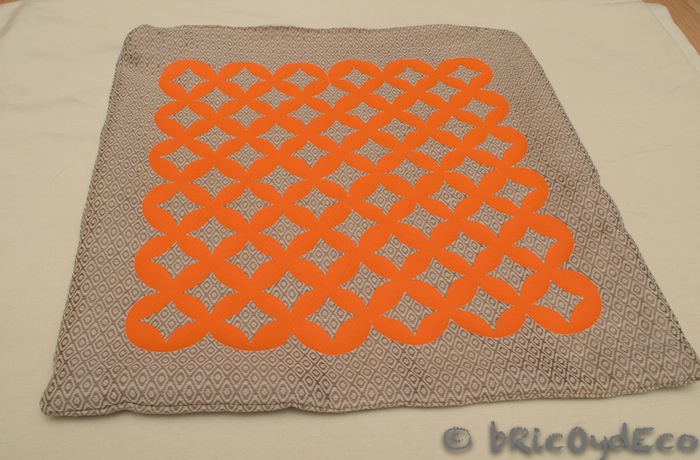
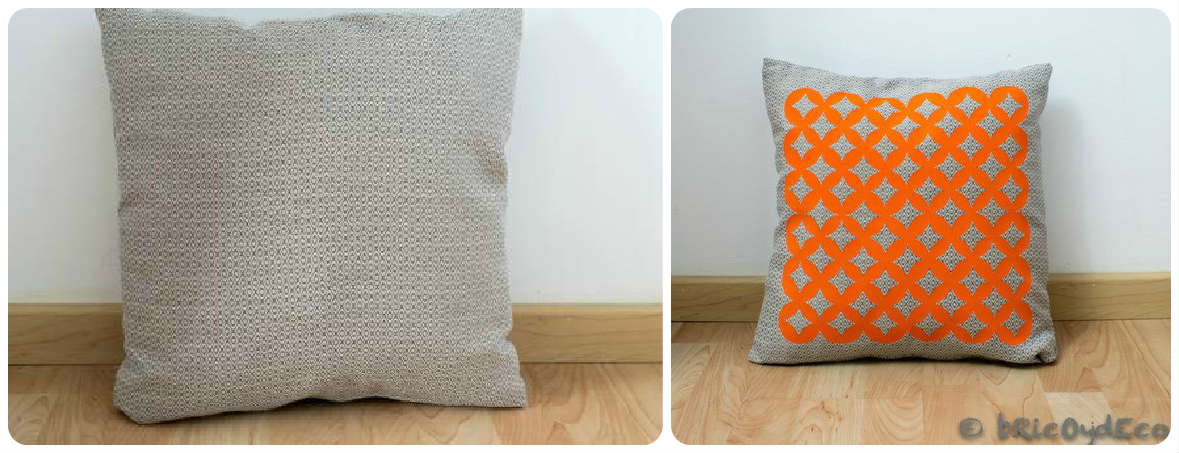
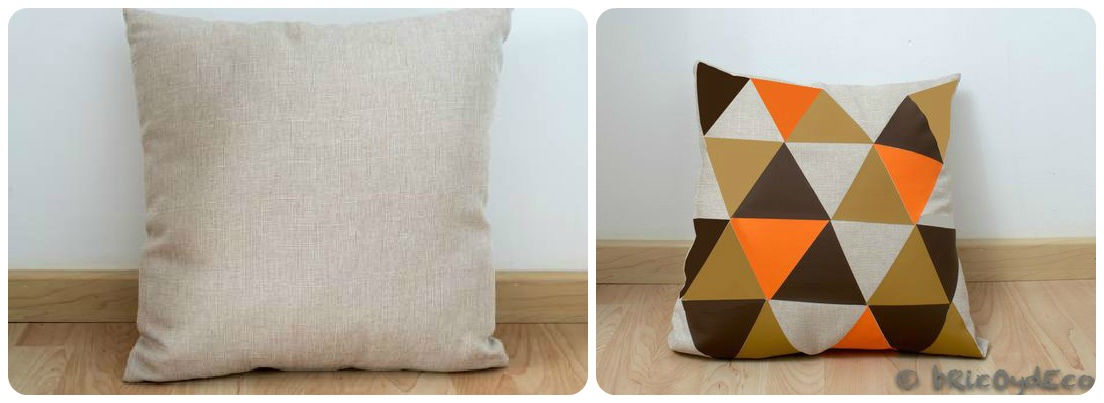
In the following image you can see the before and after of the cushion that I have used to make the tutorial and also another cushion with a composition of triangles of different colors, so you can see that a complicated drawing is not necessary to obtain a good result.
I hope with this tutorial on how to apply textile vinyl at home We encourage you to try this simple technique to personalize fabric, be it cushions, table linens, clothes, etc., and give our home a unique and personal touch.
If you liked this step by step, please share it on your social networks.


