

After showing you the latest vinyl tune-ups I’ve done on cabinet doors and a nightstand, I owed you this tutorial on how to cover corners with self-adhesive vinyl. I have taken enough photos so that you can see each step well and I will try to explain it in as much detail as possible so that nothing is left out.
First of all, I want to warn you that to do this tutorial I have not completely covered the furniture because the intention was to show you how I cover the corners and edges when I tune a piece of furniture with vinyl. I also want to say that every master has his own trickthat there will be other forms of cover corners and edges with vinyl, I show you how I do it in my case, which does not have to be better or worse.
Once these clarifications are made, let’s get down to business 🙂
Case 1: Cover the corners of a piece of furniture
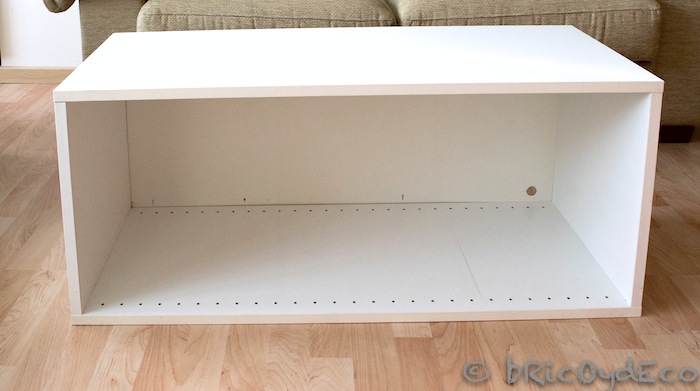
This is the piece of furniture that I am going to use as an example. As you can see, it is the typical rectangular melamine module, without moldings.
The first thing we have to do is start lining the part of the furniture that will be on top, that is, if the piece of furniture is a bedside table, we will start with the part on which we will place things on top (the lamp, a book, etc.). The reason for doing it this way is because we will leave some tabs on the sides that we will then cover with another sheet of vinyl, if you look closely you will notice the relief a little, that is why it is better that it goes in the less visible parts, that is, in the sides, since if it were at the top it would be more easily distinguished.
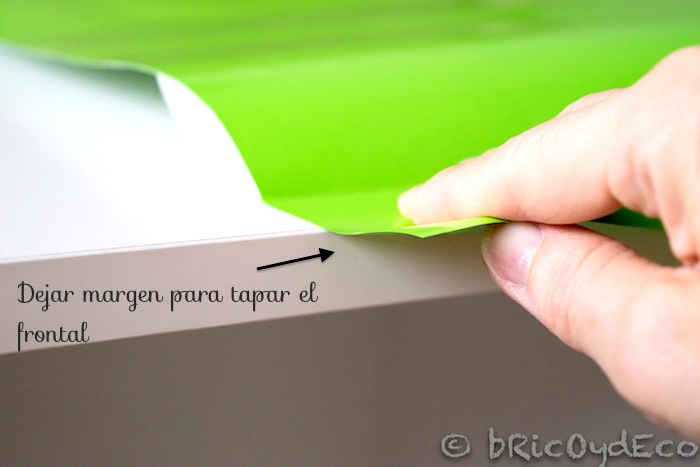
Next, we cut the piece of vinyl that we are going to place, always keeping in mind that we must leave plenty of room to cover the front. We start by lining the upper part but without gluing the front, which will be the last thing we forge. The reason why I do it this way is because if the fronts are not lined, it is always easier to peel off the vinyl to remove any bubbles that may have remained and reposition it.
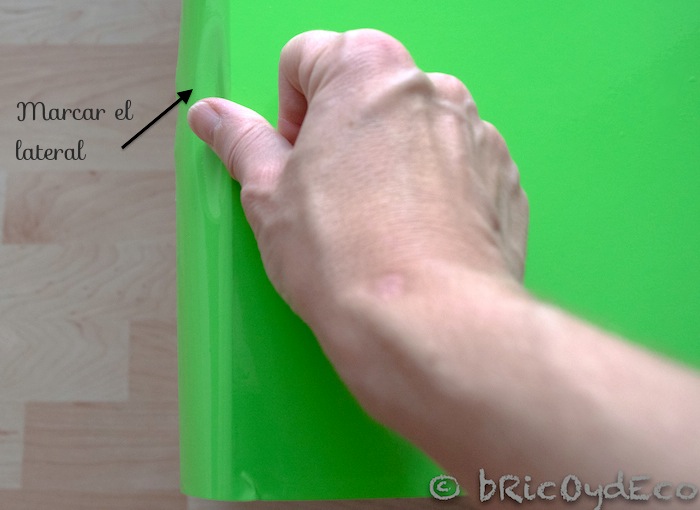
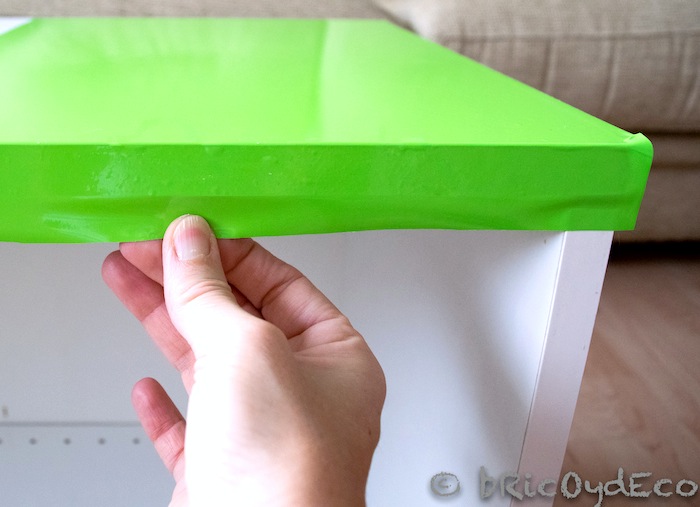
Once we have lined the upper part, We will mark the entire edge of the furniture with our finger.
The next step will be stick the self-adhesive vinyl to the front of the furnitureTo do this, I stretch the vinyl with one hand and fix it with the other (in this image I was taking the photo with the other hand).
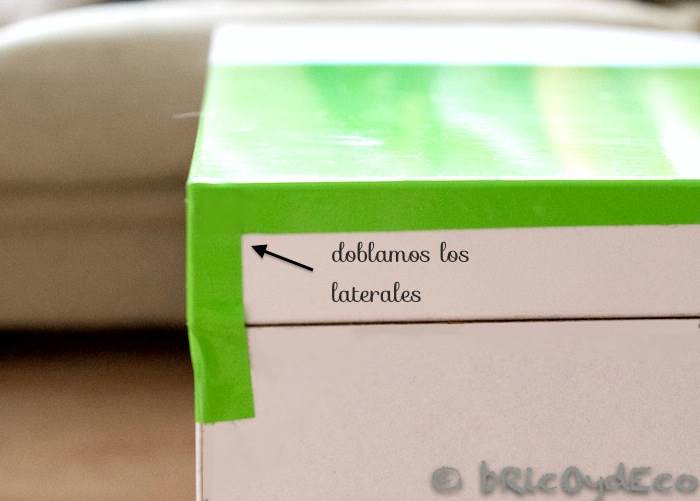
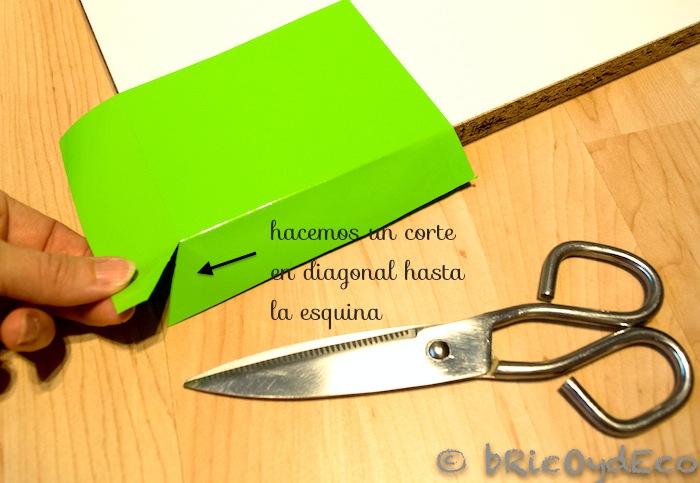
Once we have fixed the vinyl to the front of the furniture, we make a cut in the corner with scissors. It is important that the cut reaches just to the inside corner of the furniture.
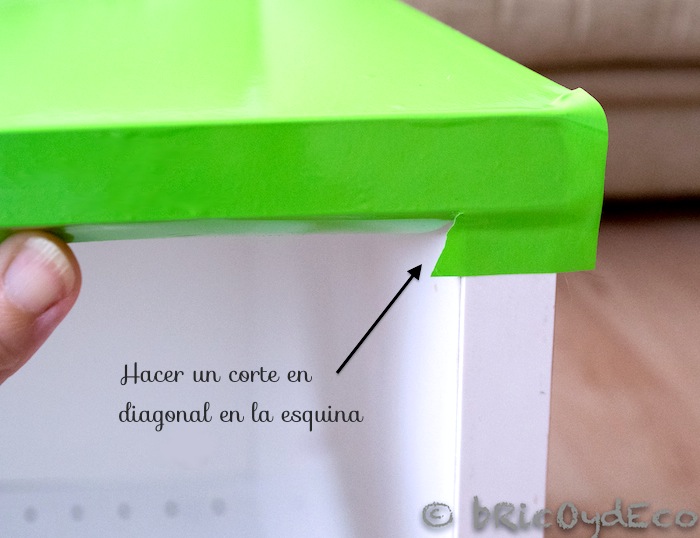
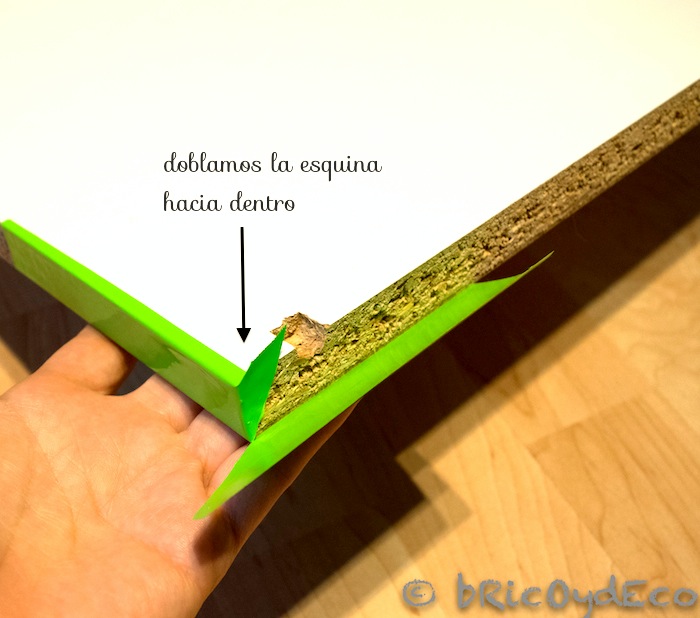
Next we will fold the two tabs that we have left towards the interior of the furniture.

In the part of the external side we must follow the same steps. This time I made the cut with the cutter because the margin was smaller.
And in the same way that we have done with the inner corner, we fold the tabs resulting and we fix them to the side of the furniture.
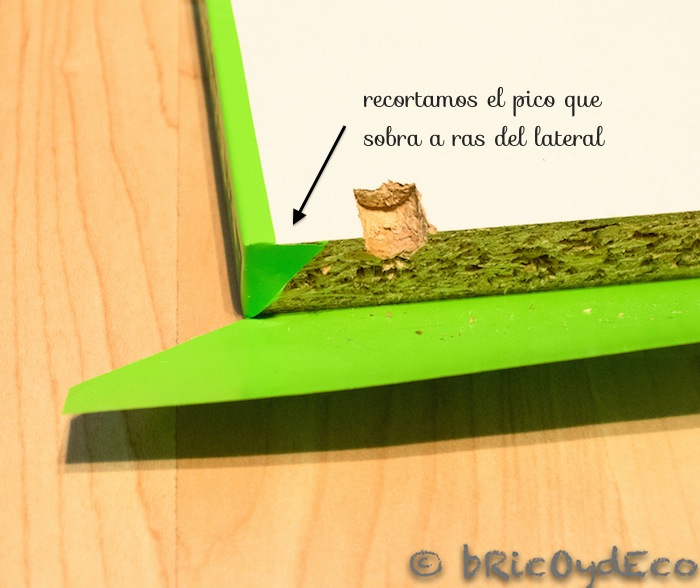
The lashes should be no more than 0.5 centimeters. If it exceeds this measure, we can eliminate the excess with the help of a ruler and the cutter. To do this, we place the ruler on top of the furniture and pass the cutter without pressing too hard so as not to damage the furniture but enough to cut the vinyl. Then we remove the excess part and that’s it.
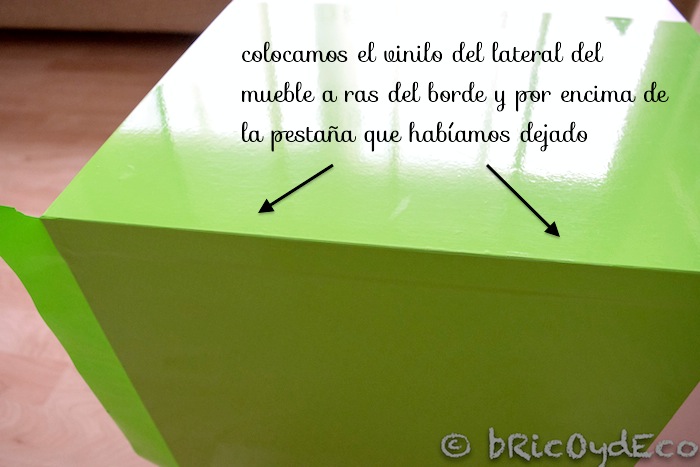
Once we have folded the tabs, we place another sheet of vinyl to cover the side of the furniture. We will align it with the edge of the furniture, being above the tab we had left.
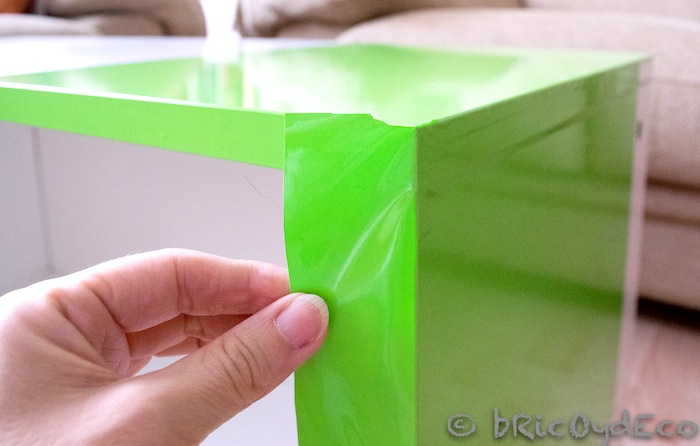
As we had already done with the upper part of the cabinet, we fold the excess vinyl with which we have covered the side to cover the front part of the cabinet.
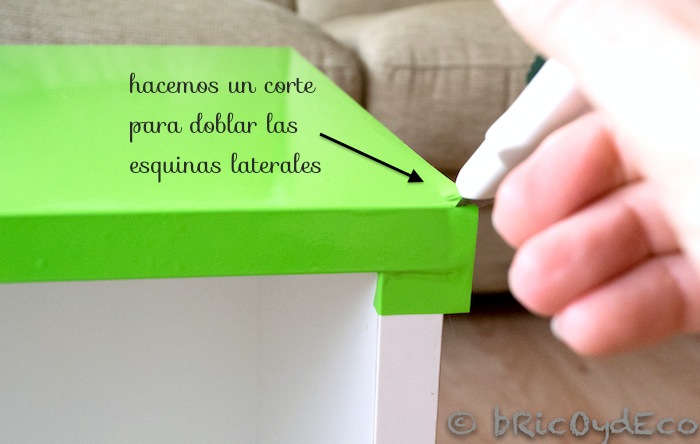
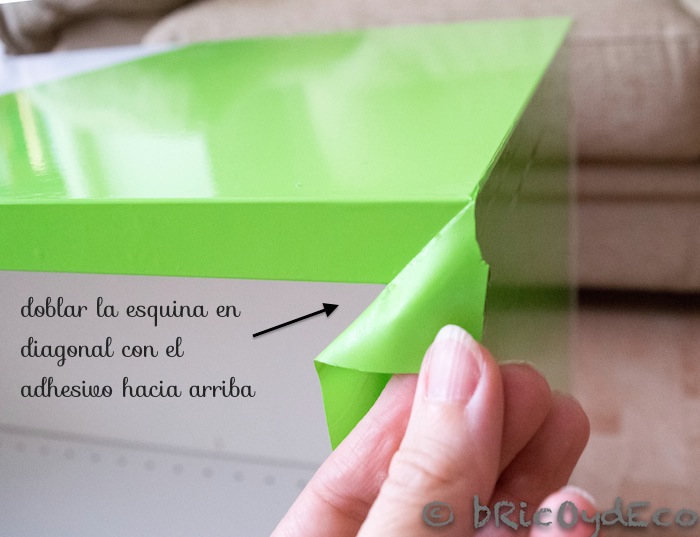
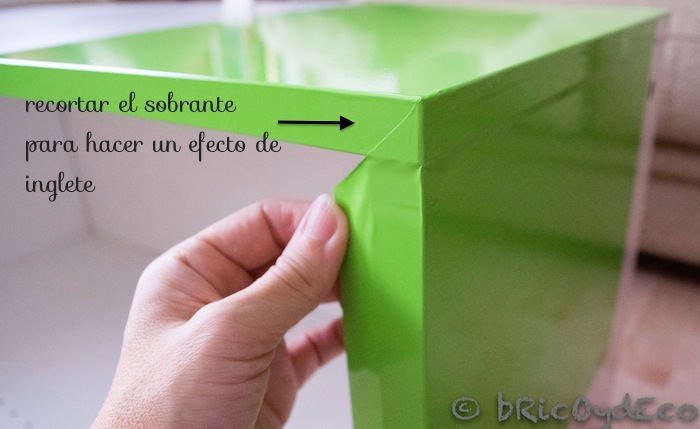
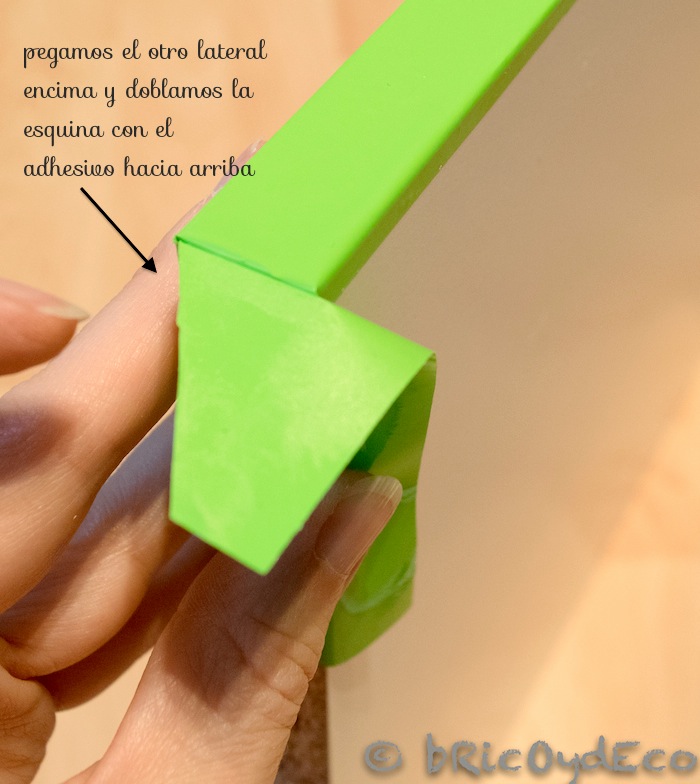
Next we fold the corner diagonally, with the adhesive facing up (the part that is touching my finger is the one with the adhesive). This way the cut will have a miter-like effect (like picture frames, for example).
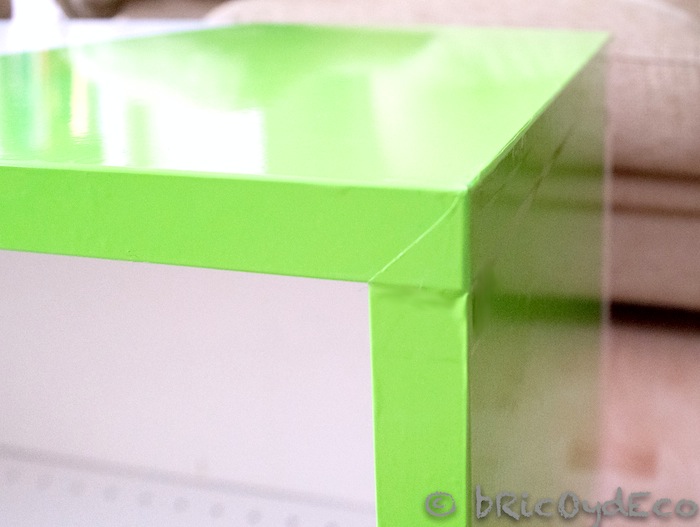
This is how the corner looks once we have cut the excess part.
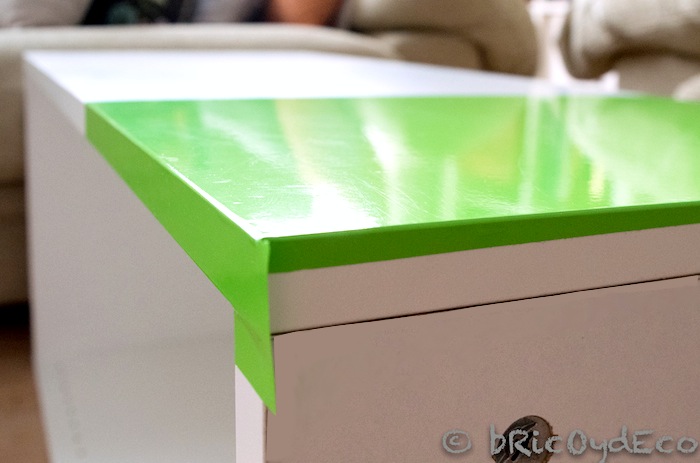
Then we will fold the tab inwards and we already have the side part finished off.
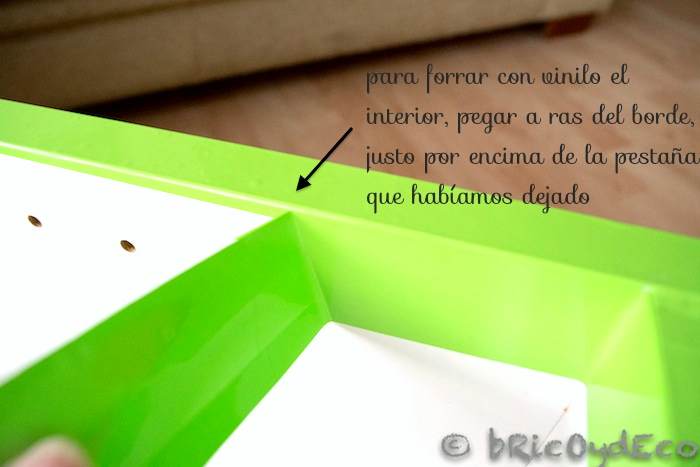
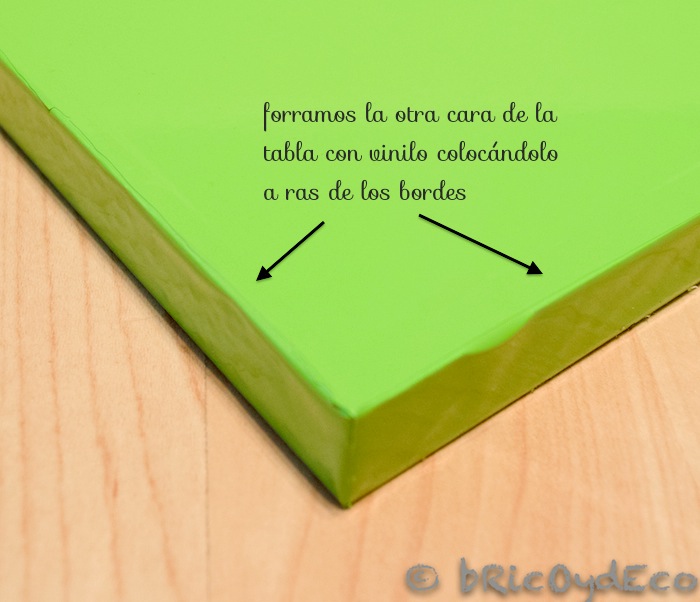
If we also want to cover the inside of the furniture, all we have to do is cut a sheet of self-adhesive vinyl and place it flush with the edge, above the tab (in the same way that we have done when we have covered the side).
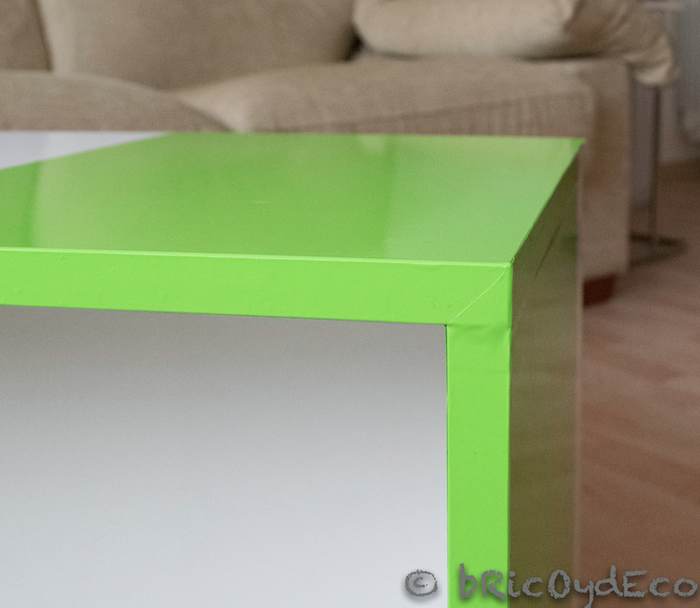
And after following all these steps, the inside corner of the furniture and the outside will be lined.

Case 2: Cover the corners of a door
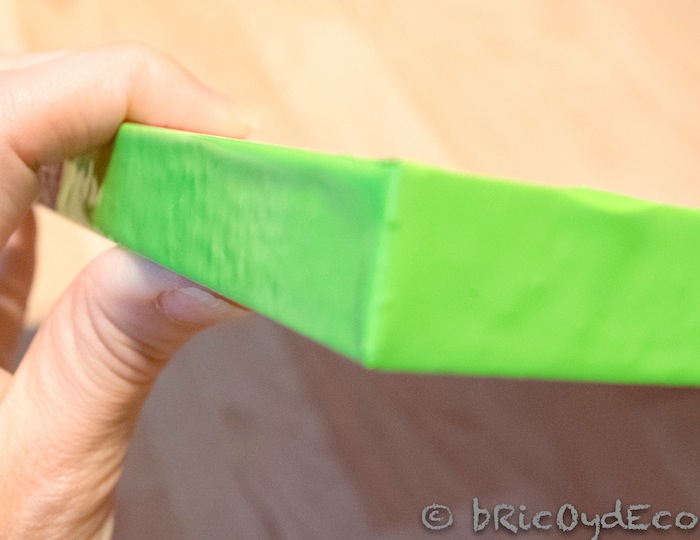
The method for cover corners with self-adhesive vinyl of a door It is very similar to the one I just explained for the piece of furniture. In this case I have taken for the demonstration one of the shelves of the previous piece of furniture, which after all has the same shape as a door. Also keep in mind that some sides are not edged, so the vinyl will be a bit rough in that area, although this detail is only aesthetic and does not affect the execution of this step by step.
First of all we will cover the part of the door that will be visiblethat is, the external face (keep in mind that since it is a demonstration, I have not covered the whole table, only the corner part).
We must leave enough margin to also line the sides of the door. Then we mark the edges with our finger and make a diagonal cut with the scissors to the corner.
We bend one of the sides until it is well adhered and without bubbles to the edge of the door. I insist again that I am only lining one corner, but when we are lining an entire door, we will have to be working on two corners at the same time (one at each end), that is, we will do this step in one corner and then in the other. the opposite party.

Next we bend the corner to the other side, we will see that a little vinyl sticks out.
You have to cut that part that protrudes and leave it flush with the edge of the door.
Then we fold the other side and fold up the excess part of the corner. This will create a right angle join.
We will cut the excess part with scissors or a cutter.

Finally, we will line the inside of the door with a vinyl sheet, the one that remains inside the cabinet or wardrobe. To do this we must place it flush with the edges and above the tabs that we had left.
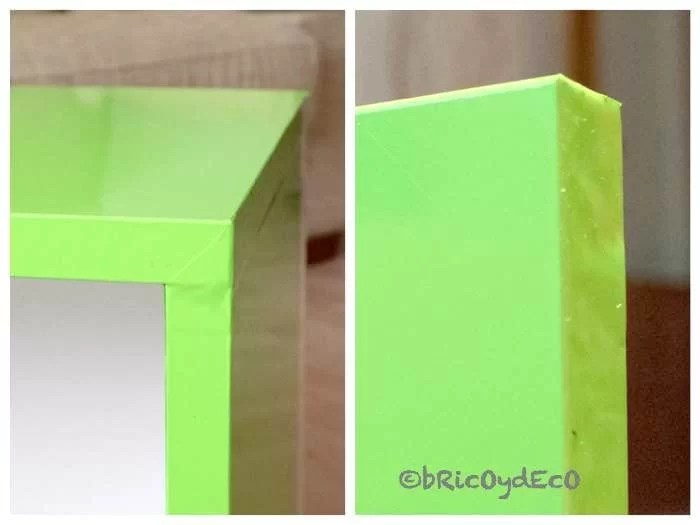
In these photos you can see in detail the final result of how the corner of a door, table or shelf that we want to cover is finished off.
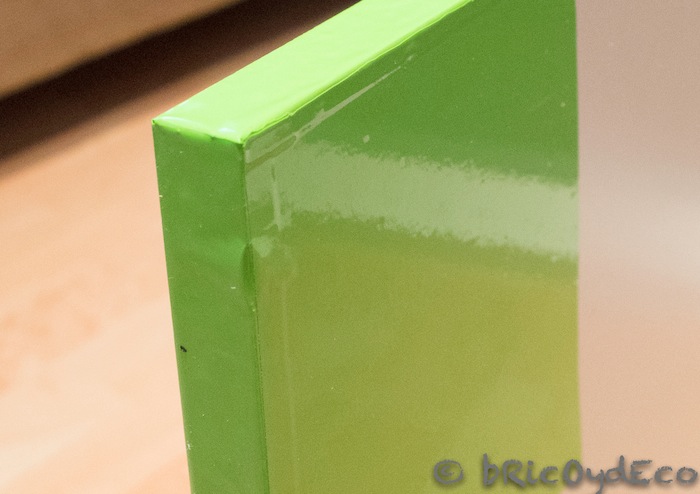
To finish I will give you a trick so that the corners are well fixed to the furniture or to the door and that consists in applying heat to them with a hair dryer. In this way the adhesive of the vinyl will be fixed to the vinyl of the tabs and the transition between one and the other will hardly be noticed.
I hope that this step by step will make it clearer how cover corners with self-adhesive vinyl and you are encouraged to tune up furniture and doors with vinyl to achieve a good result in a short time and at a very reasonable price.
Please, if you liked this post, I would appreciate it if you would share it on your social networks 🙂


