

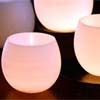
The wax lanternsalso called light screenseither hollow candlesThey can be very very decorative elements that help create relaxing environments.
In previous articles, we have shown how to do balloon shaped lanterns that are really decorative and very appropriate for outdoor areas, even for floating in ponds. Or also how to decorative glass light fixturessuper original, very very easy to make, and very appropriate for Christmas decoration.
Do you dare to make wax lanterns? If on some occasion you have wanted to make wax lanterns, but you have not known how to make them, or you have believed that their elaboration was very complex, do not miss this article. Next we are going to show you that it is an easy and quick craft to do.
If you don’t see yourself…
However, if you don’t feel like it, or crafts aren’t your thing, you always have the option of buying them already made.
On the internet there are countless stores where you can buy very original lighting. Taking a look I came across a website that caught my attention. I’ll explain why:
It works exactly the same as a commercial gallery. Without leaving the same building, you can visit different independent stores.
Exactly the same thing happens with living. From the same portal, you can visit and compare prices and products from different sellers.
Well, one of the categories they have is LED lamps, where you can find countless lighting elements of a wide variety of styles.
Well, going back to the subject at hand, this time, we bring you another way of making this type of element that, being very colorful, is, at the same time, easy to make.
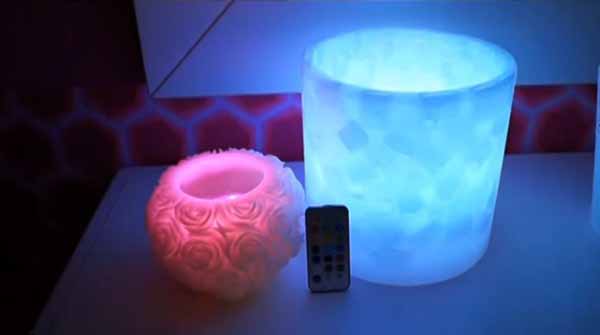
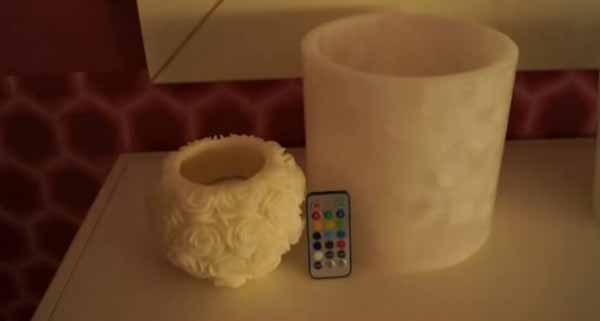
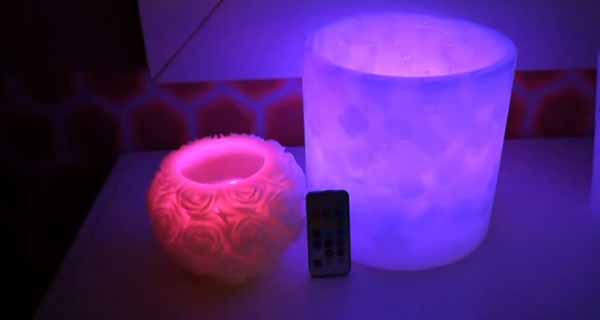
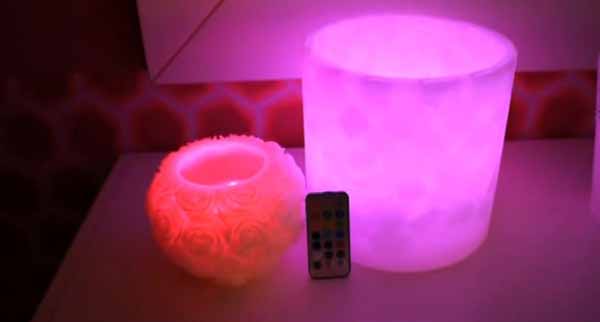
It is a large wax lantern with a tubular shape, inlaid with wax “tiles”, which provide incomparable lighting effects. In addition, a simple locking mechanism can be inserted inside them. LED lighting, that will make your wax lantern a unique decorative element.
Before starting with the step by step, indicate that the paraffins that are used for this type of article, differ from each other, in addition to of course in quality, in the degree of fusion. The degree of fusion gives the temperature from which the paraffin changes from a solid to a liquid state. This degree of fusion is measured in degrees Celsius, which is the one used in Spain.
For wax lanterns, the most appropriate paraffin is 58º, which, once in a solid state, remains translucent, allowing light to pass through from within.
Wax lanterns video
https://www.youtube.com/watch?v=MpZUQRaP8mc
Materials we will need:
-
- 58º paraffin
- 20 x 20 cm metal tubular mold
- Release agent for candles
- Tray that does not serve you
- A pan
- Iron that you use only for crafts (optional)
- Cutter or knife
Procedure for making wax lanterns
First step
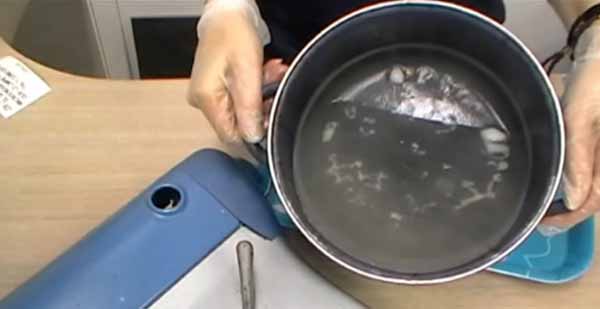
The first thing we have to do is heat a kilo and a half of paraffin in the pot, until it becomes a little cloudy.
Second step
We apply release agent on the tray and pour the paraffin on it, carefully so that it does not overflow. And we let it dry. Before it is completely curdled, when it has a texture similar to plasticine, we will make some cuts in the shape of squares.
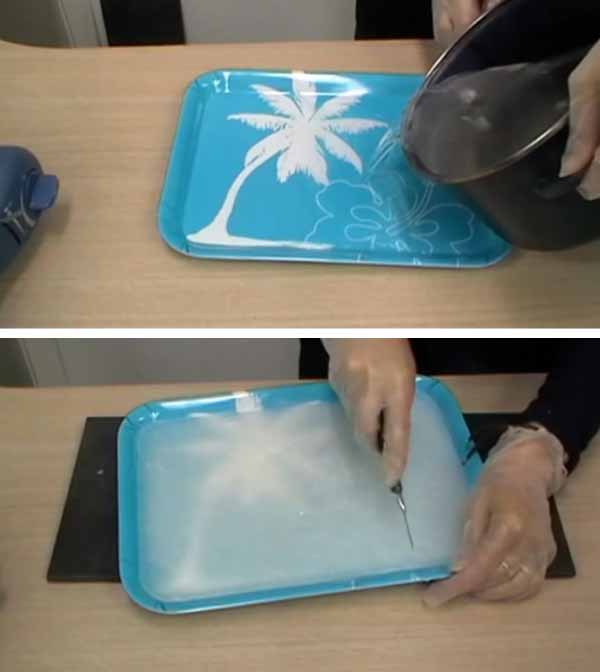
And now is when we let it dry completely.
Once dry, we take off all the pieces.
You can skip this step and go directly to step 3, but in this way you will obtain a much more decorative and elaborate wax lantern.
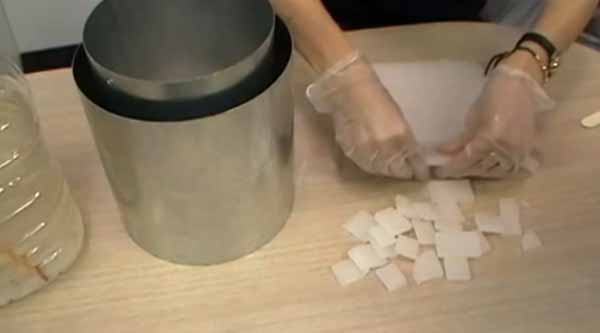
Third step
Now we apply release agent on the inner face of the larger mold, and on the outer face of the smaller mold. We introduce one inside the other and pour a little paraffin. Then we add pieces of the paraffin that we had previously prepared in the tray and, thus, we alternate the liquid paraffin with the wax “tiles”.
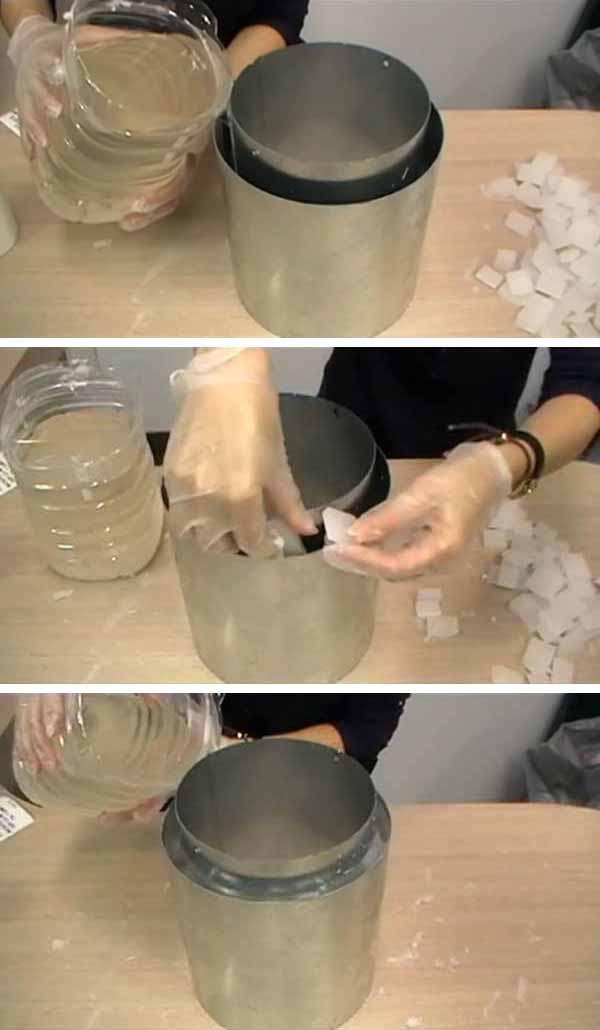
When we reach the edge of the mold, we let it dry and, as the level drops, we fill it. Tear off the thin film on top a little, and fill to the brim.
If you chose to skip step 2, in this third step you would only have to pour liquid paraffin inside the molds, until you reach the edge.
Fourth step
Once dry, we remove the inner mold and, with the cutter, cut one of the ends at a 45º angle, since we have to prepare it to make the base.
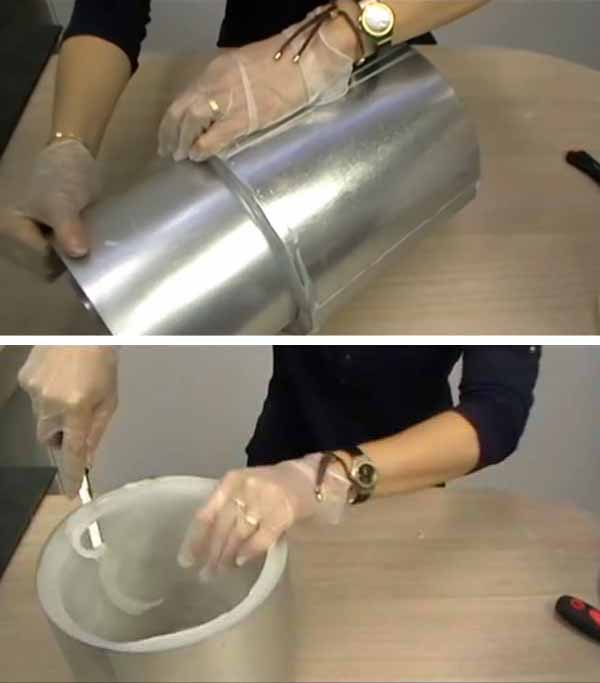
Fifth step
We apply release agent on the surface on which we are going to work, and we put the part that we have just cut at 45º in contact with it.
And we pour the paraffin inside the lantern again. Pour until it is similar in thickness to the rest of the lantern. Now let dry.
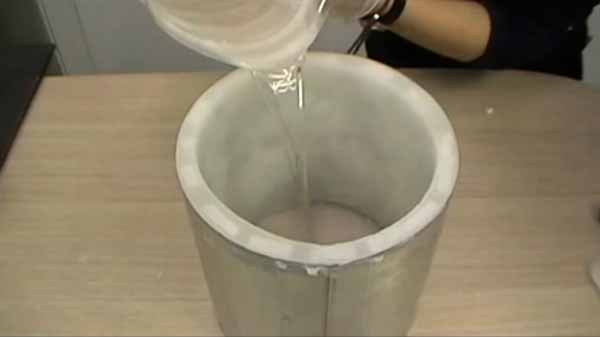
step six
Now remove the outer mold. As you can see, the square pieces that we introduce in a solid state can be seen. When you introduce light inside it, it will project shadows and lighting effects that would not be achieved otherwise.

Seventh step
Now we iron the entire outside of the piece. Do not give too much temperature to the iron, this way you will prevent the paraffin from melting excessively.
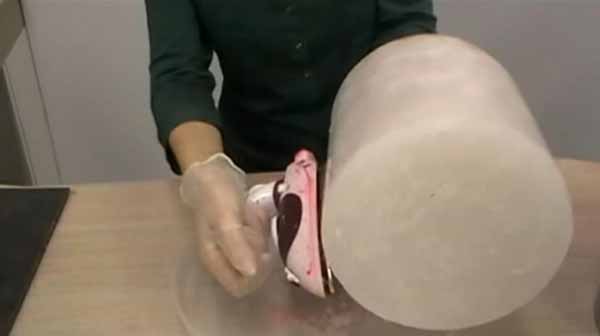
With this step you will obtain a completely smooth and soft wax lantern, with an impeccable and very professional finish. However, if you see it as too complicated, you could skip it.
Eighth step
All that remains is to insert the led light inside the lantern and enjoy its effects.
What do you think? Did you like it? Then share it with your family and friends.
You may be interested in seeing these other related articles:
Pyramid shaped candles |
Globe shaped lanterns |

candle making |

Christmas candle holders |
.


