

The days go by so fast that when we want to realize it we will already be at the end of October, and what happens at the end of this month? Well, in addition to changing the time on our clock, it celebrates Halloween (also known as Halloween or Halloween Night). It is customary to celebrate this festivity in Anglo-Saxon countries, some in Latin America and in much of Spain, so today I want to show you the step by step of a garland for Halloween with which to decorate your Halloween parties. In addition, this craft is ideal to do with children on one of those autumn afternoons when bad weather begins to show its paws.
The materials that we will need to make our garland for Halloween are the following:

– Cardboard black and orange (other colors can also be used depending on the design). An alternative to black cardboard is black self-adhesive vinyl, you can see here how to work with it and here and here some examples of the final result.
– A pencil light and one dark to be able to draw on both cards.
– Tail for crafts, which is transparent once it dries. If you use vinyl, neither the glue nor the brush will be necessary.
– A Brush to apply glue.
– A rule or bevel
– Nail scissors. If the craft is going to be done by children, it must be ensured that the scissors are appropriate for them.
– A drill to make holes.
– A string or thick thread (I have used black wool that I had at home).
Once we have all the materials we can get down to work to make our garland for halloween.
First we will draw two equal triangles on both orange and black cardstock. Both triangles will have two 20-centimeter sides and one 14-centimeter side.
On the shorter side we will draw one centimeter from the vertices, two small rectangles as tabs 1 centimeter high and 2 wide. Also on the black cardboard we will draw another inner triangle which will be 1 centimeter apart from the edge.
Once we have everything drawn, we cut both triangles without cutting the inner triangle of the black cardboard (This is very important).
In the following images you can see the two triangles drawn on the cardboard, although the orange does not show too much.

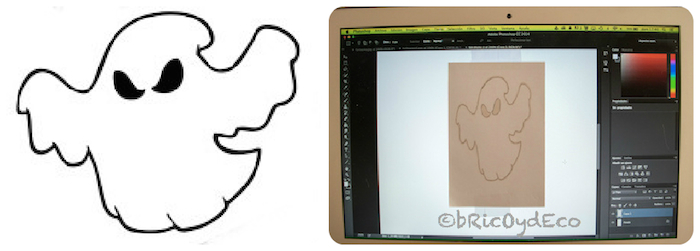
The next thing we need to do is find a Halloween-related design for our garland. Ideally they should be silhouettes that can be traced and cut without many complications.
The chosen drawing must be about 12 centimeters wide so that it fits in the internal triangle of the black cardboard. Ideally, the edges of the drawing should overlap the edges of the inner triangle.
Once we have the design, it can be printed or traced directly through the computer screen, to do this fix a sheet of paper with a little tape and raise the brightness of the monitor to the maximum.
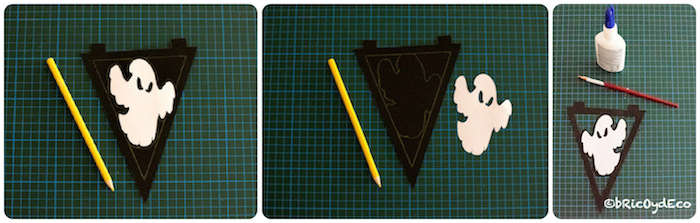
The next step will be cut out the drawing, trace it on the inner triangle of the black cardboard and cut out the excess part. For this reason it was so important not to cut the inner triangle out of the black cardboard, as some parts of our drawing will be attached to the triangle frame.
Normally we will not use the drawing that has served us as a template but in this case, being a ghost, I have taken advantage of it.
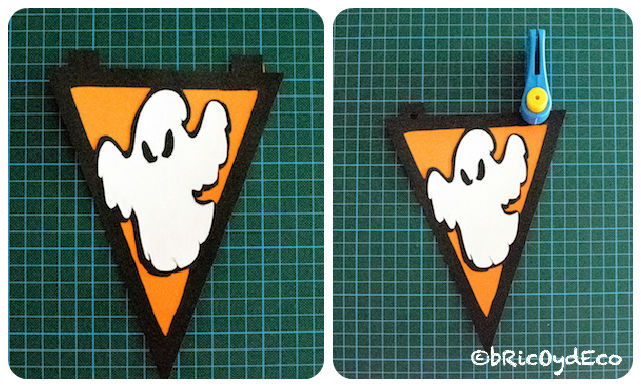
Once we have it all cut out We will apply glue with the help of a brush to glue the ghost to the black cardstock and the black cardstock to the orange cardstock. Looking at the following images, it will surely be clearer to you.
When the adhesive has dried, with a hole punch we will make a hole in each tab to be able to pass the rope or cord to hang our garland for Halloween.
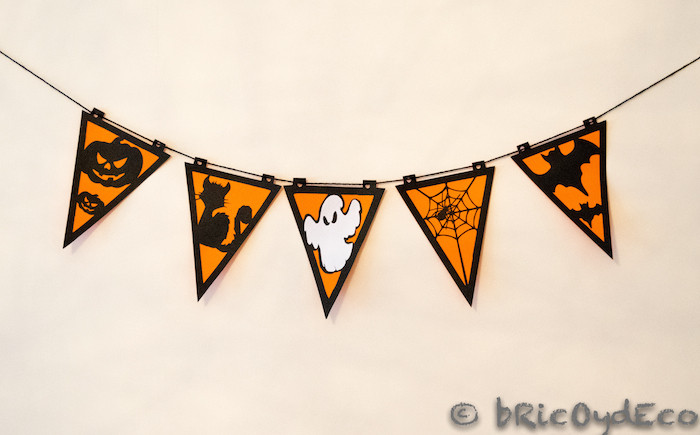
The same steps that we have followed to make our little ghost are the ones that we must follow with the rest of the garland designs (although the same could always be repeated).
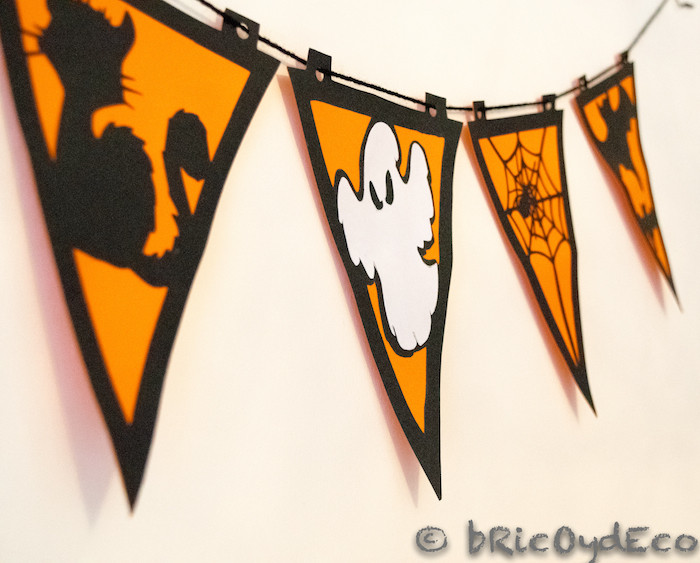
As you can see in the following image, apart from the little ghost, I have also cut out a cat, some pumpkins, a spider web and some bats.
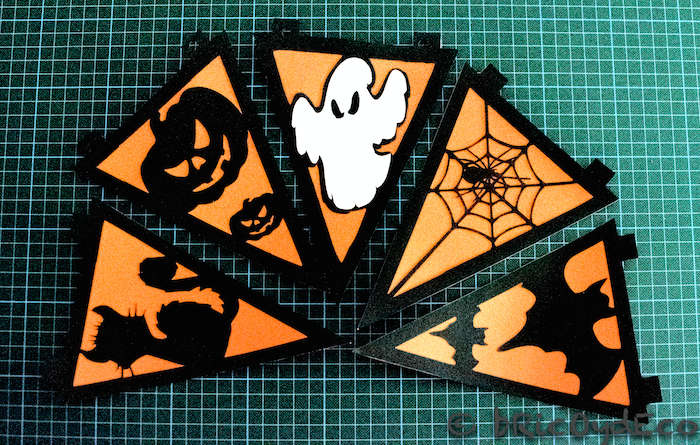
As you can see, the execution is not complicated but it is entertaining, especially if the drawings have a lot of detail, but seeing the following image I think it is worth the time invested, right? Also, if you do this craft with the little ones in the house, you will surely have them entertained all afternoon.
Do you plan to do any crafts to celebrate this festivity? What do you think of this garland for halloween? I hope you liked it and if so, I would appreciate it if you would share this post on your social networks.


