With this post I want to show you how to put custom doors on a bookcase or piece of furniture easily and economically since, on many occasions, it is the doors that make the final price of the bookcase or piece of furniture more expensive.
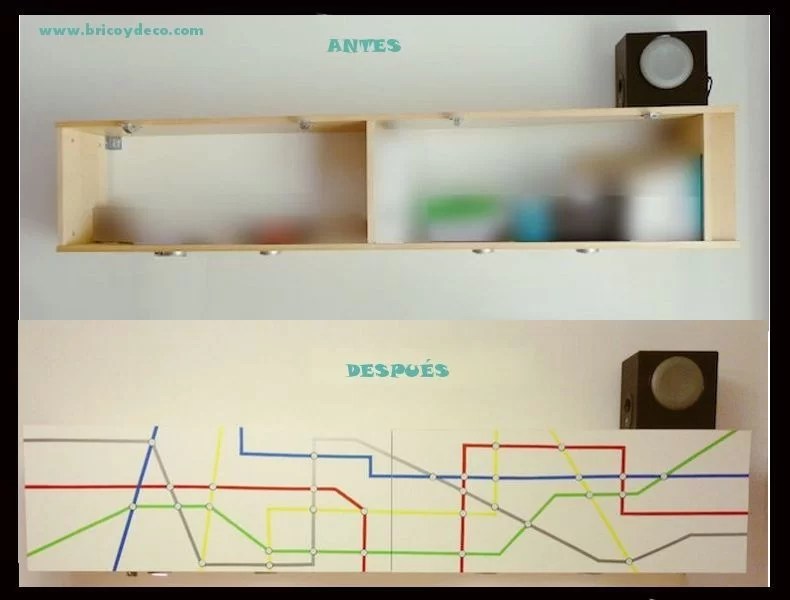
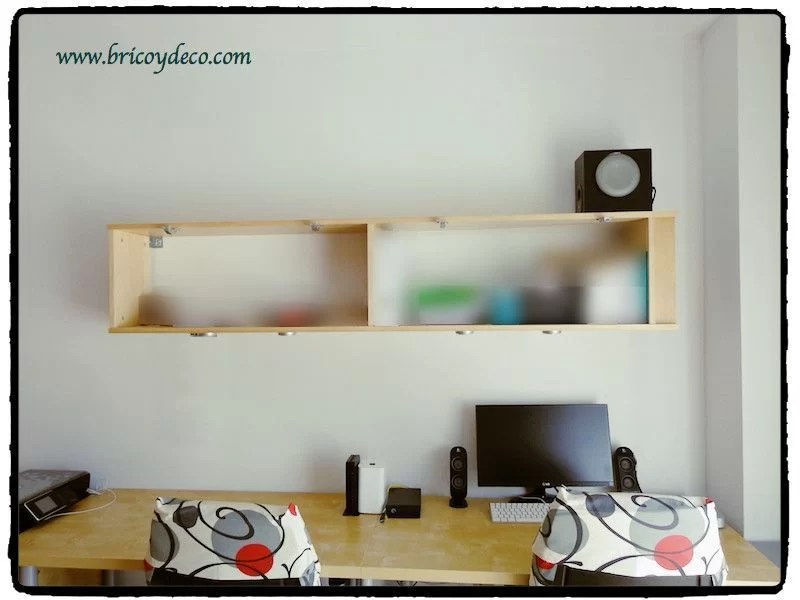
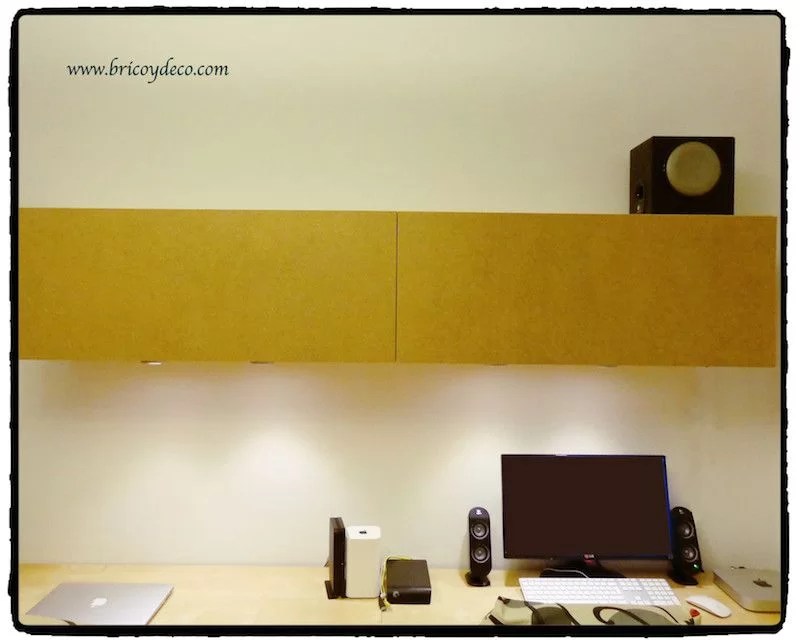
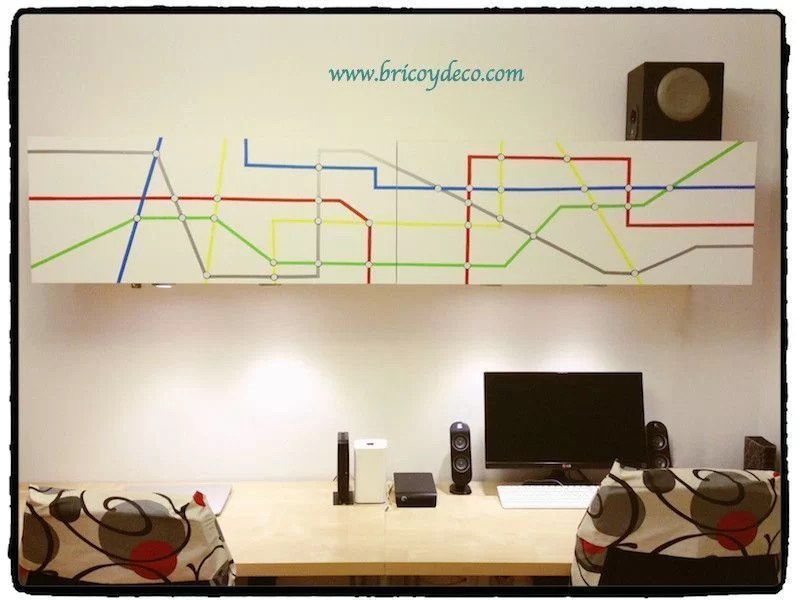
At home we wanted to put a shelf above the work table to increase storage area and create some points of light on the table. Since we had a Billy bookcase, we decided to hang it horizontally on the wall.
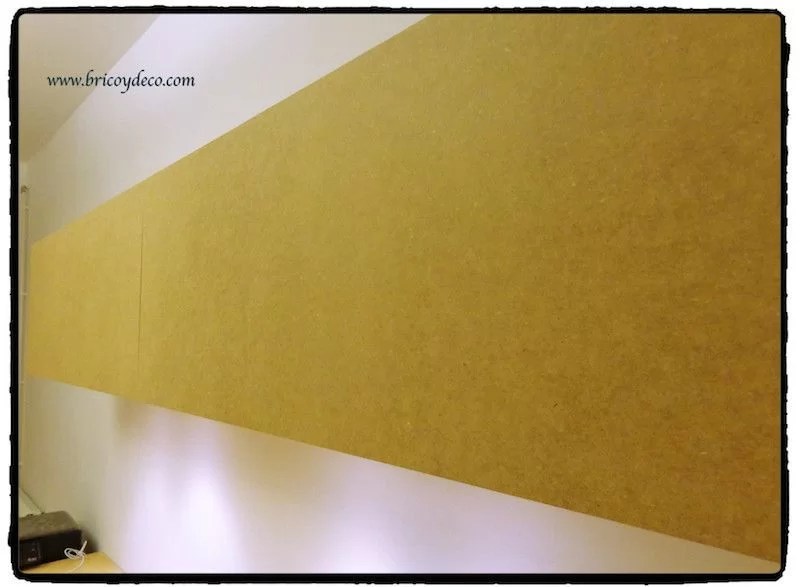
As you can see in the following photo, visually it was not very attractive and on the left side you could see the plinth. Initially, we installed the Billy Morrebo door that we already had, but it was heavy and uncomfortable to open (we fixed it to the top of the bookcase). In addition, the door left the plinth exposed, so visually it still looked like what it was, a bookcase placed horizontally.
After giving it several turns, we decided to attach some mdf doors. As the bookcase was 202 cm long x 40 wide, we bought two MDF boards 120 cm long x 40 cm wide x 1 cm thick, in this way we obtained two doors with which we totally hid the entire front of our bookcase. bookcase/shelf and that, furthermore, they were not heavy when opening them.
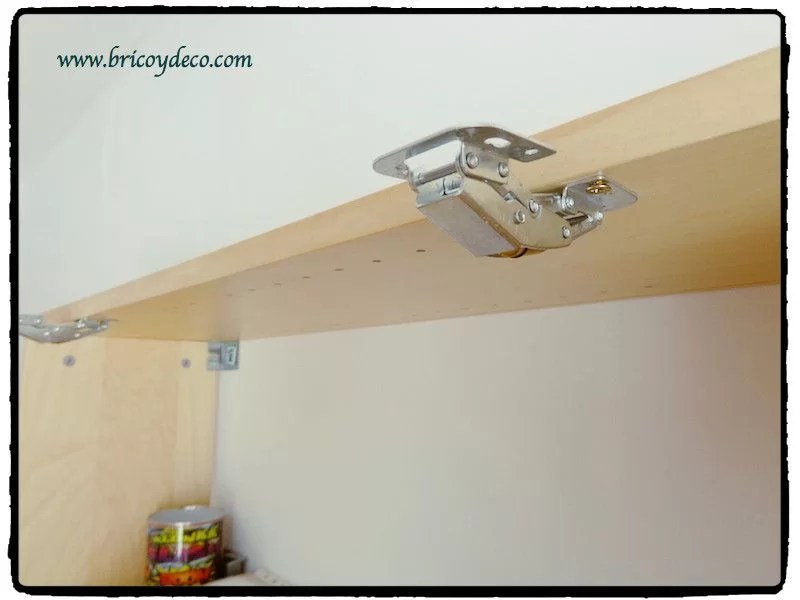
To fix the doors to the top of the bookcase, we used some cupless hinges like the ones in the following image. The advantage of this type of hinge is that there is no need to make a recess in the door to attach them, since they can be placed on any smooth surface.
With a jigsaw we cut the excess part of each door until adjusting them to the length of the bookcase and once placed, our horizontal bookcase already looked like a piece of furniture with doors and all this for less than €15 (MDF boards and hinges).
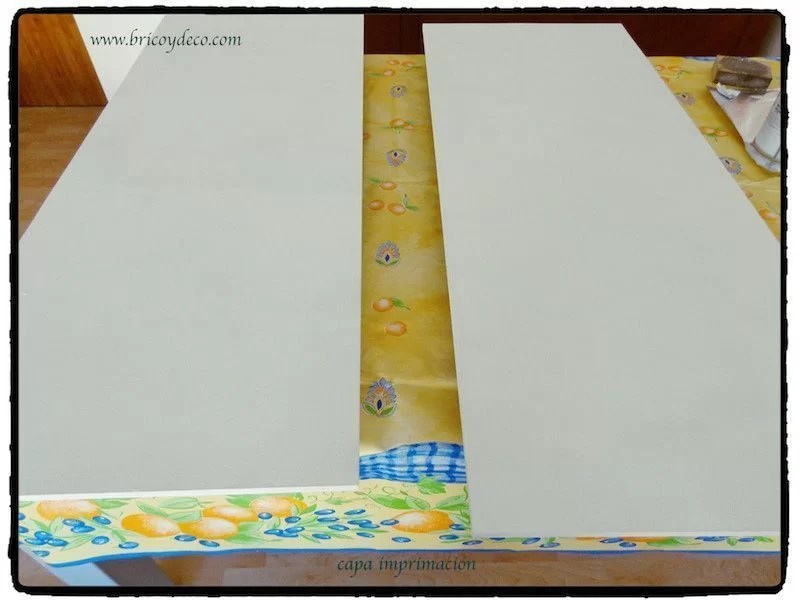
The next step was customize DM doors. First I gave a primer coat just like I did when I painted the cabinet doors.
 And once it had dried completely, I applied a coat of special tile paint that I had left over from when I painted the office bookcase.
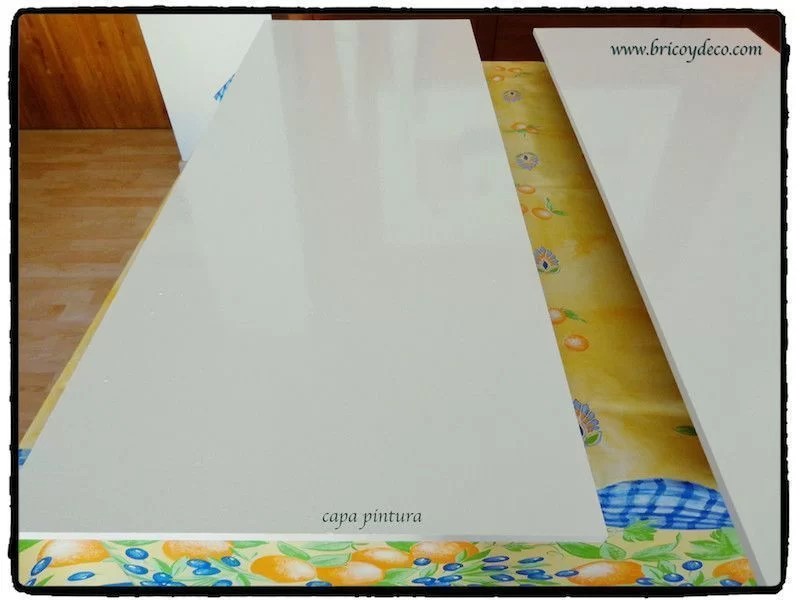
The special paint for tiles does not need primer but I applied it for two reasons: first, because I didn’t know if I would have enough leftover tile paint to give the doors two coats; and second because with a coat of primer the door was not going to absorb as much paint when I gave it the second coat. With the special paint for tiles I got the same shine and tone as the Billy bookcase that I painted months ago and that is located on the opposite wall.
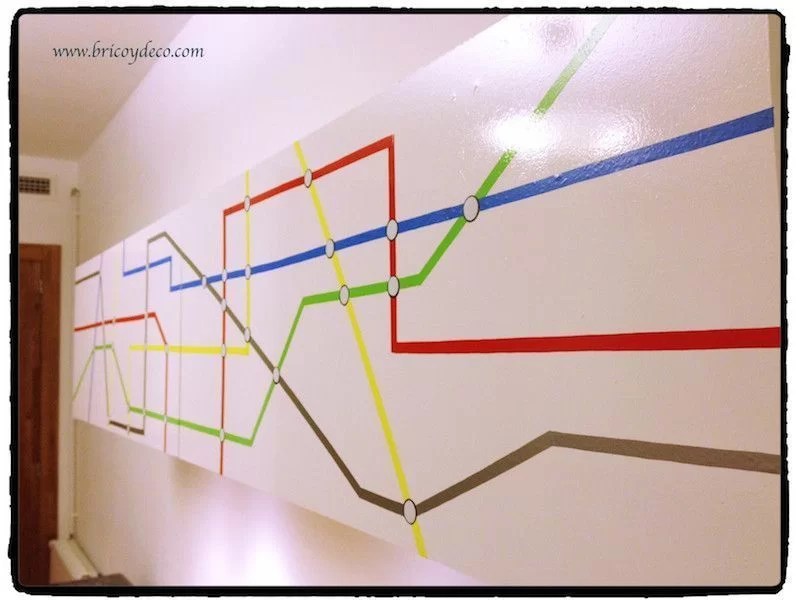
I was clear that I wanted decorate the doors with self-adhesive vinyl since it can be easily renewed if I got tired of the design later on. I was looking at different models but the price skyrocketed due to the dimensions of the doors (just over two meters long). I was looking to give the doors an urban touch and with some color so when I saw this vinyl that simulated the subway linesI knew I had found the design I wanted.

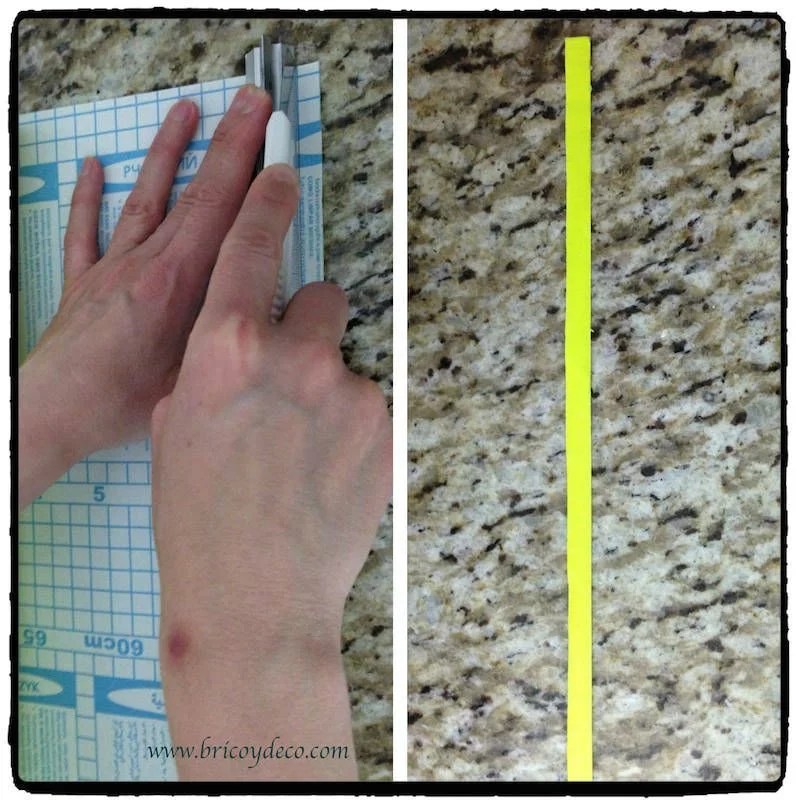
Taking advantage of the fact that he had remains of self adhesive vinyl of different colors that I had left over from other tunings, I set out to design my own Metro map. For the lines I cut strips 1 centimeter wide, using a cutter and a ruler.
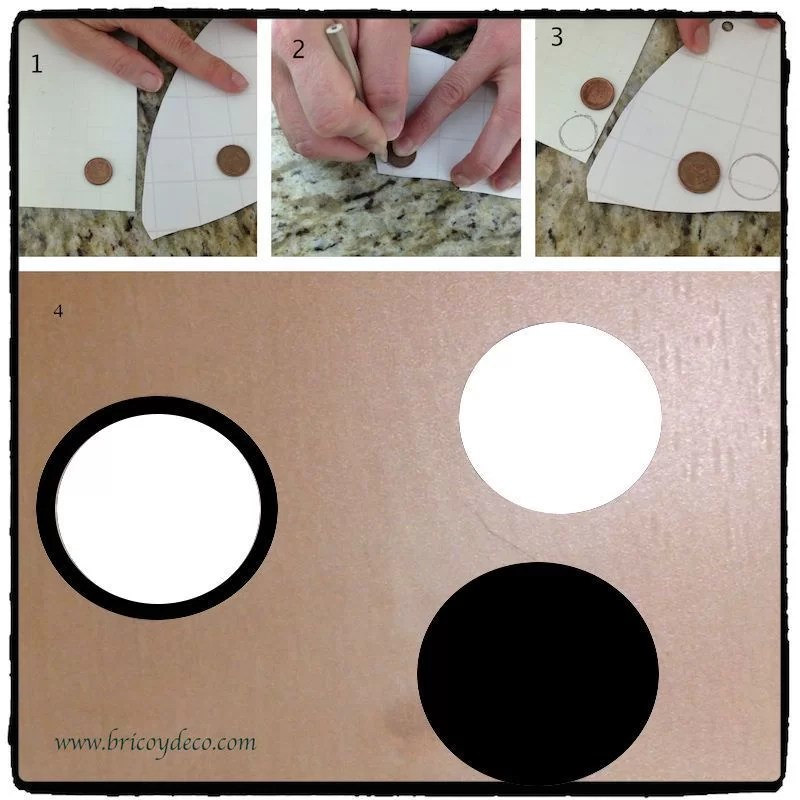
For transfers I used black and white vinyl, with the black vinyl and a 2-cent coin I made a circle and with the white vinyl and a 1-cent coin, I made another circle. He then cut them out and pasted the white on the black. To make the edges look better, they can be reviewed with a black permanent marker
And once we had the lines and transfers, all that remained was to create the links to build our own Subway plan.
Summarizing…
If you have a module or bookcase that you want to put some doors on without breaking your pocket too much, you will need the following:
For the doors:
- MDF boards
- Hinges without cup or overlay
To paint:
- primer
- Acrylic paint, or special paint for tiles or homemade chalkboard paint.
- Roller.
- self adhesive vinyl
- Cutters, scissors…
Of course, the design is free, the doors can be painted in a single color or several, they can be covered directly with self-adhesive vinyl, or draw some reason with a template… The possibilities are endless and, in our case, we have been satisfied with the final result.
I’ll get off at the next one, and you?