

How was your weekend? i spent sunday updating the duvet cover in our bedroom because the one I had no longer combined with the new decoration. After spending several weeks searching for a duvet cover, I couldn’t find one whose design and price convinced me 100%, so it occurred to me take advantage of the back of the duvet cover that you already had and buy a fabric to replace the part that is visible. In this way, I made sure that I was going to like the cover and that it was also not going to skyrocket in price since I would only need half the fabric.
There is a wide variety of prices when buying a duvet cover depending on the size, quality, brand, etc. For a 150 cm wide bed, we will rarely find a cover with a price lower than 30 euros (it is usual for it to cost 50 euros and up). On the other hand, its preparation is not complicated at all since it only consists of sewing three sides of the cover and leaving one of the widths open to introduce the filling.
Sometimes we calculate the cost of the fabric and conclude that it is practically the same price to make it as to buy it, but it does not have to be that way. We can reduce the cost of making a duvet cover if we reuse one that we already have, in addition we can also buy cheaper fabrics on sales or in markets. There are many people who associate the word “flea market” with “poor quality” but, as everywhere, there is everything. In fact, when it comes to fabrics, many stalls stock up on leftovers from stores from other seasons or from the end of rolls with an excellent quality/price ratio.
Materials
For upgrading a duvet cover from one we already have we will need the following:
– Duvet cover that we no longer use. We will need the back of a duvet cover that we are no longer going to use, in this way we will save half of the fabric. We could also use a top sheet.
– Fabric for the top of the cover. The fabric must be double width to cover the length of the bed (about 230 cm margins included). On the other hand, for a 90 cm wide duvet cover you need about 160 cm, for a 135 cm duvet cover you need 230 cm, for a 150 cm duvet cover you need 250 cm and for a 180 cm duvet cover you need 270 cm. . We must also take into account the cover for the cushions and if we want to make a cushion with the same fabric.
– Sewing machine. It is not essential but it will certainly save us a lot of time. It is not necessary to have great knowledge either, since we only need to make a straight stitch on the three sides of the cover, a hem and a zigzag stitch to finish off the edges of the fabric so that they do not fray.
– Scissors, needle, thread…
Step by Step
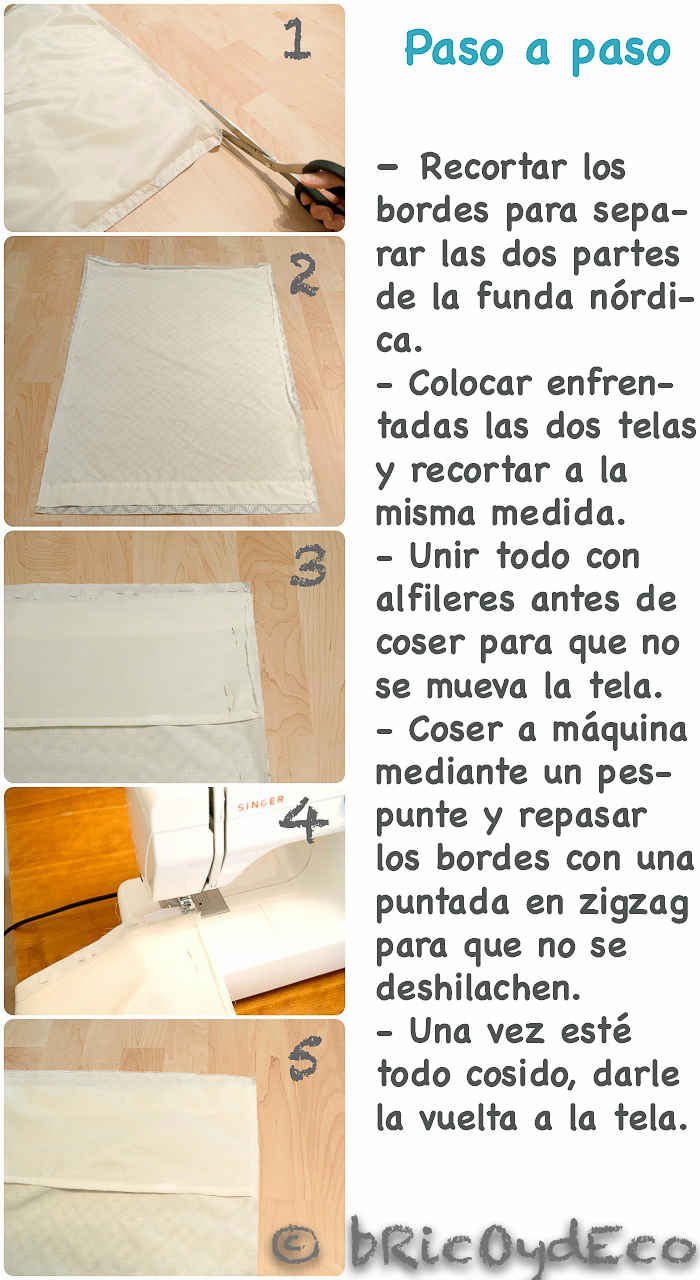
The images of Step by Step they are from the pillowcase since due to the dimensions of the duvet cover, it was difficult for me to photograph it so that everything I wanted to show came out, but the steps to follow with the duvet cover are exactly the same as with the pillow cover.
First you have to turn the cover inside out and cut the sides to eliminate seams and separate the back and front. We could also unsew it but it will take us much longer and by cutting the edges we will only lose a couple of centimeters.
Next we will use the back as a pattern to cut the fabric that we have chosen, for this we will face the right of both fabrics and we will join them with pins so that neither of them moves and facilitate the cut.
Next We will sew with the machine using a straight stitch the two lengths of the fabric and one of the widths. For close the cover so that we can insert the padding we have two options: the first is to leave a tab and close it type on as you can see in step 5; the second is to hem it and close it with buttons. I used the first option for the pillowcases and the second option for the duvet cover since I took advantage of the eyelet strip that was already on the cover that I reused.
Finally we put the fabric of the right side and we can iron the edges to better seat the seams.
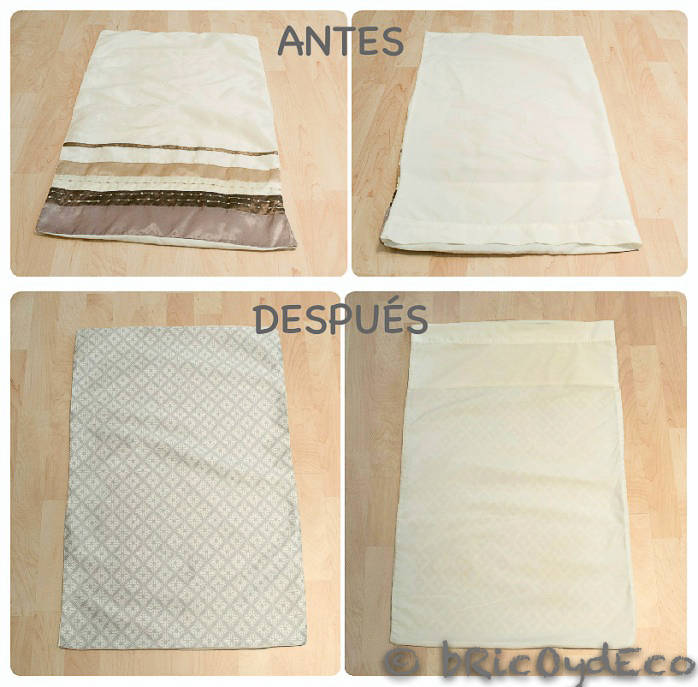
In the following image you can see how the pillowcase was before and how it is now. The part that you have reused is the one that is plain in color,
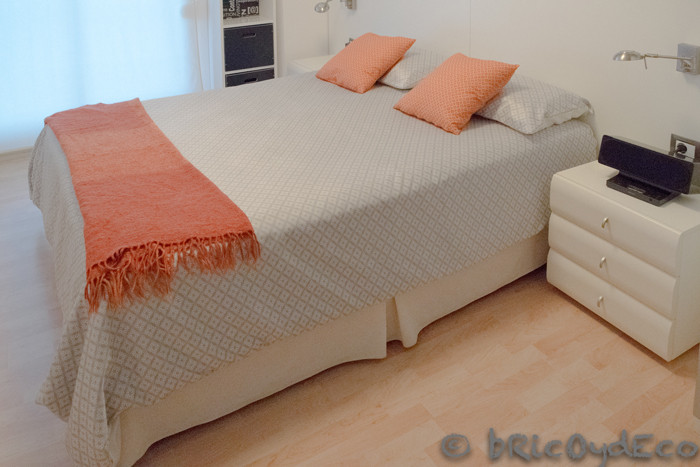
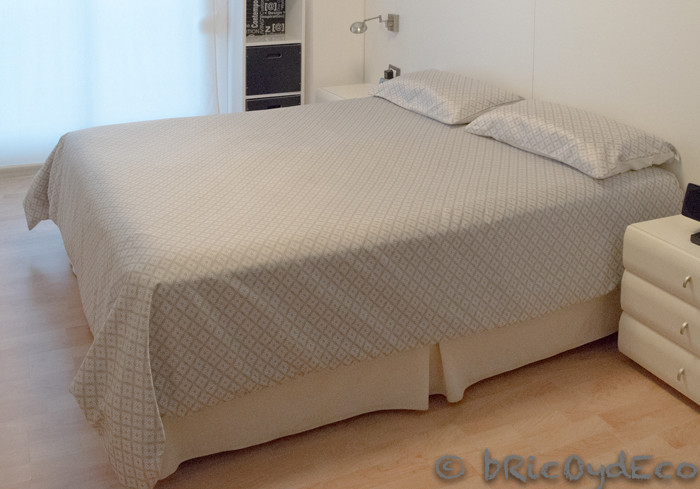
As I have already mentioned, the steps to do the same with the duvet cover are the same as those followed for the pillowcase. In the next photo you can see the final result with the cover and the cushions already placed on the bed.
As you can see, you don’t need great sewing skills (mine are basic) or a large investment to renew the duvet cover on the bed. I was lucky enough to find a fabric in the flea market that was just the color I wanted and with a design that I liked for 6 euros per meter (3 meters of double-width fabric for 18 euros in total).
By reusing the back of a duvet cover we will save half the fabric in making a new duvet coverIn addition, we can also reuse the piece of waste to make cushions or other sewing jobs (patchwork, kitchen aprons, etc…).
If you liked this post and found it useful, I would appreciate it if you shared it with your friends 🙂


