

Do you have a wooden box and do not know what to do with it? Turn it into a nice gift or decorative detail for your home. With this step by step you will learn to decorate and recycle a wooden box, using the decoupage technique and stencils.
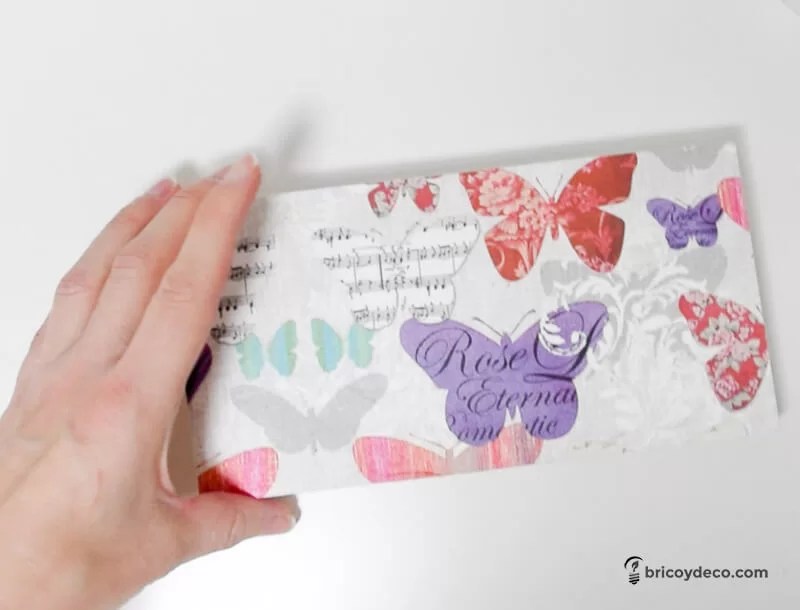
Currently there are many products that are packaged in wooden boxes: fruits and vegetables, bottles and even nougat. The latter was what was contained in the wooden box that I wanted to recycle. For this, I have used the decoupage technique with paper napkins and stencils.

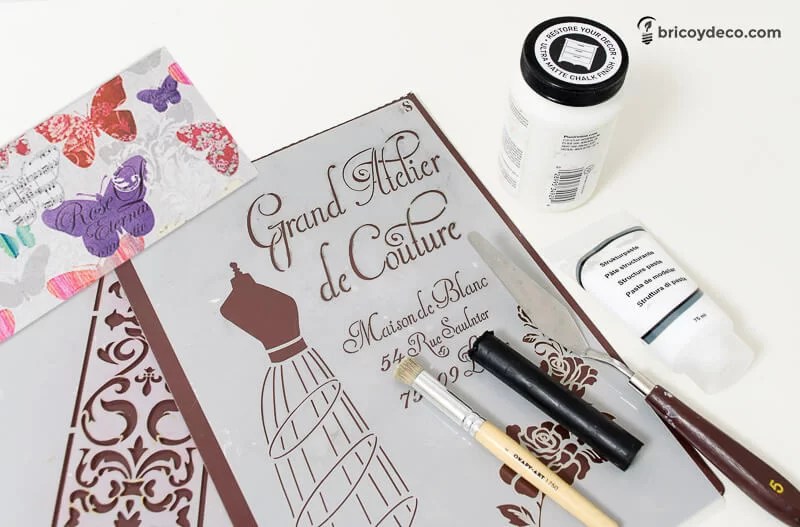
Materials to recycle a wooden box with decoupage and stencil
- Napkins or paper for decoupage
- Stencils to stencil (in this link you will find a tutorial to make your own templates).
- Relief paste or molding paste
- Chalk paint or chalk paint
- Solid oil on stick
- stencil brushes
- Spatula
Step by step to decorate a wooden box
To decorate the wooden box I used the decoupage technique which consists of adhering paper to a support (wood, metal, ceramic…). I have also used stencil templates and molding paste to create reliefs. Below you can see the entire process.
Lid decorated with decoupage
The steps to follow to decorate the box lid with decoupage are the following:
- First, the lid is painted with white chalk paint. Keep in mind that the napkin is translucent, so painting the support white will better highlight the print.
- Once the paint has dried, the adhesive will be spread and the napkin will be stuck on the support.
- Finally, varnish is applied to the napkin or a new layer of the same decoupage glue. This protects the result.
In this link you will find a video tutorial with the whole process to decorate with paper napkins.
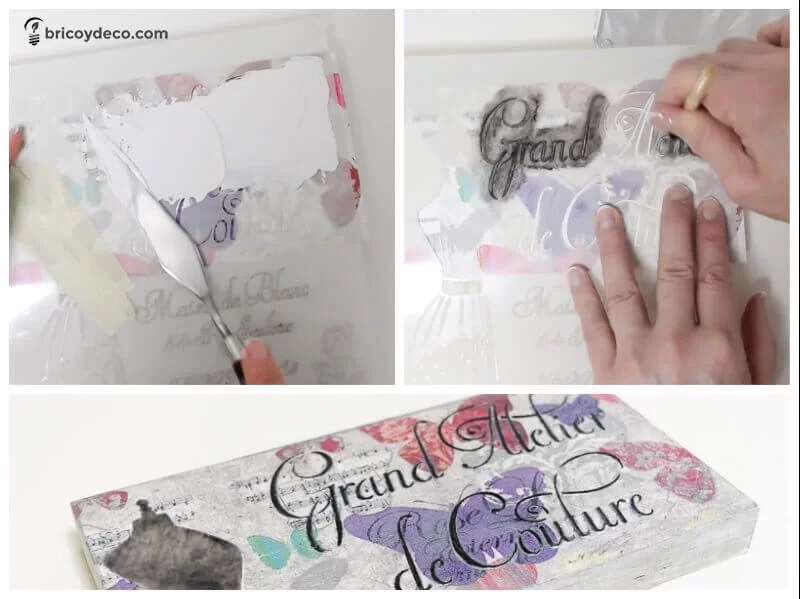
Once the varnish has dried well, the decoration of the cover will be completed with some letters made with stencils and embossing paste. To do this, the following steps will be followed:
- The stencil template is placed on the decoupage decorated box.
- The relief paste is spread with the help of a spatula. It is advisable to apply thin layers to achieve a better result.
- Wait for the paste to dry (about 30 minutes), to paint the relief with a solid oil stick. You can also paint with any other type of paint, although you have to keep in mind that you should not load the brush too much so that it does not slip under the template.
Base decorated with relief paste
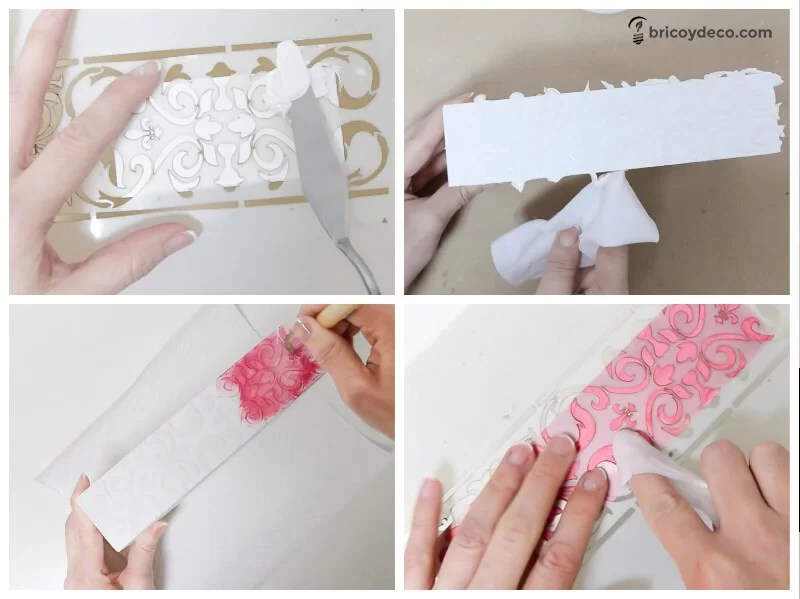
The wooden box base It was decorated with a stencil template and relief paste. The steps to follow are very similar to those of the cover, as you will be able to check below:
- First, the base is painted with white chalk paint.
- Once the paint has dried, the stencil template is placed on one of the sides and the relief paste is spread with the spatula. Keep in mind that you will have to wait for the paste on one side to dry and harden before you can do the next.
- With the help of a paper napkin, remove the remains of relief paste from the edges of the box.
- When the putty has hardened, the four sides are painted with the oil stick.
- Finally, the stencil is repositioned and some of the paint is removed with a damp napkin. In this way, a stripping effect is created and the relief stands out more.
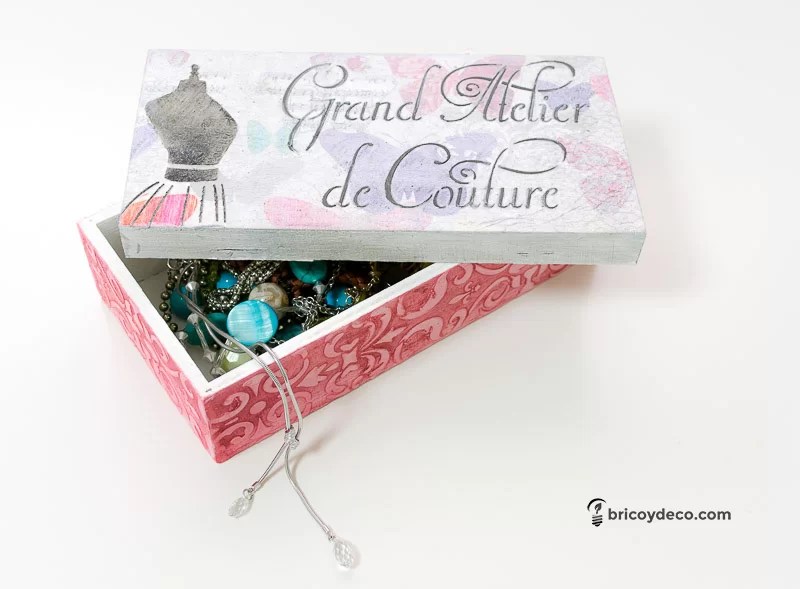
After following all these steps, this is how the wooden box will finally look after decorating it.
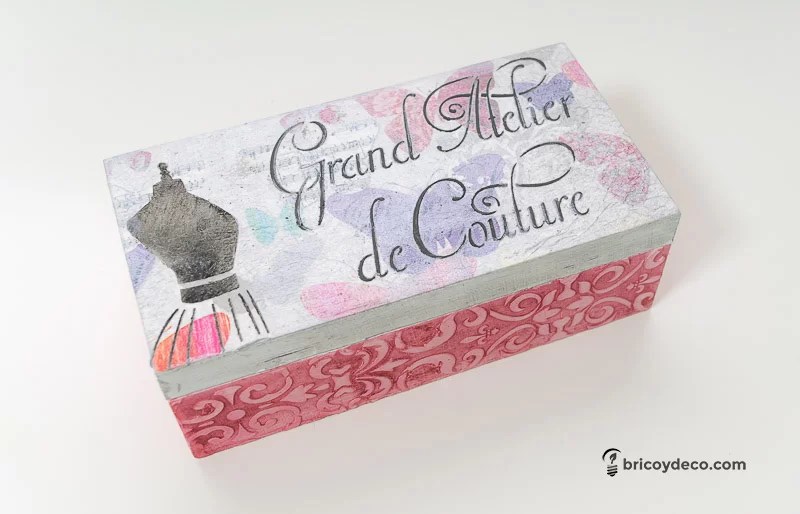
Now it is a decorative complement for any corner. But it is also a practical box where you can store what you want.

In my particular case, I have used it to store necklaces and jewelry, but you can find a wide variety of uses for it. Surely at this moment you are thinking of a specific one.
what did you think of this idea to recycle a wooden box? Combining two techniques such as decoupage and decoration with stencil templates, results as beautiful as this jewelery box can be obtained. Looking at it now, who would say that before it was a box of nougat?
If you liked this post, you can see many more tutorials and DIY projects at


