
")
There are numerous techniques and resources to recycle and embellish furniture and objects, such as the stencil with relief pastea technique that I had not tried until now and that has pleasantly surprised me both for its simplicity and for its decorative effect.
I love stencil templates as they are the perfect resource for decorating with motifs for those of us who don’t know how to draw. It also has a lot of possibilities since with the same template very different results can be obtained depending on the color or range of colors used.
Despite the fact that I have recently done several works with stencil, I had not yet tried the stencil with relief paste So when I was given a recycled box and bottle to give them a second chance, I decided it was time to do it.
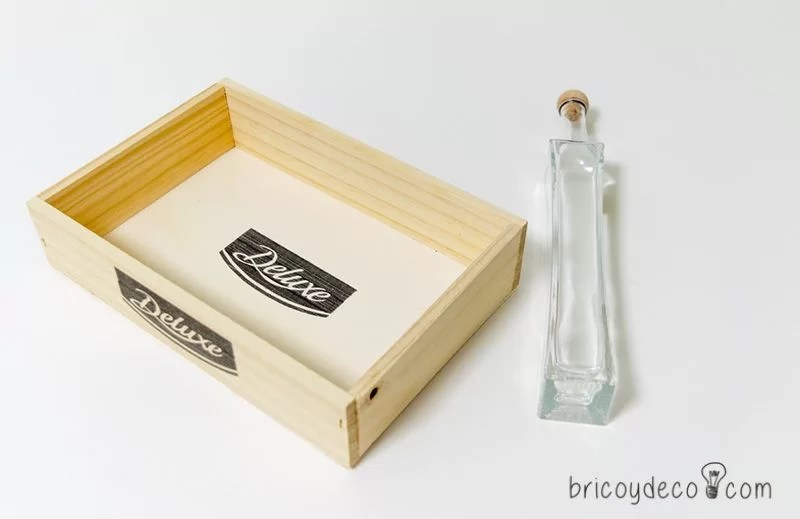
Materials needed to make a stencil with relief paste
When purchasing a stencil template Not only must we be guided by the design, but we must also take into account a series of factors to get the most out of it:
– Durability: that it can be reused many times, otherwise it can be expensive.
– Versatility: that it adapts easily to different surfaces to be able to use them on both straight and rounded shapes.
– Cleaning: that the material used in its manufacture allows it to be cleaned with solvents to remove traces of paint and putty.
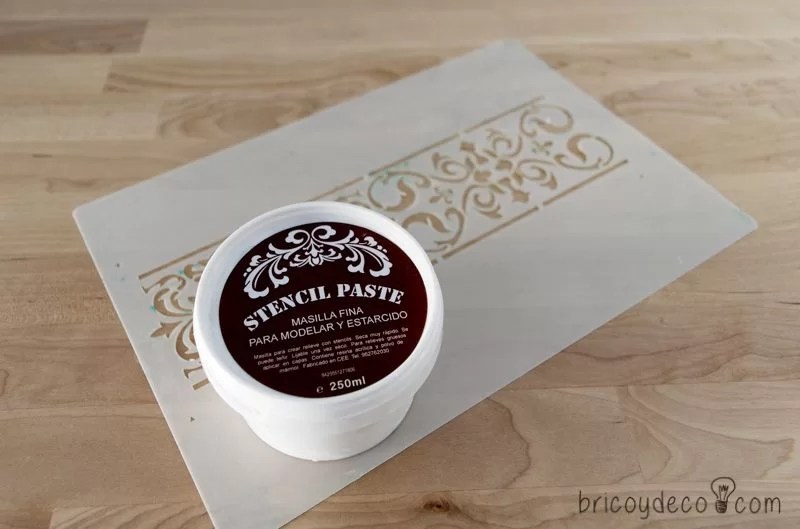
On the other hand, the embossing paste or putty It must have good adhesion on different surfaces (wood, plastic, glass…), as well as a quick drying so as not to eternalize the work and that it can be sanded and stained or painted.
How to decorate with stencil with relief paste step by step
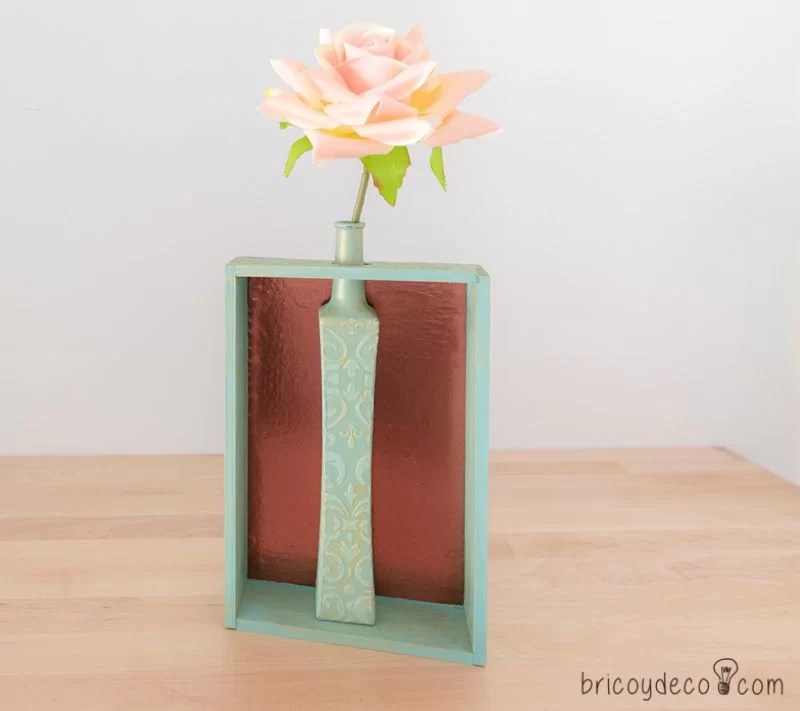
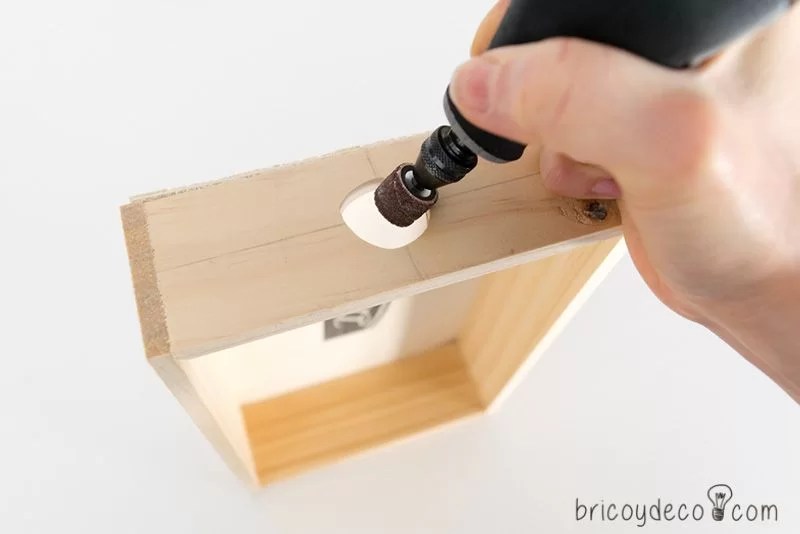
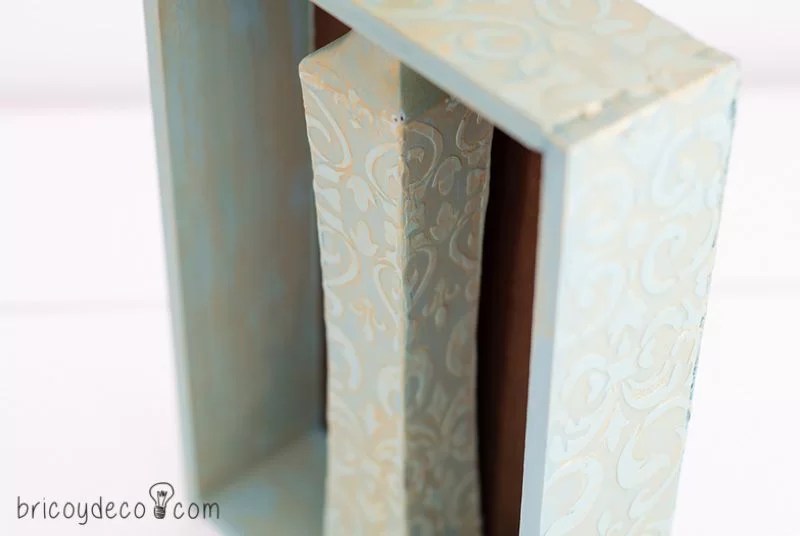
I wanted to create a composition with the box and the glass bottle so I thought of making a “framed vase” by placing the bottle inside the wooden box, but since it was bigger I had to punch the box to be able to insert the neck of the bottle.
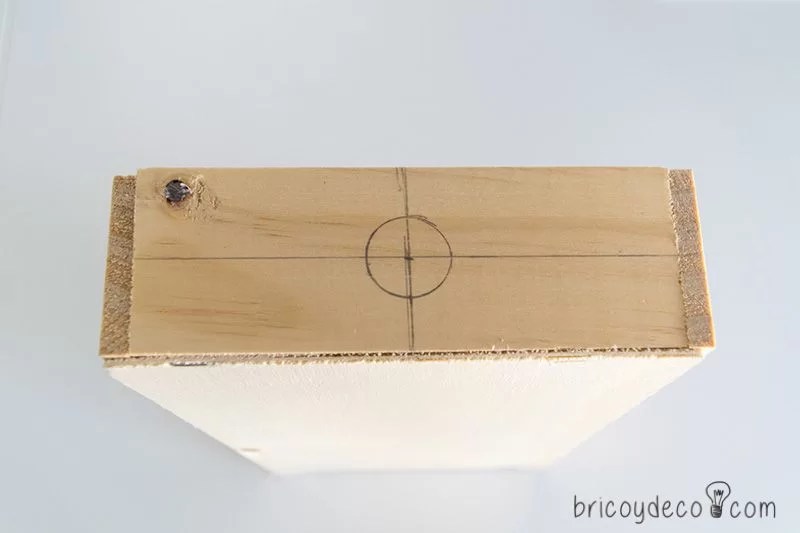
With the help of a multitool, I drilled a hole that I gradually enlarged and rounded thanks to the sanding accessory.
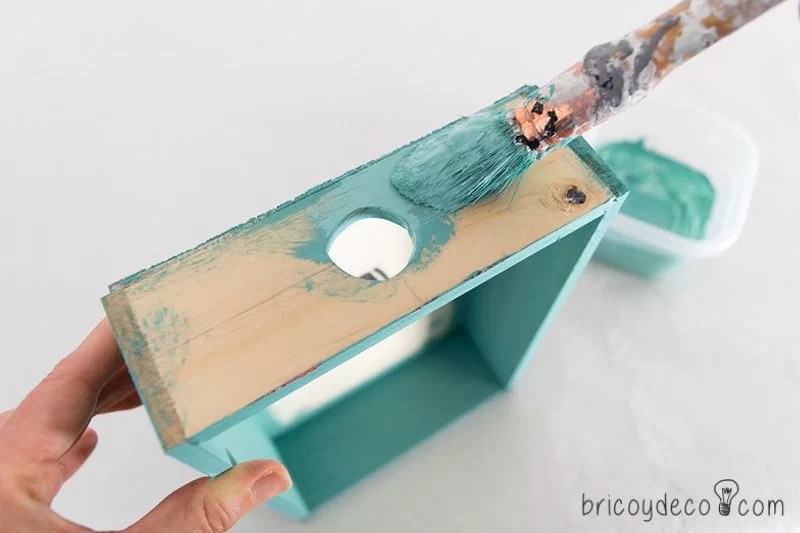
Next I painted the box and the bottle with chalk paint or chalk paint.
Once the paint had dried (approximately half an hour), I sprayed removable adhesive on the stencil template before placing it on the box and bottle, This prevents the stencil from moving when spreading the relief paste or putty.
On the other hand, for apply the paste You can use a flat stick like ice cream sticks, a spatula and even a brush.
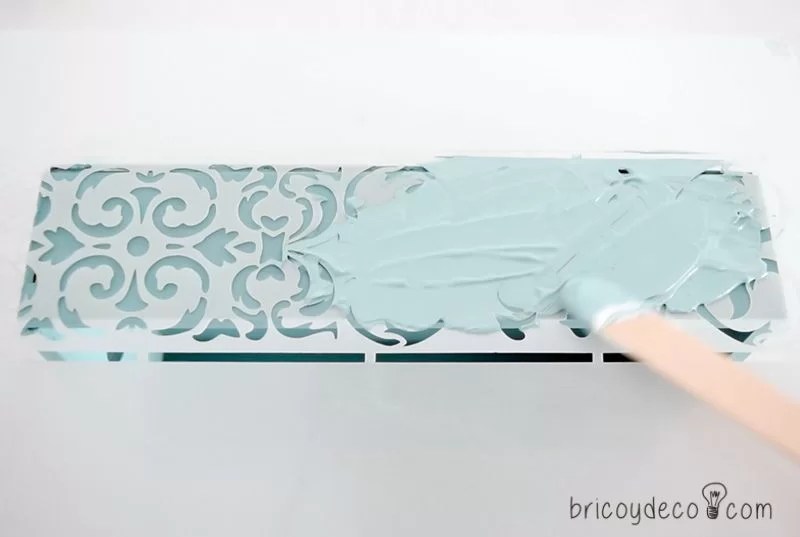
As I mentioned before, it is important that the paste can be painted and stained. My intention was that both the background and the relief were the same color but at the same time I wanted to give depth to the relief, for this reason I mixed the paint with the pastesince in this way the relief would be a lighter shade than the background and would stand out.
In addition, it must be taken into account that a very thick layer should not be created, but approximately 1 millimeter thick, and overlap layers as they dry until the desired thickness is reached.

After placing the paste, I removed the stencil and waited half an hour for it to dry (you can speed up the drying process with a heat gun or a hair dryer). Finally I passed a fine grain sandpaper to smooth the surface.
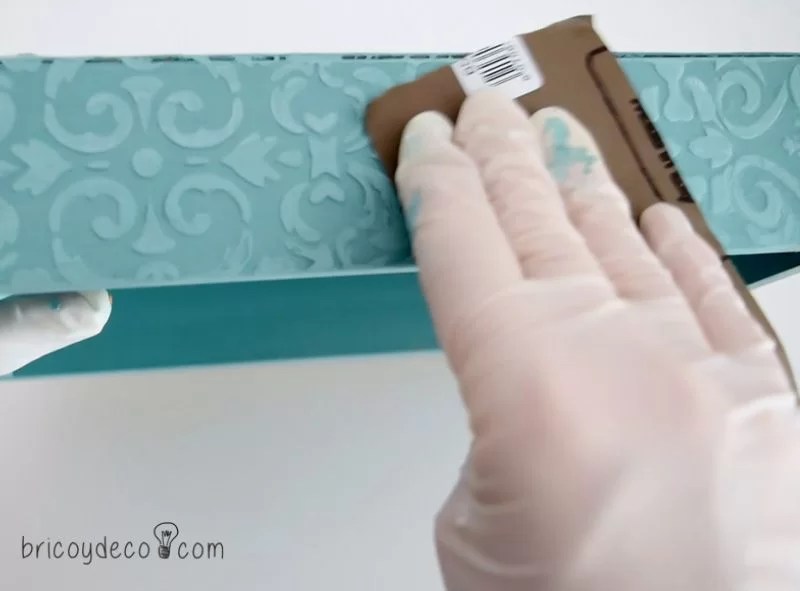
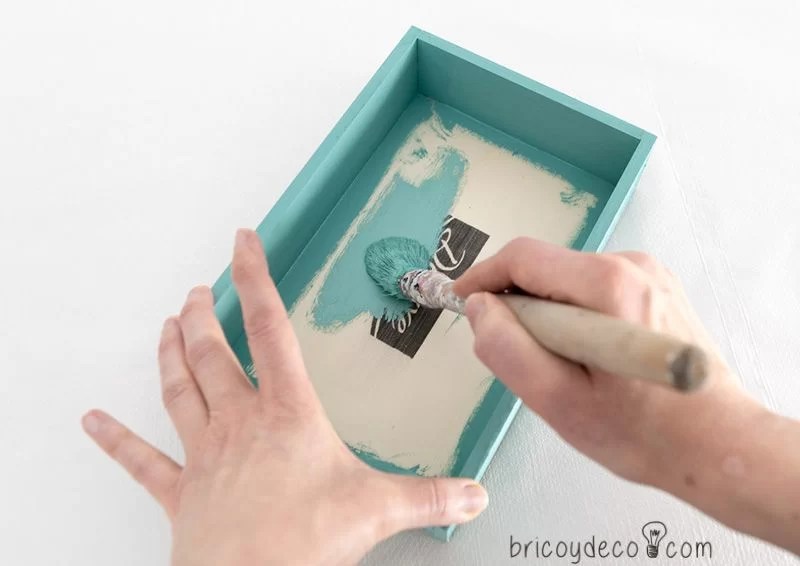
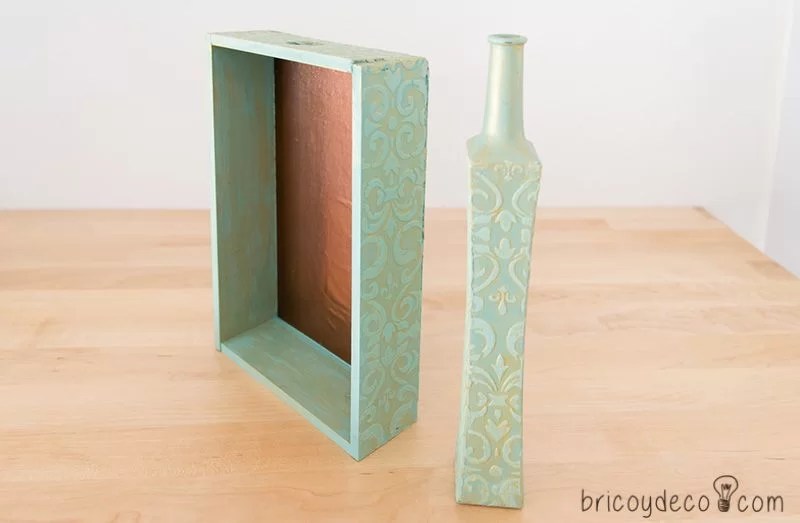
The next step was to create a gold effect with gold acrylic paint and sand again to wear this effect over the relief to accentuate the depth. Finally I lined the bottom of the box with copper-colored wrapping paper to highlight the bottle on the box.
In the following video tutorial you can see step by step the entire process to decorate and recycle with stencil templates and embossing putty:
Summarizing…
Do you have any doubt left? Let’s review the steps I’ve taken:
1st.- Paint the box and the bottle. In the case of glass, and since it is a non-porous material, I recommend using a primer or a paint with good grip, such as chalk paint.
2º.- Spray removable adhesive on the stencil template to prevent it from moving when placing it on the box or bottle.
3rd.- Dye the paste or relief putty with paint (can also be applied without staining and painted later).
4th.- Spread the embossed paste on the stencil with a spatula, trying not to make the layer too thick.
5º.- Remove the stencil and wait for harden embossing paste.
6th.- Sand and repaint to create a metallic effect.
7º.- Immediately clean the template with a moistened napkin to remove the remains of putty and paint. If they have dried, they will have to be removed with a solvent.
After all these steps, this is how the box and the bottle were finally left.
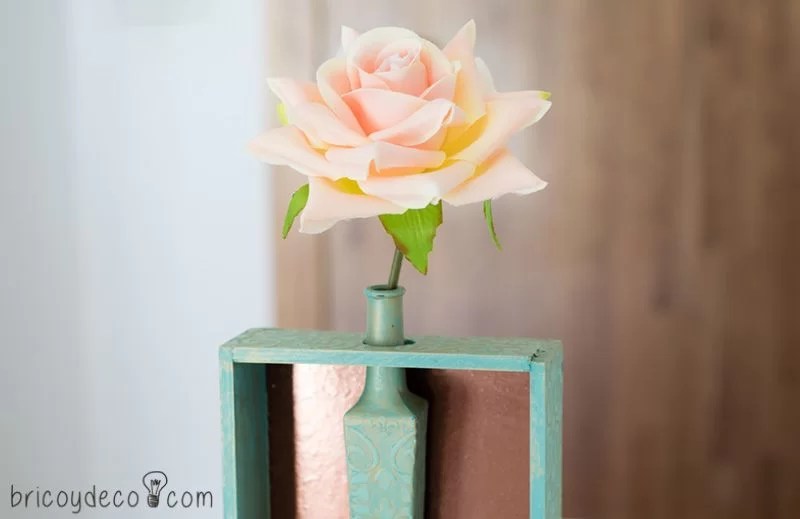
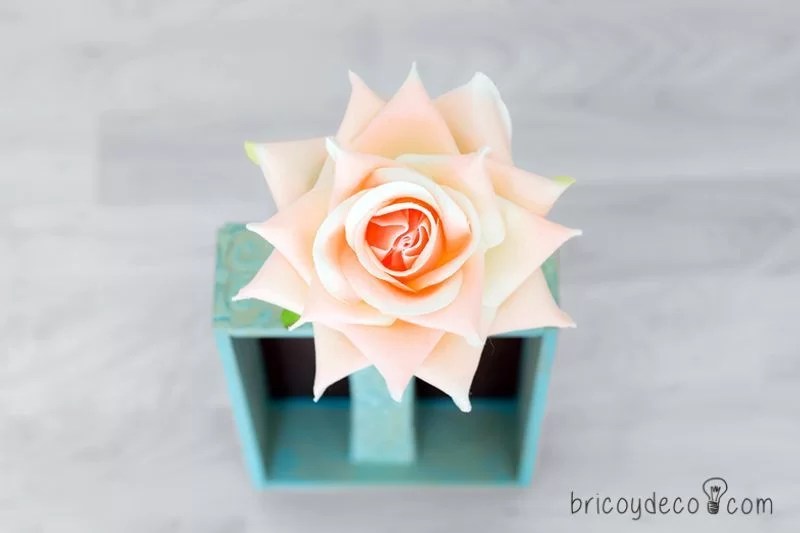
And as a final point, a delicate rose to show off in this “framed vase”.
What do you think of this idea to recycle a box and a glass bottle? have you ever used stencil with relief paste? It was the first time I tried it and I am satisfied with the result.
If you liked this post, you will find more ideas about recycling, decoration and DIY projects at .


