

.
Since the earliest times, wood decoration has been an outstanding art. The tendency of human nature has always been to ornament each article of ordinary use. Humanity, from its earliest times, cut drawings or designs on every wooden article that is capable of carving. This can be seen in the work of various peoples who preserve this tradition: the North American Indians carve their hooks or the stems of their pipes, just as the Polynesians carve their oars.
Its applications are very varied, although its main function is ornament. It is used both at an architectural level and for the embellishment of everyday objects.
Like all crafts, it has an artistic component, in which the carver-craftsman pours his creative talent to get a work of art out of a few simple boards, and another component, technical and mechanical, that must be taken into account so that the raw material respond to the efforts of the carver and achieve the desired result.
For all these reasons, we wanted to dedicate an excellent step-by-step tutorial from the friends of TallaMadera to this ancient art.
I’m sure that all wood, DIY and handicraft enthusiasts will enjoy reading it and putting it into practice.
By the way, at the end of this article you have some complete woodcarving manuals that you can view, and also download them for free.
Wood carving step by step by Ninsfor
photo: Barry Blair
.
To carry out the wood carving, specialized tools such as gouges are used, choosing high-density woods that do not splinter easily.
Materials and tools needed
Gouges:
|
5/10 |
3/15 |
1e/5 |
|
3/20 |
9/3 |
3f/12 |
|
12/10 |
5/10 |
|
|
1e/16 |
11/2 |
Knives:
Sandpaper:
- From 80 grit to 420 grit
Other materials:
- I always have the seating strap at hand. I use an old strap from a shaving kit to which I have attached some wood to keep it firm.
- A preferably hard brush to remove chips from the carving.
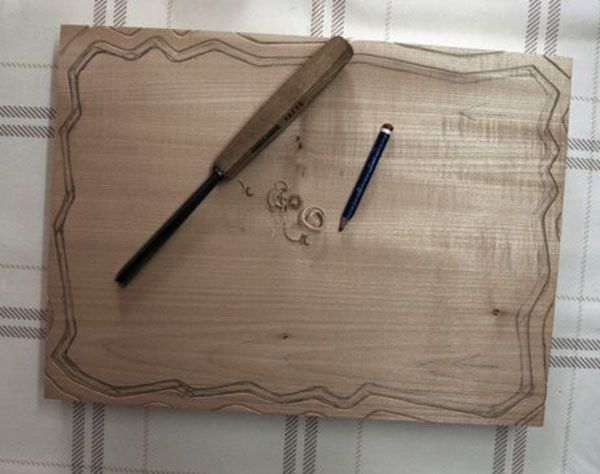
- A wooden rectangle basswood (kind of wood) , with measurements of 40 cm by 30 cm and a thickness of 4.5 cm. You will see the direction of the grain marked in pencil on the wood.
.
Wood carving procedure
First step
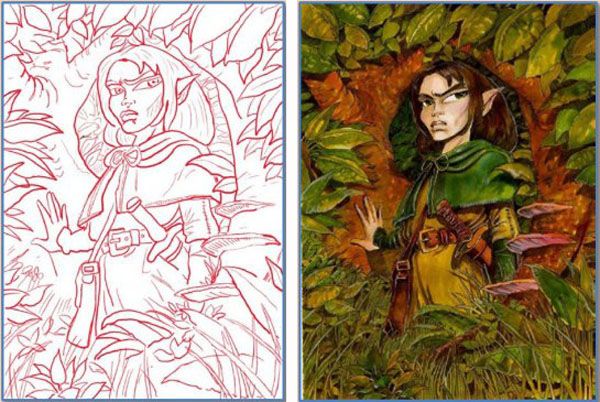
I am going to carve a drawing downloaded from the internet. With an image editing program I give it the corresponding measurements (30×40). I go over the main lines and transform it into a “sketch” from which I print several copies that I will need as I progress in the carving. Each image occupies two pages (DIN A4). The programs that I usually use for drawing are Photoshop and Sai, the latter being much more comfortable for drawing. You also have free and open source software like gimp either inkscape with which you can carry out the same image treatments if you work with Ubuntu – or another Linux distribution. There are also free versions of these programs for Windows.
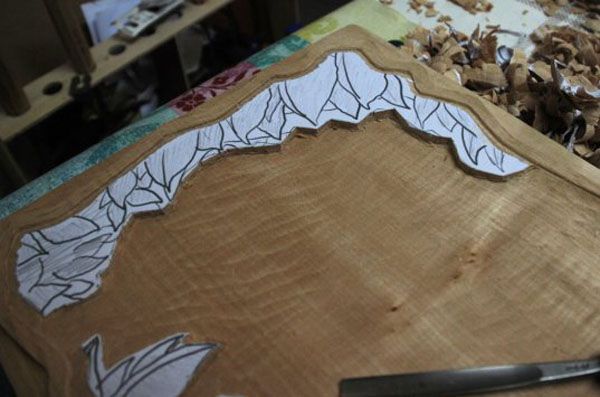
For my taste, a rectangular frame is too classic, so I draw a frame like in the photo, which stands out against the rectangular background. This frame will have a depth of 0.5 cm on the outside. The interior will depend on the figure to be carved, respecting the drawing. I mark it with the 12/10 tool and empty the outside with the 3/20
 .
.
Second step
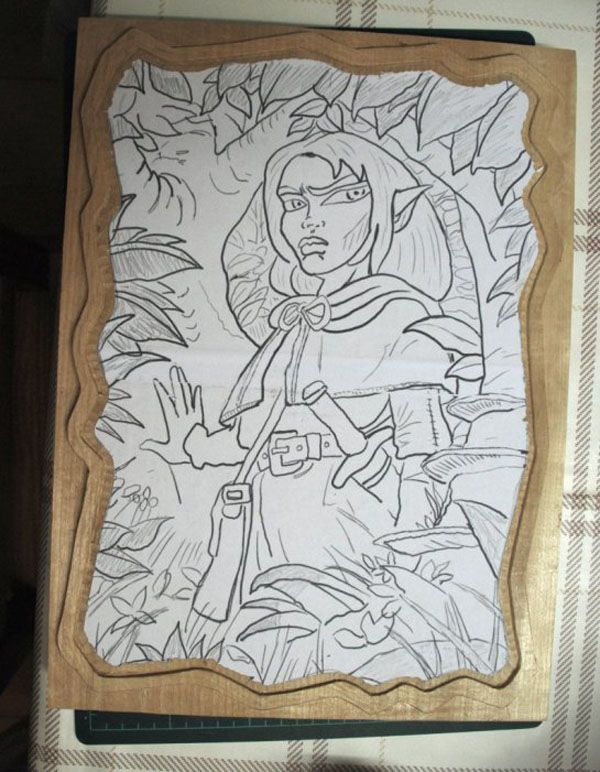
I paste the image on the wood. I use glue stick, clean and fast.
I have the 4.5 cm deep. Studying the drawing I consider how to distribute in four cm. (0.5 cm will be background) the various planes of the image. I shade in pencil what will be the outermost plane (plane 1). I will cut it out and smooth the background to stick the drawing again.

To empty I use a gougeCommonly used tool in wood carving/sculpture. 5/10 and one 3/20
.
Third step
I paste the drawing to cut out plane 2. It should be remembered that some elements share planes.
.
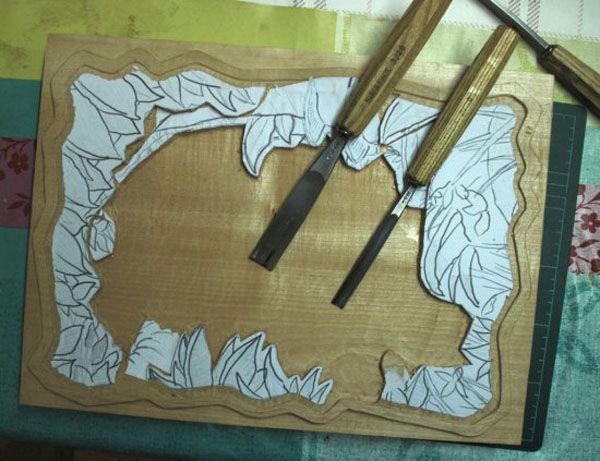
Fourth step
We already have two levels. let’s paste the main figure and start cutting it out
.
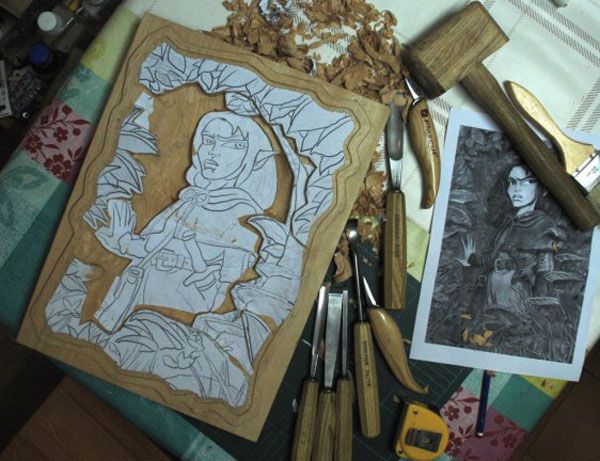
Fifth step
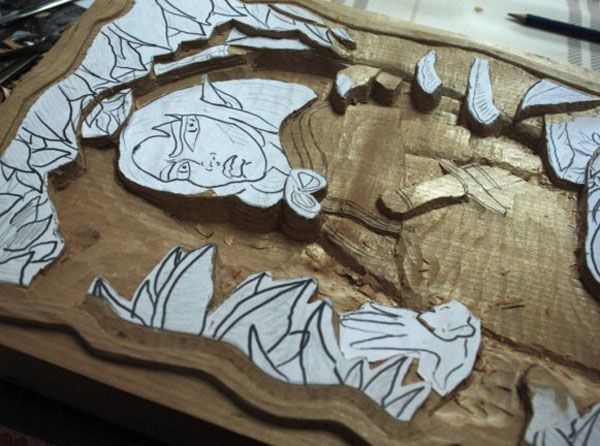
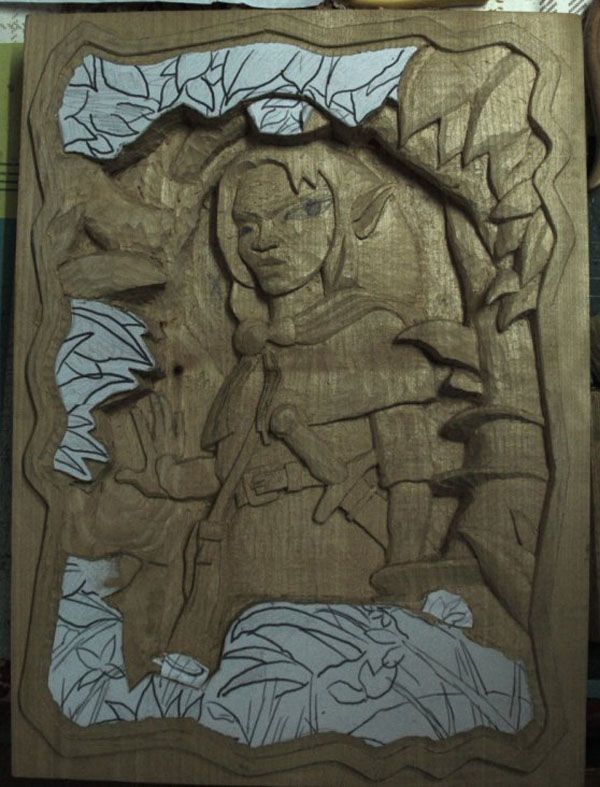
I have to work, from this moment, keeping the complete drawing in view, since I am going to start with the details. I have removed the original, folio size in black and white. I also have a real size copy of the drawing on hand as sometimes I have to take some measurements. In the following photograph we see how the levels are distinguished and how the roughing is not the same depending on the drawing.
.
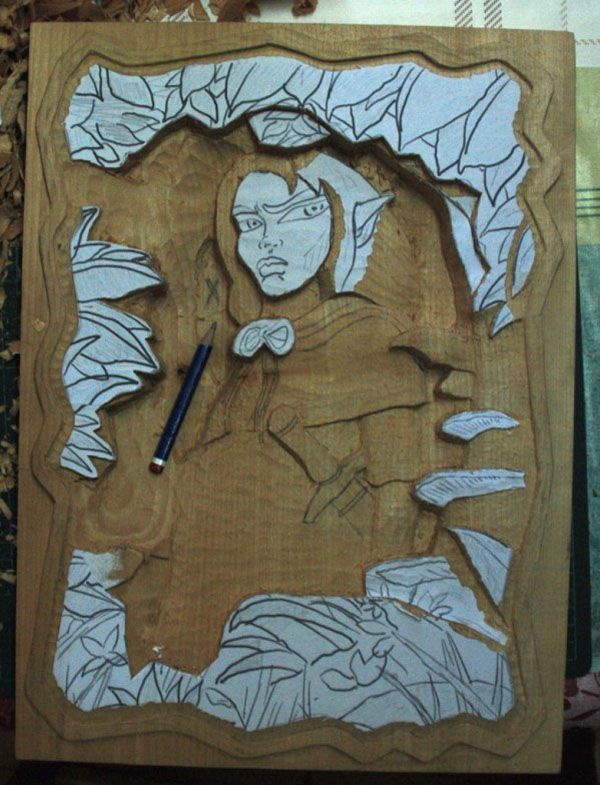
step six
I begin to delimit the figure.
.
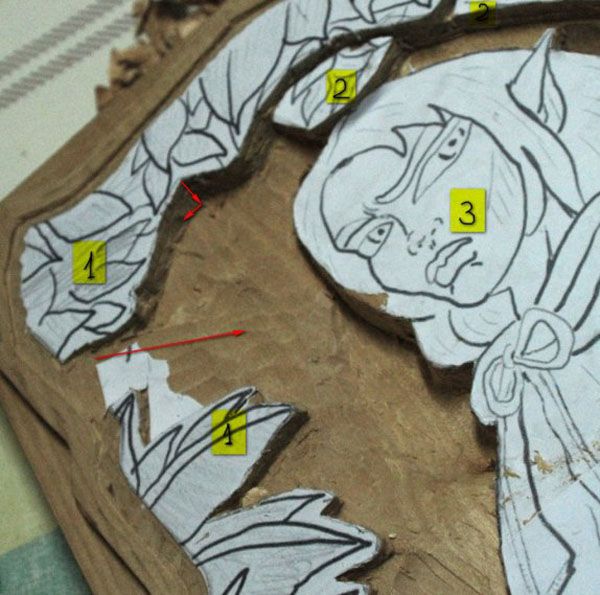
Seventh step
Do not lose sight of the drawing. We appreciate that the hand rests on the tree in a plane that is behind the body. I start emptying this part without neglecting that there is a maximum depth that I must not go beyond.
.
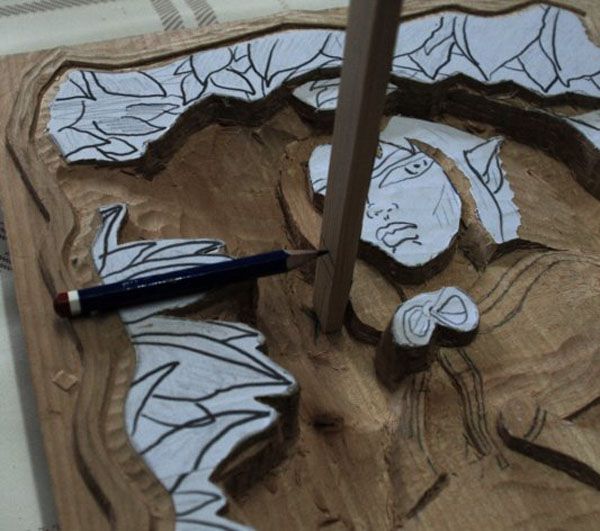
Eighth step
You can see this area marked with an X. To take the measurement and assess the depth I have used this simple method: A wooden bar placed vertically on the deepest area and a pencil resting horizontally on the wood and I mark the bar. Then I measure that part of the bar and, in this case, I see that I have deepened 4 cm. So I have 0.5 cm left, which is what I planned to leave at the bottom.
.
Nineth step
You can also see that I am working, I would say, from below, leaving the edges for last. I do it this way because I avoid the danger of breaking these parts and I can lean on them if necessary. In any case, what the “final” detail is, I won’t do it until the figure is almost ready, and especially I’ll leave the lower part of the drawing for last because it is the one that seems more complex to me.
.
tenth step
From this moment on, various phases of carving, in which I outline each part. If you look closely you will see that I do not stick completely to the drawing but that I “interpret” what seems to me to be the best.
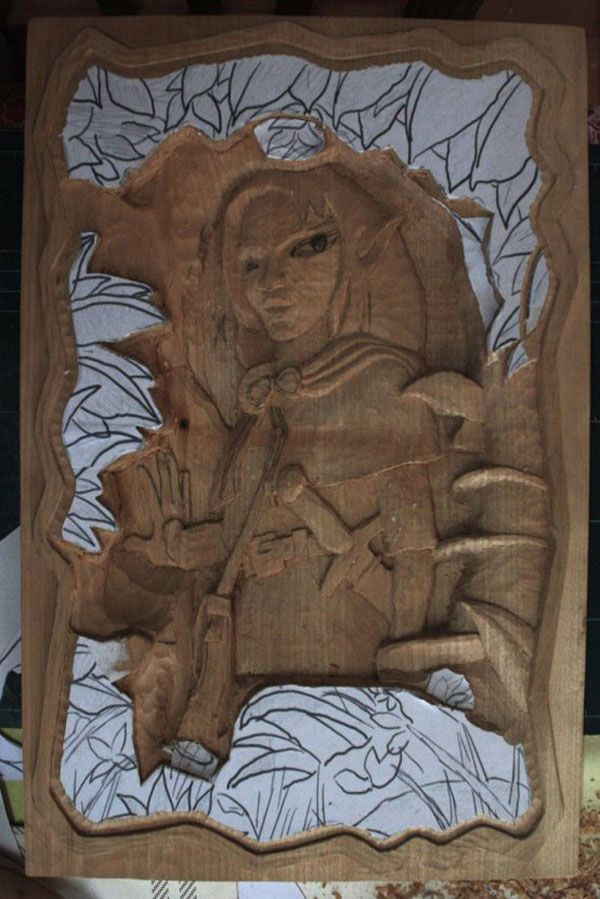
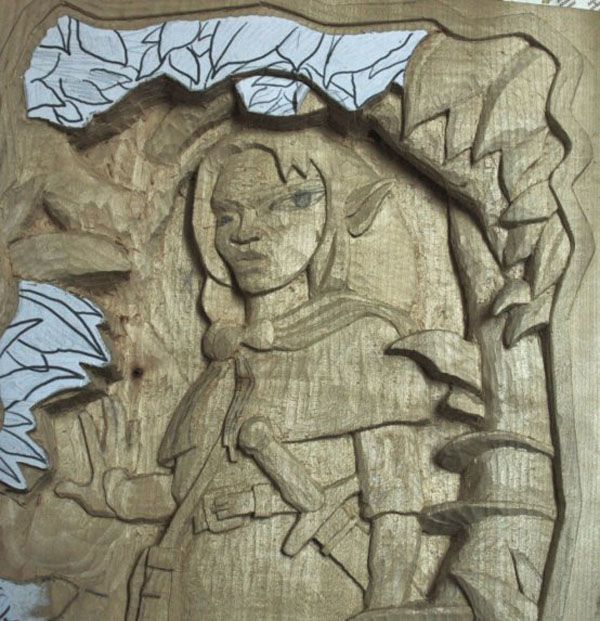
This part admits a flatter carving of the leaves, because they rest on the trunk. The other leaves require another treatment, especially those on the left.

At this point the most difficult thing for me is to empty under the leaves, since they should not give the sensation of being a “lump” but of being in the air and in various planes.

When I am emptying under the sheets I take special care not to pry because by thinning them I make them more fragile and they could break. These types of carvings are usually displayed on the walls, like paintings, so they will always be seen at eye level or from below. By this I mean that if it is necessary to leave “stronger” parts to avoid breakage, we will do it in the upper part that is not visible. Here we see a detail of the upper right.
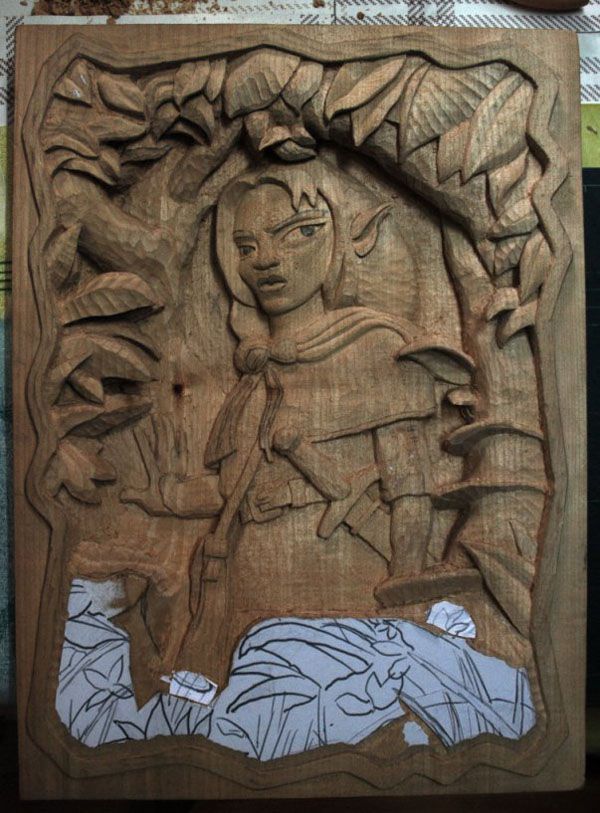
This is the current status of the carving. I’m working on the top left side and will continue down.
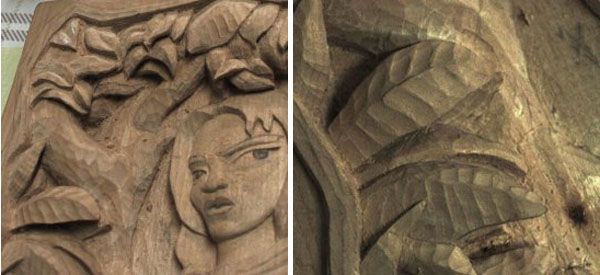
In the photos above we can appreciate the detail of this area and part of the left side.
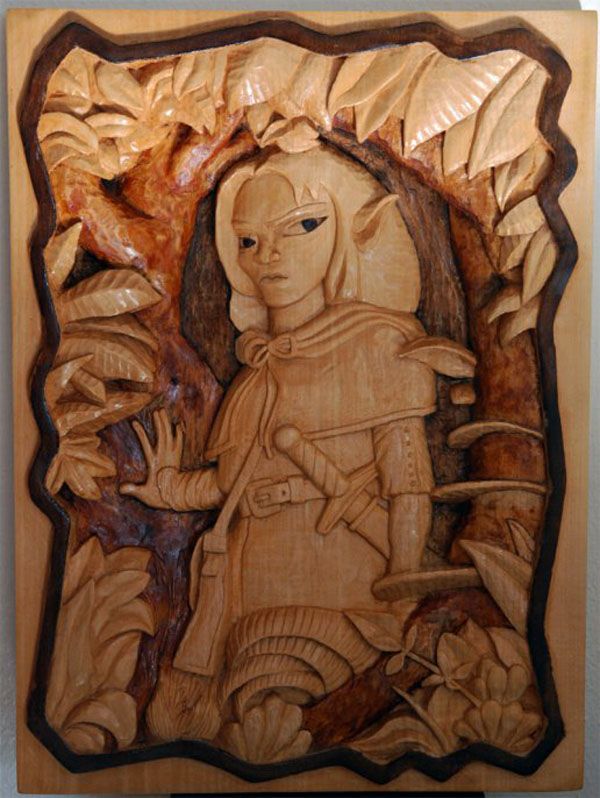
What remains is detail work. Once finished and sanded, I have used water-based dyes to give some depth to the relief, and finally I have finished it with shellac, with a brush.
This is the final result, which I have also uploaded to the gallery. I hope you like it and that it has been useful to you.
Source: Wood carving
Here I leave you some complete manuals on wood and its carving, which you can view for free, and even discard them.
Download the manuals:
1.- Wood carving step by step.
2.- Carve wooden figures.
Viewing the manuals:
1.- Wood carving step by step.
Woodcarving step by step 101123140032-phpapp02 from Gladys Rodriguez


