

With absolute certainty, a very high percentage of people have needed to apply silicone, at least on some occasion.
The use of silicone is so widespread that silicones with countless technical characteristics and colors are marketed for almost any use that we may need, both at a private and professional level.
The application of silicone, not being complicated at all, must be done slowly and taking into account only a couple of details. The problem is that when you realize this, you are already silicone up to your eyebrows.

How to apply silicone easily and cleanly.
The action of apply silicone The first time we have faced it, I the first, we have done it in such a brave way that it has bordered on daring. We have inserted the silicone tube into the applicator, we have cleaned the area where we are going to apply it a bit, we have cut the cannula, we have placed the gun, and we have pressed the trigger.
So far everything is perfect. We have done it with absolute poise and skill.
However, things change as soon as you start removing the excess silicone. We started by filling one of our fingers and we ended up with both hands full of silicone, without being able to touch anything. Of course, the clothes are also full of silicone stains. It must also be said that with regard to possible silicone residues on clothing, it will not cost you much to remove it if you know how to choose the right product.
Not to mention the application itself, both the area where we have applied the cord of siliconelike much further, are filled with silicone.
Also, no matter how well you clean everything, I can guarantee that you will spend months, even years, removing bits and pieces of silicone.
Applying silicone – the Video
We include a video tutorial so that the explanations that follow are, if possible, even more graphic and easy to understand.
Spanish version
English Version
I can assure you from my own experience that at that very moment, the “DIY” ego falls to the ground like a lead.
However, the reality is different. Applying silicone can be super easy, while achieving an impeccable finish, as long as you keep in mind a few simple details.
When preparing the materials that you will need, in addition to the silicone and the applicator, also have the following on hand:
- Masking tape (the one used by painters).
- Protective paper with masking tape (also the one used by painters).
- Kitchen paper. If you don’t have it, toilet paper can also do the trick.
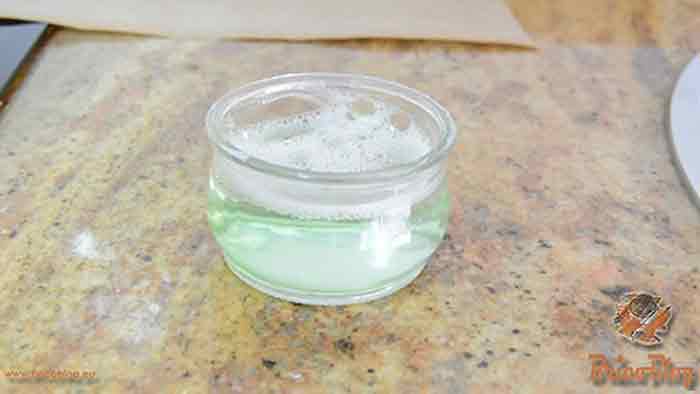
- soapy water

Materials for silicone application.
For the latter, you just have to fill half a glass and pour a splash of liquid soap, or dishwashing soap.
How to proceed with silicone
1st step
Before applying the silicone you must prepare the ground. Clean the area where you are going to apply silicone well. Y have everything well organized.
2nd step
Protect border areas. For the vertical area, that is, the plinth, use masking tape. For the horizontal area, that is, the countertop, it is better to use protective paper with adhesive tape. This last protection is better since, being much wider, it is materially impossible to stain the countertop.
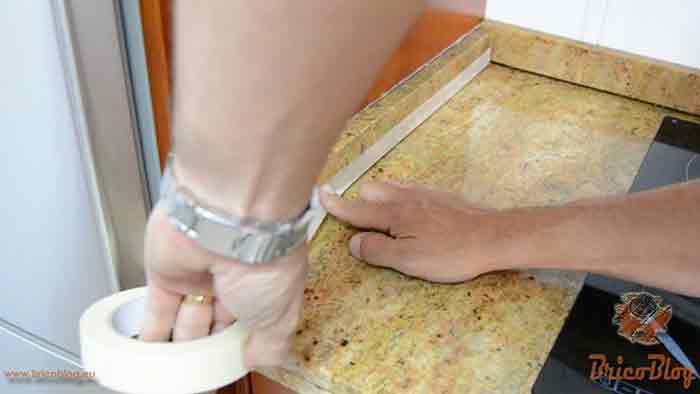
Preparing the ground.

Protecting the area on which we will work.
Leave only free where the silicone should be inserted and fixed.
3rd step
Now we will prepare the silicone tube and the applicator. Be careful when cutting the cannula. The more you cut, the thicker the silicone cord will be. Here you must calculate more or less by eye.

Loading the silicone applicator.
And we apply the silicone throughout the area.

Applying the silicone cleanly.
4th step
Now we have to remove the excess silicone. Wet the finger, with which you are going to remove it, in the soapy water, and pass it over the silicone cord to remove the excess. Do it in small sections. Clean your finger with the kitchen paper, wet it again, and repeat the operation until all the excess is removed.
Prepared to remove excess silicone.

Removing excess silicone.

Removing the excess silicone.
5th step
Finally, the masking tape and the protective paper must be removed immediately. As they will have traces of silicone, do it carefully not to get anything on.

Removing the bodybuilder tape.

Removing the protective paper.
You just have to let it dry.
It takes only a little longer to do it this way, but the result is absolutely flawless. Guaranteed!!

Silicone application finished

job completed successfully


Silicone application completed successfully.
.
If you find this trick useful, you can share it on your social networks.
.


