

In the previous chapter of Felt workshop from scratch I showed you the types of thread that are usually used when sewing felt work, as well as the stitches that we are going to use most frequently. In this new chapter we will perfect the topic of stitches by learning how can we do them evenly. Remember that if you have missed any of the previous chapters of the Felt Workshop from scratch you can see them all at this link.
When sewing felt, it is not only necessary to learn how to do the type of stitch that we are going to use, but also In the event that it is a visible stitch, we must do it in such a way that it is straight and uniform.otherwise our final work may lose visual and decorative quality.
Experienced seamstresses are able to make a hand stitch so perfect that you could hardly tell it apart from a machine stitch, but that certainly isn’t my case and I imagine it won’t be yours either.
In the following image you can see some indicative measurements of the size and distance between stitches.
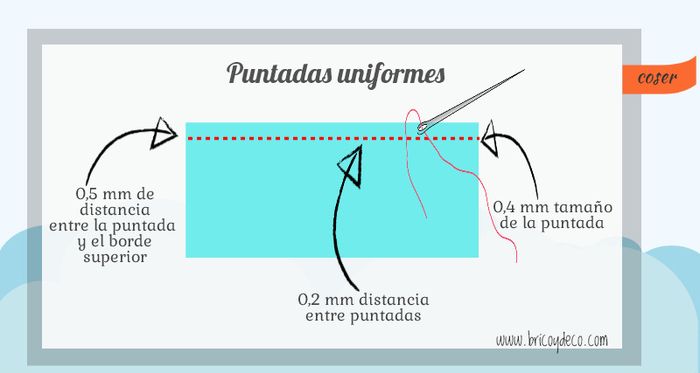
Generally we must leave a few 5 millimeters of distance between the stitching and the edge of the felt, although this distance will depend on the size of the piece that we are going to sew. If, for example, it is very small, we will reduce the distance to 2 or 3 millimeters, but we will also extend it up to 1 centimeter in the case of larger works (a bag, for example).
If we backstitch, the stitch will be about 4 millimeters long, leaving a small distance between stitch and stitch. In the case of making a blanket stitch or an overcasting, the distance between stitch and stitch will be about 4 millimeters. For the back stitch we already know that we must not leave any gap between stitches.
When I started sewing felt, not only did I make each stitch a different size, but I also lost the straight line easily, so I thought I’d find a trick to make the stitches more or less equal and at the same distance from the edge. For this I made a very simple template and that anyone can do with a piece of cardboard or cardboard as you can see in the following drawing:
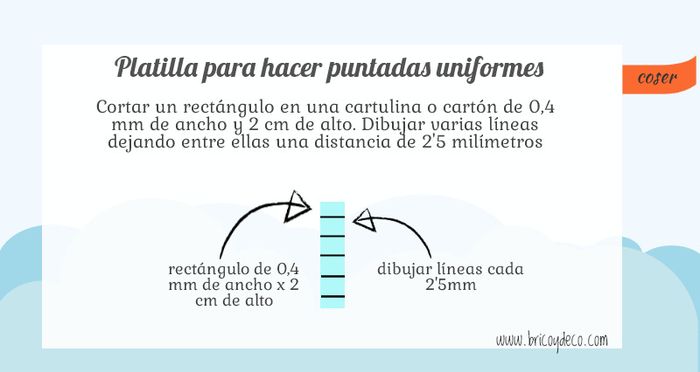
It is convenient that the cardboard that we use to make the template is consistent and that it does not bend easily (the cardboard of the tetra brick works very well). The lines that we draw on the cardboard will serve as a ruler, so I recommend that you do them with a permanent marker so that they do not get erased.
Always we will align the edge of the template (mm 0) to the edge of the felt, whether the shape is straight or rounded. We will be guided by the horizontal lines that we have drawn to decide the separation that will be between the edge and the stitch (2.5 mm, 5 mm, 7.5 mm, 1 cm…).
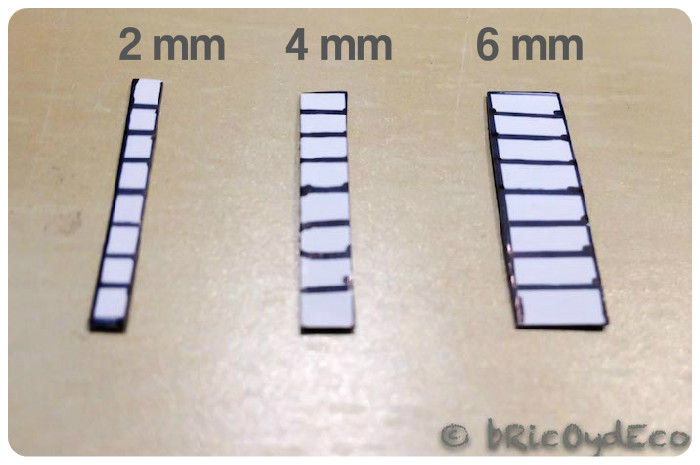
It is also convenient that you have several templates prepared with different stitch widths (for example 2 mm, 4 mm and 6 mm), so that you use at each moment the one that best suits the size of the piece that you are going to sew.
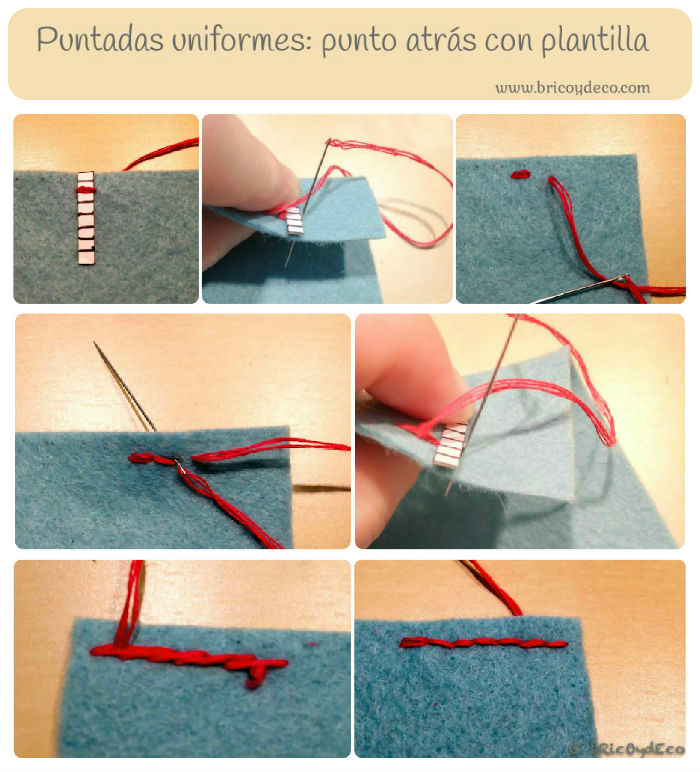
Now let’s see how we are going to use our template. If we’re going to do a backstitch, We will pass the thread over the mark that suits us best according to the separation we want to leave (2.5 mm, 5 mm, etc.). Before tightening the thread we will remove the template, placing it again to the left of the last stitch. As it is a backstitch we will leave a small margin between stitch and stitch.
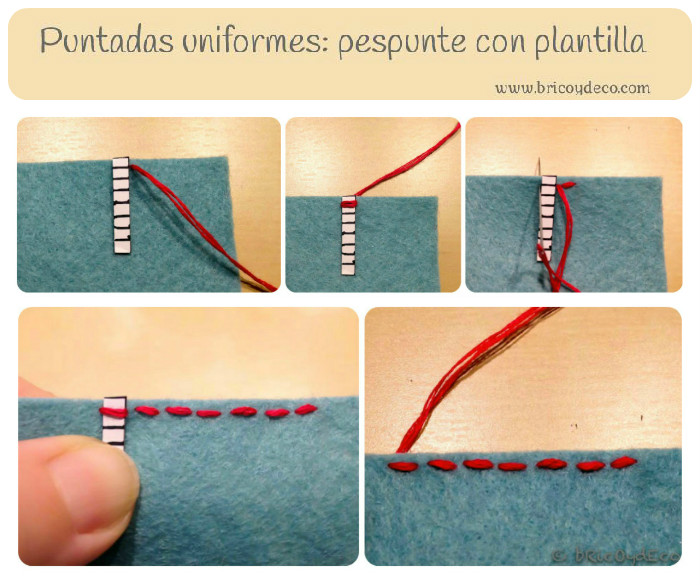
If he stitch type is back stitch We will place the edge of the template attached to the edge of the felt and we will pass the thread over the mark that interests us, removing the template and placing it again on the back on the right side of the first stitch.
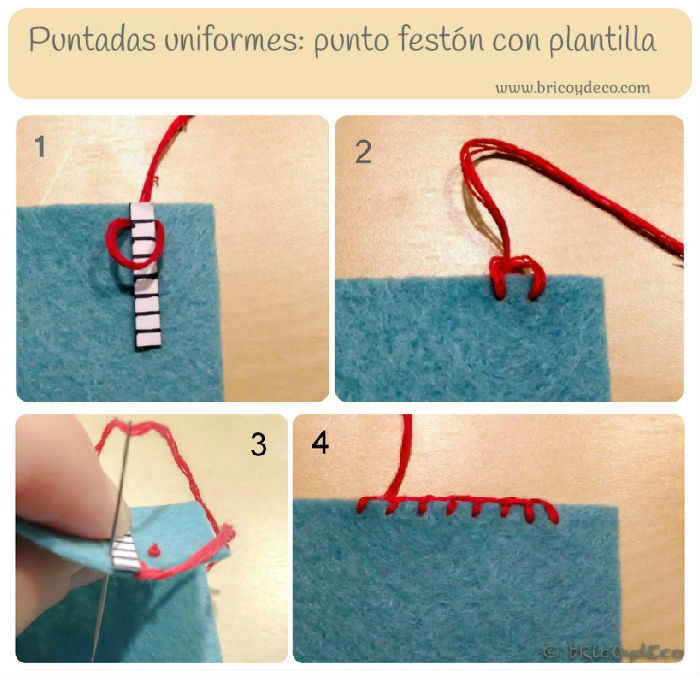
to do the satin stitch with template We will follow the same steps as with the back stitch but placing the template to the left of the last stitch and making a stitch yes and another no.
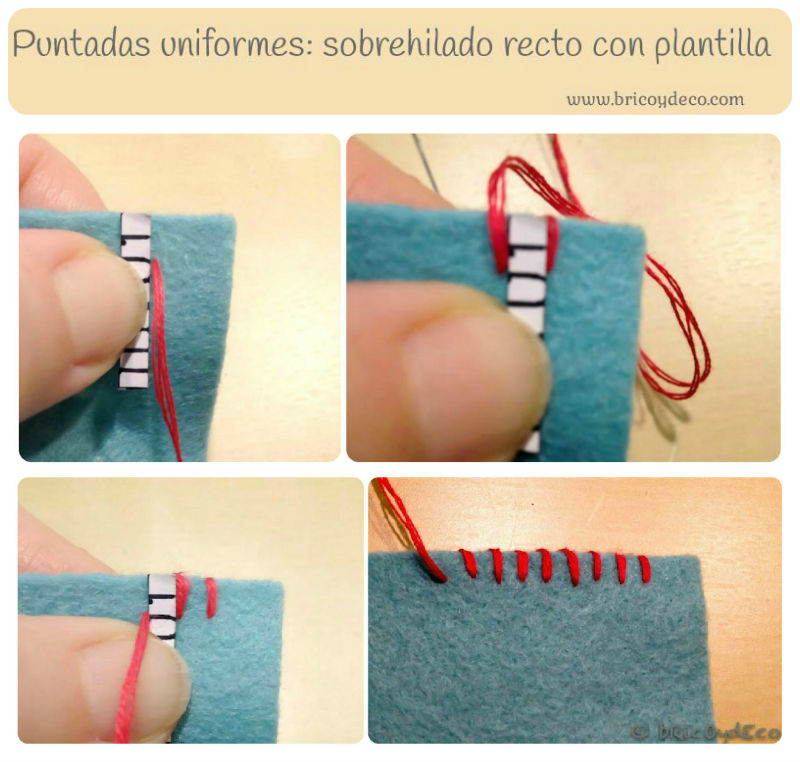
A straight overcasting It is done following the perpendicular of the template and taking the width of the template as the separation between stitches.
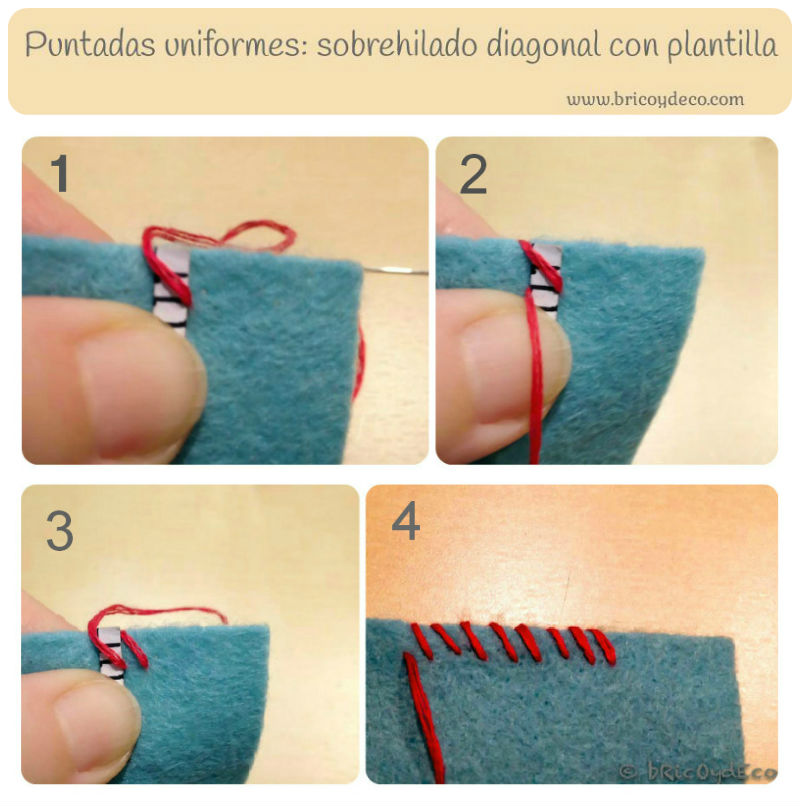
And if it’s a diagonal overcasting We will pass the crossed thread over the template and we will nail it again on the back, as seen in the following image.
Using the template may seem a bit heavy at first and it will surely take you a little longer to sew the felt, but over time you will see how you gain skill when using it, and with practice you may even manage to do without her because you have managed to make some perfect stitches.
I hope this chapter Felt workshop from scratch You have found it interesting and that thanks to it you can make uniform stitches. For the next chapter we will see how we can decorate our felt work with embroidery, fabrics, beads, etc.., if you don’t want to miss it, sign up at this link to receive the weekly newsletter with the summary of the published entries.
If you liked this post, I would appreciate it if you would share it on your social networks.


