

Some gifts and batches of products are presented in wooden trays but these do not usually have a very good presence. They are normally made with low quality wood, however this is not a reason to get rid of them, with a little creativity you can recycle a wooden tray and completely renew its appearance.
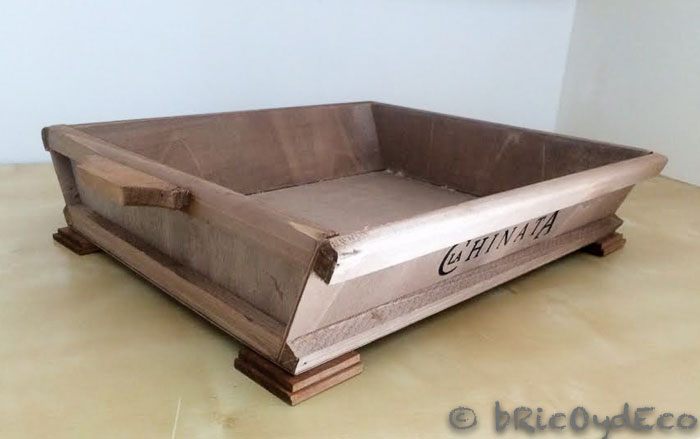
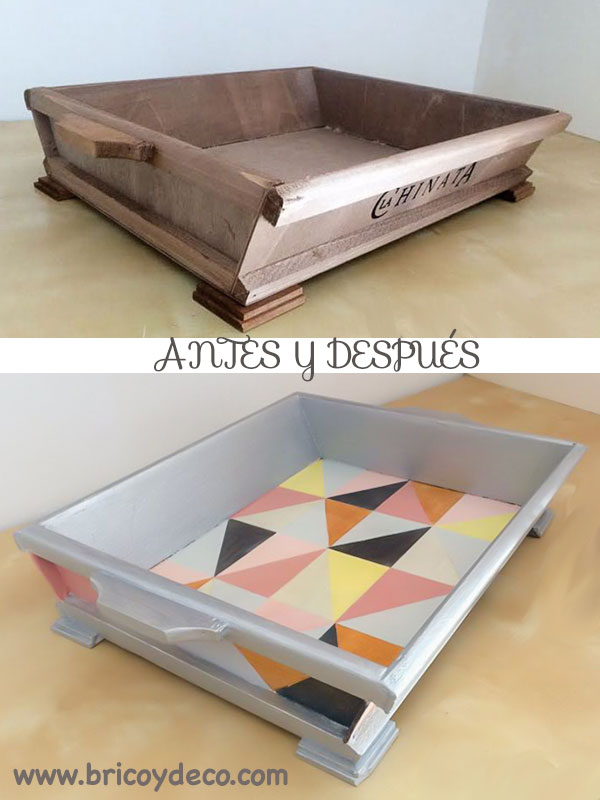
Some time ago my boyfriend gave me a set of personal care products that came in a wood veneer tray. Its appearance was quite rough, with imperfections, not sanded and in some areas it was even a little chipped.
But despite everything I kept it because I liked its shape, I was convinced that with a good face wash it could look good.
I’m not one of those who likes to accumulate too many things, but sometimes it’s worth saving certain objects while waiting for that idea to revive it and give it a second chance. For this tray that moment had come, I needed a basket or box in which to place some of the crafts that I am going to take to the fair DIY show, so I rescued it from the drawer. Below I detail the step by step of your transformation.
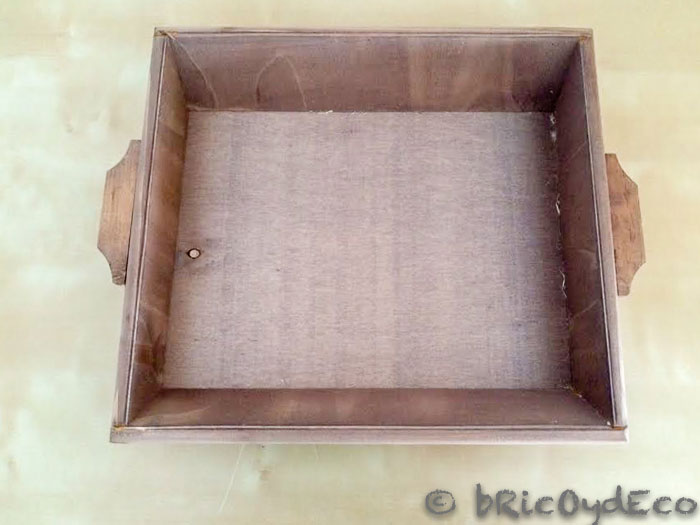
What I did in the first place was Sanding wood to soften it, make it more pleasant to the touch and remove splinters. I also took the opportunity to erase the printed letters with the sandpaper.
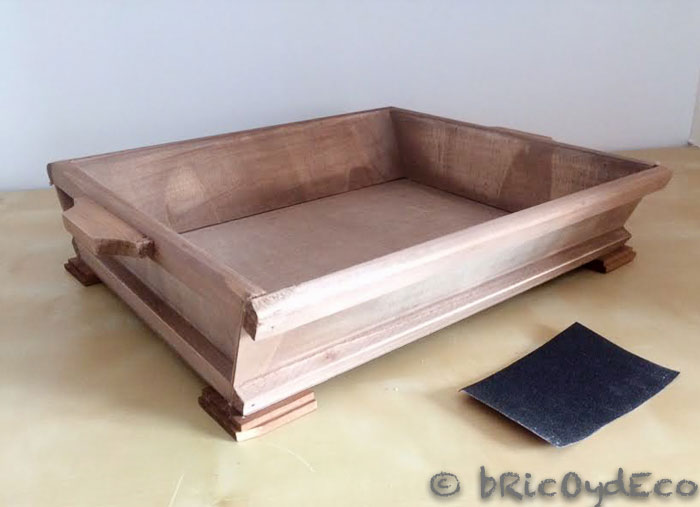
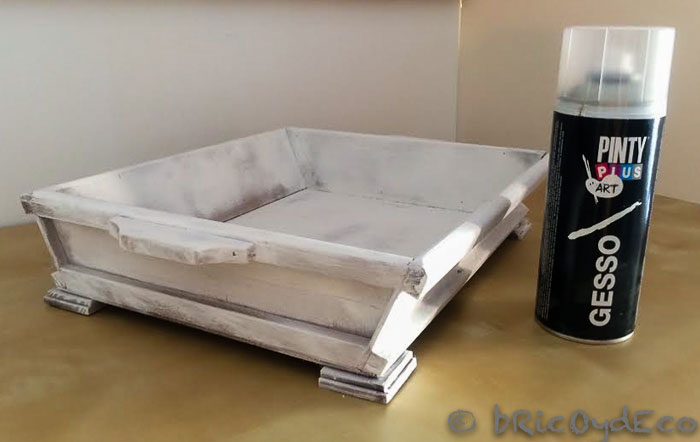
I then gave him one gesso spray primer, I had already tried it on glass (you can see it at this link) and I wanted to see the result on wood. Just like glass, the gesso dried quickly and adhered perfectly.
After gesso primer the tray was already prepared to apply any type of paintin fact at first I was going to use acrylic paint but I remembered that I had a sample of blackboard paint that they gave us for DIY Hunters Day, and I thought it was a good time to try it.
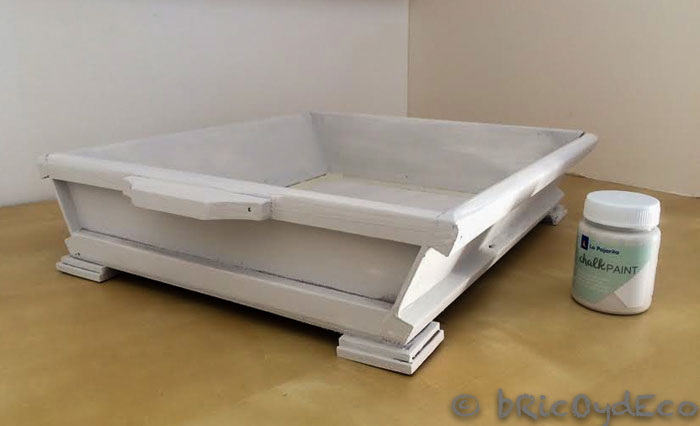
Advice: with blackboard paint, a previous primer is not necessary, but if we give it, we will be able to save paint since the first coat is the one that absorbs the most amount.
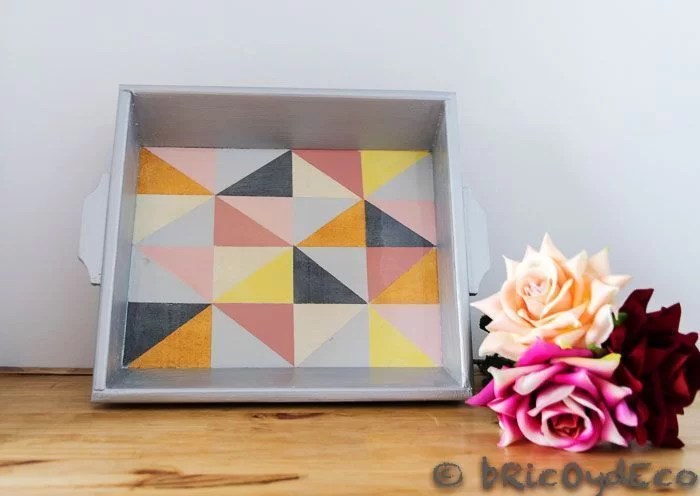
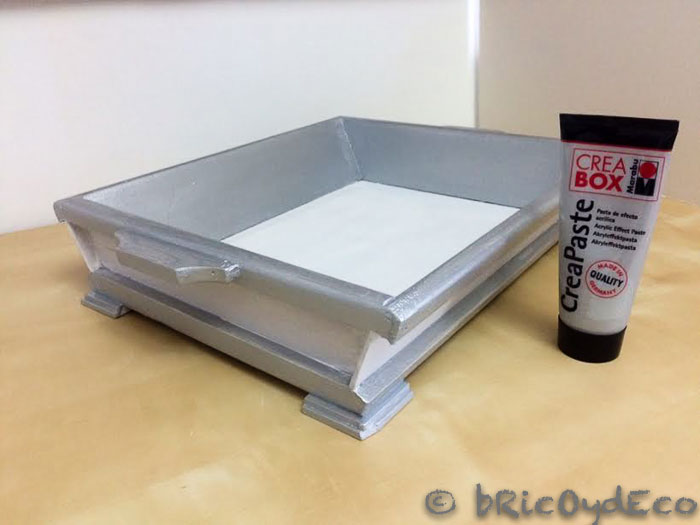
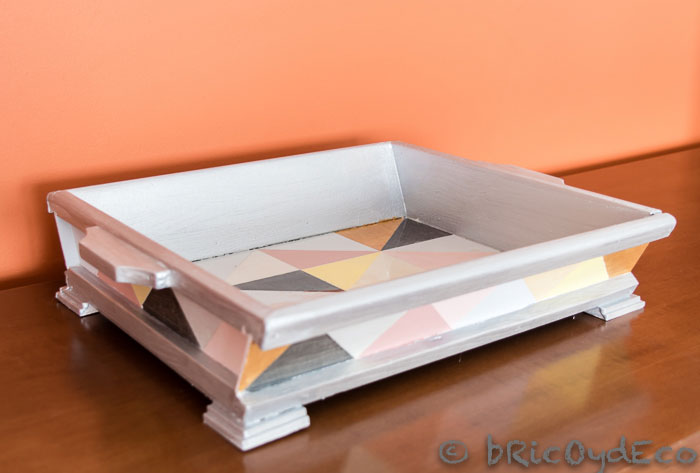
Once the chalkboard paint was dry, I applied two coats of metallic colored acrylic paint by zone of the handles, the moldings and the internal walls of the tray.
Now the tray looked like something else but it was bland, it lacked the decorative touch.
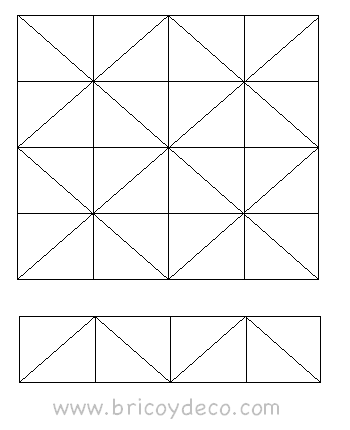
You already know that I love geometric prints and that lately I have used them to decorate cushions (you can see it here and here), so it occurred to me that I could decorate the bottom of the tray and its outline with colored triangles. For this, the first thing I did was draw the triangles with a pencil drawing various lines diagonally, horizontally and vertically.
Then I looked for one earth tone based color palettewith yellows, oranges, pinks and greys.
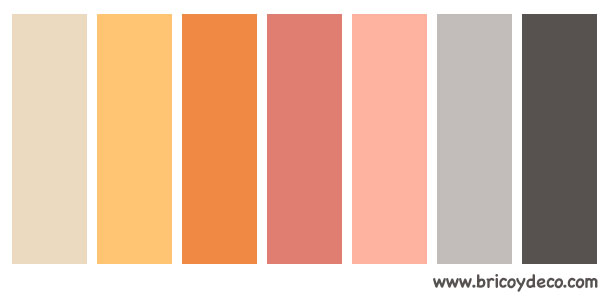
To achieve these tones I mixed homemade chalkboard paint (you can see the recipe at this link) with acrylic paints of different colors.
The next step was to protect the bottom edge of the tray with painter’s tape, as well as the triangles that I was painting.
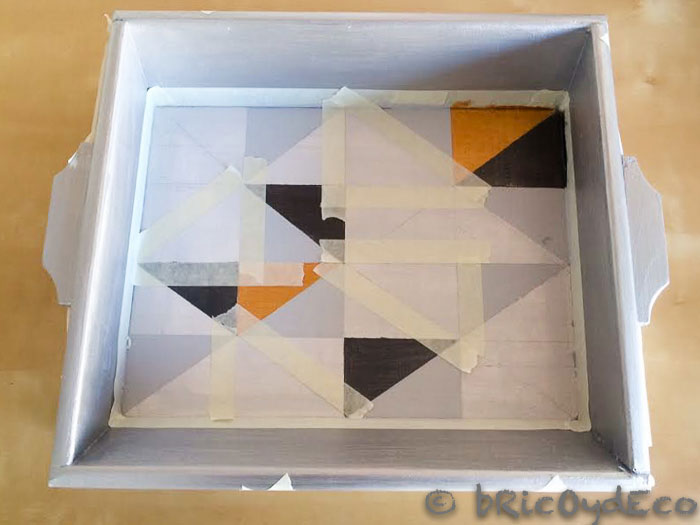
This task is not complicated but it does require time and patience. Since each triangle has two layers of acrylic paint, you have to wait for the first layer to dry before applying the second. You also have to wait for the second layer to dry so you can put painter’s tape on top and paint another triangle… and so on until 64 triangles are painted.
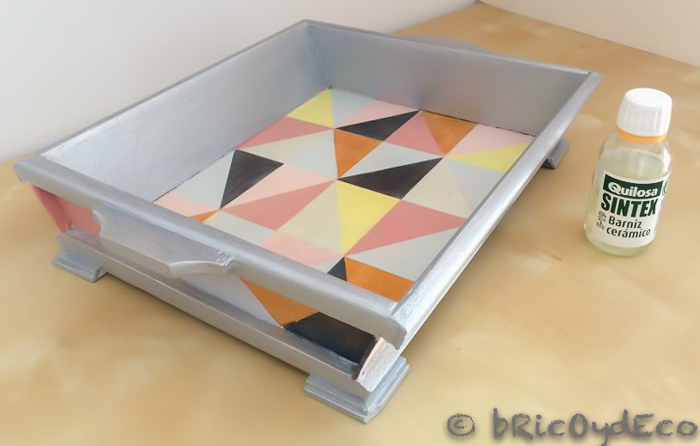
Finally to protect the tray I have used a ceramic varnishin this way you can place objects inside it without worrying that the painting may be damaged.
As this varnish is quite liquid, what I have done has been to pour it directly on the bottom of the tray and move it until it covers the entire surface. This way there are no brush or roller marks left.
After all these steps, the original tray has nothing to do with what it is now, I often change, right?

Painting is an activity that I like and it relaxes me, although I have to admit that I ended up a bit fed up with so many little triangles, however the final result makes up for it. By this I mean that DIY projects require a bit of skill and patience, especially when they don’t go well at first, but they never mean wasted time because if the result is good we will get great satisfaction and if it isn’t, you will have learned how don’t do it for a next time.
As you have seen, with paint and a nice combination of colors you can recycle a wooden tray It is enough and without grace to give it a modern and totally renewed look. Do you dare to try it?
If you liked this post, you can find many more DIY jobs and crafts at . Thank you very much for commenting and sharing!


