

What do the feast of Saint George and Mother’s Day have in common? That in both it is usual to give roses or flowers. If this year you want to be original and make a personalized DIY gift for that special person, don’t miss this step by step to make a painting with paper roses.
Handbox’s new craftlover challenge Welcome to Spring with Novasol Spray and Ceys, it has come to me that I did not even paint (never better said) to create a DIY project that can be given away both in the Feast of Saint George next April 23, as in the Mother’s Day to be held on May 1.
In both celebrations women are usually given roses or flowers, so I have been thinking that it would be a good idea to make a painting with paper roses, since it is a way to give flowers that will not wither over time.
Materials to make a painting with paper roses
To make this painting I used the following materials:
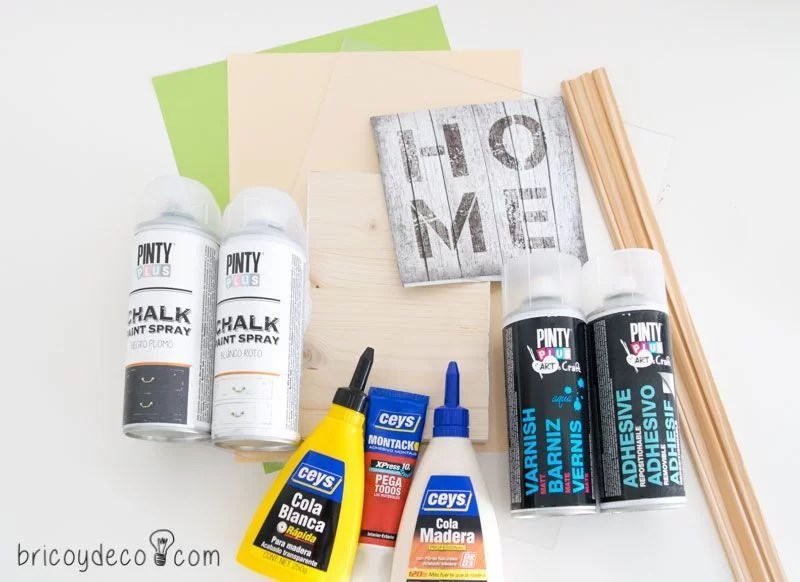
– A block of pine wood for the base. The one I have used had been left over from another project since I usually save the surplus boards and slats to use them.
– A wooden molding for the frame.
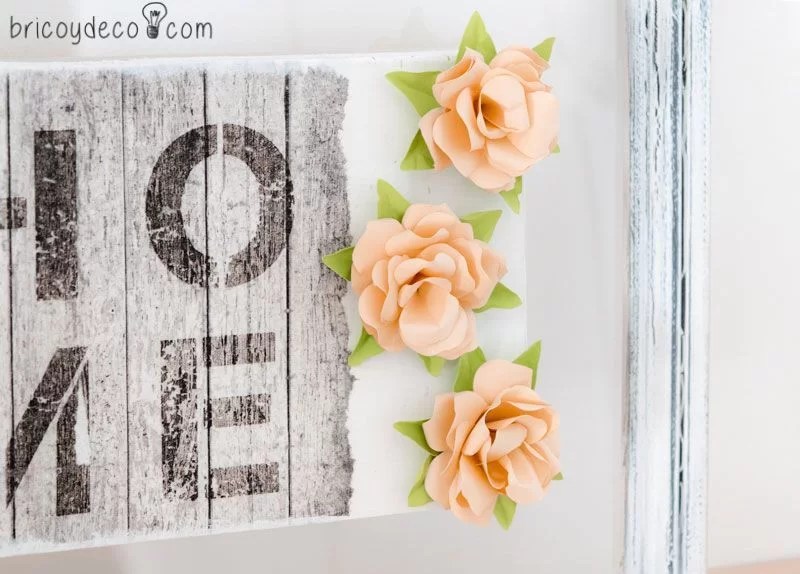
– A paper napkin, the one I used has the word “HOME” printed on it.
– Colored cardboard for the paper roses. Better if they are not too thick, I have chosen them in a pastel pink color and green for the leaves.
– A rigid plastic sheet. The truth is that I had it at home for quite some time and I don’t remember how it came into my hands, only that I kept it to use it one day.
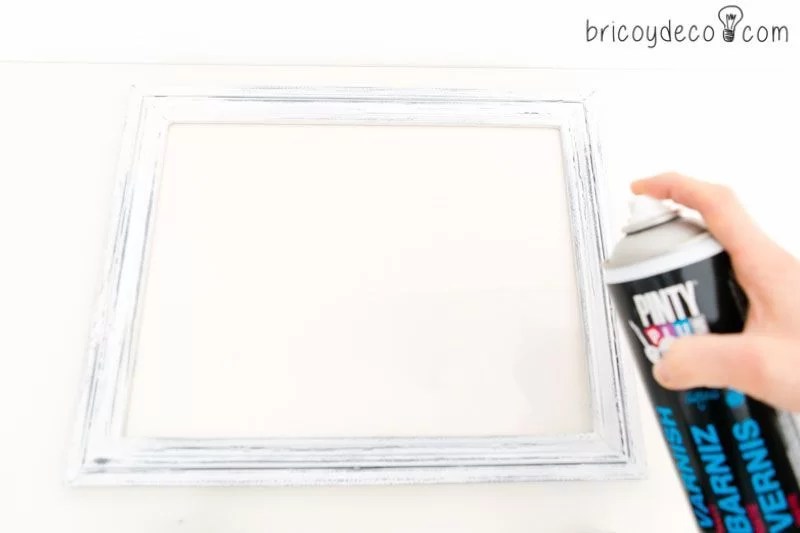
– PintyPlus spray Chalk Paint in lead black.
– Chalk Paint spray by PintyPlus in off-white black.
– PintyPlus water-based matte varnish.
– PintyPlus removable glue.
– White tail of Ceys.
– Ceys wood tail.
– Ceys transparent mounting adhesive.
Step by step to make a painting with paper roses
So that the step by step is as clear as possible, I will subdivide it into the three elements that make up the painting: the base, the frame and the flowers.
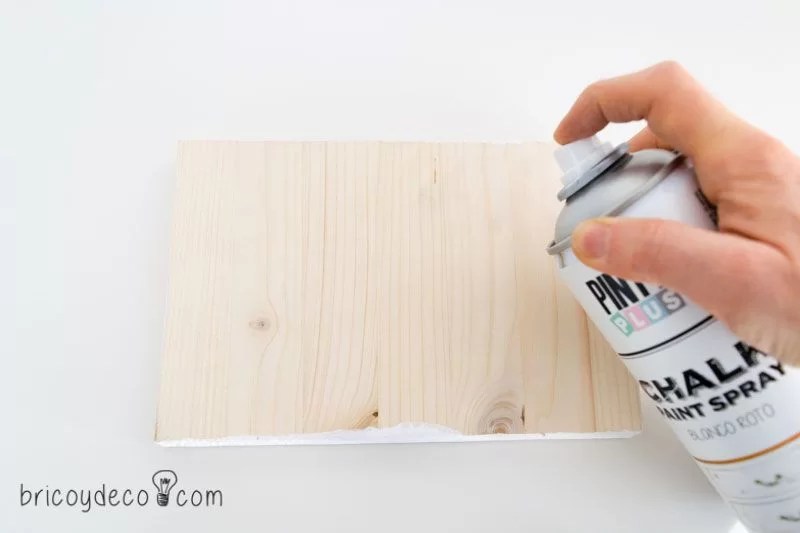
Wooden base with decoupage
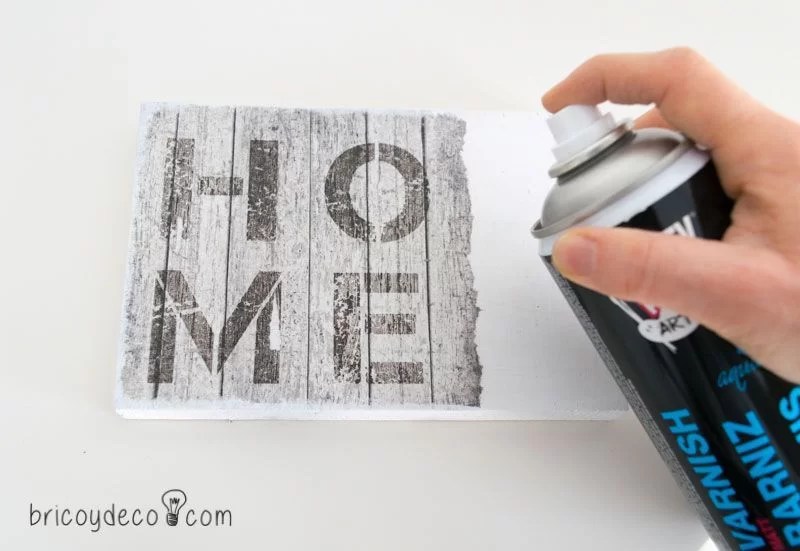
First of all, it will be necessary paint the wooden board with white Chalk Paintin this way the motif of the napkin is highlighted.
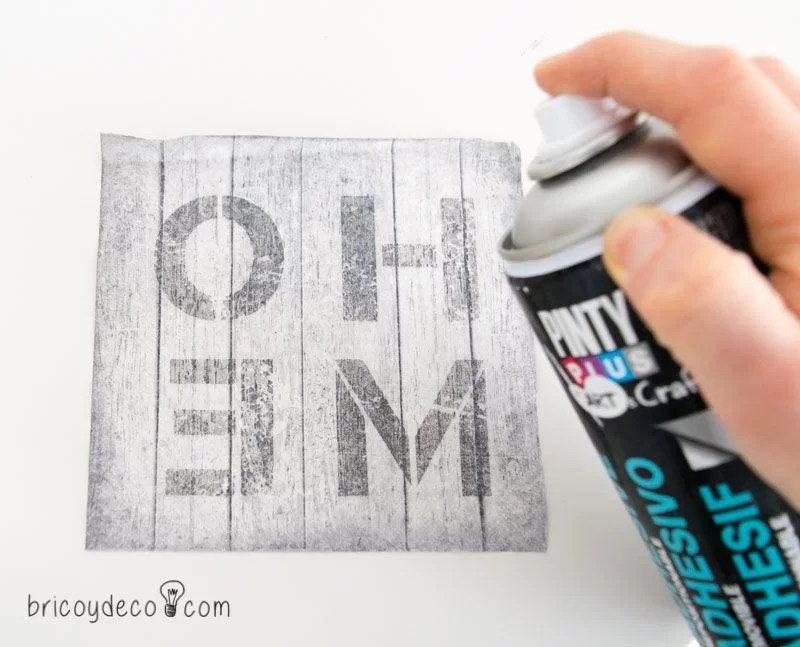
Next, the layers of the paper napkin that are not printed are removed (normally there are two) and sprayed with removable spray glue, since in this way the napkin does not get too wet and prevents it from wrinkling.
To permanently fix the napkin you just have to apply a little white glue on the edges and corners. Finally, protect the base with a matte water-based varnish and let it dry.
paper roses
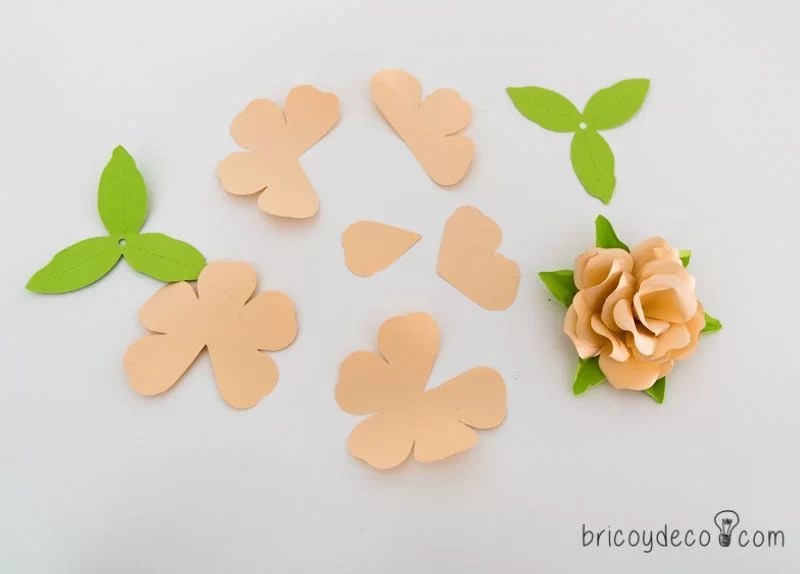
I had already made this type of paper roses with eva rubber (you can see the step by step at this link and download the template from this link), once all the pieces have been cut, you will have to roll the edges of the petals with help of a round toothpick. They are then joined with craft glue or with a hot glue gun.
Lastly I used Ceys transparent mounting adhesive to glue the flowers to the base.
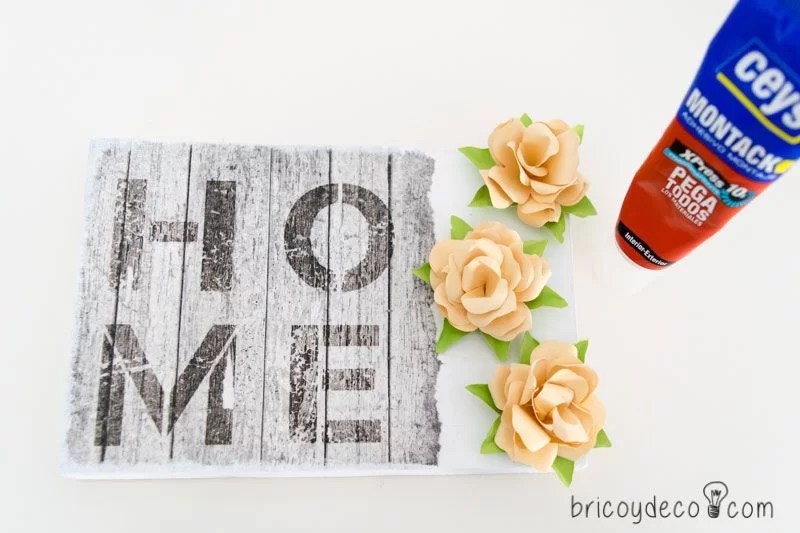
I want to emphasize that I have loved the opening system of both this adhesive and the Ceys glues, since it is possible to reuse them without annoying plugs of dry adhesive forming in the nozzle.
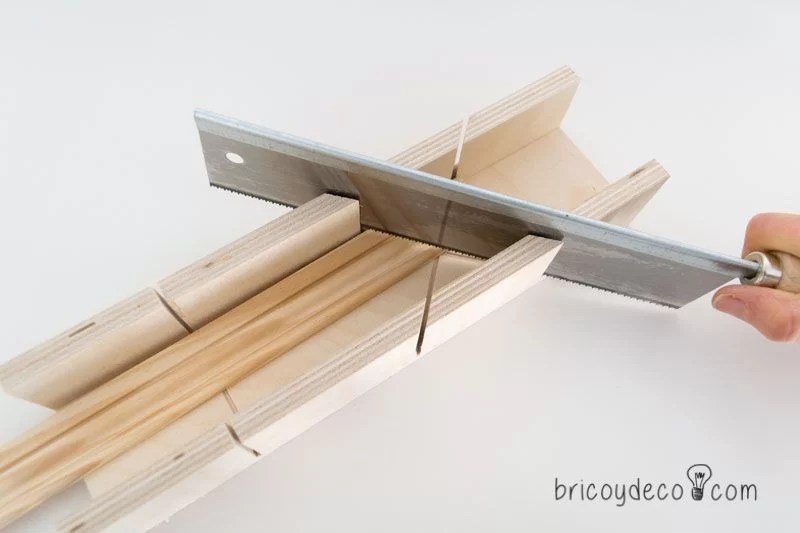
Crackle effect frame
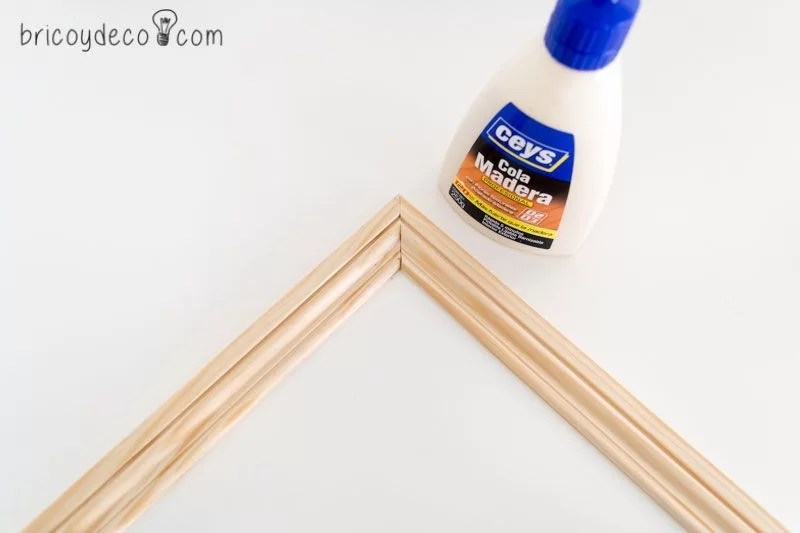
To make the frame I cut the molding with a miter saw.
Next I have joined the corners of the frame with Ceys wood glue that can be sanded once dry and painted.
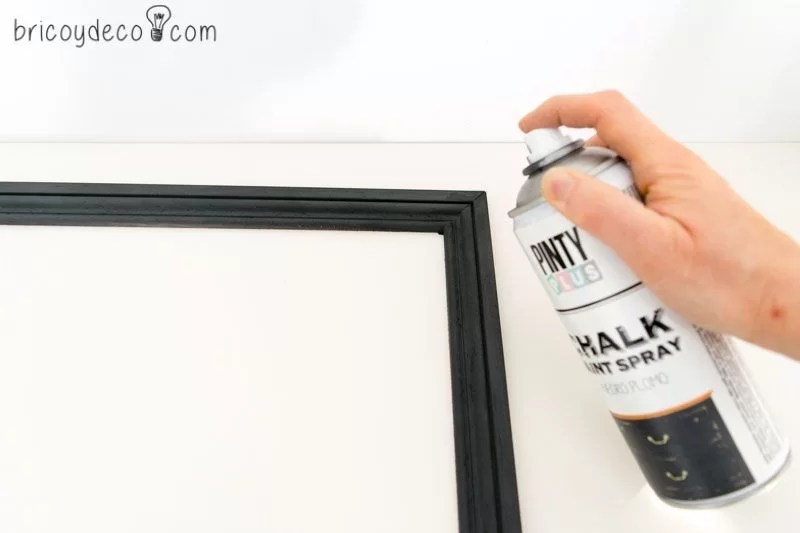
After letting an hour pass (time recommended by the manufacturer to paint on the wood glue), I painted the frame with lead black chalk paint.
The following steps have to be done fairly quickly to get a crackle effect with white glue. Once the black paint has dried, with a brush the entire surface of the frame will be impregnated with white glue.
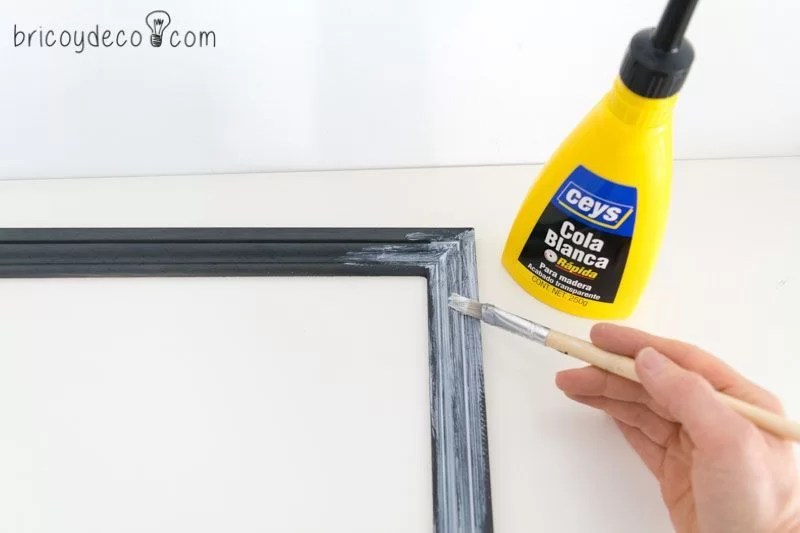
When the tail is still biting, it is painted with off-white chalk paint.
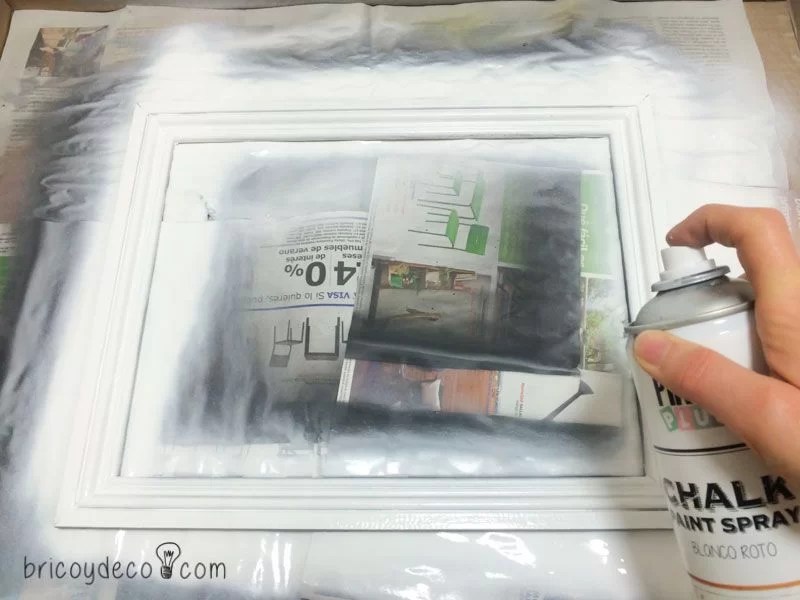
If the surface is dried with a hair dryer or heat gun, a more accentuated crackle effect is achieved.
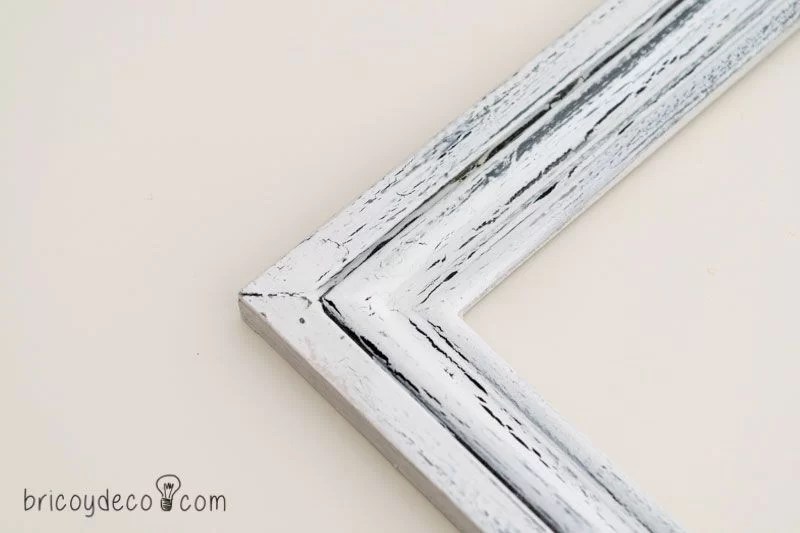
Finally, the frame is sanded a little to enhance the aged appearance and the result is protected with a matte water-based varnish.
After following all these steps, all that remains is to join the rigid plastic sheet to the frame with the transparent mounting adhesive.
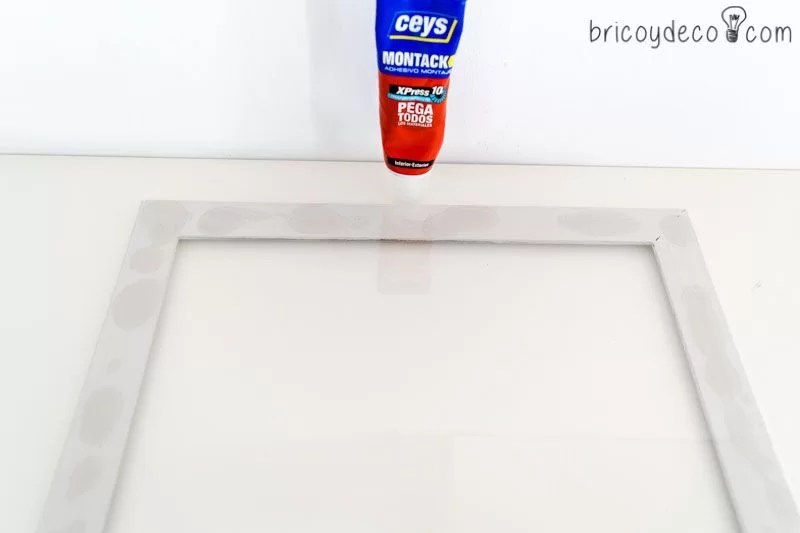
And the base to the plastic sheet.

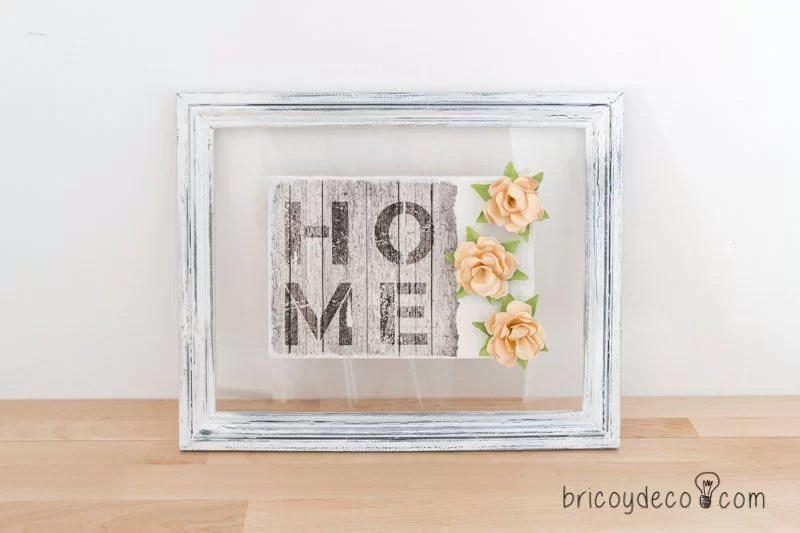
Finally, this is how this painting with paper roses has turned out.
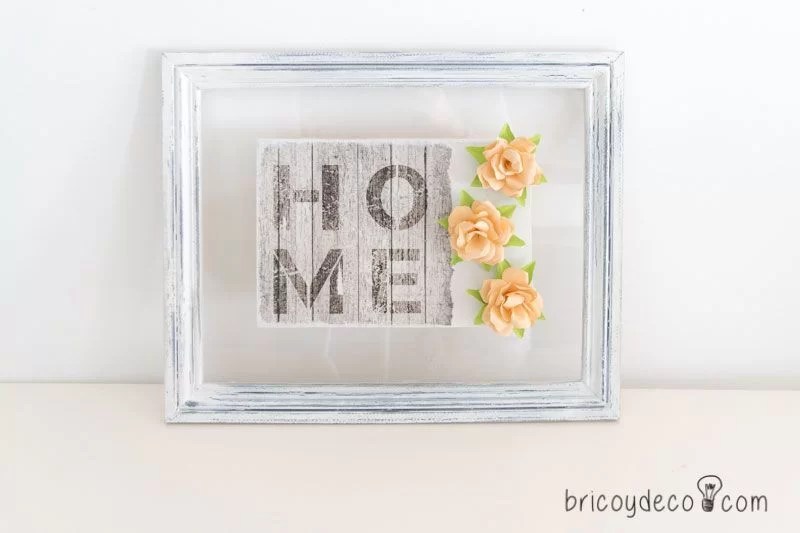
Placing the board on the rigid plastic makes it look like it’s suspended, plus the crackle effect of the frame blends perfectly with the napkin motif. Finally, the paper roses add a soft note of color to the whole set.
Do you already have your gift for Saint George or for Mother’s Day? What do you think of this idea? make a painting with paper roses? In this way you will be able to surprise that special person with a unique detail and made by you with much love.
If you liked this post, you can see many more inspiring ideas and DIY projects at .
Creative challenge: Handbox, Novasol Spray and Ceys


