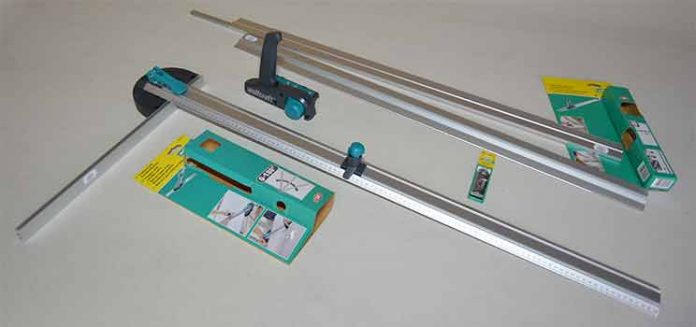
Plasterboard or, what is the same, plasterboard, can be cut in many ways. From manual means, such as a handsaw, to mechanical means, such as a jigsaw or also with a disk saw.
When it comes to making a couple of cuts in a plate, to make a small repair, any of the indicated methods is valid.
However, when we are talking about installing a ceiling or several walls, things change a lot, basically for two reasons.
On the one hand, the enormous amount of dust in suspension produced by mechanical means when cutting this type of material.
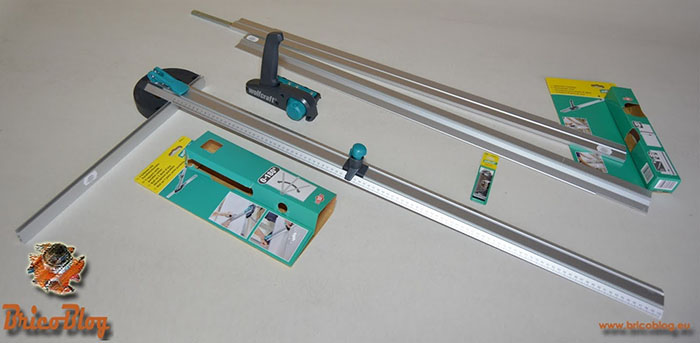
Drywall cutting tools. WolfCraft Guides
And, on the other hand, the time that must be dedicated to preparing the cut: Put a ruler or a strip as a guide, hold it at both ends with a pair of clamps, make the cut, remove the clamps,…
In this article we will talk about a system specifically designed for cutting plasterboard, providing precise, fast, comfortable, impeccable cuts and without producing a speck of dust.
Before continuing, I want to make it clear that the system that we will see next, not only it is valid for DIYersbut it is also veryY appropriate for professionals and installers of ceilings and walls.
Well, as I was saying, I’ll show you how to use two drywall tools that WolfCraft has designed specifically for cut drywall.
Well, let’s go without further delay to see them.
longitudinal guide
First of all, we have the longitudinal cutting guide, along with an extension, in case we need it.
This is the guide itself, which is nothing more than an aluminum profile, with a total length of one meter, and a useful length of 90 cm, and with a groove through which the mechanism that makes the cut slides.

Longitudinal guide and extension, for cuts in plasterboard
In the lower part it has two plastic pieces with two small metal tips, each one of them. As you can see, each of these has 2 small points.
What is the mission of these two small pieces?
Once the guide is in place, we press down by nailing the fasteners into the plasterboard, thus preventing the guide from accidentally moving during the cut. In addition, as they are such small points, they do not make visible marks, once the plasterboard is installed.
We continue with these two pieces. They must be placed at both ends of the ruler, but always in contact with the plate. In other words, if the plate is smaller than the guide, we must bring the two fixings closer, so that they always remain within the surface to be cut and, in this way, they can fulfill their function.
cutting mechanism
Ok, now we move on to the cutting mechanism. On the one hand, it has a spring with which both the exposure of the blade and its change are regulated.
On the other hand, it has a wheel that manages a second blade, but this time it is in the form of a claw. As before, it regulates both the exposure and the change of the blade.
And finally, we have the handle, in which the spring that takes care of the first blade is located. This grip has minimal forward movement. In its default position, although the blade is ready to cut, it does not touch the plasterboard. Pulling the fist forward lowers the blade minimally, but enough to contact the material and make the cut.
guide extension
Finally, in the lower part of the guide, we have a metal plate, which is fixed by means of four small screws, and which serves to join the guide with the extension.
How to cut plasterboard?
Well, once we have seen all the theory and knowing everything we need to know, we are going to see it in action.
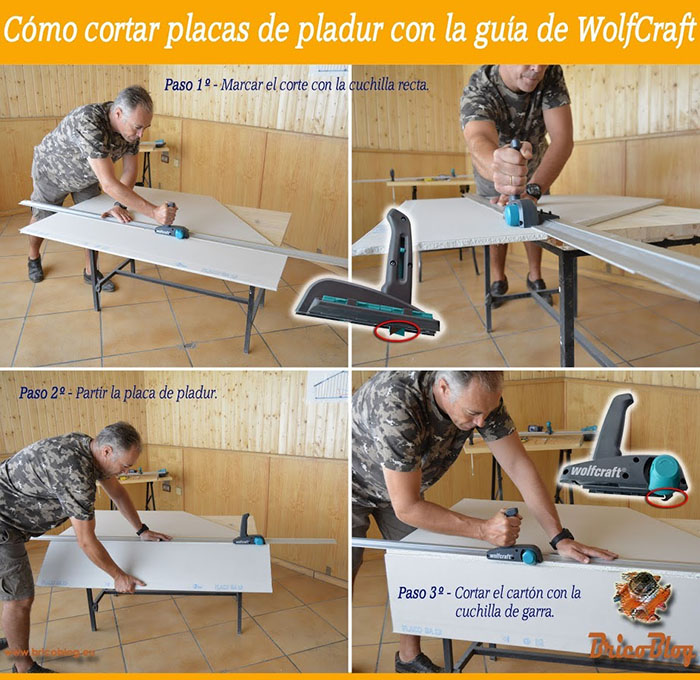
Infographic of the longitudinal cutting process of plasterboard with a guide.
As the plate that we are going to cut is 1.20 m wide and the guide is short, the first thing we will do is mount the extension. To do this, we loosen the 4 small screws of the union plate. We center it at one of the ends. We tighten the two corresponding screws. We introduce it in the extension. And we tighten the other 2 screws. We already have, practically, two meters of guide.
First step
Now we will only have to measure where we want to cut, place the guide, tighten to fix it to the plasterboard, take out the straight blade, and make a pass forward.
With this we have managed to mark the cut, which is the first step.
Second step
Now with a sharp movement, we split the plate. It is not necessary to exert too much force, since the plasterboard breaks very easily. This is the second step.
Third step
And the third and last step will be to hide the straight blade, take out the claw blade, and make a back pass.
What we are doing now is cutting the paper that is attached to the back.
Doesn’t it seem easy? Well, if you see the video that we have included at the end of this article, it will seem like child’s play.
Parallel and angle cutting guide
On the other, we have the parallel cut guide, which is complementary to the previous one. With these two tools we can make any type of cut that we may need.
As can be seen in both the video and the photos, it is calibrated just like a ruler.
It also has an angle marker, with a quick-lock mechanism.
And a second aluminum profile that we can move depending on the need. You just have to loosen the three screws located on one of its sides, move it as necessary, and tighten again.
This guide, like the previous one, also has, at the top, a groove through which the blade moves. To fix the blade to the desired size, you just have to turn the knob.
let’s do some tests
parallel cuts
We put a stop on the plate so that it does not move, and we move the guide assembly by sliding it along the edge of the plasterboard.
Once the cut is marked, we make a sharp movement to split the plate, just as we have done before.
We put the previous guide on the edge, the longitudinal one, with the claw blade unfolded, and slide it back to cut the paper from the back side.
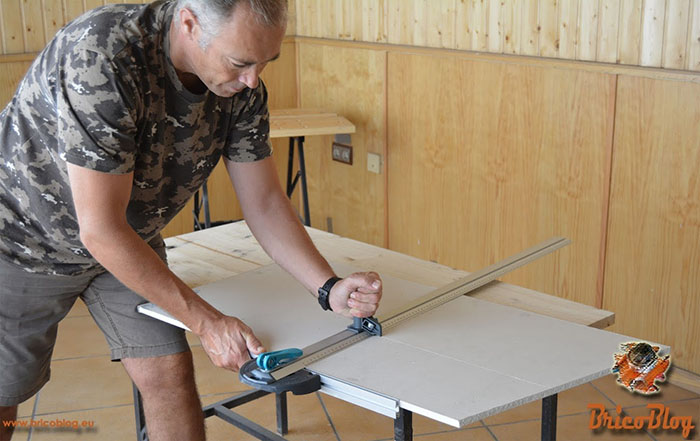
Cutting of plasterboard plates with parallel guide.
angled cuts
Angled cuts can really be done in two ways. It’s a matter of trying and staying with the one you prefer.
In both cases, the first step is to select the cutting angle. For what we will use the angle marker that is incorporated, we will fix it. And we place the second profile of the guide on the edge of the plasterboard.
Method A
We place the longitudinal guide in contact along the entire length, with the parallel guide. We press to fix that one. We remove the parallel guide. And we cut as we saw before.
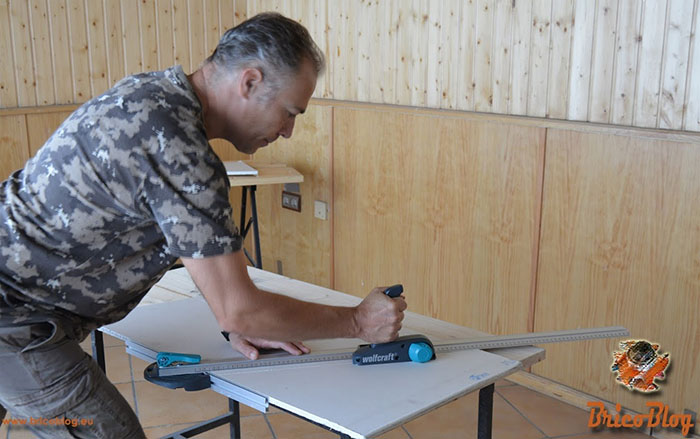
Plasterboard cutting with angle guide.
Method B
We replace the cutting mechanism, putting the parallel guide, that of the other guide. We take it to the angle marker, and we make the cut exactly as we have seen before.
Inside Cutting Tool
Finally, we are going to see a tool whose use may seem hard, but nothing is further from the truth. In this way, you will be able to work 100% on the plasterboard.
This tool can be used to create recesses, eg for sockets or switch boxes.
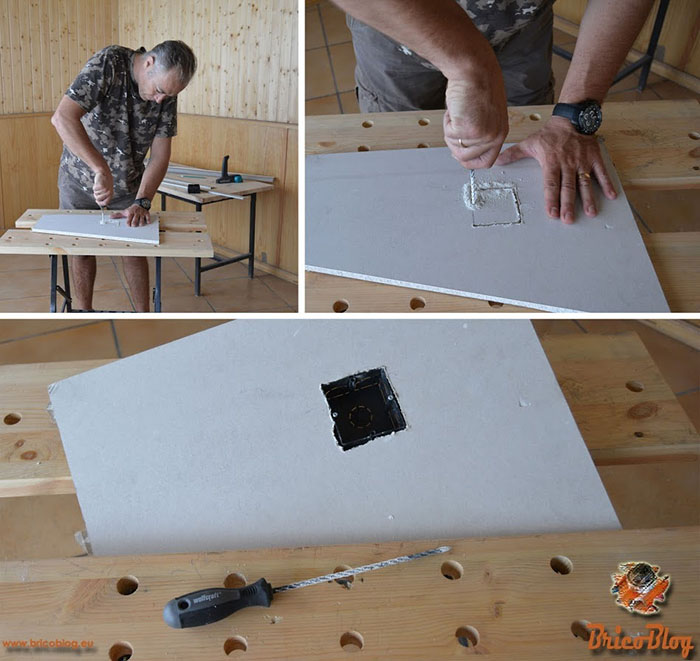
Tool for interior cuts of plasterboard.
As can be seen in the photo, it has an auger-shaped tip to penetrate the material.
Once transferred, we cut it with the body of the tool. It is very similar to a rasp, and is handled as a manual saw.

Interior cuts in plasterboard. Manual tool.
Video
In the following video we include, graphically, all the information included so far. Both the theoretical and the practical content.
Conclusions
The truth is that these three tools of WolfCraftThey greatly facilitate the work and save a lot of time. When worn, you can clearly see that they are thoughtfully designed specifically for cut drywall in virtually every conceivable way. Therefore, they are recommended for use by professionals and installers.
I hope that if you have the need to do a job that requires cutting drywall, this article will help you.
Its use, a priori seemed easy. But really, it is even easier and more comfortable.
For this reason, we will use them in the soundproofing work that we are carrying out in this location. Below is a link in case you want to see the planning of the acoustic insulation work, or see the articles that we have already published about it.
Therefore, later we will see them at full capacity. It’s antent@, and don’t miss it.


