

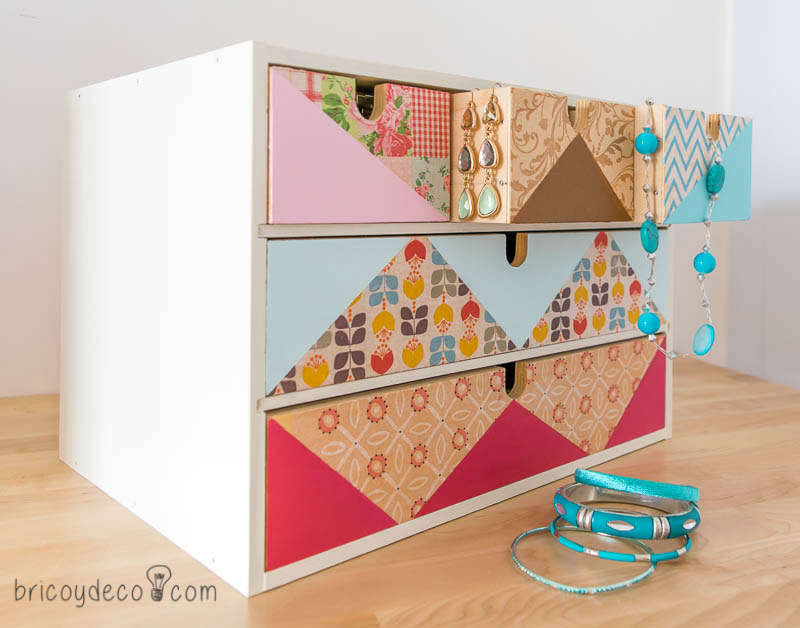
The main reason why I like the technique of decoupage on untreated wood it is because if it is done with a translucent paper such as rice or napkin paper, the result obtained is much more natural than priming the surface beforehand. With this step by step you will see how this technique has been applied on a wooden chest of drawers to get an amazing result.
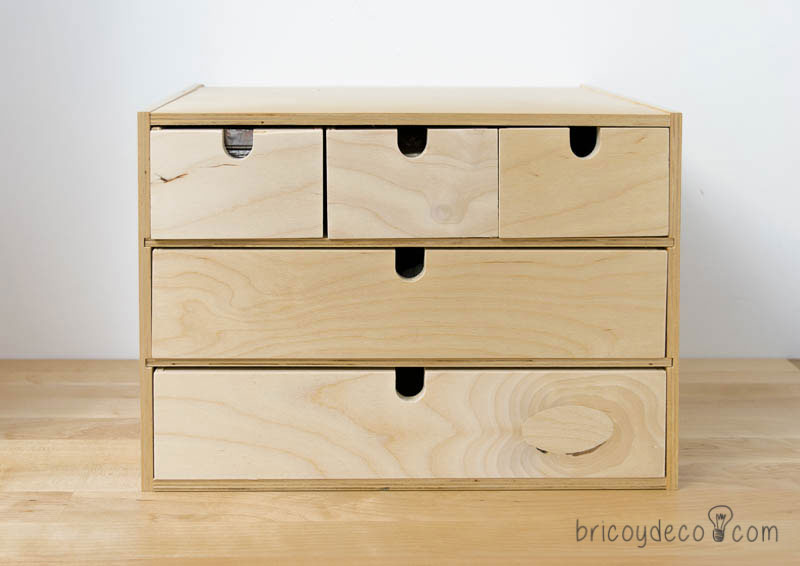
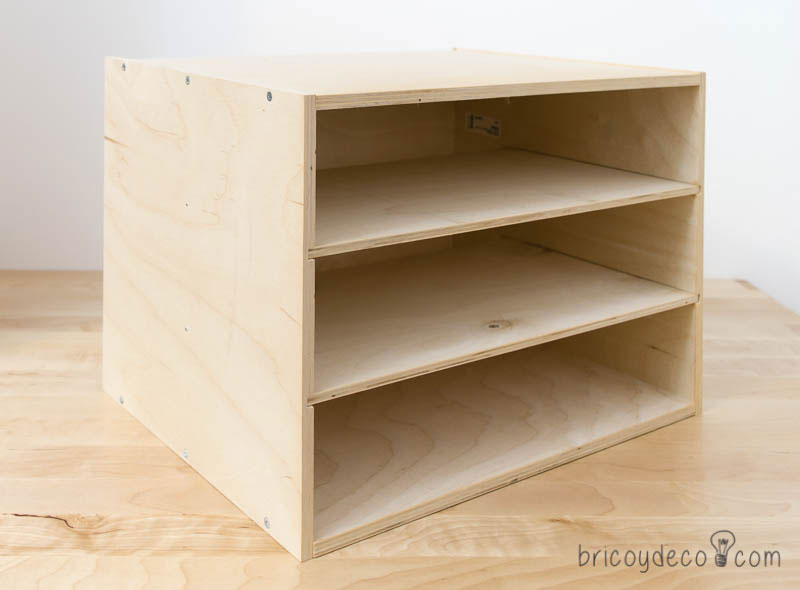
Some time ago I bought a mini wooden chest of drawers that I use as a jewelry box and that I have kept untreated until now. In fact, I hadn’t modified it for all these years because I wasn’t sure how I wanted to decorate it, or rather, I was waiting for inspiration to strike me.
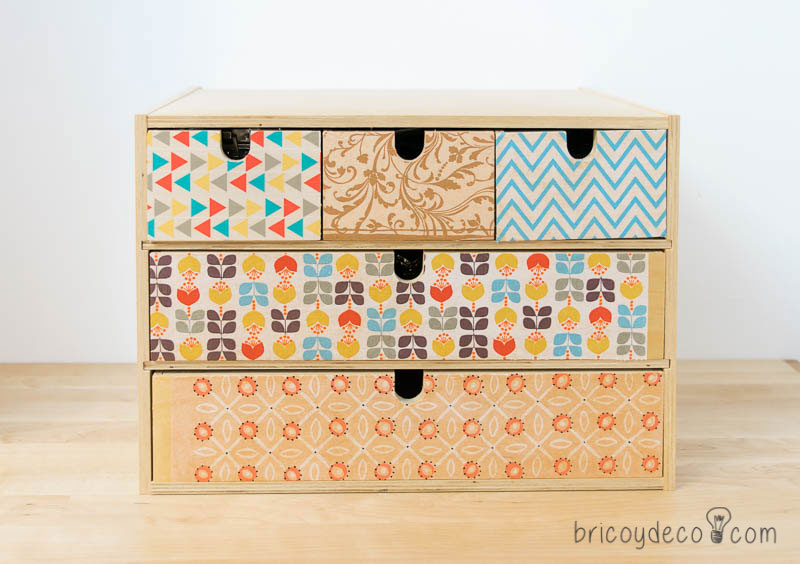
As I am very fond of buying decorated paper napkins, It occurred to me to give the chest of drawers a “scandi” touch with some napkins with geometric and floral motifs that I had at home using the decoupage technique.
Normally, the object or piece of furniture that you want to decorate with this technique is usually primed, but I had previously tried to stick the paper napkins directly on the wood, without primer, and I quite liked the result since it is more natural, as if you were drawing directly on it.
Materials needed to do decoupage on untreated wood
To make decoupage on untreated wood we will need the following materials:
– Decoupage glue, you can also use carpenter’s glue diluted with water.
– A brush or brush.
– A roller or spatula (in this link you have a step by step to make a DIY spatula).
– Scissors and cutter.
– Plastic sheet (film) or baking paper.
It should be noted that the wood must not present knots or changes in color that can be transparent through the paper napkin. Apart from the napkins you can use:
– Rice paper
– Decorated sheets
– Gift Wrap
– Photocopies
– Magazine clippings, etc.
Finally, if you also want to paint on the napkin, you will need acrylic paints and also a varnish to protect the result. You can use the same adhesive glue as a varnish but with an aerosol or spray we prevent bubbles from forming.
Step by step and video tutorial
The steps to take to do decoupage on untreated wood are the following:
1º.- With a brush apply the glue for decoupage on the wood, insisting on the edges and corners since they are the areas where the paper is usually peeled off.
2º.- If paper napkins are used, the white layers must be discarded before place it on the wood.
3º.- Next, a plastic sheet and a roller or spatula is passed from the center to the sides to eliminate air bubbles. It is very important that the paper is protected since, being wet from the glue, it can easily break while we spread it.
4º.- Once it has dried, it will be necessary cut off all excess with a cutter or sandpaper past the corners.
5º.- If you want to paint on the napkin, you have to allow about 12 hours to pass so that the paper has adhered correctly, since otherwise bubbles may form and we could also drag it with the masking tape.
6º.- Finally, there is only protect the result with a varnish, better in aerosol to avoid the formation of bubbles.
In the next video tutorial you can see the step by step:
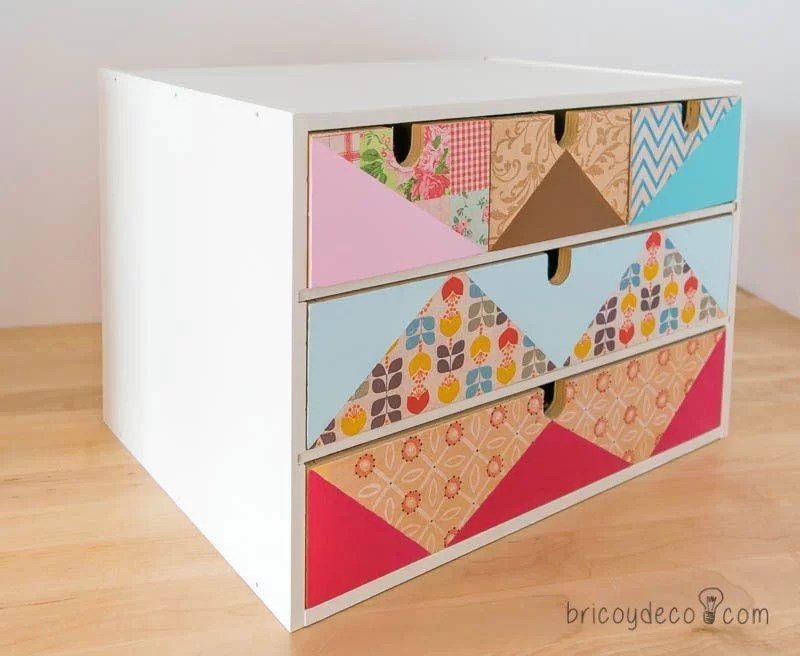
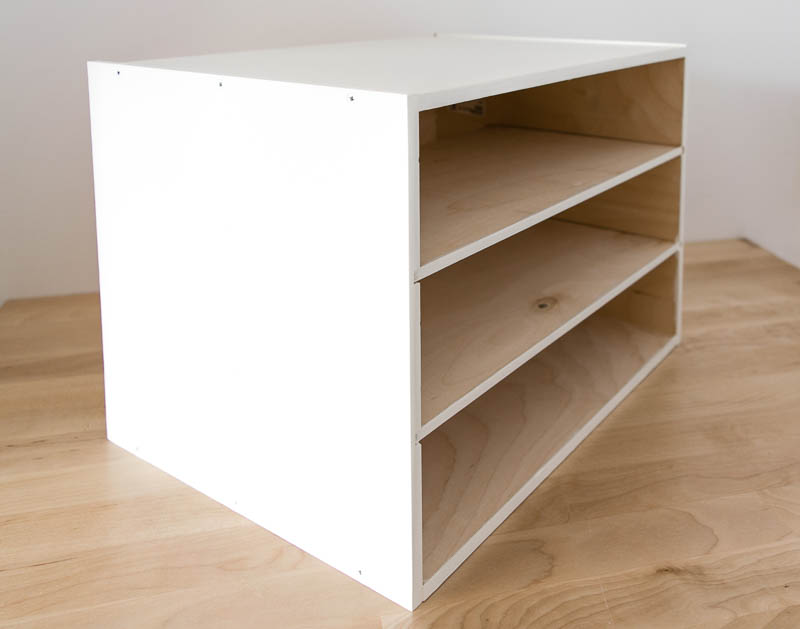
To give a little more grace to the mini dresser I painted some triangles with acrylic paints of different shades coordinated with the patterns of the napkins (you can see how to create your own paint colors in this link).
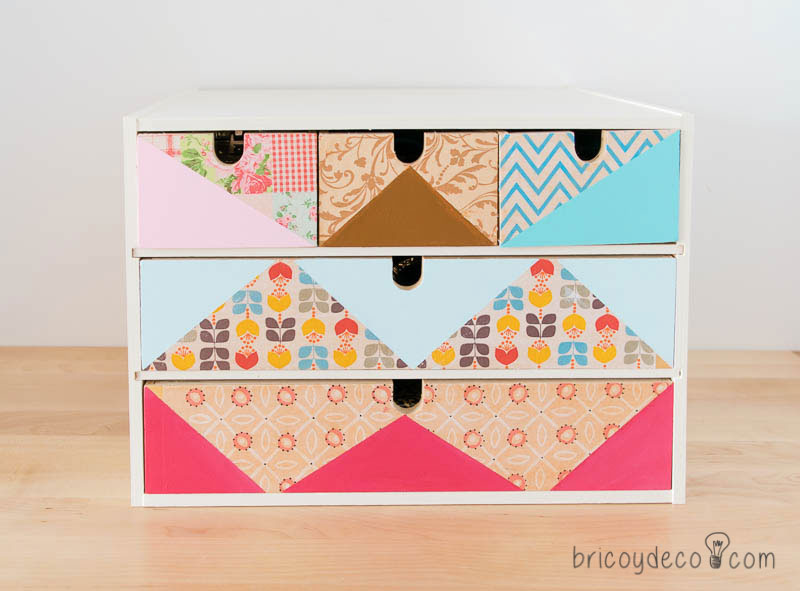
The drawer structure I painted it with a “cotton white” water-based enamel.
In the following image you can see how it looked after a couple of coats of paint:
Finally I think it was worth all the time I spent waiting for inspiration to strike.
Have you ever tried to decorate using the decoupage technique? If you have not done so, I recommend that you try it because it is quite addictive as well as cheap, since practically any role can be used. If you also try to do the decoupage on untreated wood You will see how the result surprises you.
If you liked this post, you can see many more tutorials and DIY ideas at .


