There are plenty of alternatives when it comes to DIY fixings. For this reason we have dedicated this article to different types of DIY anchors, some of which are unknown to most fans.
Depending on the type of fixing, we can anchor different elements on different surfaces. Each fixing is indicated for a specific support, supporting from very small weights to large loads.
Next we will see five different types.
DIY fixings
As I said, we will see five types of fixings that will help us to hold loads in different types of materials.
Tests on different materials
To see how they are installed and to be able to observe how they behave, we have made a complete video.
We have carried out the tests on what in cinematographic jargon is called “props” or, what is the same, a simulator. In this way, we can see from the inside of the wall how the different anchors behave.
Among the fastening materials we have chosen from the softest, such as laminated plasterboard, to harder ones such as cellular concrete, passing through the brick and the thermo-clay block.
Of course, for this test tutorial, we used our favorite Ryobi tools, such as our 18V cordless drill driver.
If you want to know in depth this magnificent tool, click on the following link drill driver.
Plug for Plasterboard
We will start with the TAPLA, which is specially designed for installations on laminated plasterboard. Hence its name: ATwith for PLAplaster case.
It consists of a plug that, on the outside, has the same grooves as a screw, but much more pronounced.
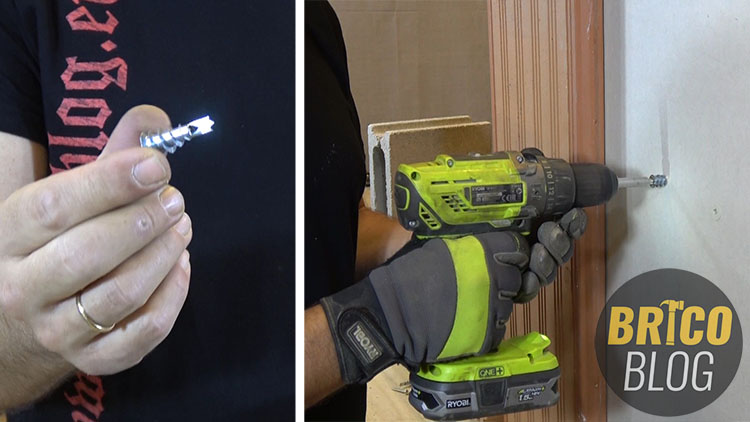
Its installation is very easy since, as it has a perforating tip, it is not necessary to drill previously. It is screwed directly onto the plasterboard.
When putting the screw or the eyebolt, we see that it loses the tip, since its function is only to pierce the wall.
This type of plug can be found in plastic and metal material.
They are indicated to support a maximum load of about 8 kg.
Nylon plug
Next we will see the nylon plug. This one, surely you know it very well, since it is the universal cue par excellence.
It is the wild card of fixations, since it gives us a solution in 99% of cases.
The side fins prevent it from turning during screwing. Making a perfect anchor possible.
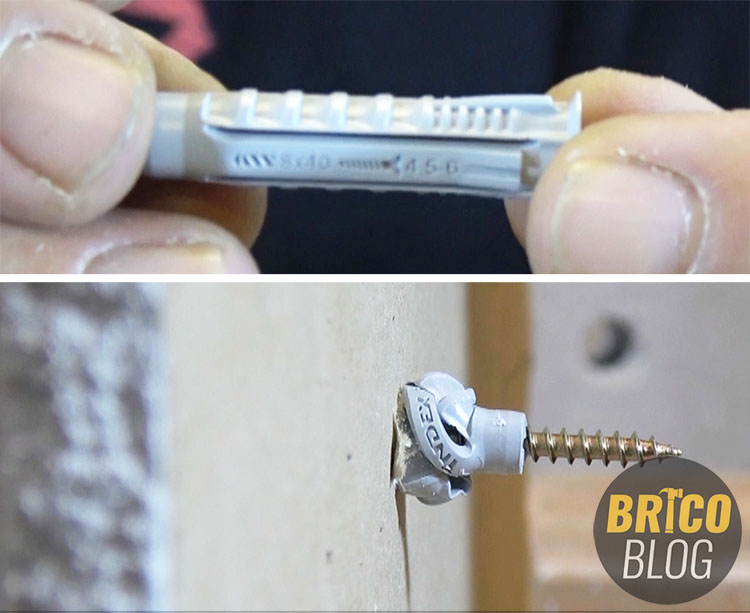
It is used for practically any type of support, from solid materials such as reinforced concrete, to hollow materials such as plasterboard.
Plaster, being a very soft material, can be drilled with the same drill bits that we use for wood.
When screwing on this plug, we can see how it shrinks on itself, achieving a riveting effect.
In the case of the brick, masonry drill bits should be used.
Advice
When drilling hard materials, it is convenient to do it with a drill of a lower number and, once this is done, make a second pass with the desired number.
Why?
Because, especially with larger diameter bits, the vibration produced by the drilling itself makes the hole slightly larger than the one we were looking for. And this can cause enough slack so that the plug is not properly anchored.
This aspect is fundamental when we talk about DIY fixings.
cue stick
What are the differences between this cue and the normal cue?
On the one hand, it is installed through the part to be immobilized. Hence, its greater length.
And on the other hand, the screw is inserted by hitting it with a hammer, instead of being screwed. Hence its name.
But, if we look at the screw, we might think: If it is installed by knocking, why does it have the head with the notch for the screwdriver?
Very simple: To be able to disassemble it.
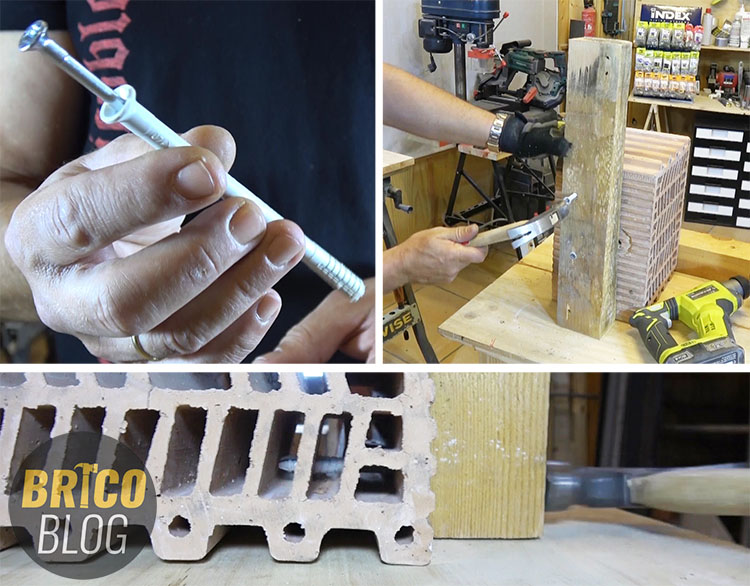
It must be said that its installation is much more comfortable than the traditional plug.
Instead of marking, remove the piece that we want to anchor, drill and cross our fingers so that none of the drills have been diverted. We place the piece, and we make the holes and introduce the plugs, one by one.
The plug is immobilized by expansion, that is, when inserting the screw, the plug opens against the walls of the hole.
The punch, impact or, also known as nailable, plug is mainly indicated for solid materials.
In concrete, for example, it has the following tensile strength:
- 6mm diameter. . . Resistance of 18 Kg.
- 8mm diameter. . . Resistance of 29 Kg.
hammer with base
We arrive at the cue with a base. This type of plug is specifically designed for the installation of insulating panels. Whether acoustic or thermal.
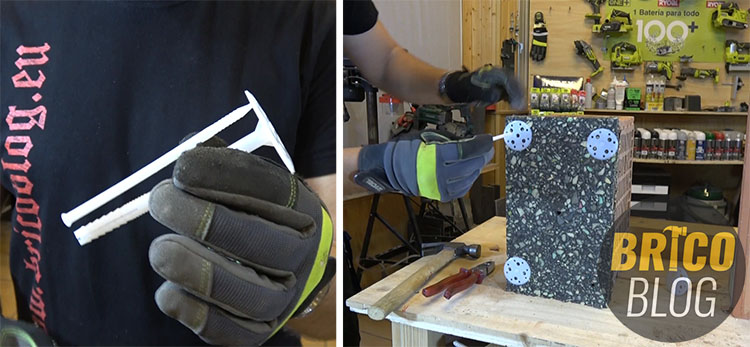
It is composed of two parts. The cue itself. And a nail also made of plastic material.
Its assembly is identical to the punch block that we have just seen.
The insulating panel is placed… We drill… We insert the plug until it stops… And we nail.
Repeating the operation, as many times as necessary.
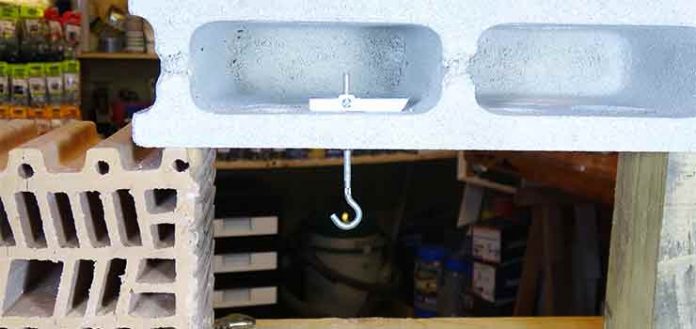
rocker cleat
And finally, we come to the tilting cue. As soon as I explain how it works, you will realize why this name.
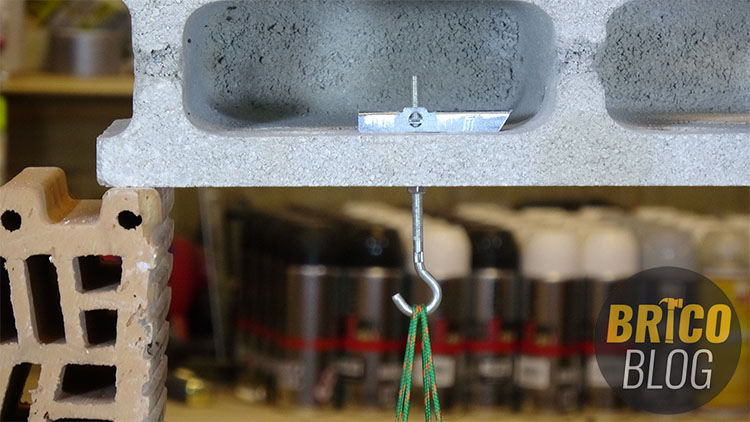
Its system is as follows: It is introduced through the surface… The mobile part tilts… And that is when it is anchored.
We can find it with threaded rod, open hook, and closed hook.
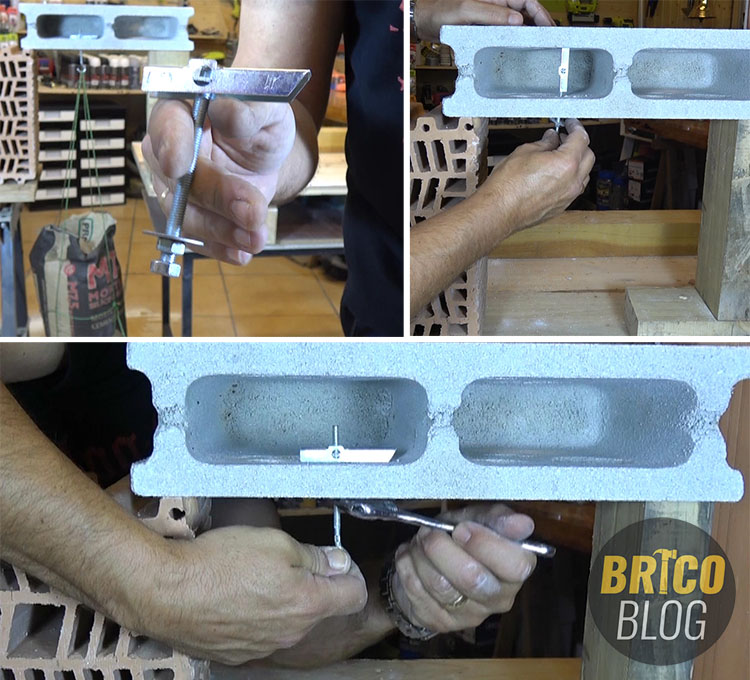
This anchor is used exclusively for horizontal surfaces, that is, on ceilings. And its main use is to hold lamps and ceiling fans, as well as wall lights, although they are also widely used for the installation of the structure of false ceilings.
Its installation is very simple. To do this, we have to take into account the dimensions of the mobile part, which is the most voluminous part. However, in the package or wrapper comes the diameter of the drill bit that we must use.
For example, for a plug with a diameter of 5 mm, we have to use a 14 mm drill bit.
And for another 8mm, a 22mm drill bit.
They are exclusively indicated for hollow materials, such as plasterboard, or flasks, whether they are made of concrete, like the one we have used, or made of brick.
The installation is as follows: We drill, we insert the anchor, we tilt, we give it the desired height by threading the rod, we fix it with the nut, and we have it ready to withstand large loads.
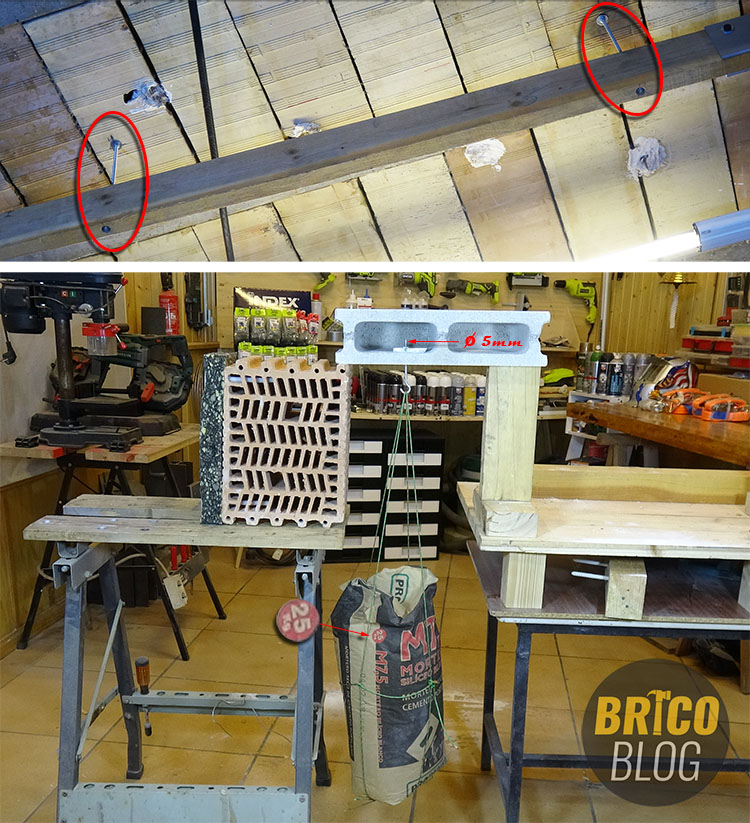
In the previous video, you can see how we have hung a 25 Kg load from a 5 mm diameter plug.
However, one of 8 mm can withstand tensile loads of up to 140 Kg.
I am sure that if you are a DIY enthusiast, you will surely use them and get the most out of them.
Another product that is also widely used in home DIY and that is part of the group of sealants and anchors, is Sanitary Acetic Silicone. We invite you to this article since it is very didactic.
Did you not know any of these DIY fixings?
You can tell us by leaving a comment.
.


