

With today’s post begins the special series of DIY gifts for Christmas which I have spoken to you about in the last few days. My intention is that they are simple ideas that anyone can do, or at least encourage you to try. Surely the recipient of the gift values your effort and appreciates that you had the detail of creating something exclusive and personalized for him or her. In addition, my intention is that these gifts are low cost so that the crisis does not leave anyone without their gift!
For this first DIY idea I have chosen a fabric whale that we can give to both children and adults. I will include the link to download the pattern in the week’s newsletter (if you are not subscribed you can do so at the end of this post). The materials that we will need are the following:
– Cloth. I have chosen a piece of turquoise color that I already had but for tastes there are colors, you can choose the plain or printed fabric and the color that the person you are going to give it to may like the most.
– Thread, needle and scissors.
– wadding or foam for the filling. Normally I use the wadding of the pillows that I am renewing.
– Vinyl for the pattern. It is not essential but making the patterns with vinyl makes it much easier when it comes to cutting and sewing the fabric (I say this from my own experience).
Once we have all the materials, we will follow the following steps to make this funny fabric whale.
1º.- Cut
We print the pattern on vinyl or on a sheet of paper and cut it out. If we don’t have a printer we can also trace the drawing by placing a sheet of paper on the computer screen and raising the brightness to maximum.
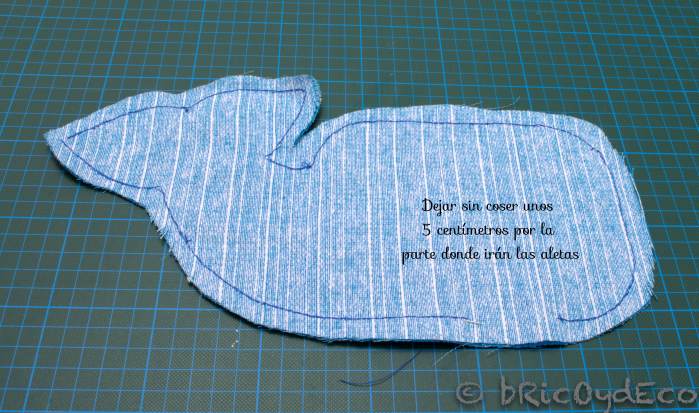
Later we will place the fabric inside out, fold it in half and place the pattern on top. If the pattern is made of self-adhesive vinyl, nothing else will be necessary because it will be adhered, if we have used a sheet of paper, it will have to be traced on the fabric or fixed with pins.
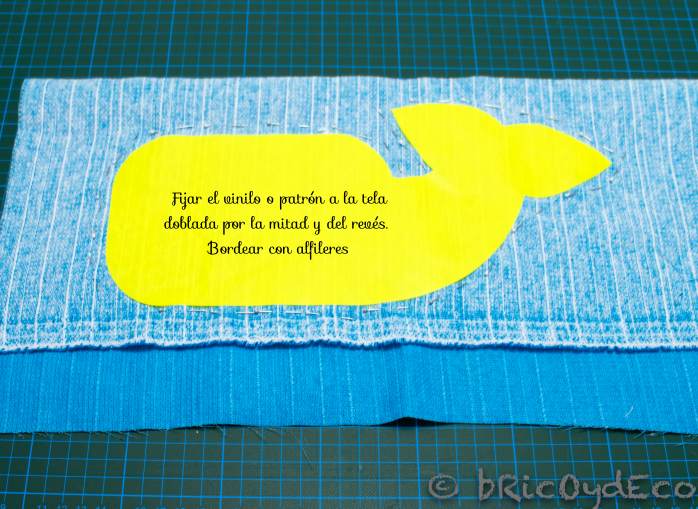
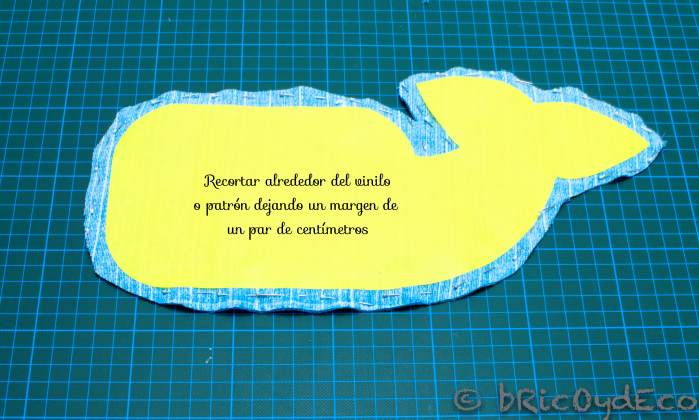
Once we have fixed or traced the pattern, we will place pins to join the two fabrics a couple of centimeters from the silhouette of the whale. Later we will cut around the pins.
To make the fins we will follow the same procedure as with the body of the whale. The fins can be made with the same fabric as the body of the whale or with a different fabric. In my case I chose a different one because my fabric was smooth and that way I give it more life.
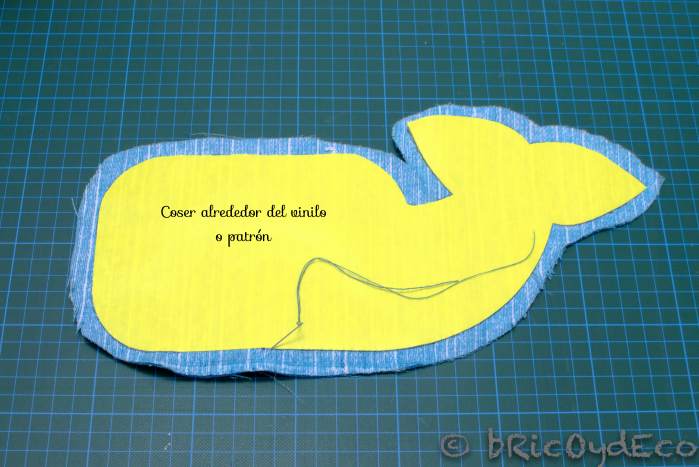
2º.- Sew
We will start sewing from the middle of the whale towards the tail, turning around until leaving about 5 centimeters without sewing in the belly area. I have sewn it by hand because it is not very big but it can also be sewn by machine.
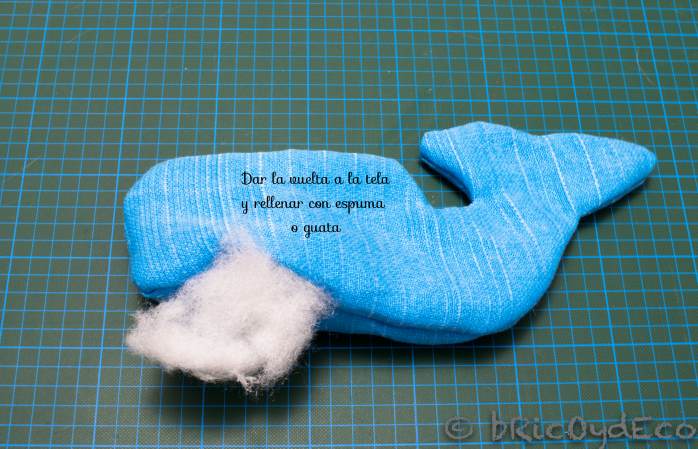
The area that we have left unstitched is where we will turn the fabric to turn it right side out and where we will insert the wadding to fill the whale.
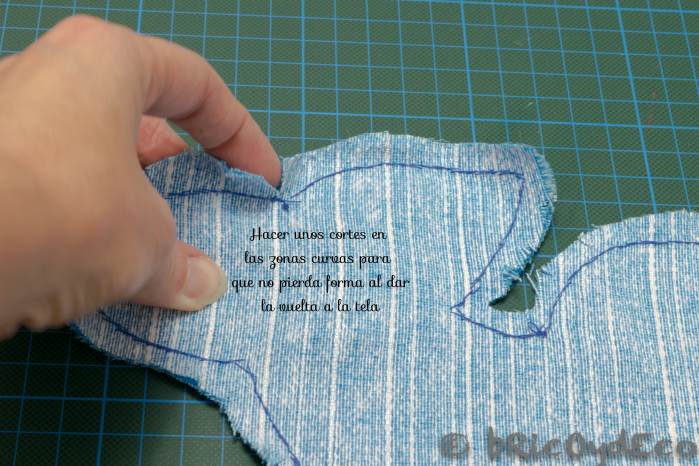
Before turning the fabric over, we must make a few small cuts in the curved areas so that it does not lose shape.
We will sew the fins in the same way as the body of the whale, leaving a small part unsewn to be able to turn the fabric over and insert the filling.
3º.- Fill
We will fill the whale with wadding or foam, starting to fill in the tail area. To access the most difficult areas we can help ourselves with a pencil.
Once the whale has reached the desired consistency, we will make its eyes and mouth, since it is stuffed and we can better calculate its position. For this I have made a backstitch with black thread, although we can also sew some buttons as eyes and place some decoration on it such as a small bow.
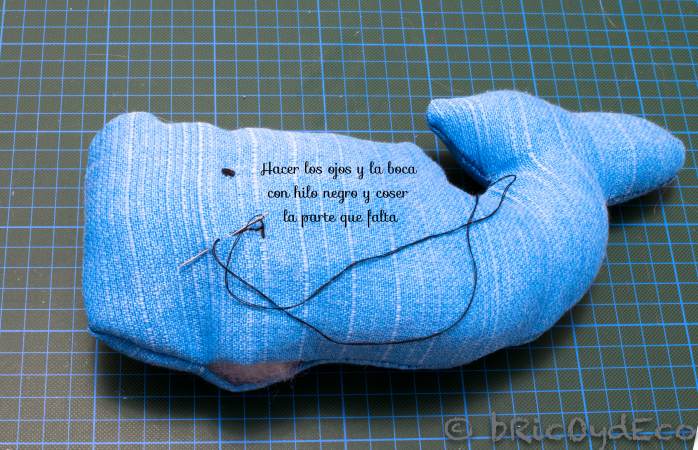
Next we will close the part that still remains unsewn with small stitches so that they are seen as little as possible. Next we will fill in the fins, close them and sew them to the sides of the whale’s body so that when we put it on a surface it stays planted.

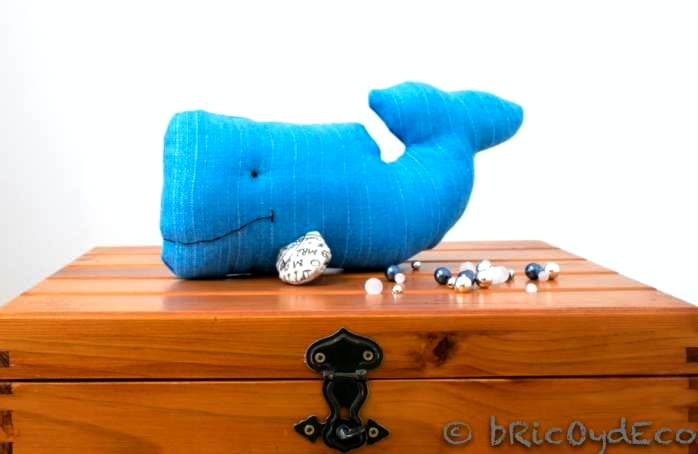
In the following image you can see the finished fabric whale. As you can see, it is a very simple but successful craft that is available to anyone.
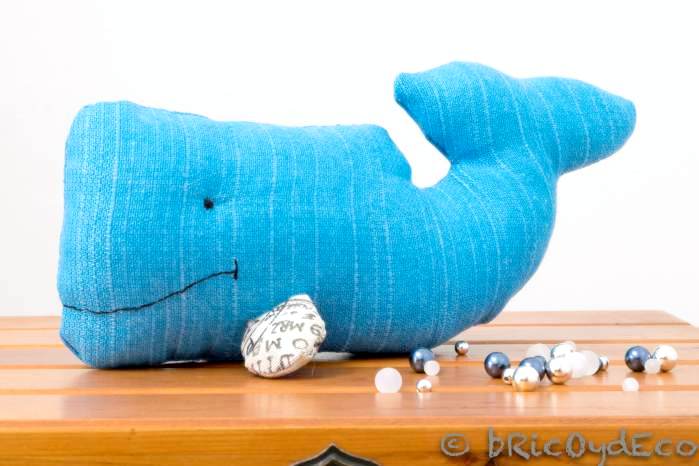
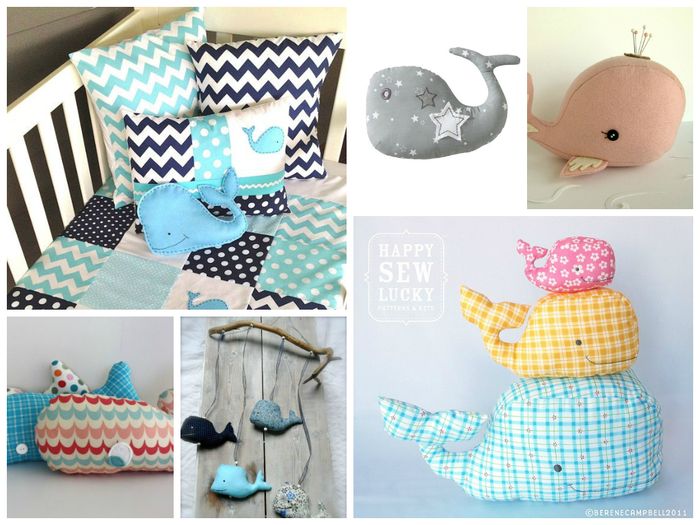
In addition, the pattern of this fabric whale can be adapted to make a crib mobile for babies, children’s bedding, cushions, a family of whales or pincushions and key rings for the older ones.
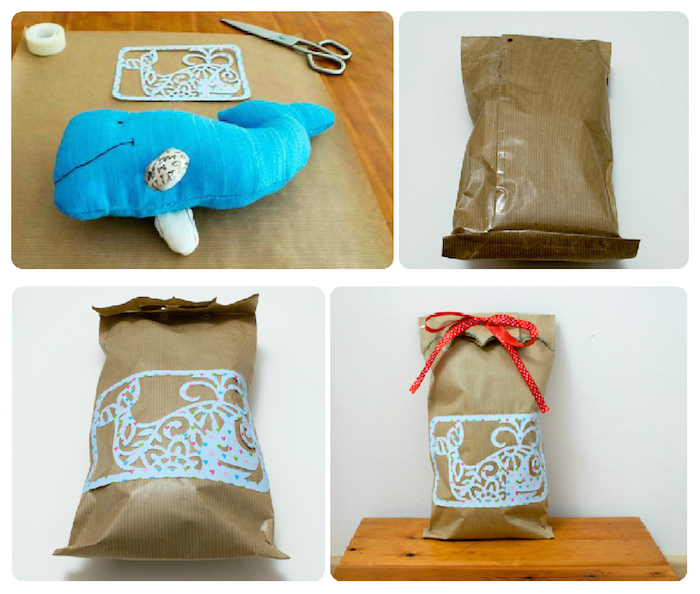
Now that we have our finished fabric whale, we are going to wrap it for a gift (You can see the essential materials for creative gift wrapping here). The materials I have used have been kraft paper, cardboard, tape, self-adhesive vinyl and ribbon to make a bow.
To wrap gifts that are not rigid like this whale, a good solution is to make a bag with kraft paper, to do this we will fold the paper and fix the side and base with tape.
Then I have glued a die-cut cardboard in the shape of a whale. I will include the pattern of this design and another simpler one to cut out by hand.
Finally I have folded the upper part, I have cut it forming waves, I have made two holes and I have passed a ribbon. It has not been perfect but I hope to improve with practice.
I hope you liked this idea and it serves as an inspiration when it comes to make your DIY gifts for Christmas or to participate in the solidarity campaign «Every child a toy».
If you liked this post, please share it on your social networks.


