If you are looking for a case for your tablet that is original but you do not like the price, look no further because this DIY retro camera tablet case that I made last weekend is so cheap and easy that you won’t even need a pattern.
The other day they called me on the phone to tell me that as a former client of a certain company they gave me a tablet. The truth is that the detail is to be appreciated because normally it is the new clients who take all the promotions and discounts.
Once I received the tablet, I searched the internet for covers and the ones I liked were either sold overseas or seemed expensive to me. So I said “well, nothing, I’ll do it myself”, said and done (well, not so fast but almost).
Materials
To make this DIY tablet case we will need the following materials:
– felt of various colors. I have used gray felt, light blue printed with polka dots on one side and a small white square.
– Thread, scissors and buttonswhich is something that practically all of us have at home.
– Adhesive Velcro.
Step by Step
This time I have not taken photos of the step by step because the cover has been one of those things in which the desire to see it finished is stronger than the patience to portray every moment. Even so, I hope that it is clear enough with the explanations and some drawings that I have prepared for you.
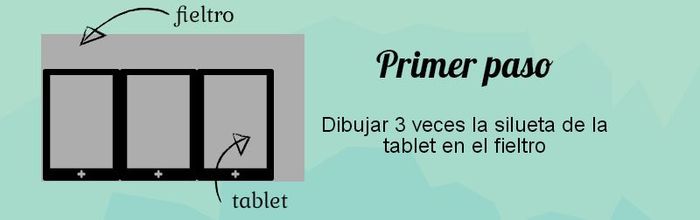
First of all we will place the tablet on top of a sheet of felt (in my case gray felt), we will place the tablet on top and with a pencil we will draw its silhouette three times one after the other horizontally, as you can see in the following drawing:
Then with the pencil we draw a rectangle that is one centimeter longer than the one we have drawn previously and we will cut it out. This way we make sure that the tablet will fit in the case.

The next step will be to place the tablet in the center and fold the right part of the rectangle on top of it, in this way we will obtain the size of the envelope in which the tablet will go. Next we will sew both the top and the bottom.

With these three steps we will have already made the frame of our DIY case for tablet, now we will have to decorate it and give it that retro or vintage camera style.
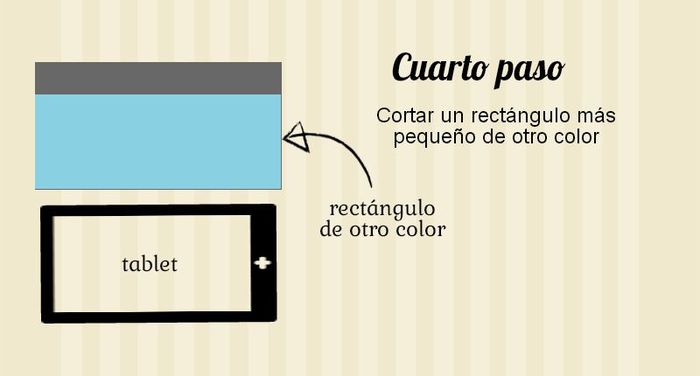
To do this, with a different color felt (in my case light blue), we will cut a rectangle of about 3 or 4 centimeters less than the top of the cover (to make it clear the top of the cover is the side that we have left without sewing ).
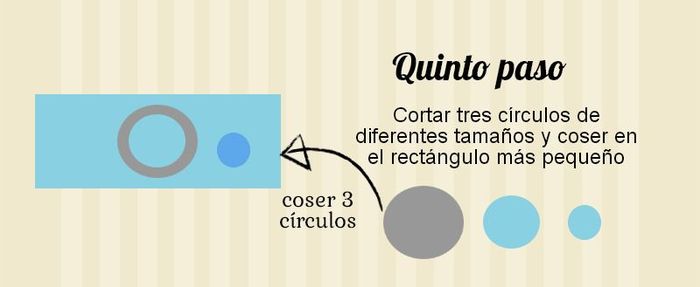
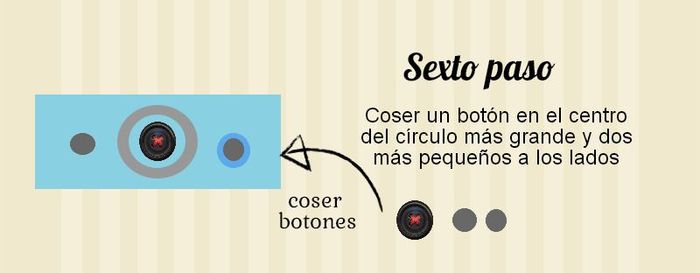
Next we will draw three circles of different sizes and colors and we will sew the largest one in the center of the rectangle, the medium one inside the large one and the small one on one side.
The next step will be to sew a button in the center of the two circles simulating the camera lens, and two smaller ones on each side as if they were the controls.
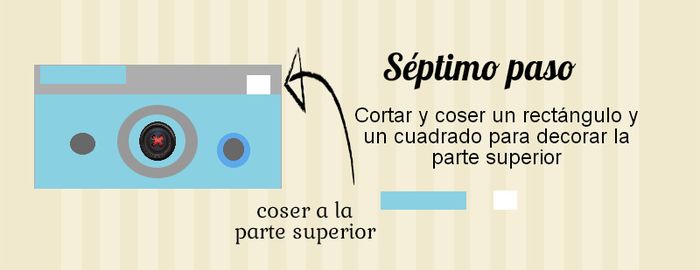
Once the lower part of the retro camera is decorated, we will add some details to decorate the upper part, for this we will cut a rectangle and a square that will simulate the flash.
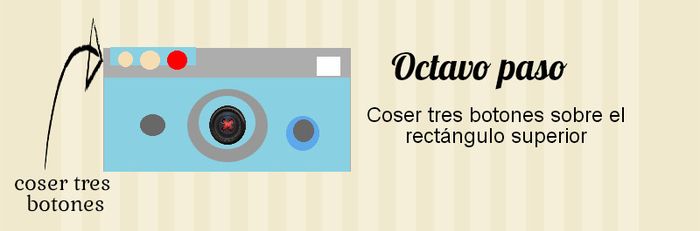
On the small rectangle we will sew three buttons.
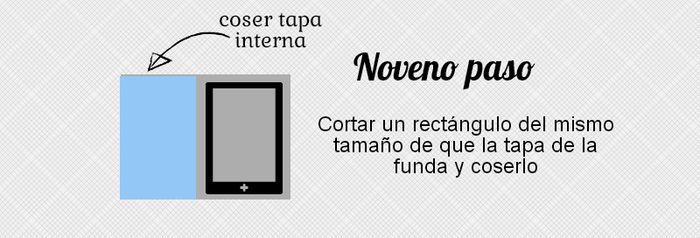
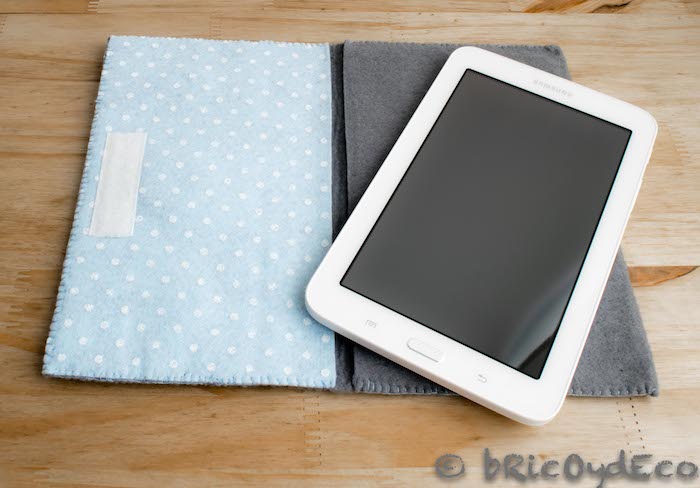
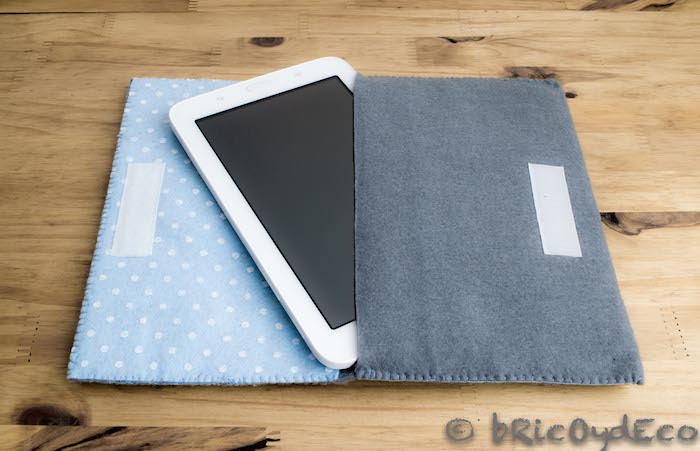
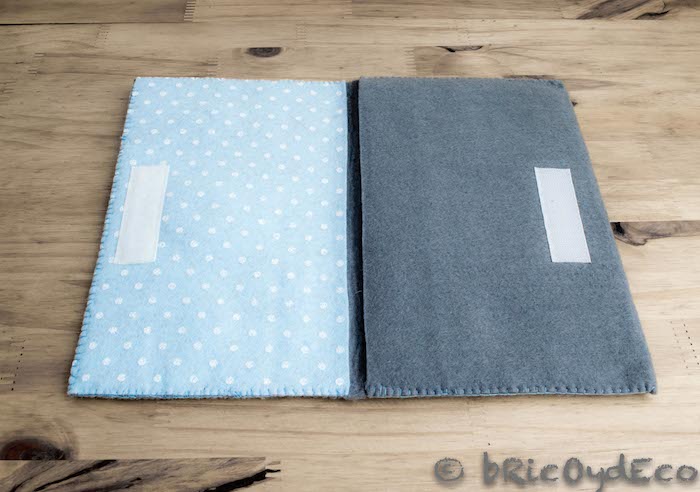
After all these steps, we only have to finish off the inside of the cover of the DIY tablet case by sewing a rectangle of contrasting felt (in my case the blue one). In this way we will make it more consistent and we will also cover the stitching that may have been visible.
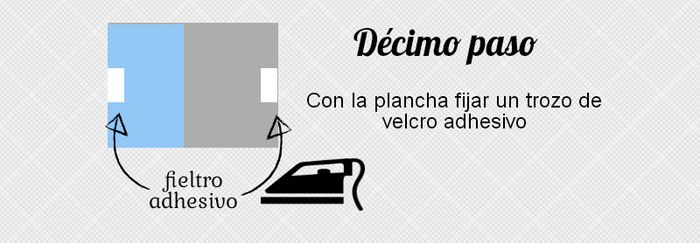
To finish, we will only have to place a piece of adhesive velcro on the internal cover and on the opposite side so that we can close the cover. To fix the adhesive velcro we will use the iron.
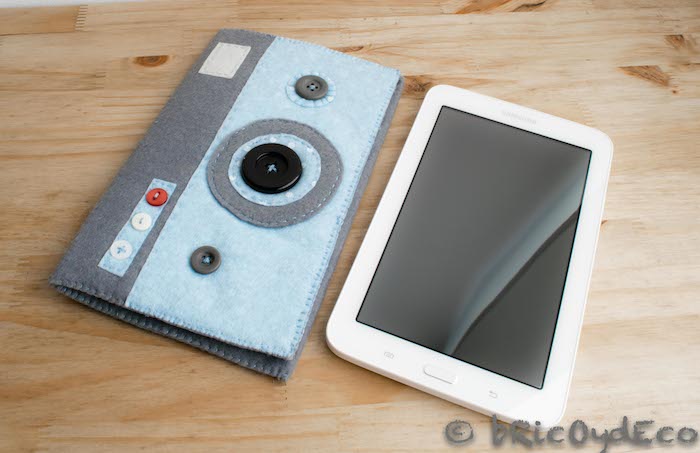
And in this simple way, in just a few hours and for very little money, you can have your own tablet case with a design made by yourself. Then I leave you photos of the finished cover so you don’t miss any details.
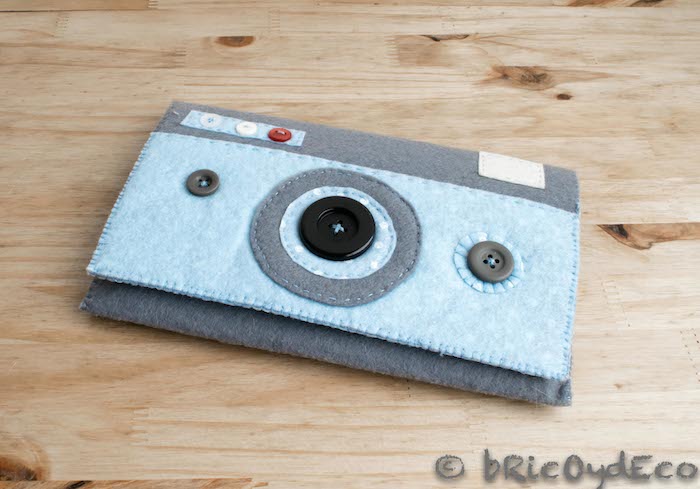
I hope you liked this DIY vintage camera style tablet case, As you have seen, it is not that difficult to make a personalized cover, but so that there is no doubt, I leave you with an infographic with all the steps so that you can see them at a glance.