

Finally Friday! The weekend is here and with it a new DIY proposal to give away this Christmas. If the previous ideas were a fabric whale, a felt poinsettia and a decorated magnetic whiteboard, for today I wanted to make some felt brooches in the shape of flowers.
This idea comes in handy to complement other gifts. For example, imagine that your sister/friend/mother/etc loves a scarf/hat/jacket that she saw one day when you were walking. You wrote it down on your mental gift list, but if you also want to personalize it and make it unique, why not add a DIY detail? If you add a combination of brooches to that garment that you have made yourself, it will have an added value that the person who receives it will surely appreciate.
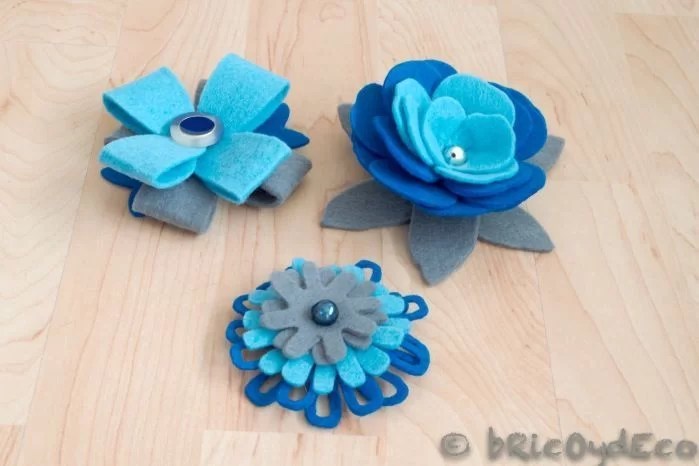
This trio of felt barrettes can be used separately or combined in different ways and to create beautiful compositions. Although they are different, the three share the same colors and theme (flowers), but they could also do using the same design but each one of a color.
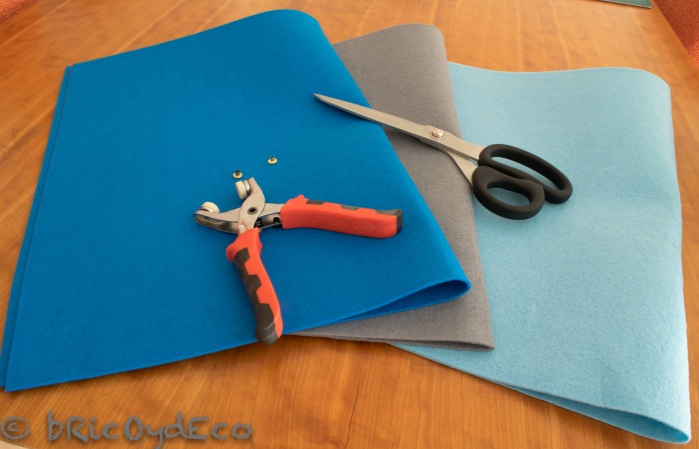
The materials that I have used to make these flower-shaped felt brooches are the following:
– Felt pied. I have chosen intense blue, light blue and gray as they go very well with the gray and dark tones of winter.
– Scissors.
– beads. Pearls, buttons and even jewelry beads that you no longer use.
– Safety pins or pins.
– Needle and thread.
– Optional: some pliers to apply rivets.
Both felt and beads can be purchased at craft stores as well as Chinese stores. I bought the pliers to apply rivets at Lidl, but as I have told you they are not essential to make the brooches.
Once we have gathered the materials, The steps to follow are those:
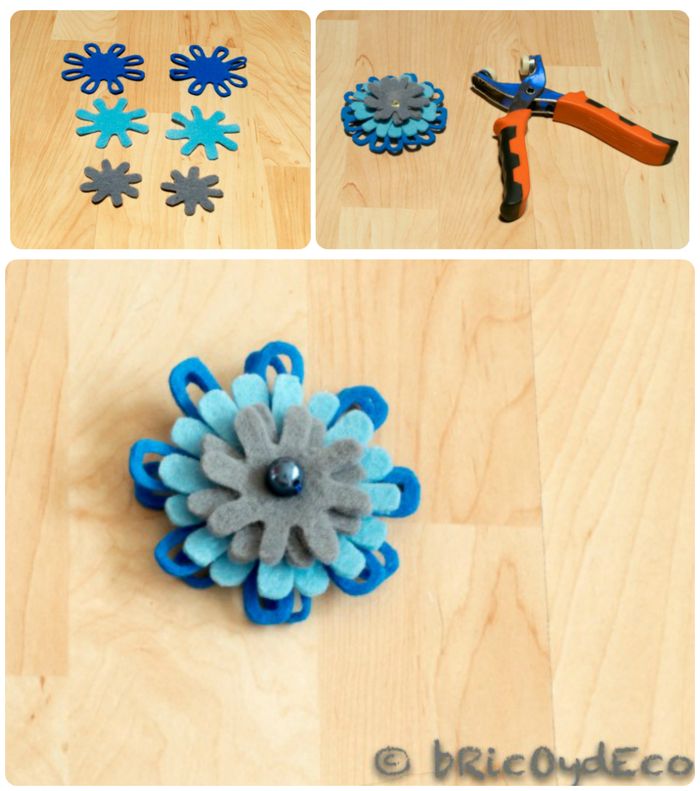
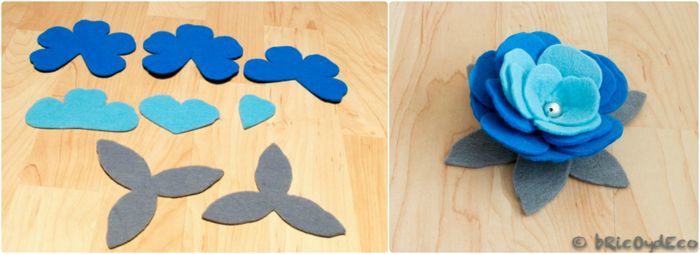
1º.- Trace and cut the pieces
The first thing we have to do is trace the templates or patterns of the flowers on the felt (you can see here my trick to trace on felt without leaving marks). I’ve uploaded the flower patterns to the subscriber area (if you’re not subscribed you can do it here, it’s free).
Next we will cut the pieces with scissors (small, rounded details are best cut with curved nail scissors).
2º.- Join the pieces
To join the pieces of the first flower I used pliers to apply rivets but it could have been sewn perfectly with a needle and thread, I used them because I had just bought them and wanted to wear them for the first time.
Once all the pieces were joined, I sewed a blue pearl on top to embellish the flower and hide the rivet.
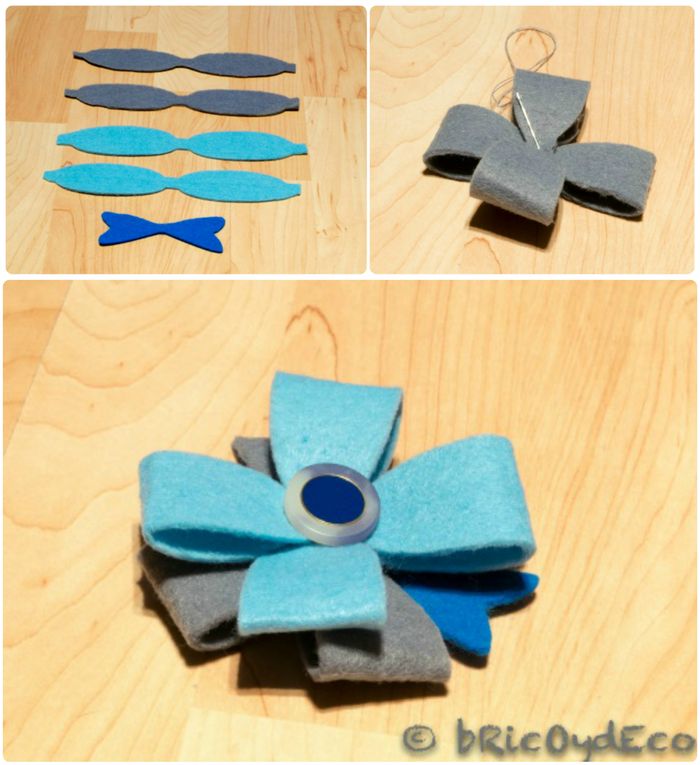
The second flower is shaped like a bow. so to join the pieces what I did was sew the ends of each elongated strip (the gray and light blue ones) and sew them through the center to the rest.
The piece of blue felt represents the leaves of the flower and is sewn in the center, below the other pieces. To finish off the top I sewed a button in shades of blue.
To mount the third flower, the first thing I did was sew the outer petals (the blue ones) and then the inner ones. Next I sewed a silver pearl on the top and the leaves (grey felt) on the bottom.
A few months ago I made some eva rubber roses for mother’s day, you can see the Step by Step here as it is similar to this felt rose.
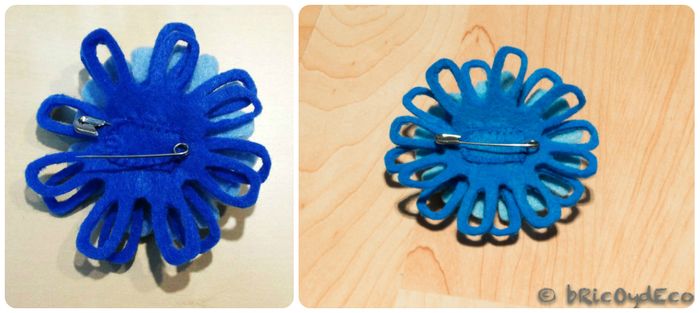
3º.- Place the safety pin
Once we have assembled the three flowers, we will place a safety pin or pin on the back. For this we will need a small piece of felt of the same color as the piece of felt in which the pin will go. We will sew it in such a way that half of the safety pin remains inside, so that when it is opened it is well secured and does not come out.
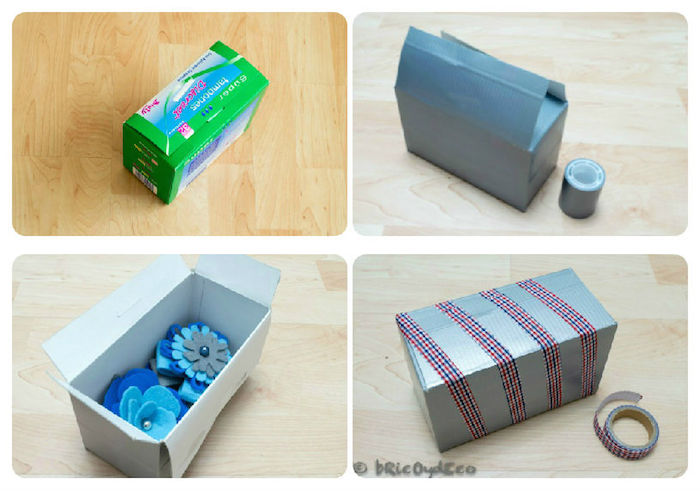
4º.- Gift wrapping
To wrap I took advantage of a cardboard container (I ran out of tampons and I thought that the box was ideal to store the brooches). So that the printed colors and drawings would not be seen, I covered the box with a kind of silver plaster/insulating tape that I had at home (you can also use self-adhesive vinyl for example).
I then placed around fabric tape or self-adhesive cloth tape and in no time I had the gift wrapped. Why, seen like this, nobody would say what the box was used for before?
In the following image I have given you some examples of how to combine this trio of brooches to give life to a coat, a wool hat, a scarf or a collar.
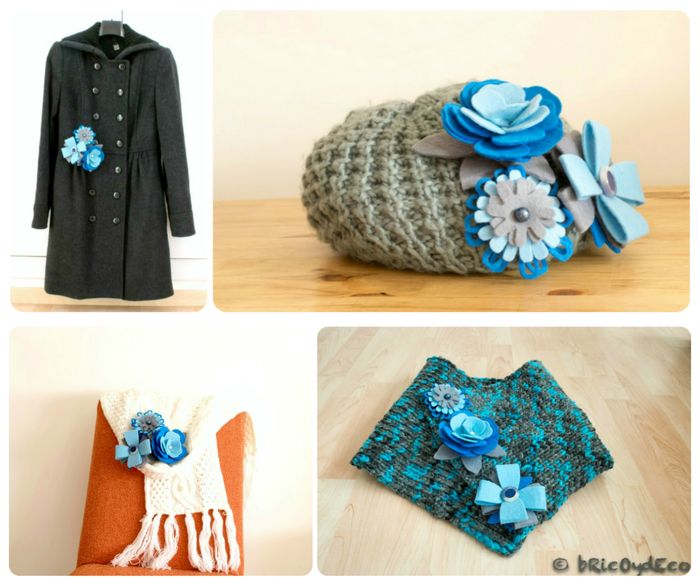
You see how with a few simple felt brooches a gift can be personalized and made unique. There may be many hats/scarves/coats like the one you bought but… how many with that brooch or combination of brooches?
I hope you liked this new DIY gift idea for Christmas, if so, I would appreciate it if you shared it on your social networks.


