

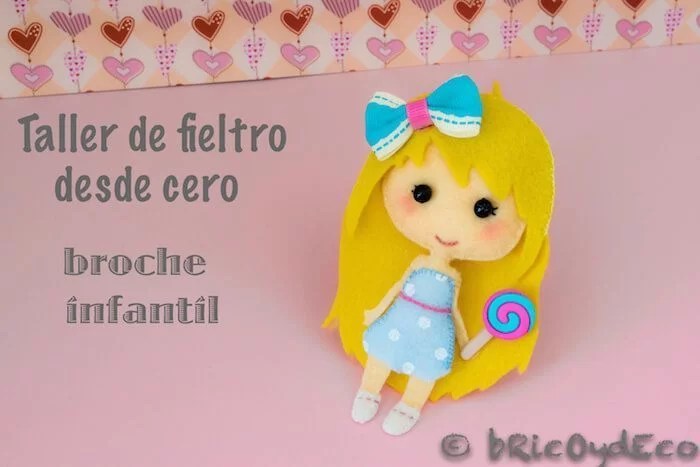
We continue with the practical exercises of the Felt workshop from scratch. In this second exercise we will see how to make a brooch for girls, but we will also practice the technique to make a dimple and create the effect of “sunken eyes” in our figures with filling.
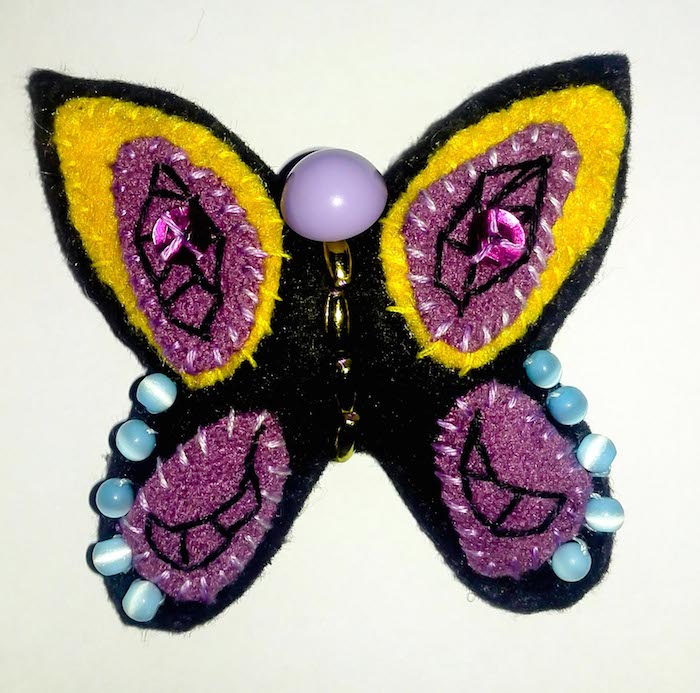
Last week I proposed to you to make a butterfly (you can see the challenge in this link) and some of you have sent me your works. For example, Yeraldine from Medellín sends me this colorful butterfly with a very successful combination of tones.
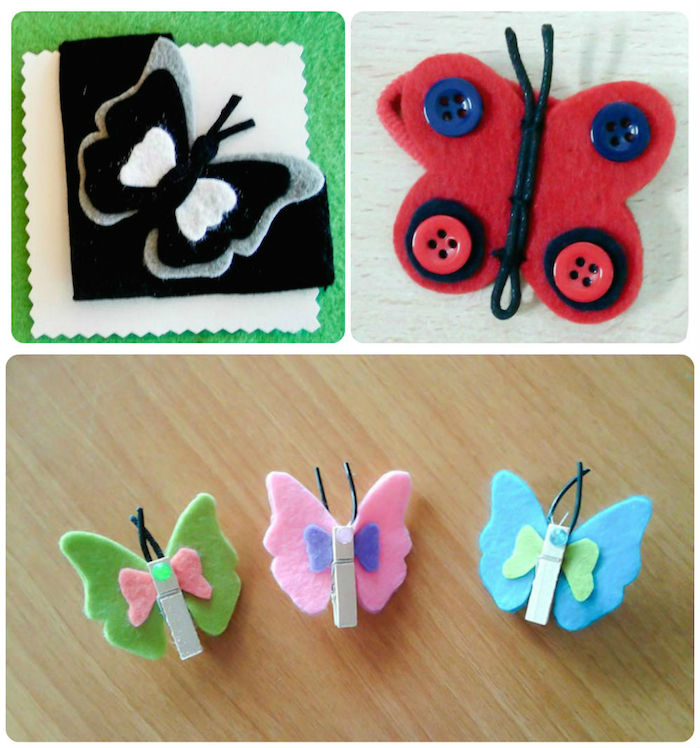
Mayte sends me several very interesting proposals to do with butterflies. In them we can see that with simple combinations of colors and different sizes very good results are obtained.
You can send photos of your practical exercises to the contact email address[arroba] indicating in the subject “FELT CHALLENGE”. In each new chapter of the Workshop I will be publishing the works that I have received until then.
For this new practical exercise I have thought of proposing that you do a child brooch. This type of brooches can be a good personalized gift idea on these dates when many girls celebrate their First Communion, it can not only be used as a brooch but can also be adapted to other uses (key ring, pendant, to personalize your backpack, etc).
As I told you last week, the challenge or exercise is not that we all make exactly the same figure. For example, this doll can be customized to look like the girl we want to give it to, or instead of a doll we can make her a princess or her favorite fairy tale character. The most important thing about this exercise is that we are going to practice the technique to make a dimple and create the effect of «sunken eyes», in this way we recreate the eye socket and avoid the opposite effect of bulging eyes. In the following image you can see an example:
Image: Buncha Monkeys
To make the children’s brooch that I propose in this practical exercise I have needed the following materials:
– 1 millimeter thick skin-colored felt for the body.
– 1 millimeter thick pastel blue felt printed with white polka dots for the dress.
– 1 millimeter thick yellow felt for hair.
– 2 beads for the eyes.
– Sewing thread.
– Beads: hair bow and lollipop-shaped button.
– Textile glue.
The Steps that I have followed have been the following:
1º.- I have cut all the pieces of the pattern only once except for the head and body that I have cut twice. I have done it this way because I am going to fill only the head and the body.
2º.- Next I have marked the factions with a pencil of the face (eyes and mouth) to serve as a guide. With fuchsia thread I have made the shape of the mouth and with black thread a pair of eyelashes on the sides of the eyes.
Advice: When we are going to make a figure with stuffing, we must sew the features with thread before stuffing and sewing the front and back pieces.
3º.- Then I have sewn the two parts of the body leaving a space of a couple of centimeters to insert the cotton filling (you can also use wadding or pillow foam).
To sew both pieces of the body I have used a blanket stitch, except in the visible area of the face (the one that is above the hair), in which I have made a backstitch with small stitches so that they can be distinguished as little as possible.
4º.- The next step has consisted of sew the dress to the body and the shoes to the feet. For this I have used festoon stitch because it was more decorative.
On the other hand, I have given both the dress and the shoes some fuchsia stitches to decorate them and create contrast.
5º.- At this moment in which we have the figure almost finished in the absence of placing the hair and some accessory, it is when we must shape the eyes.
To do this, firstly, what we will do is stick the needle in the back of the head and remove it from the front, at the height where we have marked the eye. The thread must be placed double so that it is strong enough.
In the following image you will see that I have used black thread but basically I have done it so that it would be distinguished in the photos, it could have been done with thread of the same color as that of the head.
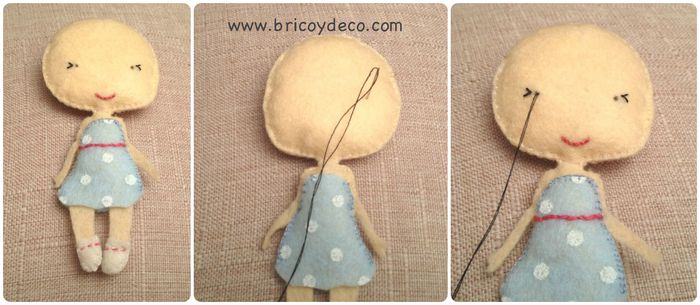
Next, the needle is inserted in the front part to remove it from the back of the head, pulling the thread to tighten it and create that sunken or dimpled effect. We will stick the needle back and forth two or three more times to make the dimple even more pronounced. With the other eye we will do the same.
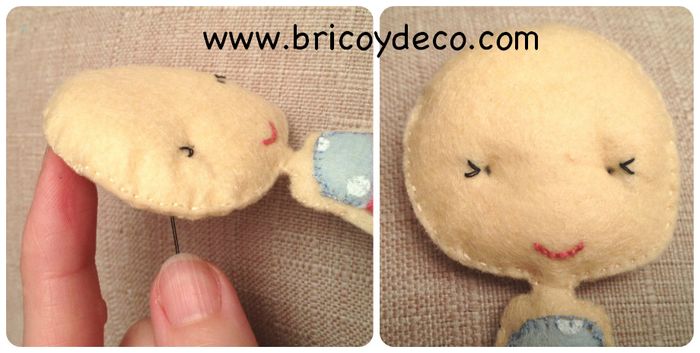
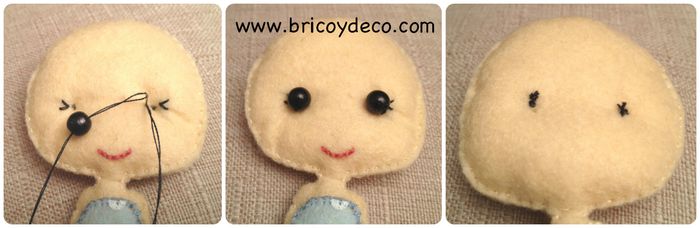
The last step will be to pass the thread through the black bead and place it on the sunken part of the eye. This way it will stay above the eye socket and not flush with the felt.
Trick: If you don’t have black beads, you can use a bead of any other color and paint it with a black permanent marker. In fact, the beads that I used were two white pearls.
In the following image you can see how the eyes have been both from the front and from the back. As I have mentioned before, I have used black thread so that it can be better distinguished in the photos, but you can create the dimple effect with thread of the same color as the felt and, later, use a thread of the same color as the bead so that from the rear it is not so noticeable.
6º.- Once we have placed the eyes we will only have sew the two parts of the hair and fix it to the head, for this I have used textile glue since in this way the hair is more natural as no stitches can be seen.
In the following image you can see how the hair completely covers the thread and the knots at the back of the head.

7º.- To finish the brooch, fix the hair bow and the lollipop button with textile glue, paint the cheeks with blush and sew the pin to the back.
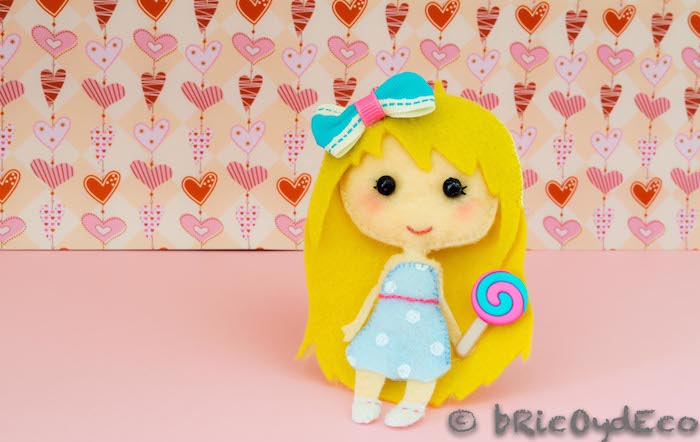
Below you can see the final result:
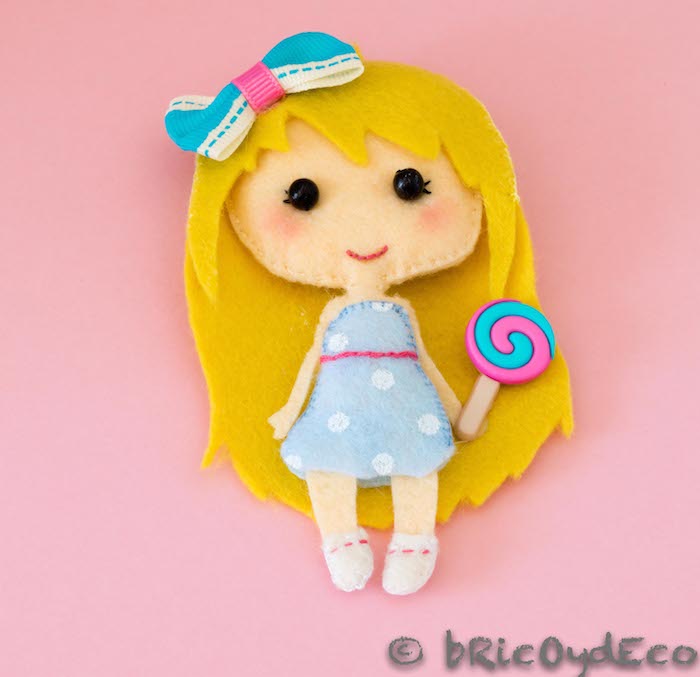
As I always tell you, the difference between a “standard” product and a handmade and personalized one always lies in the small details that make it different and special.
What do you think of this practical exercise? Felt workshop from scratch? Are you going to dare to do it? The important thing is that you practice sunken eyes effectfor this it is not necessary that you make a doll, but you can also try other types of stuffed figures such as animals, robots, superheroes, etc.
If you liked this post, you have many more works with felt at .


