

In the previous chapter of Felt workshop from scratch I showed you how to do embroidery and how to put a face on our felt figures and dolls. To finish this section on felt decoration, today I will show you how our work can be decorated and complemented, as well as the different materials that we can use. If you have missed any of the previous chapters of the Felt workshop from scratch or you simply want to review what we have done so far, you can directly access all of them from this link.
I always tell you that they are the small details those that can turn a simple brooch or felt figure into something sophisticated and elegant. On many occasions it is not even necessary to have great knowledge of sewing, with a little creativity and patience you can do wonders.
There is currently a great variety of materials with which you can decorate the felt and complement our workI am going to tell you in this post what I usually use and how I use them.
Decorate the felt with buttons
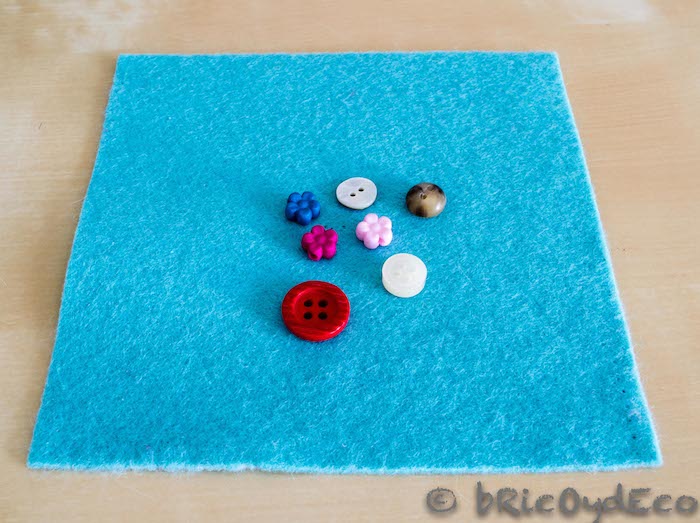
We already saw in the previous chapter of the Felt from scratch workshop that with small buttons we can make the eyes of our felt figures and dolls (in this link you have some examples), but they can also be used to decorate our work.
Advice: before getting rid of a piece of clothing, remove the buttons and put them away, no matter how simple they may seem, they can be very useful for your felt work.
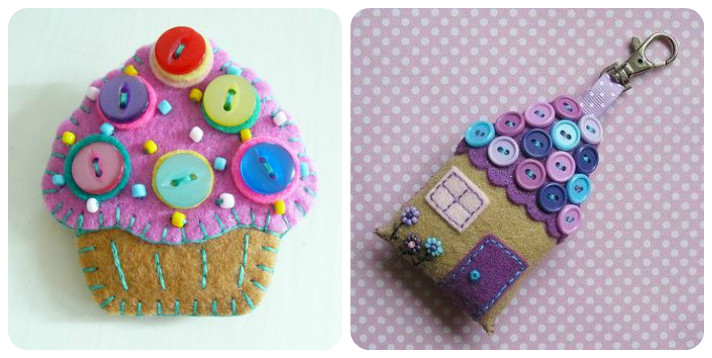
In the following image you can see how different buttons have been combined to decorate a cupcake and a felt keychain:
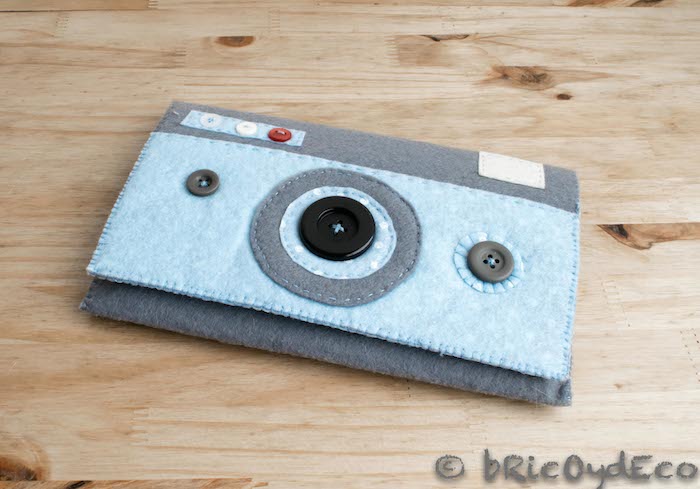
Similarly, when I did my tablet cover I also used buttons to decorate it (you have the step by step in this link).
Embellish the felt with beads
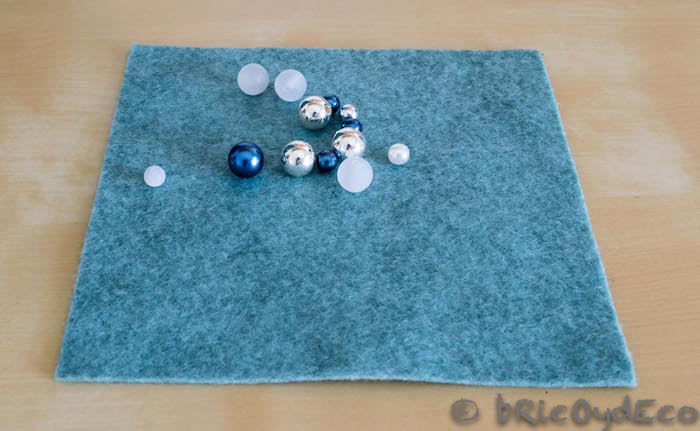
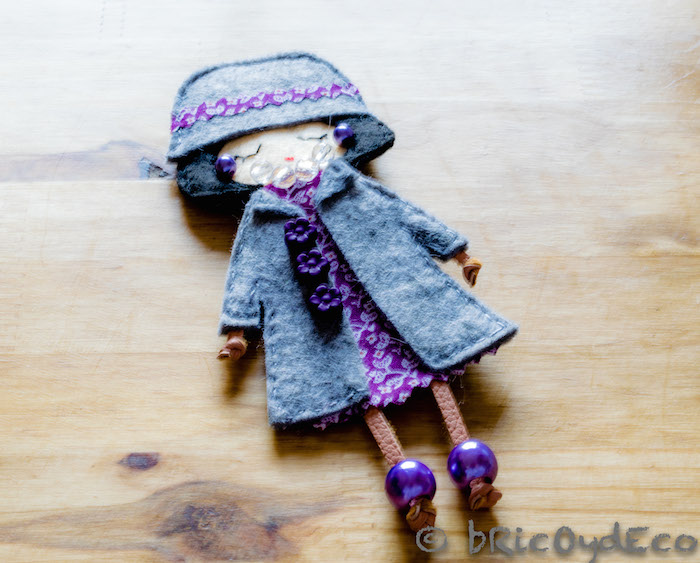
sewing pearls and beads We will be able to give our felt work a more luxurious finish. In the following images you can see how a hat and a felt bracelet have been decorated with beads, enhancing the final result of the work.
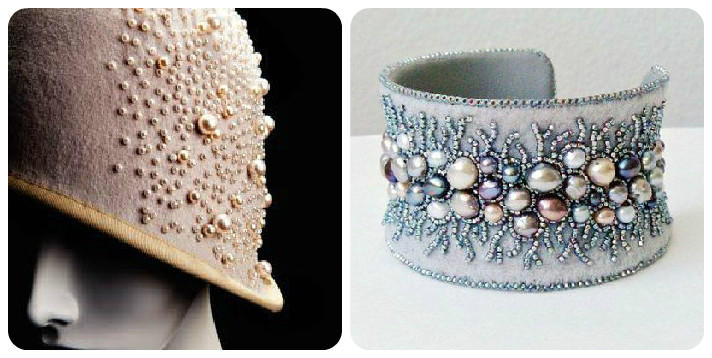
Advice: For a good finish, it is preferable to sew the beads with transparent thread or, failing that, use a thread color as close as possible to felt.
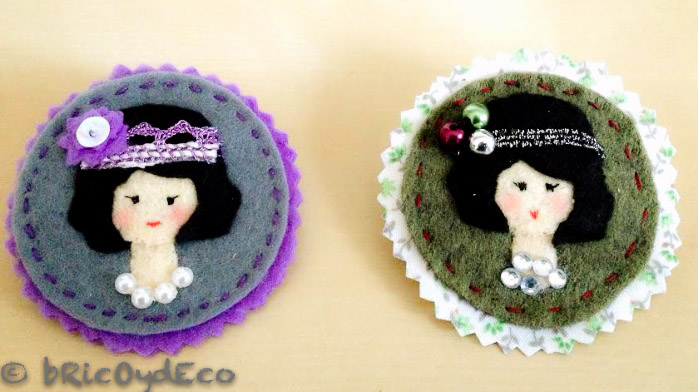
I have particularly used beads in some of my works as accessories for my dolls: earrings, necklaces, hair ornaments…
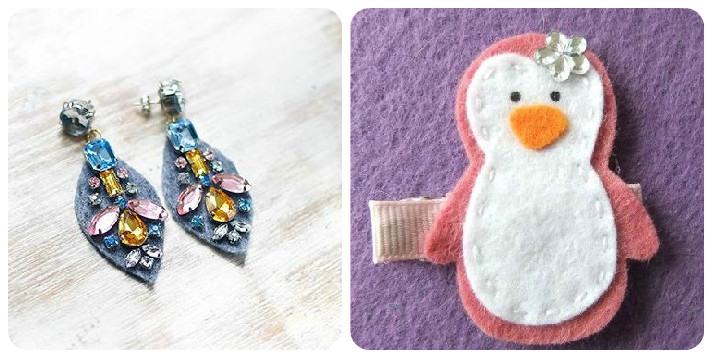
Decorate the felt with rhinestones
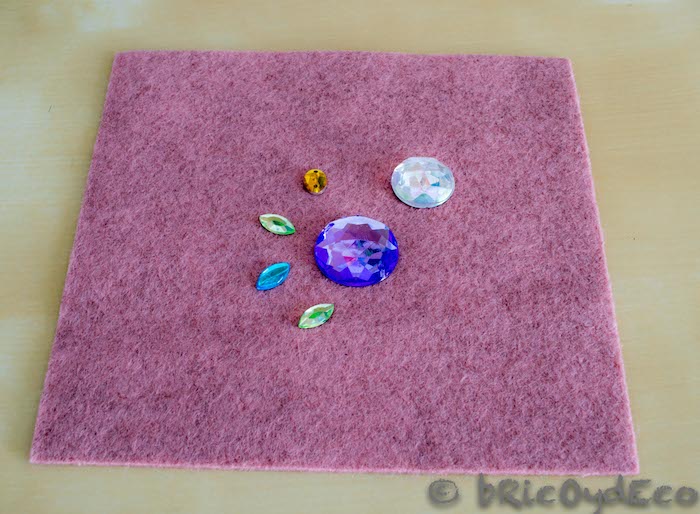
The rhinestones It is another of the materials that will visually enrich the appearance of our felt work. They are usually used in making jewelry (brooches, earrings or necklaces), but also to decorate figures and dolls with them.
We will usually meet three types of rhinestones: those that can be sewn, those that have hot melt glue and those that do not have any adhesive. The latter can be attached to the felt with textile glue or with a hot glue gun. The stones that have hot melt glue incorporated need a tool that melts the glue, if you do not have this tool do not worry because they can also be fixed with textile glue.
Advice: To handle small rhinestones, you should use tweezers, this makes it much easier to apply the glue and place the stone on the felt.
Decorate the felt with sequins
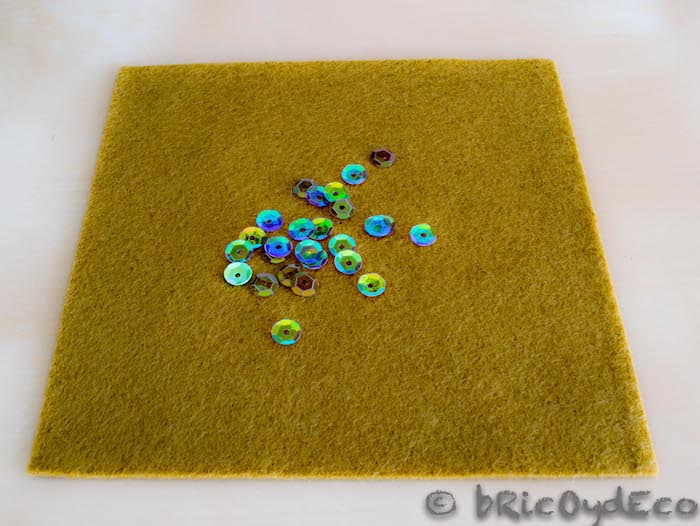
the sequins It is a resource that used in its proper measure can bring a lot of showiness and even an original touch to our felt work.
In the following image you can see how a simple white felt mitten has been added with some sequins. They have also been used to simulate the scales of this little fish, giving it a very original touch.
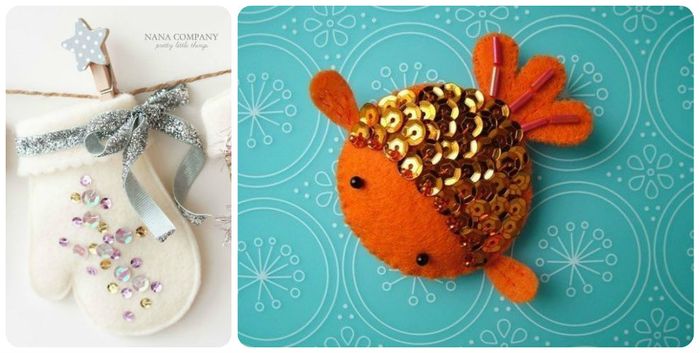
Advice: To sew the sequins it is preferable to use transparent thread, thread similar to the color of the sequin, or camouflage the thread with a small bead.
Decorate the felt with fabrics
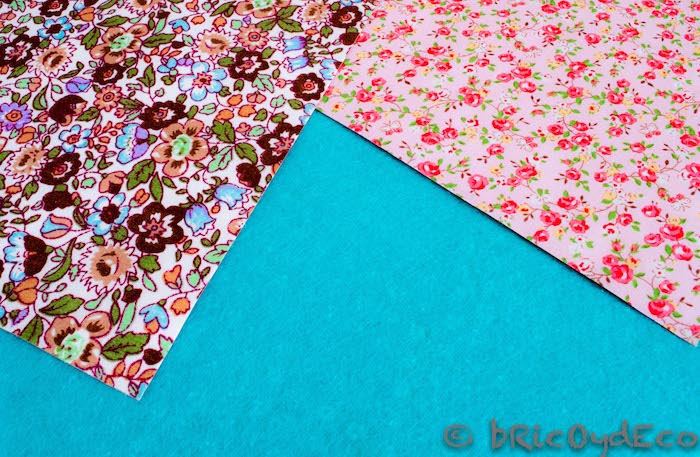
the fabrics Not only will they serve us to decorate the felt, but with them we will be able to make complements and accessories such as clothes, belts, etc. It is not necessary to buy fabrics since we can take advantage of remnants, leftover hems or clothes that we are going to discard.
Fabric and felt overlays are very attractive if we know how to combine the different patterns and colors.

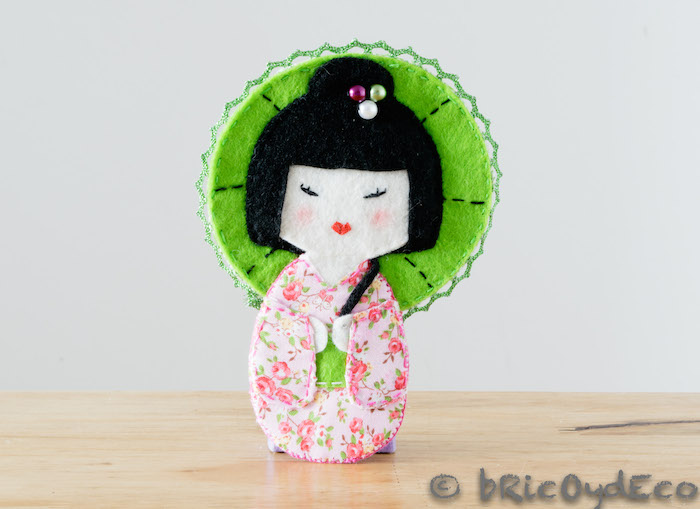
The fabric can be attached to the felt by sewing or with textile glue. If, for example, what we are going to do is the dress of a stuffed doll, the most normal thing is that the fabric is sewn independently to give it more movement and volume, but if it is a doll without stuffing, it can be glued to the felt. In the following image you can see one of the kokeshi dolls I made and in which the kimono fabric is glued to the felt:
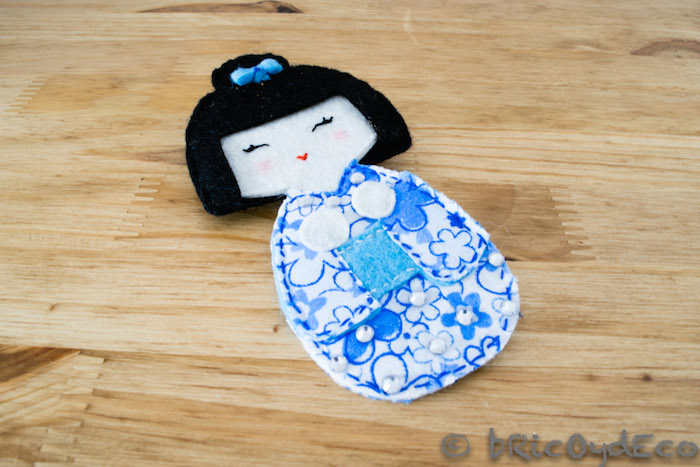
Advice: To prevent the fabric from fraying, apply a little white glue or craft glue to the back of the edges once you have cut it.
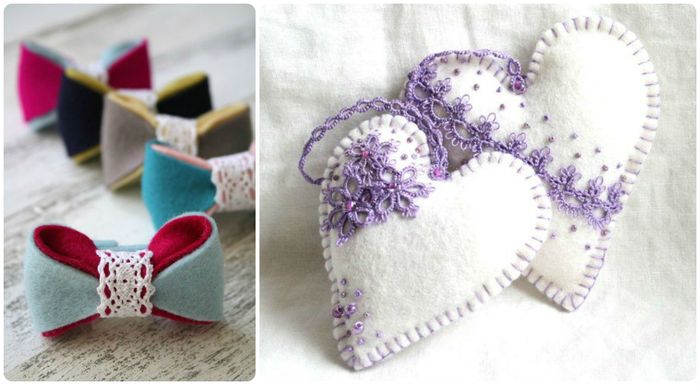
Decorate the felt with lace, lace or trimmings
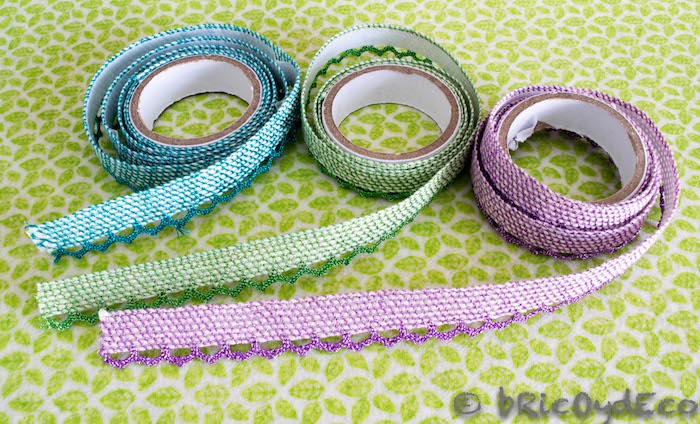
The lace, lace or trimmings They will give a delicate and romantic look to our felt figures. In the following examples you can see that both the bow and the heart would have much less charm without the lace that adorns them.
I used a lace to decorate the edge of the parasol of one of my kokeshi dolls, if it had not been for this detail the parasol would not have been very funny.
Decorate with ribbons, cord or mouse tail
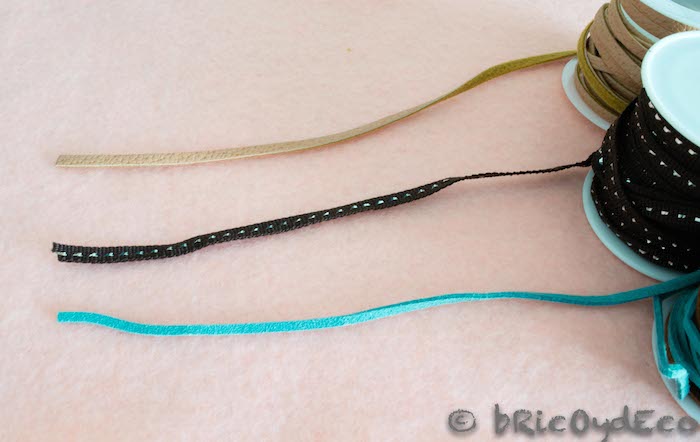
Ribbons, laces and mouse tail They can not only be used to decorate the felt, but they also have their functional part, as is the case with door hangers. They can also replace some parts of the felt figures such as arms and legs as you can see in the following image.
paint the felt
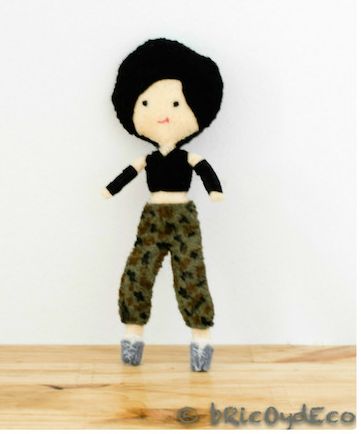
felt can be painted with textile paint, markers, colored pencils or even makeup powder. For example, an embroidery can be painted if we are better at drawing than sewing, or we can also add depth by darkening some areas. In the following image you can see how I painted with a camouflage print on green felt.
Advice: Before embarking on the adventure of painting the felt, do a little test on a non-visible part (the inner face for example) to check how it will look.
The list of materials with which we can decorate the felt could be even longer (glitter, chains, charms, stamps…), but I think that with what I have mentioned in this chapter we have more than enough to enrich our crafts. felt and give them a personal and unique touch. Remember that often less is more.so try to decorate with taste and without overloading.
With this chapter of Felt workshop from scratch The most theoretical part of the course is over, from now on we are going to put everything learned into practice. When I Say “we go» is because I would like you to participate in the weekly challenges and exercises that I am going to propose. I would be delighted to receive your figures to publish them on the blog and on social networks. Always keep in mind if you are starting to work with felt now that the most important thing is not the final result but that you dare to try it, skill comes with practice so… to practice it has been said!
If you don’t want to miss any exercise or challenge, sign up at this link to receive the weekly newsletter with the summary of the published entries.
If you liked this post, I would appreciate it if you shared it on your social networks.


