

With this third installment of the Felt workshop from scratch we will see how they can be done unfilled and 3D flower patterns. In the case of flat or 2D flowers, the technique is very similar to that of figures without filling, although to make 3D flowers it will be better to guide us with patterns. If you missed the previous chapters you can see them here and here, if you don’t want to miss any more you can subscribe here.
How can I make a pattern out of a flower without a fill?
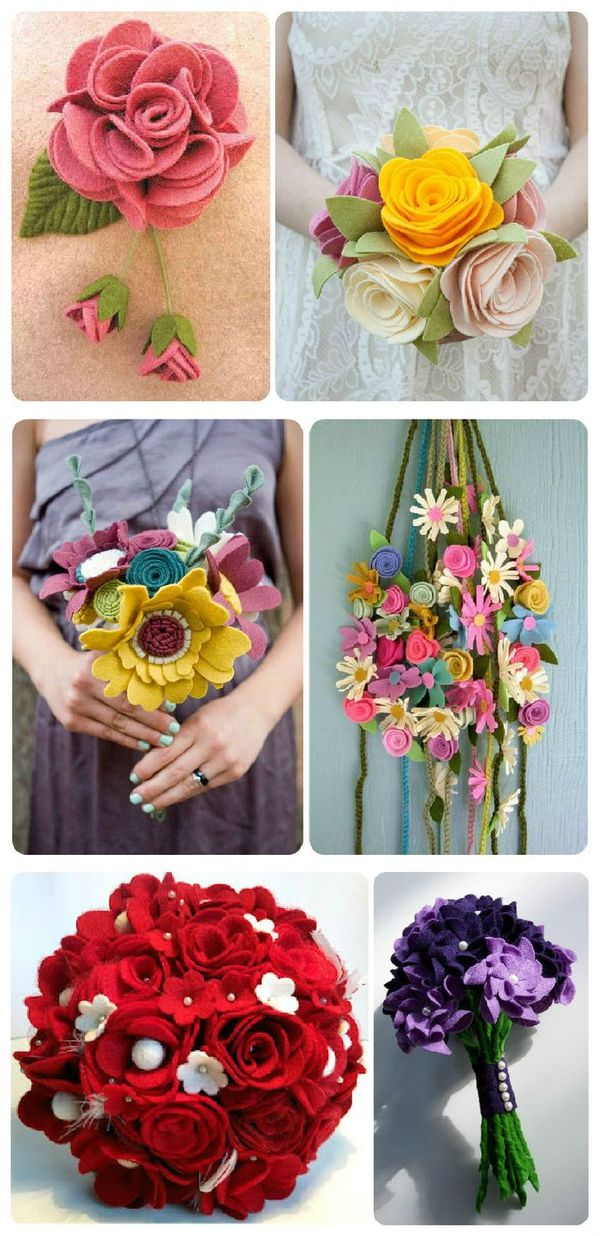
When I talk about a flat flower, 2D or without filling, I mean the flowers that you can see in the following image:
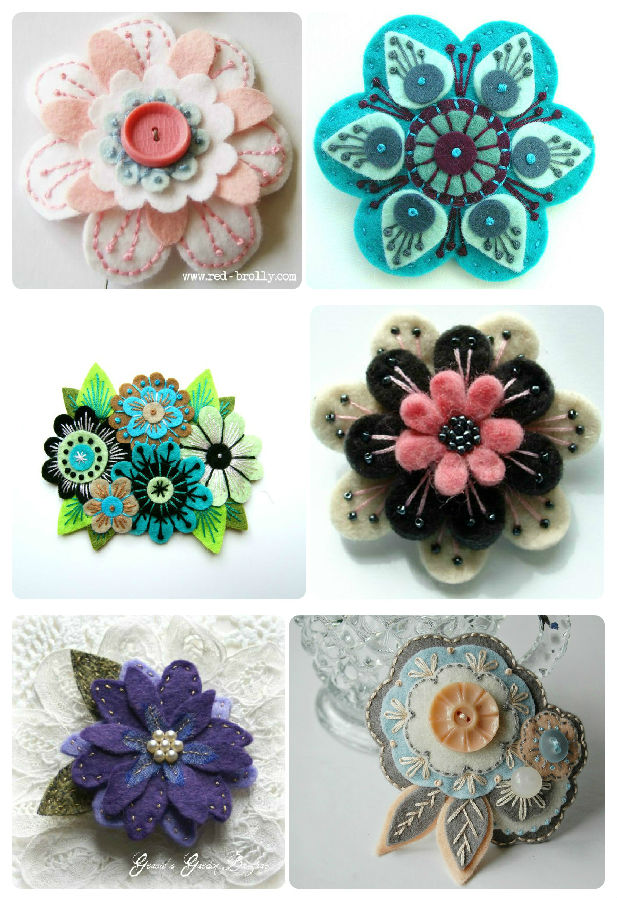
If you realize these flowers are very worked at the level of embroidery and details (buttons, pearls, beads, etc), but the base pattern to be cut on the felt is very simple as it is made up of petals, circles and flower shapes.
To make a composition similar to the previous ones you have two options. The first option It consists of following a basic flower pattern and making a similar design or one adapted to our tastes. Personally, this is the option that I like the most because if we want to create something unique and personal, the best thing is to be inspired and not do it exactly the same.
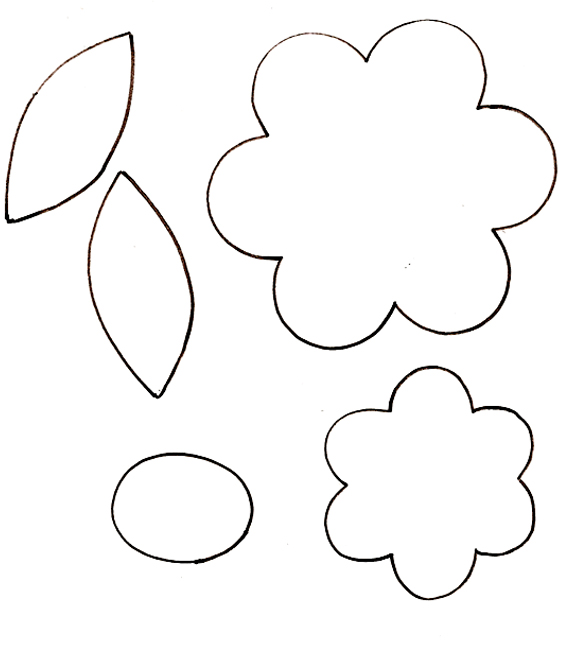
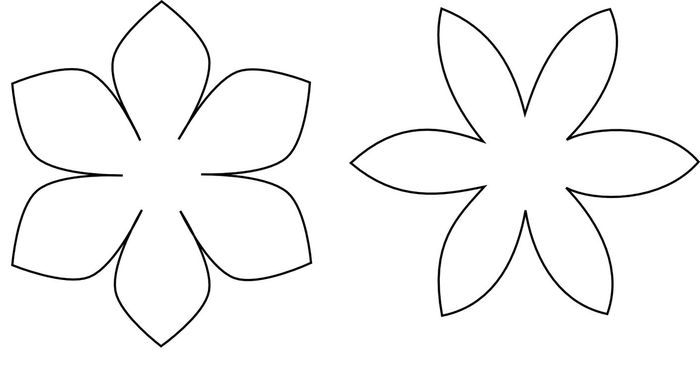
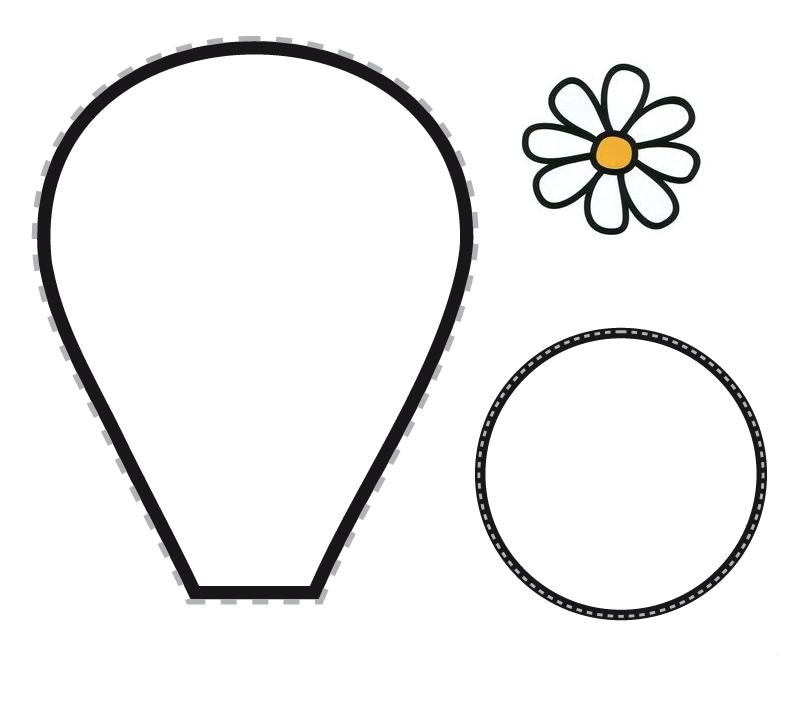
Then I leave you basic patterns to make 2D flowers with which you can make a multitude of compositions by changing their size and combining them with each other.
The second option It will consist of following the same steps that we gave in the previous chapter to draw patterns from flat images. That is, copy the image several times to cut each part separately and then cut it out on the felt, or trace the parts directly from the computer screen.
How can I make flowers in three dimensions or 3D?
When I talk about flowers in three dimensions or 3D, I am referring to the flowers that are usually made for bouquets, pins or topiaries.
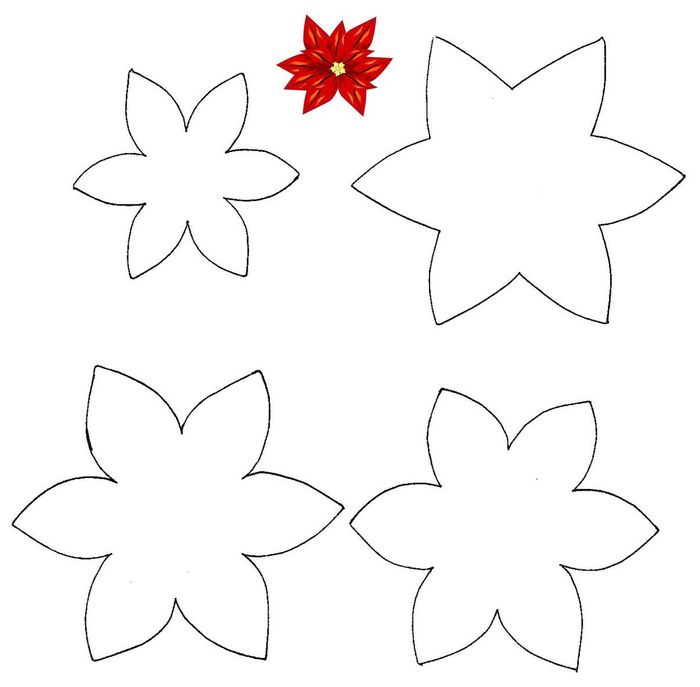
An example of a 3D flower is the poinsettia that I made last Christmas (you can see the step by step in this link):

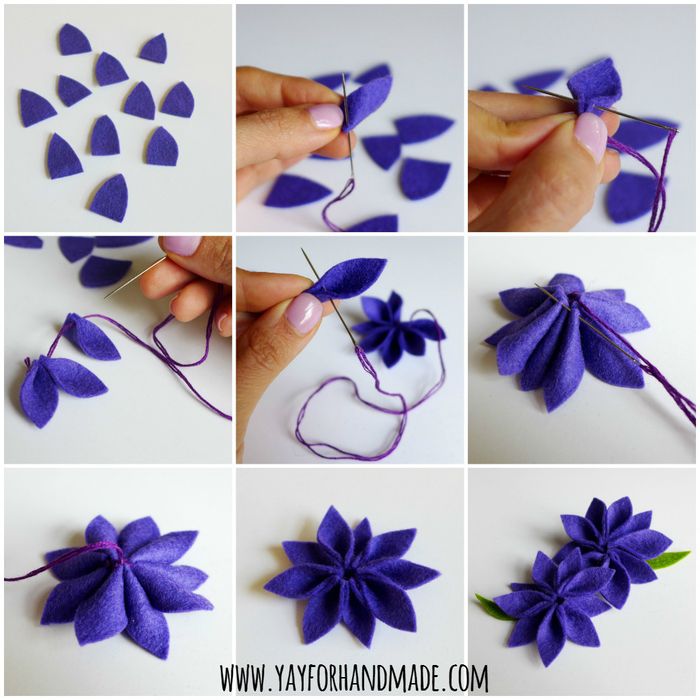
In the following image you have more examples of felt flowers in three dimensions:
Getting the pattern of a embossed flower from an image is not easy, so my advice is to search for the flower pattern on Google. It doesn’t matter if the pattern is for a paper or fabric flower, we can adapt it to felt as well.
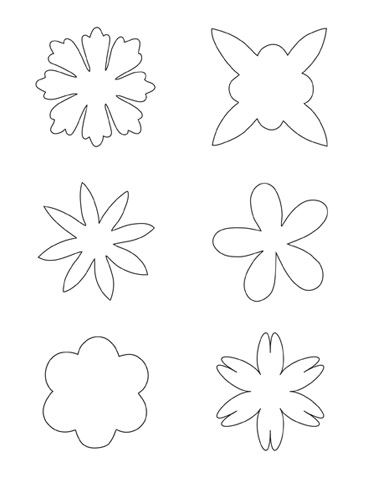
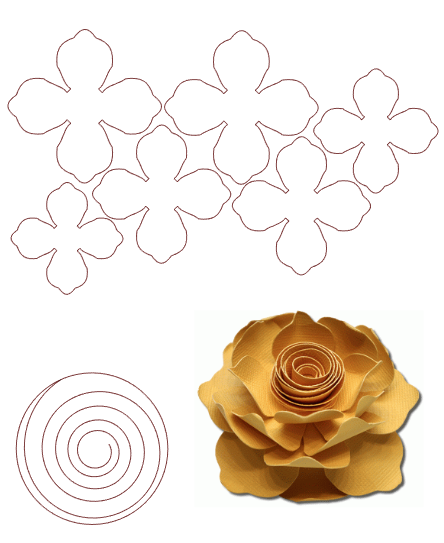
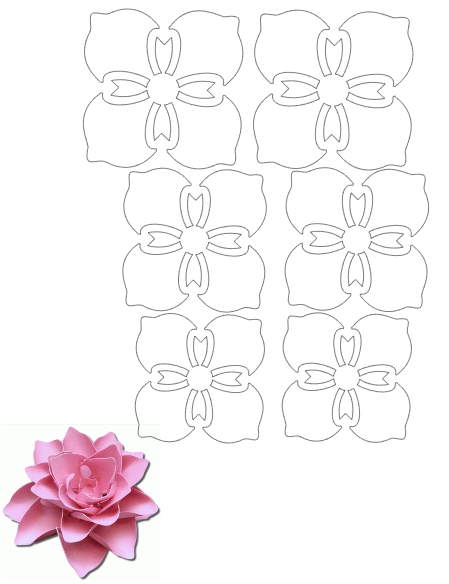
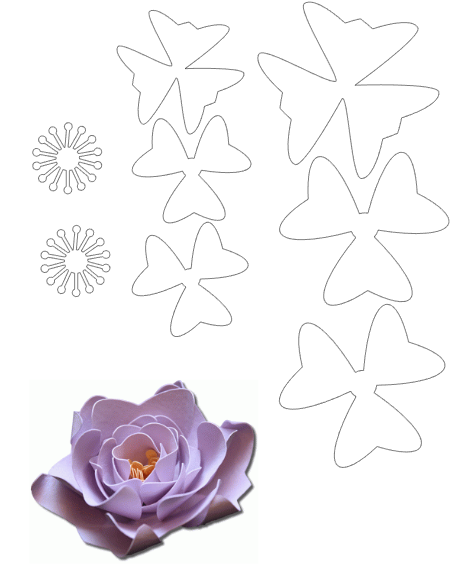
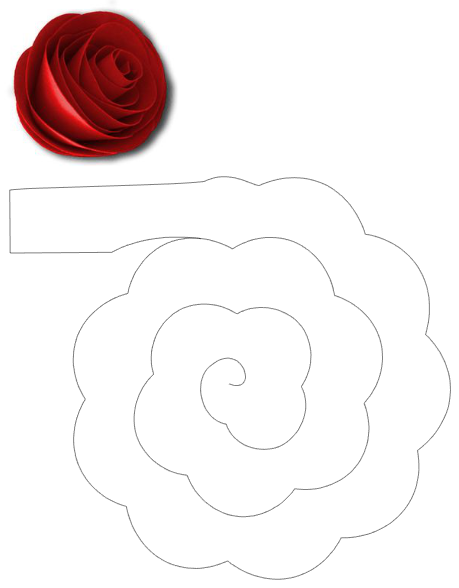
Here is a series of 3d flower patterns that will allow you to make a multitude of compositions combining different colors of felt and types of flower.
pattern 1 flower
pattern 2 flower
pattern 3 flower
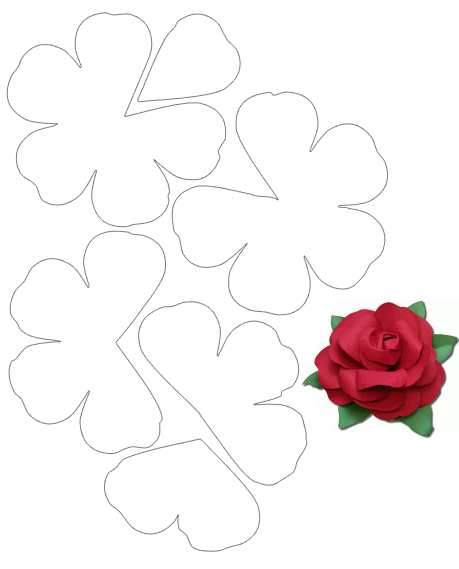
Pattern 4 pink (version 1)
Pattern 5 pink (version 2)
Pattern 6 poinsettia
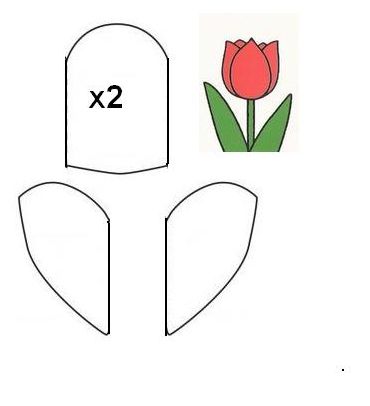
pattern 7 tulip
pattern 8 daisy
In the case of 3D felt flowers, I advise you to experiment, since from from a basic shape such as a circle, a square or a triangle we can create beautiful petals. In the following step by step you can see how by rolling a strip to which several cuts have been made, we can make a 3D felt flower in a few minutes.
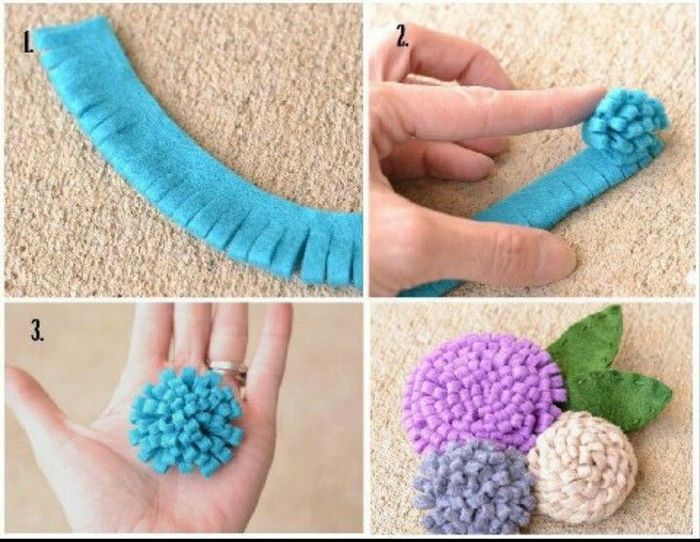
In this image you can also see another technique to gather and join all the petals and compose the flower and that is the one I used when I made the felt poinsettia.
When choosing the type of felt, remember that to make flat flowers you can use felt 1 to 2 millimeters thick, but for 3D flowers it should not be more than 1.5 millimeters thickespecially when the flowers are small since otherwise it will not be possible to work properly and the small details will not be appreciated.
Also it is important that the felt we use is not very rigid. In the case of flowers without filling, a felt with a little more body can be used, but for 3D flowers the final result will be much better the softer the felt.
I hope you found today’s episode interesting. Felt workshop from scratch on how to make patterns for flat and 3D flowers. In the next chapter we will see how to make patterns of figures with filling and we will finish with the theme of pattern making to start with the basic stitches, how to place beads on felt, how to decorate it, etc. Do not miss any part because all of them are equally important to achieve a good final result.
If you liked this post, I would appreciate it if you shared it on your social networks 🙂


