

We keep moving forward with Felt workshop from scratch, this time with the last post that I will dedicate to pattern making and in which I will show you how to make filled figure patterns. I hope that this chapter will be as interesting and educational as the previous ones (if you have missed any chapter you can see them all at this link).
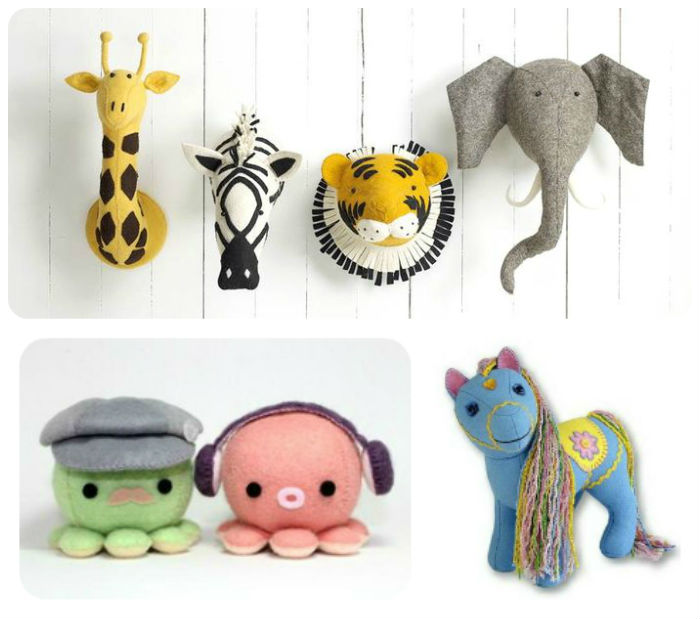
when i talk about figures with filling I am basically referring to dolls, brooches and animals like the ones you can see in the following images:

If you look carefully at the examples you will realize that not all filled figures are made in the same way, but we can establish different categories according to their difficulty.
Simple filled figures
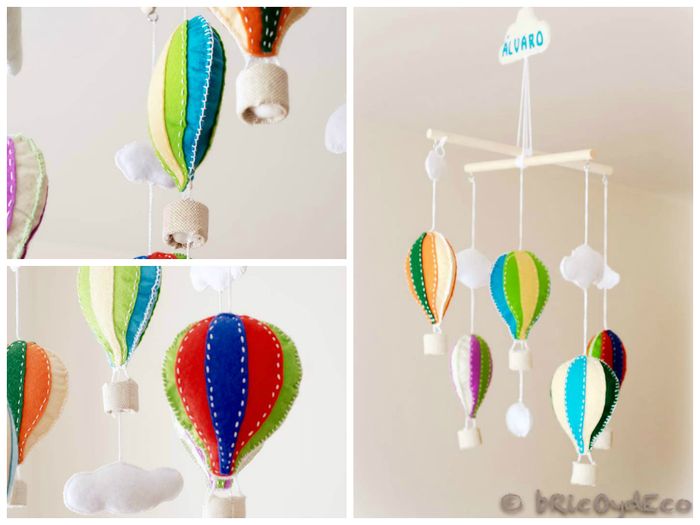
The easier stuffed figures to do are those that have a front part and a back part that are joined by the edges. An example is this crib mobile with hot air balloons that I made a few months ago (you can see the step by step in this link).
Making patterns of this type is very simple since you only have to follow the same steps that are given to get the pattern of a figure without filling, the only difference is that you have to multiply the front part by two to make a back part. inside.
Both parts can be joined with the stitching visible or on the inside so that the seams are not visible, as you can see in the following image.

Once we have both parts together, we will only have to introduce the filling.
doll figures
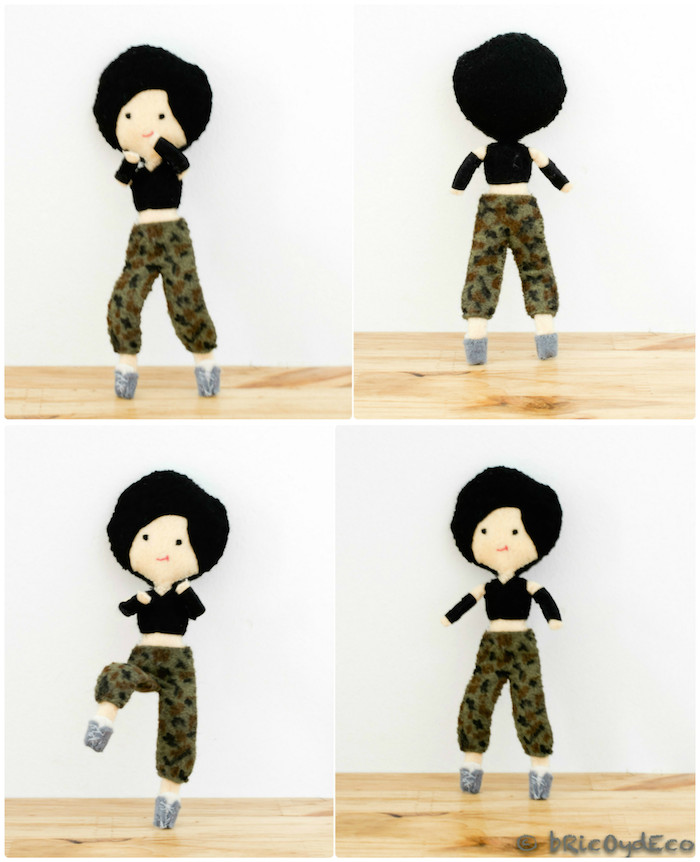
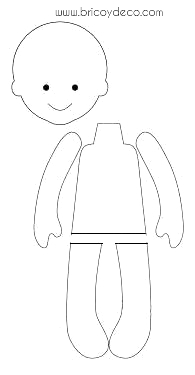
The figures of dolls or dolls They are in the second level of difficulty since, in addition to the body of the doll, we will also have to design the clothing. In the following image you can see a small doll I made a few weeks ago.
In this case we only have to fill in the body part (head, trunk, arms and legs). My advice when making this type of doll is that you have a pattern-body guide that you can adapt to the figure you want to make. In fact, by modifying the size of the head and the length and thickness of the arms and legs, a multitude of combinations can be created.
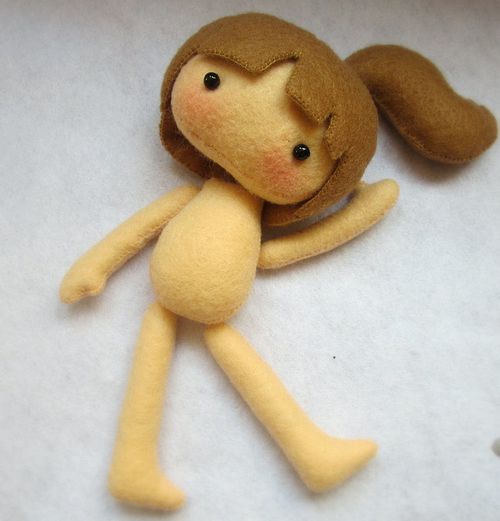
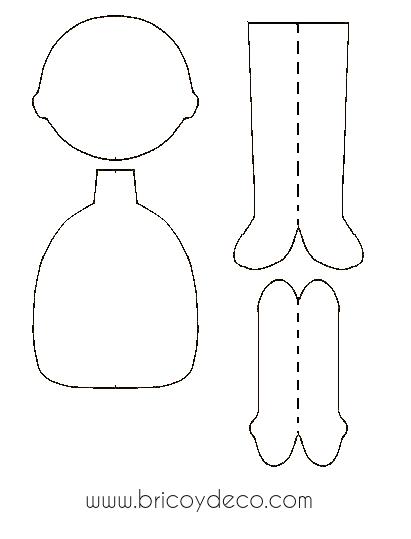
For dolls from 10 centimeters tall, I recommend that all the felt parts can be filled as it will give the figure greater realism. In the following image you can see an example of a doll body completely made with felt.
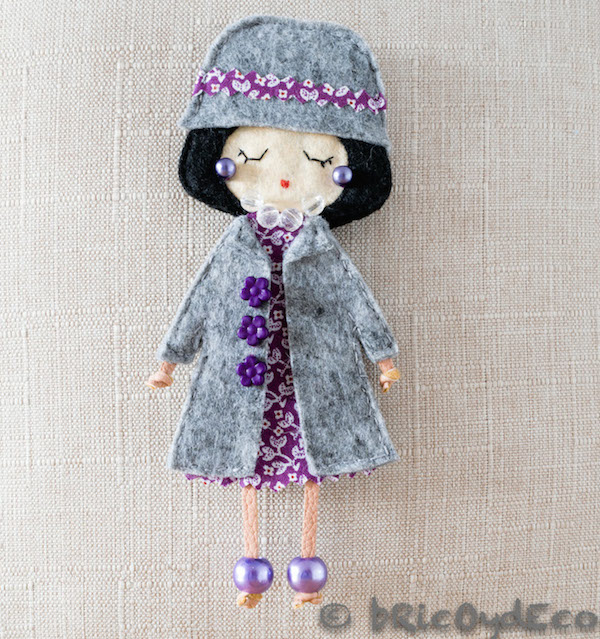
However, for brooches and smaller dolls, arms and legs can be replaced by mouse tails, leaving only the head and body to fill. In the following image you can see an example.
Here are some basic patterns to make the body of your dolls.
Pattern 1 body. This pattern has no moving parts since the entire body is one piece. It is suitable for brooches and small dolls. Keep in mind that you have to cut the drawing twice (front and back).
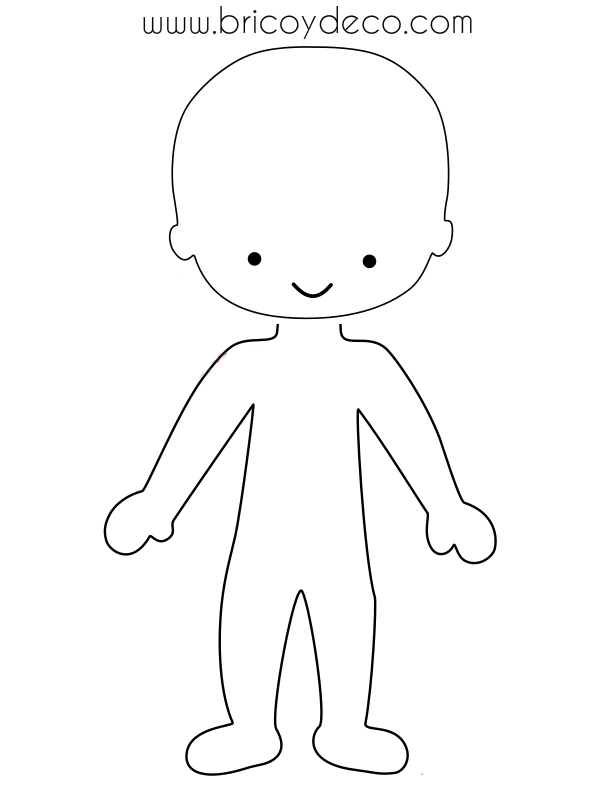
pattern 2 body. This pattern has the head, arms and legs separated from the trunk. It is suitable for dolls to which we want to provide flexibility. Like the previous one, you have to cut the pieces twice.
Pattern 3 body. When the doll is not very big, it is convenient that we fold the pieces of the arms and legs so as not to have to make too many seams and that the filling can enter easily. In this case the only pieces that we have to cut twice will be the head and the body, since for the arms and legs we will cut a single piece that we will fold along the dashed line.
3D figures with filling
The 3D figures with filling They are the ones that, in addition to width and length, have depth. A typical example of 3D figures with stuffing are stuffed animals like the ones you can see in the following image.
As was the case with 3D flowers, to make this type of figure it will be necessary to look for the pattern because it is generally quite difficult to be guided only by the image to try to draw it ourselves. On the other hand, we must bear in mind that any pattern for fabric will also work for felt.
To give you an idea of how the pattern of a 3D figure can be, I leave you the step by step of this funny little bird that I found in Love This Pic.

Finally, remember that to make figures with stuffing we should not use felt that is more than 1 millimeter thick and that it must also be soft and flexible, otherwise the stuffing will not fit well inside the figure and it will look stiff. and without grace.
I hope that this series of chapters of the Felt workshop from scratch dedicated to pattern making but I have preferred to explain everything in detail to stay halfway. For next week we will see the types of basic stitches to join the pieces, make embroideries and small details such as the mouth and the eyes, and also what thread we should use for each thing.
If you liked this post, I would appreciate it if you shared it on your social networks.
Images: Pinterest and Flickr


