

.
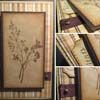 Valentine greeting card
This publication includes a video tutorial that shows, step by step, how to make a greeting card for Valentine’s Day using the scrap techniquetotally professional.
For this we have had the expertise and knowledge of a Barcelonan, Elena, who teaches face-to-face workshops on this discipline.
If you like this type of crafts you can visit Elena’s blog, Glue, paper or scissors!where he teaches you many more creations and techniques.
.
GREETING CARD
VALENTINE’S DAY
WITH THE SCRAP TECHNIQUE
Duration in minutes 8:01 Video source: Glue, paper or scissors!To carry out this superb job, you will need the following Materials:
- Cardboard decorated for cards.
- Craft cardboard (from maé).
- Stamping stamps.
- Distress ink.
- Versafine ink.
- Sponge applicator for ink.
- Scissors.
- Awl.
- Double Sided Adhesive Tape
- Adhesive foam.
- Two small binders.
- Brown marker.
…
You can find the materials for this brico in a scrap store in your city. To locate it you can put in the search engine “store scrapbook” followed by the name of your city.
You can also find them, of course, in online stores on the internet.
If you like this kind of Crafts There are groups on Facebook dedicated to this topic. One of them is Scrapbooking in Spain. It is a closed group, but you can request your acceptance so that they admit.
Here we show you step by step how to do it:
First step: We cut the craft cardboard in a size of 20 x 15 cm. and carefully fold it in half, leaving a size of 10 x 15 cm.
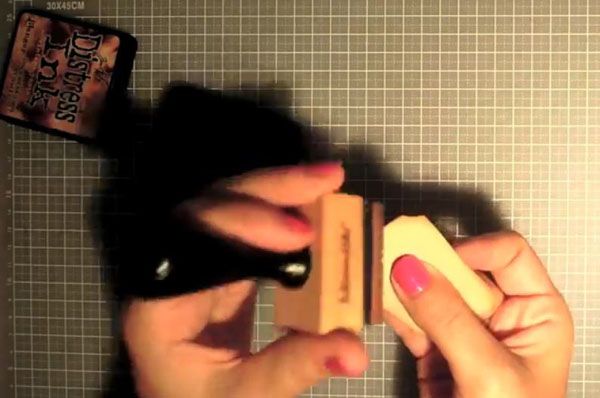
Second step: We apply the ink to the edges of the card with the sponge.
Third step: We cut the decorated cardboard in a size of 9.5 x 14.5 cm. And we also apply the ink with the applicator.
Fourth step: We cut another two pieces of craft cardboard in a size of 6.5 x 11.5 cm. and 6 x 11 cm. We apply the ink to the edges, like the rest of the cardboard used, with the applicator sponge.
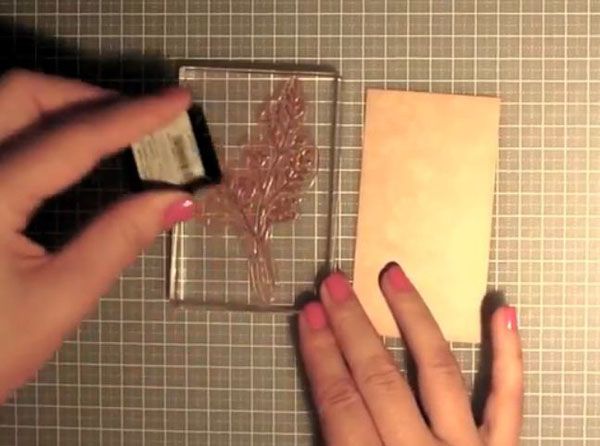
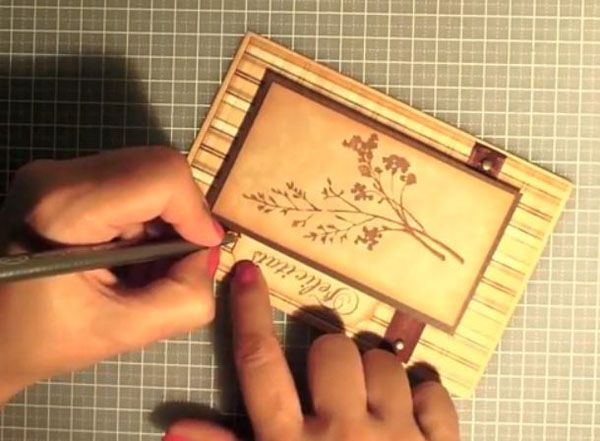
Fifth step: We stamp a decorative motif on the 6 x 11 cm cardboard. To do this we will use a stamping stamp and versafine ink, this time, dark brown.

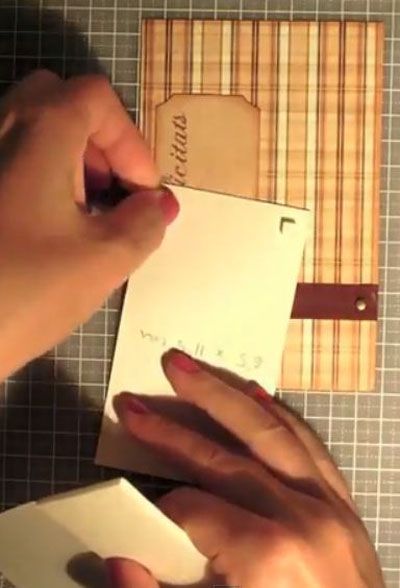
Sixth step: We cut a new craft cardboard of about 6.5 x4 cm., with the four corners in the way that appears in the video. In this one a die is used for it, but you can do it with scissors, with the cutter, or with a punch of the appropriate size. And we also tint the edges with the applicator sponge.
Seventh step: We stamp a congratulatory message on this last piece, for which we will use another stamp, but in this case, text. And we will use the same versafine ink as in the case of stamping the decorative motif.
Eighth step: We will paste the printed card with the motif on the 6.5 x 11.5 cm card. For this we will use double-sided tape.

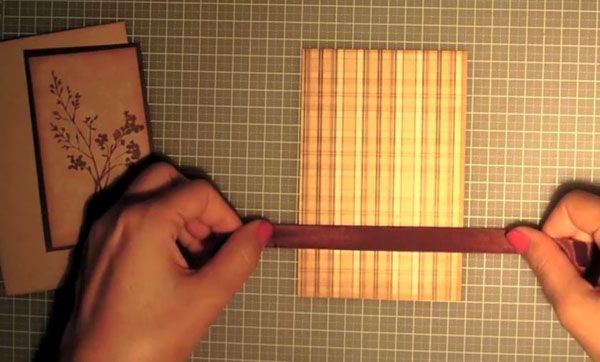
Nineth step: On the decorated card we are going to put a decorative tape, with double-sided adhesive tape, and two small gold-colored binders.
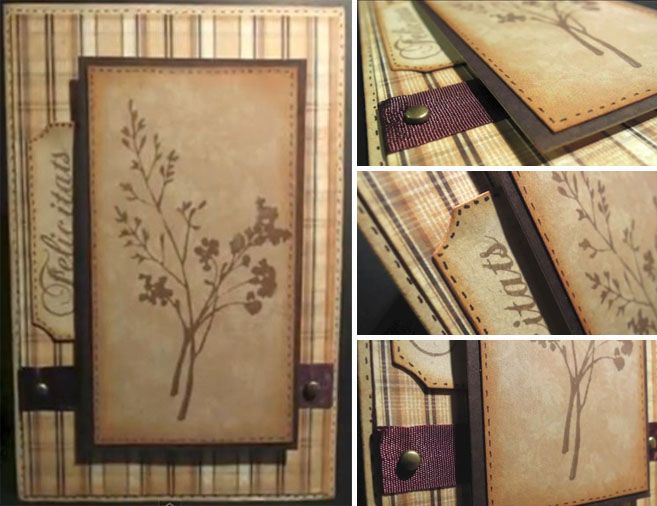
Step ten: We stick all the pieces with adhesive tape or with adhesive foam, depending on the case.
Eleventh step: Finally, in some areas of the card we will simulate the stitching of a stitch. To do this we will use a dark brown marker.
And we have finished this spectacular special Valentine’s greeting card. The finish is 100% professional, don’t you think?
If you dare to practice this technique, you will perplex more than one person when you give them this gift.
If so, we hope you send us your work and tell us about your experience.


