

In the last chapter of Felt workshop from scratch I showed you a trick to make the stitches evenly. In this new chapter I will show you how to put a face on our felt figures and we will also see how small motifs can be embroidered to decorate and enrich our work. If you have missed any of the previous chapters of the Felt workshop from scratch You can directly access all of them from this link.
When making a brooch or piece of felt for a doll or doll (animal, figure, etc.), in addition to cutting and sewing all the pieces, we must put a face on it. No doubt The eyes are the most expressive part of our face.it will largely depend on them that our stuffed animal or brooch has a happy, funny, sad face, etc. In fact, if you look closely, sometimes the nose and even the mouth are dispensed with, but never the eyes, even if it is a small point like this is the case of gorjuss dolls.
The most common techniques to make the eyes of a felt figure are the following: embroidery, with small pieces of felt or with buttons. Let’s look at each of them in detail.
embroidered eyes
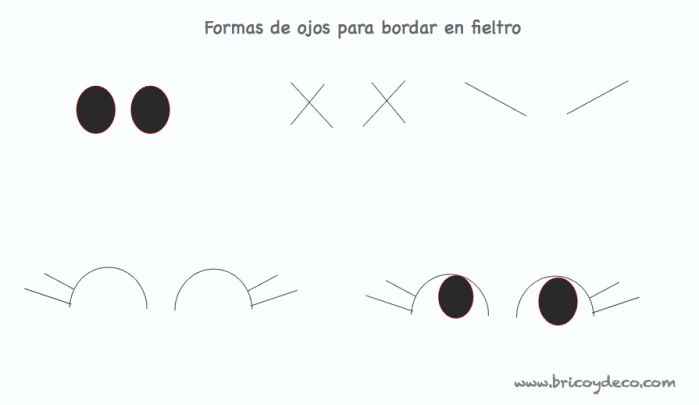
Usually when we make a brooch or a small felt figure we will embroider with small stitches both the eyes and the rest of the features (mouth, nose or eyebrows). Some of the most common ways to embroider the eyes are the following:
– Small and round, for this we will use the French knot stitch (see this link to know how to do it).
– In the shape of a cross or a diagonal line if we want to give it a Chinese appearance.
– Curved, decorating them with tabs (straight stitches) or also curved and filled, for this we will use several French knot stitches to make the part of the iris.
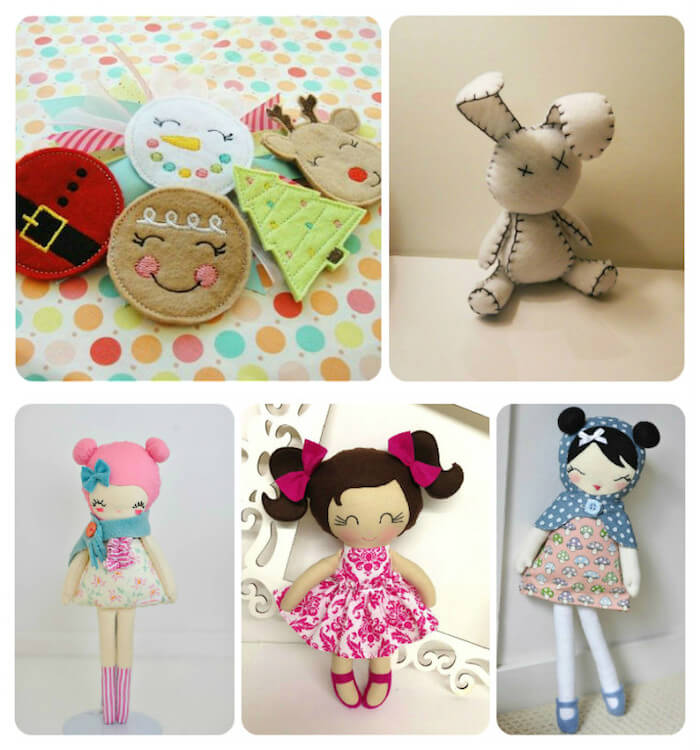
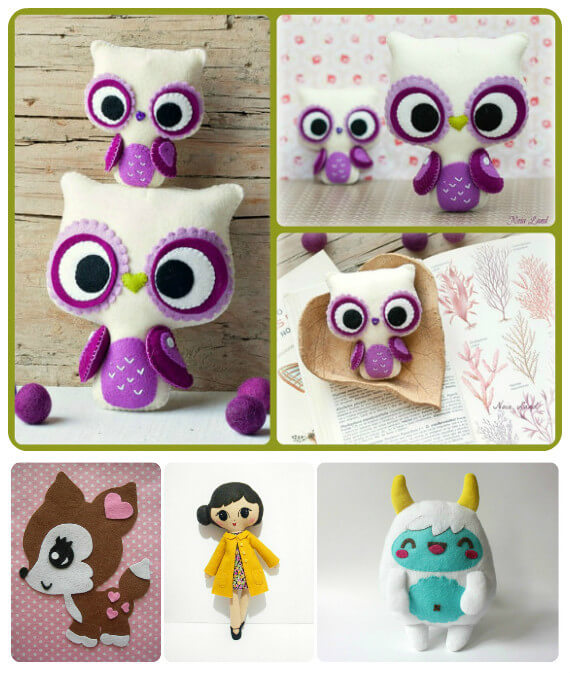
In the following image you have some examples of felt pieces and dolls with embroidered eyes.
eyes with buttons
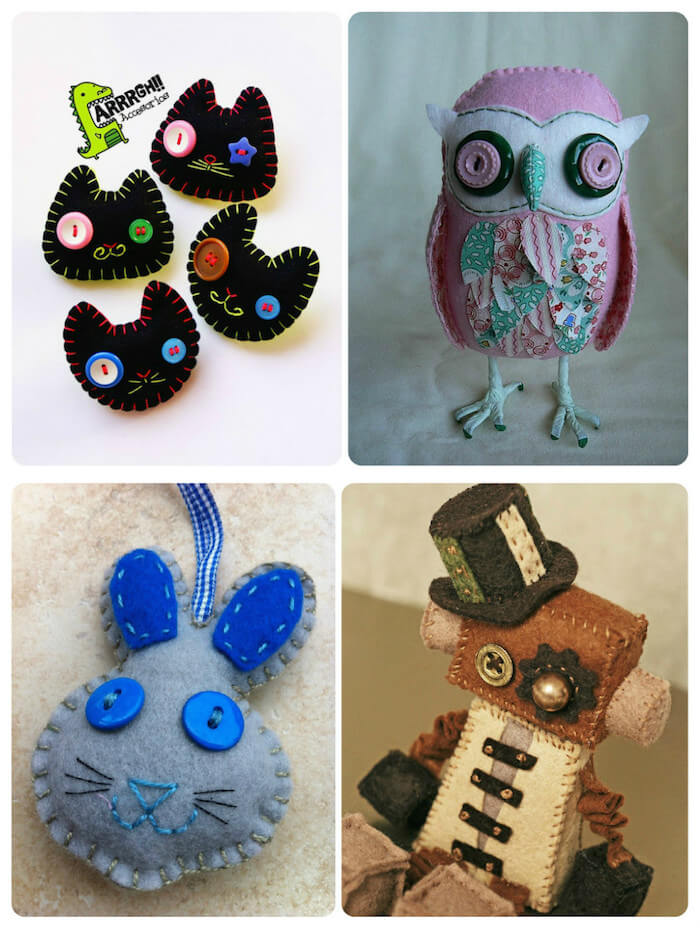
when we do felt figures with a medium or large size small buttons can be placed to simulate eyes. It is usually a very decorative effect that gives rise to original compositions, especially if we combine buttons of different colours, shapes or sizes.
In the following image you can see examples of felt work in which the eyes have been made with buttons:
eyes with felt
Another option for medium and large sized figures, which usually works very well with stuffed animals, is to make the eyes with felt pieces. Combining different colored circles creates a very chromatic effect, although it can also be done with black felt and put a point of light on it with white felt, simulating the brightness of the look. On the other hand, it must be taken into account that depending on the size of the eye, the pieces will be sewn or joined with textile glue.
In the following image you can see some examples of eyes made with felt:
Finally, I wanted to advise you not to use plastic eyes for your felt creations, it is a quick and simple resource but it reduces the visual quality of our work. An intermediate solution would be to paint the eyes but do it with textile paint or permanent markers so that it cannot be smudged in the case of washing the felt.
Other features: nose, mouth, eyebrows…
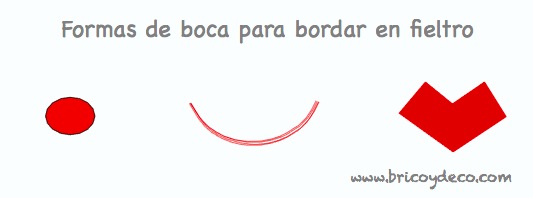
The rest of the factions will normally be embroidered with thread or we will use small felt pieces. If the figure you are going to make is not very big, I recommend that you embroider both the nose and the mouth with small stitches, in the case of the nose with a straight stitch of a tone or two above the color of the felt will be enough. For the mouth we can do a French knot stitch, a small curve or also a heart style, as you can see in the following image.
If the figure we are going to make is an animal, you can put a felt nose by making a small circle or triangle. In the case of the mouth, it is preferable that we border it, as well as the mustaches if it has them.
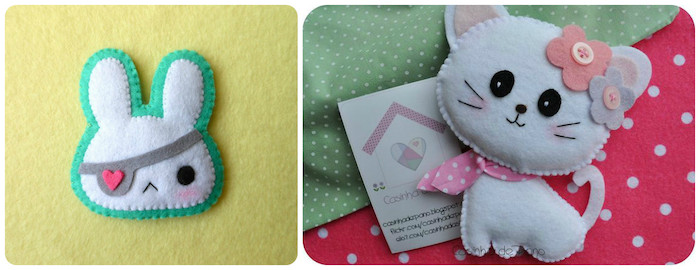
Lastly, I always prefer to do the cheeks with a little rouge since I think it looks more natural.
Make small embroideries to decorate the felt
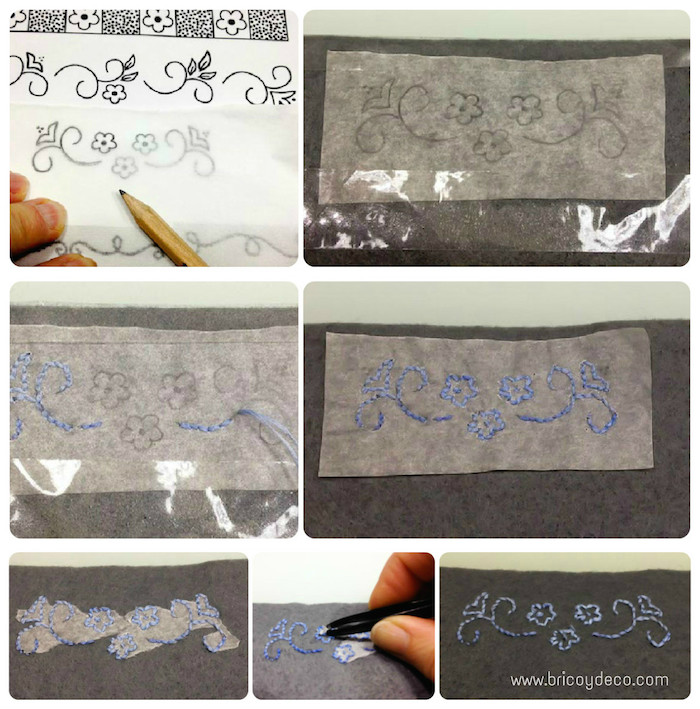
as much if you want embroider the features of the face like any other motif (flowers, branches, geometric shapes, etc.), first of all, the embroidery must be traced on vegetable paper, silk paper or any other thin and semi-transparent paper. Next, the paper is placed on the felt, fixed with adhesive tape, pins or a basting thread and both paper and felt are sewn with a back stitch (see this link on how to do it). Once finished, the paper is carefully removed, the small pieces that may remain are easily removed with tweezers.
In the following image you can see a step by step of how to embroider on felt:
And this is where this chapter ends. Felt workshop from scratch in which I wanted to show you how you can put a face on our figures and decorate the felt with small embroidery. We’ll see next week how to add accessories to our felt figures: fabrics, decorative stones, beads, etc. If you don’t want to miss it, sign up at this link to receive the weekly newsletter with the summary of the published entries.
If you liked this post, I would appreciate it if you would share it on your social networks.
Images of felt figures: Pinterest


