

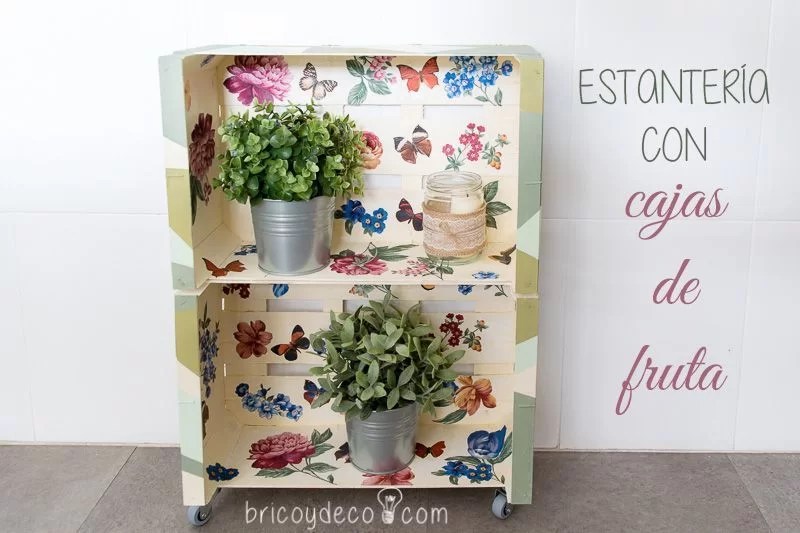
Fruit boxes can be easily found at street markets or neighborhood stores. Although their wood is of poor quality and quite flimsy, they are useful for storing small objects. If you add an original decoration, you can get a shelf with fruit boxes that will fill any corner with color.
The first time I recycled a fruit box, I disassembled it to line a panettone can with the slats.
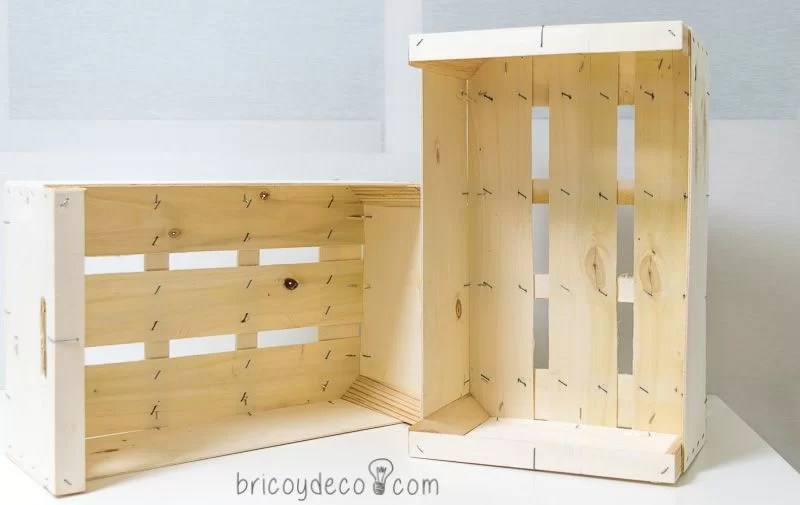
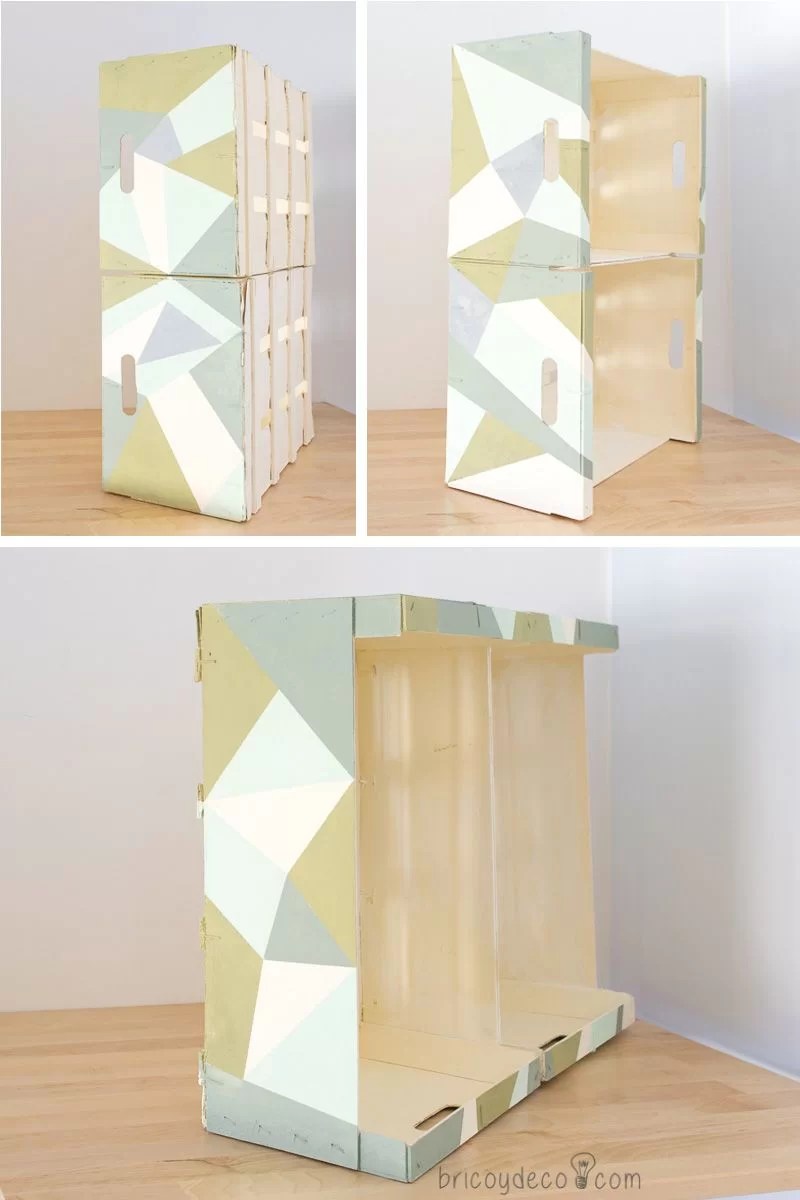
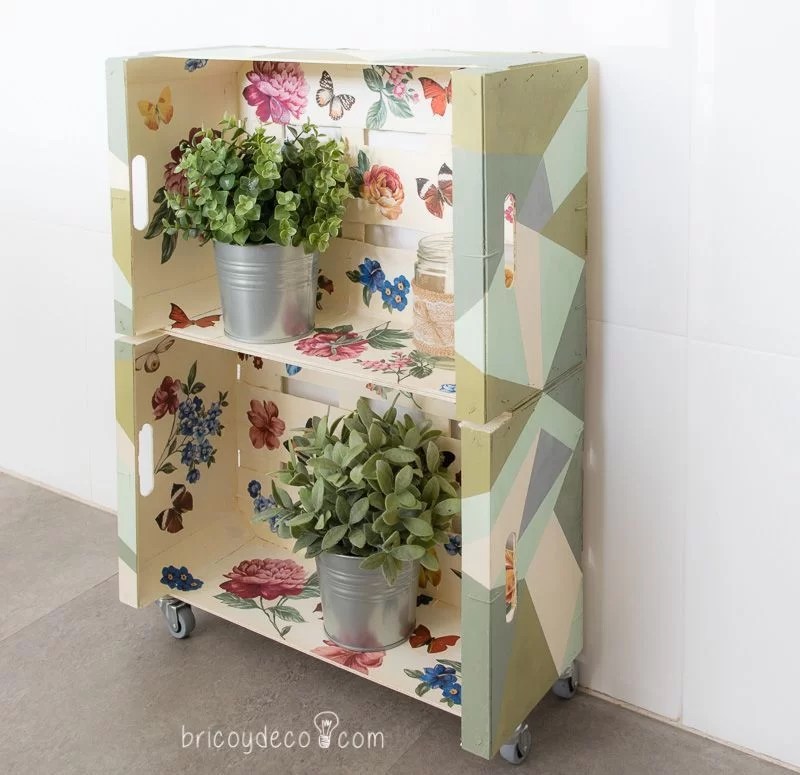
This time I had two fruit boxes 45 cm wide, 30 cm high and 14 cm deep, so it occurred to me that I could use them to make a shelf.
How to make a shelf with fruit boxes step by step
The first thing I did was Sand them down with medium grit sandpaper. (You can check this link for a quick guide to sanding wood). Then I removed the dust with a damp cotton cloth.
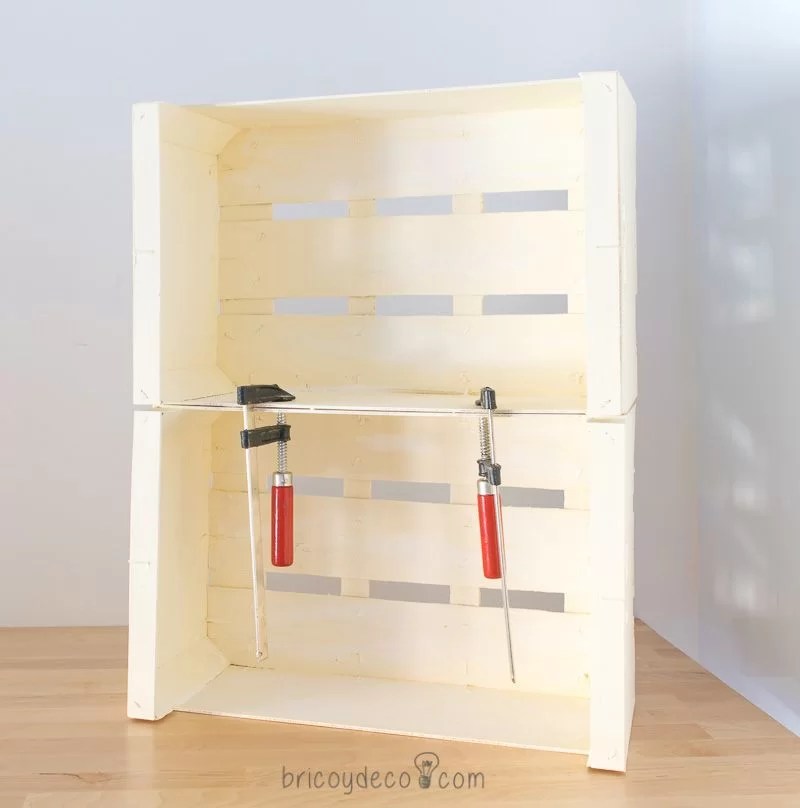
The next step was paint both boxes Vanilla in color, in this way it provided them with a clear base that brought light and, at the same time, hid the knots and staples of the boxes.
Since I didn’t have that color at home, what I did was use a matte white water-based enamel to which I added a few drops of ocher dye. The main problem with creating your own color is that you have to make enough of it as it’s hard to get the same shade again.
Once the paint had dried, I joined both boxes with a mounting adhesive and fixed them with some sergeants.
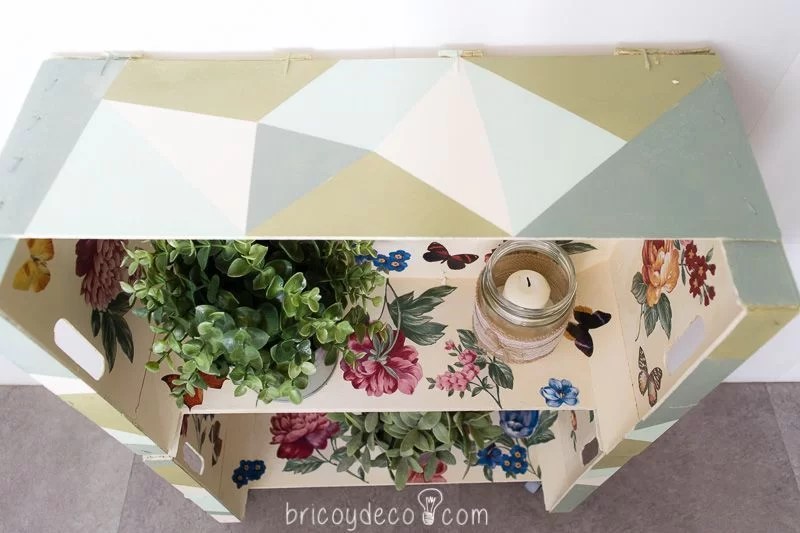
The next step was paint the outsidefor this I used spray chalk paint in 4 different colors: Ash Grey, London Grey, Vintage Olive and Mint Green.
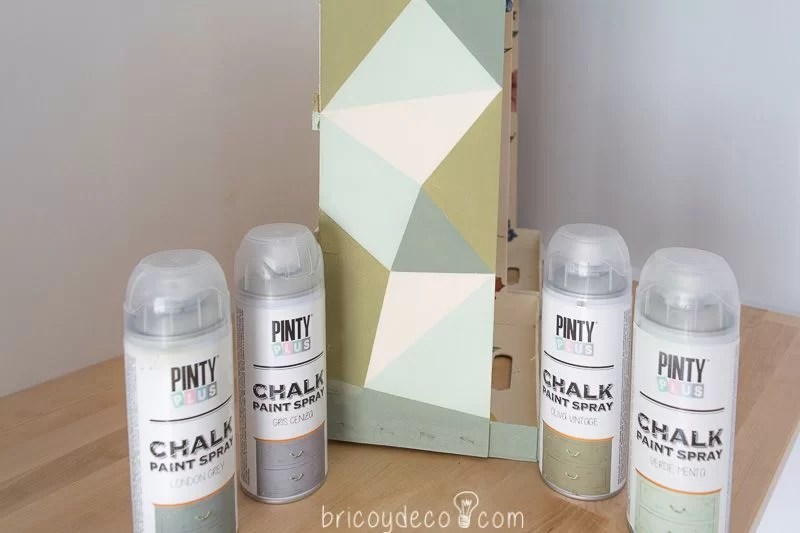
With masking tape and combining these different colors I managed to create a decoration with geometric motifs. These types of decorations are not complicated but they require a lot of time since it is necessary to protect the area that is not to be painted with each color used.
What I did was paint by color, that is, with the masking tape I was creating geometric shapes (basically triangles and trapezoids). On each side he painted 2 or 3 shapes of the same color, protecting the area he did not want to paint with newspaper or advertising brochures. When the paint had dried (about 15 minutes), I would remove the masking tape and go back to creating new shapes to paint them with another color.
It took me several hours to finish the two sides and the top, but I think it was worth it.
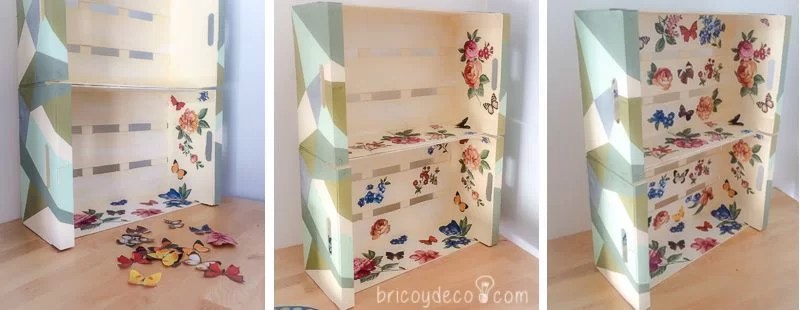
The next step was to decorate the inside of this shelf with fruit boxes. For this I used a wallpaper with a flower pattern and another for decoupage with butterflies.

With curved tip scissors I was cutting flowers and butterflies. Since I loved playing cut-out dolls as a child, it wasn’t too heavy for me despite how entertaining it is and the patience it takes.
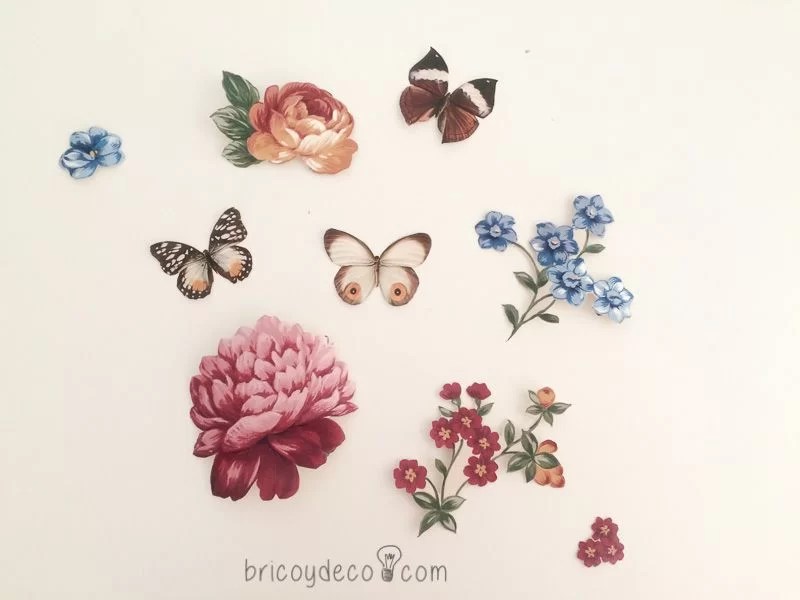
After cutting out a gazillion pieces, I glued them inside the boxes with decoupage glue.
Another option would have been to not cut out the pieces and stick the wallpaper directly onto the box, but there would have been little bulges around the staples due to the thickness of the wallpaper. In addition, cutting the pieces created a personalized pattern since I also added the butterflies.
I waited about 12 hours to varnish the inside and outside of the boxes with the same decoupage glue. Finally I put some small wheels that raised the rack and facilitated its transfer. For its fixation I used the same mounting adhesive that I had used to join the boxes.

The truth is that I had my doubts about how the print with geometric motifs on the outside would look with the vintage-style floral print on the inside, but I think I have finally achieved a current combination with a romantic touch (In this link you will find a guide to combine prints).
I also hesitated when it came to decorating the inside or outside of the boxes with the floral print. In the end I opted for the simplest option as it was easier to paint the outside with the geometric motifs than the inside.
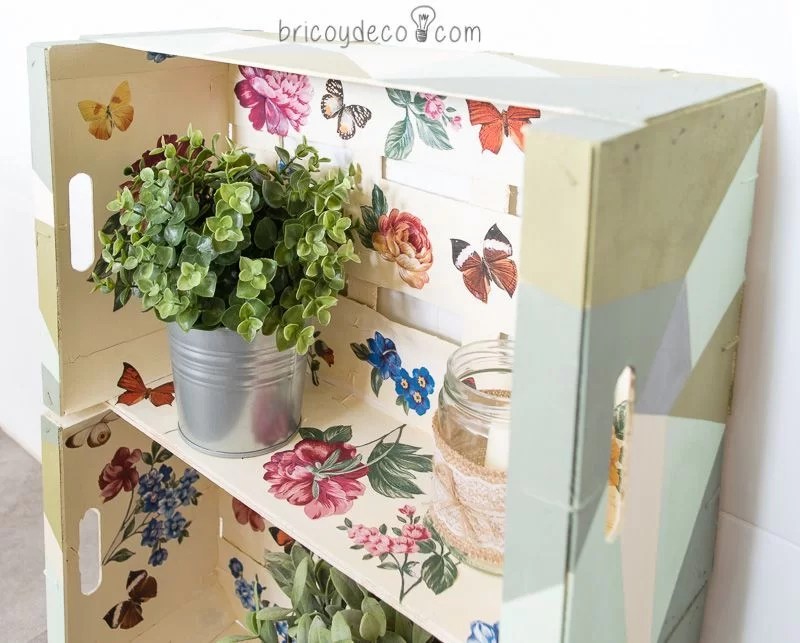
I love how it combines vanilla, greenish tones and grey, it’s as if you passed one of the leaves of the floral print through a prism of light.
Summarizing…
In case something has not been very clear, here is the summary of all the steps I have taken to make a shelf with fruit boxes:
1º.- Sand the boxes with a medium grain sandpaper and remove dust
2º.- Paint both boxes with a base tone
3º.- Join the boxes with mounting adhesive
4º.- Paint the exterior with geometric motifs
5º.- Use the decoupage technique to decorate the interior
6º.- Place some wheels to facilitate transport
Do you like how this one turned out? shelf with fruit boxes? Have you ever recycled this type of boxes? If not, I encourage you to do so because despite how unattractive they are at first glance, you can put them to practical use and radically change their appearance by decorating them.
If you liked this post, you can see many more ideas about recycling and DIY projects at .


