

.
How to make an octopus for screen printingWe are going to teach you, step by step, how to make your own 4-season octopus (4 arms) with very cheap materials, recycling wood and furniture that we have at home. It is important to have the power tools indicated below to build it, because we will have to make holes, cut wood, sand (a lot) and paint, so it is good to have a jigsaw, a drill and a saw at hand, then I detail everything that we will need to build the “Aphid” machine.
Tools:
– Jigsaw for wood.
– Drill with bits for wood and aluminum.
– Hammer.
– Electric sander.
If you don’t have any of these tools, ask for it or buy it, if you like to do this type of thing you will get the most out of it. In addition, you can currently find them in many stores and on the internet at very affordable prices.
Machine parts and components:
You can buy most of them at lumber and DIY stores in your city.
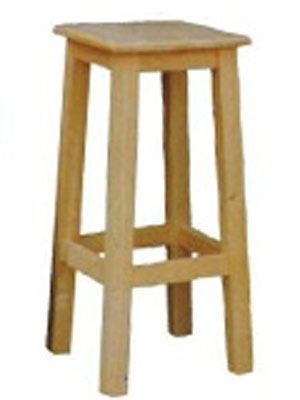
– Chair or table with 4 straight legs from 70 to 100 cm high.
The objective is to build a base, therefore a stool can serve us the same as a table, and if it does not reach the 100cm height that it should be, we will put some wooden blocks on top of it until we achieve the desired height.
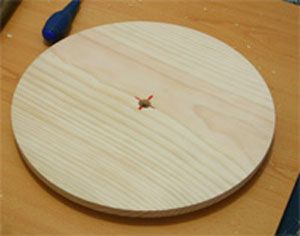
– Circular round of wood/chipboard of 45 cm approx. E3 diameter and 2cm thick.
It will be attached to the base and will serve as support for the entire structure.
– Circular round of wood/chipboard 30-40 cm in diameter and 1-2 cm thick.
– Circular round of wood/chipboard 20-30 cm in diameter and 2-3 cm thick.
– 4 wooden slats that will serve to support the stations, 60(length) x 5(width) x 3(thickness) cm
– 4 lacquered wooden boards of 45x35x2 cm that we will use as a station to support the shirts.
– 4 wooden strips to make the arms that hold the lampshades, 25x5x3 cm
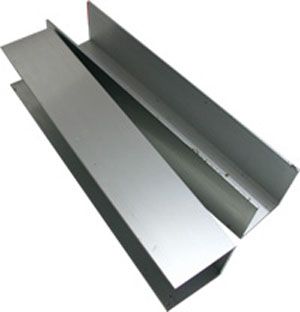
– 4 U of aluminum 20 cm long, 4 cm high and 2mm thick. They are usually cut from large aluminum bars to the size you want.
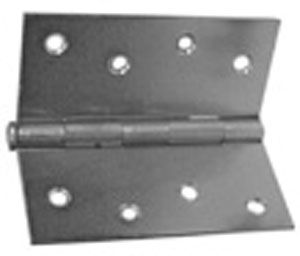
– 8 thick hinges about 5cm wide to fold the arms and screens.
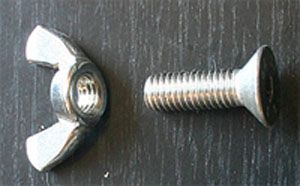
– 8 popcorn and screws 3cm long and 5mm in diameter.
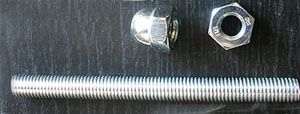
– Threaded bar from 5 to 10mm thick and 1m long, it will be used to make both the central axis and the support anchors for the arms on the stations. 2 nuts that enter the bar and a closing one.
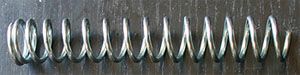
– 1 thick spring about 8mm in diameter.
– We will need quite a few 3 cm long screws and a few 1 cm long ones.
– Two-color paint enamel to differentiate the stations of the machine body, with its roller and palette to apply the paint.
With all this we can now build our Pulgón 1.0, little by little we will make improvements, such as extensions in the arms, the possibility of folding the stations to take up less space, etc.
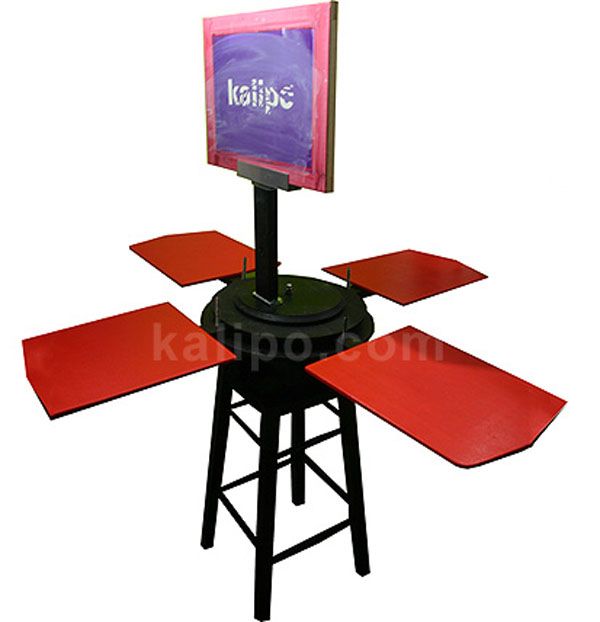
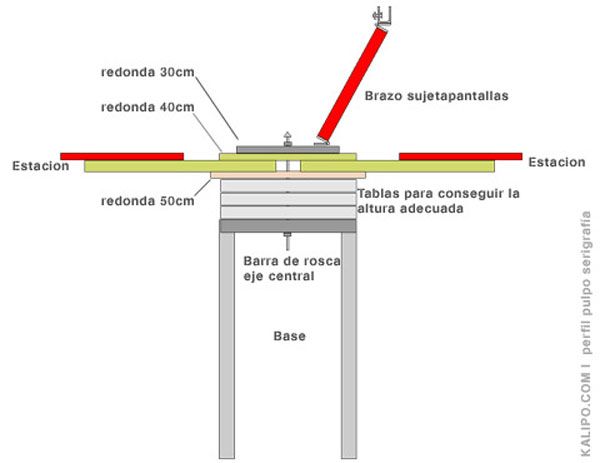
We continue with the construction of Pulgón 1.0. First of all say that the construction of this octopus is indicative, by using recycled materials each one can customize it to their height or needs, you will have to be a little skillful and handy and let your imagination develop. It should also be noted that you need a lot of space to work with an octopus, it occupies approximately 2 square meters, so you will have to reserve a good space for the bug. This is the diagram of the parts of the octopus:
We begin to build the base:
We begin to make the base that will be what the whole machine can hold. We can make a desktop octopus in which the height will depend on the table where you support it, and another version of octopus with a fixed height.
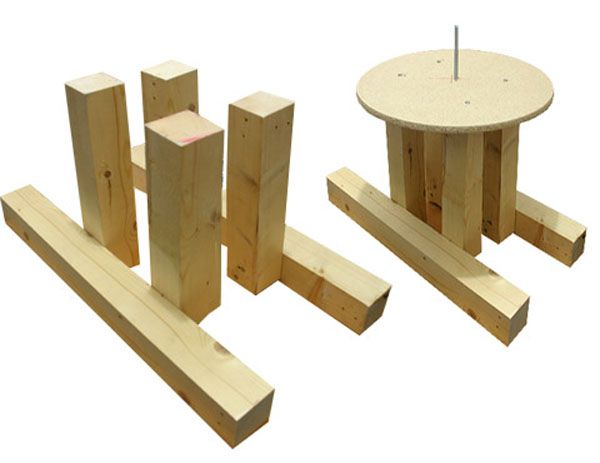
1) Desktop octopus, to be able to support it on a table and when we do not use it we remove it. We help ourselves with some wooden boards to build the legs, achieving the shape that is seen in the photograph, thus gaining stability and preventing the octopus from tipping over when we are stamping. We join the legs with the 50cm round one and make a hole in the center with a 10mm drill bit.
two) Normal option, like any screen printing octopus, it will have a base that supports the structure and reaches the right height for printing, this height is between 1m and 1.10m to print comfortably.
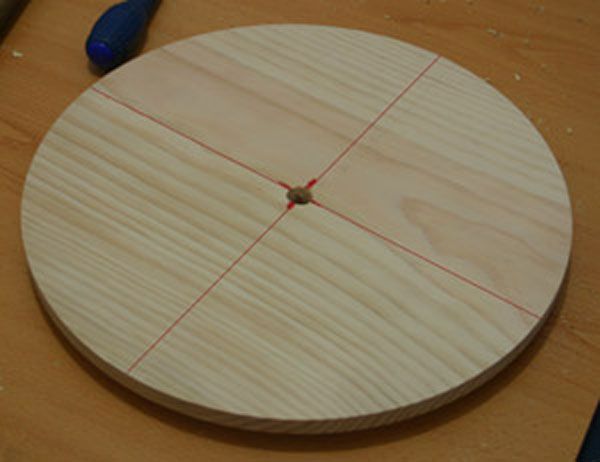
We make the main structure of the base with a stool, any narrow table that maintains that structure can also be used, in the middle we have to make a hole with the drill with a 10 mm bit. For both bases we have to take into account that the objective is the same, a base on which the whole structure will rotate around a central axis, and on this base we join the round one of 45cm in diameter, we can join it with long nails or screws and in the middle we make a hole. To find the exact center we can draw some lines dividing the circumference into 4 pieces and the union of both lines will be the center.
Arms/Bases:
We will make 4 arms that will rotate in the central axis, in each arm there will be a station or base where we support the shirt to print.
1) We take the 40cm round one and do the same process as the previous one to make a hole in the center.
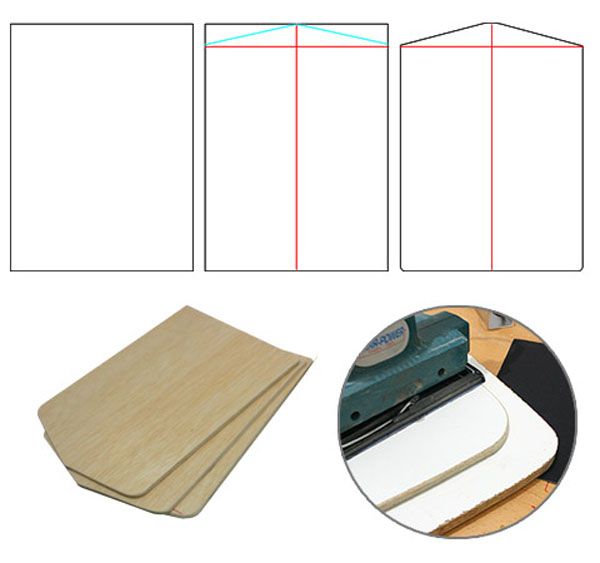
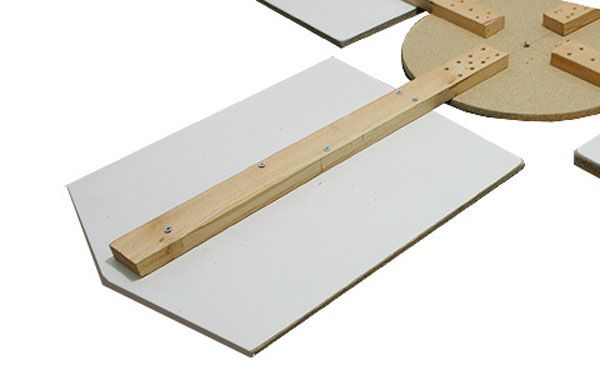
2) To make the stations we will use the 45×35 cm lacquered boards. We see the example with the first, the others are exactly the same. If you want you can vary its size and make a narrower one to print sleeves. We have to make a peak shape at one of its ends, we place the board on our work table with the lacquered part upwards, we draw a horizontal line about 4cm from the end and another vertical from end to end, join the end of the line with the ends of the horizontal and we obtain some diagonals where we will have to cut. Then we sand all the edges well so that the shirt does not get caught, avoid corners and sand them until we get curved corners.
3) We join a base to a 60x5x3 wooden strip with screws and always below, it is important that the screw does not go through the base because any notch affects the stamping. We already have one arm ready, we do the same with the other 3.
4) Now it remains to screw the arms to the round that we had previously made the hole, we place each arm straight with respect to the lines drawn on the round and fix them with screws.
Now we have to place a piece of the threaded bar in each pole of the stations, so that when lowering the screen-holding arm it fits perfectly in the station, for that we make a hole in each pole with the 10mm bit, between the station and the round one and we fit the bar that remains immobile.
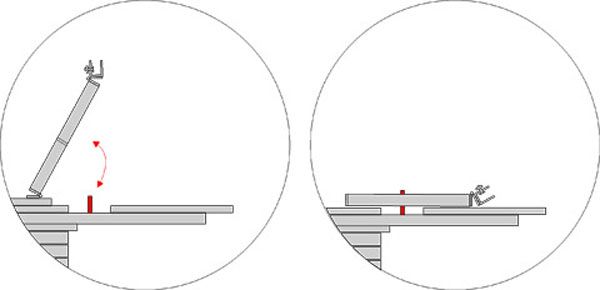
Screen holding arms:
Its function will be to fold and unfold the screen to stamp, also rotates on the central axis.
1) At the 30cm diameter base we make the central hole.
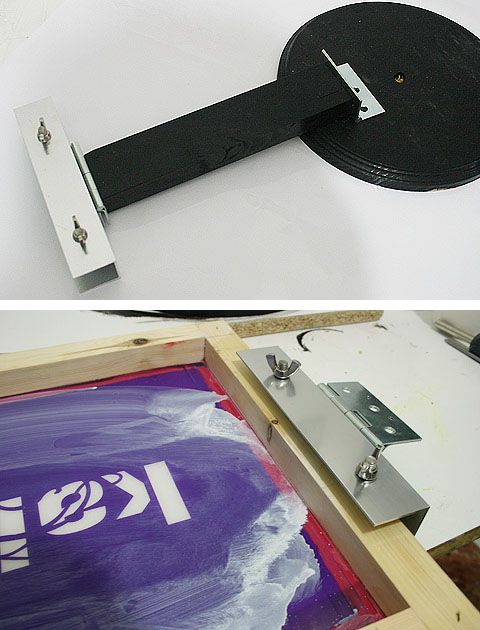
2) To make the screen fastening system, we use the U-shaped aluminum pieces. We support the aluminum piece on the work table and make two holes with an 11mm drill bit.
3) We cut the spring into parts of approximately 2cm, insert a piece of spring into one of the screws and insert it through the hole holding it with a popcorn, the same in the other hole. I explain the function of this system: When we borrow the popcorn, the spring shrinks and leaves more space in the U to put the screen, once placed, we release the popcorn and it will press on the frame holding it.
We make as many arms as colors we want to put in the machine, in the example I only made one arm, you can add up to 4, to make 4 colors.

4) We attach the U to one end of the hinge and the other to a 25x5x3 wooden strip, in this way the U can tilt from top to bottom to adapt to the station.
5) We already have the first arm ready, now we join it to the 30cm diameter round one by means of another hinge, so that we can fold it from top to bottom and make the hole in the position that fits with the bar placed on the pole. the station. (threaded bar)
In our Pulgón we have only built one arm (the rush…) but you can make up to 4 so that you can make prints of up to 4 colors.
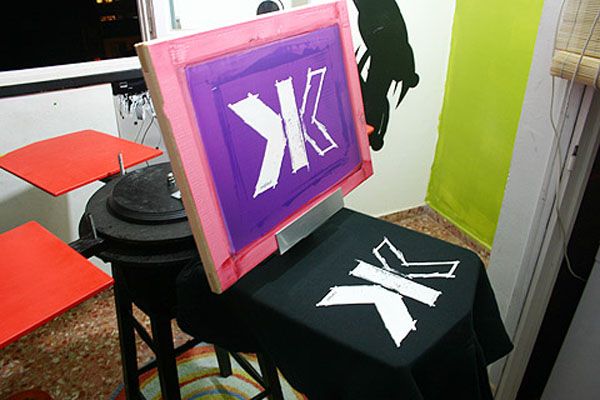
We assemble the pieces and… Tachaaaan!
We cross the base with the threaded bar and put a nut underneath that acts as a stop, on top we mount the round one with the 4 stations and on top the round one with the screen-holding arms and at the end we put another stop thread without tightening too much, we must leave the pieces rotate.
final touch up…
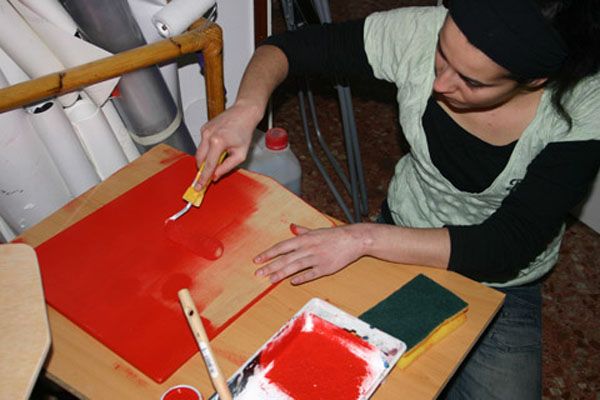
Now we can customize it, painting the pieces in the colors we want, with enamel paint or sprays. Be careful with the bases of the stations, it is where we will support the shirts and if we paint it it can stain. When applying the t-shirt fixer it can stick if we paint it, so I recommend leaving the boards with the original lacquer, which will be smooth and perfect for stamping.
As you have seen, I do not indicate exact measurements of where to screw, distances to hold the bases, etc… because I consider that each one should adjust the measurements to their needs, luck and any contribution you can share here.
Origin: Kalipo
You may be interested in seeing these other articles related to crafts:
screen printing of t-shirts |
leather embossing |
book binding |
wood pyrography |


