

There are times when we do not want to tune up or transform a piece of furniture, we simply want it to recover the luster and beauty that it had in its day and that it was losing due to daily wear and tear. Our dining room table was a clear example, the continued use had left scratches and discoloration on it so I decided to remedy it and restore a wooden table in which we had spent such good times. If you want to know how you just have to keep reading.
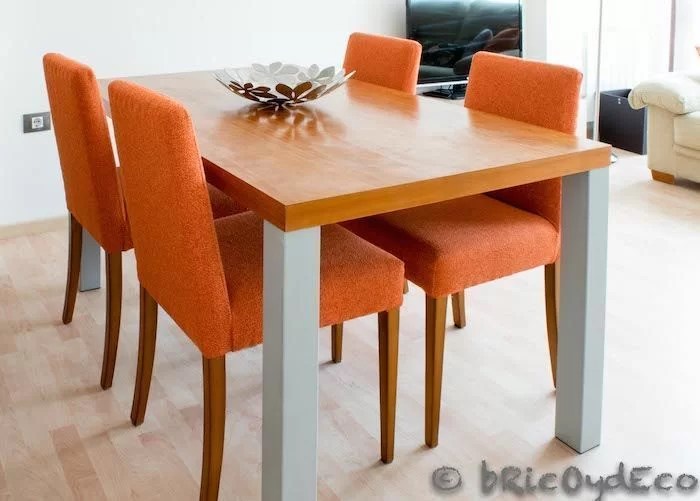
We bought this table about ten years ago, when we were still renting. Back then we liked its simplicity and modern but timeless style at the same time. Its square legs are made of light gray steel and the top is made of cherry veneer. At first we used it as an office table and when we moved to our apartment it became the dining room table.
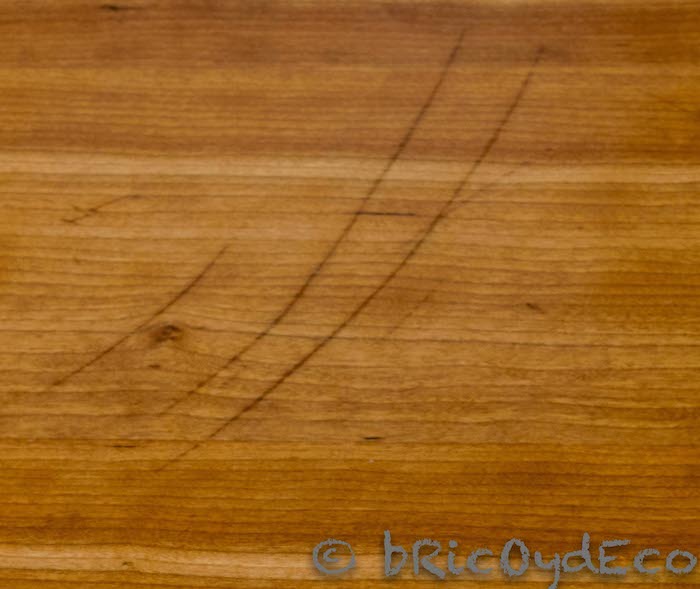
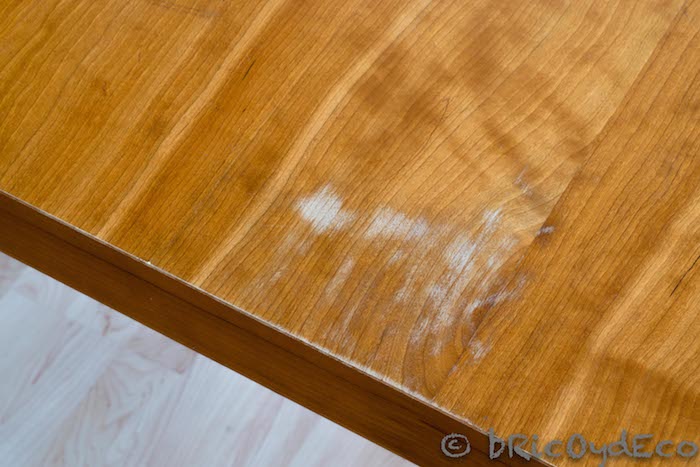
With the passage of time and daily use, the wood began to discolor in some areas, and some scratches appeared that I tried to repair by applying a stain, but the only thing I managed to do was make them even more noticeable.
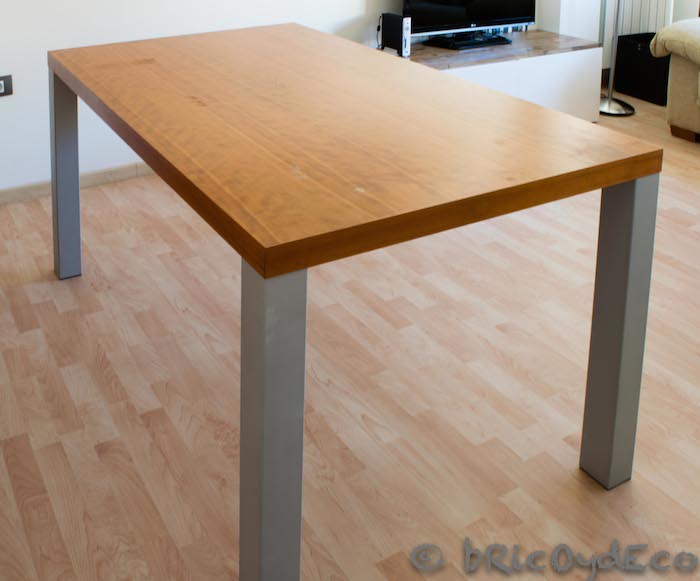
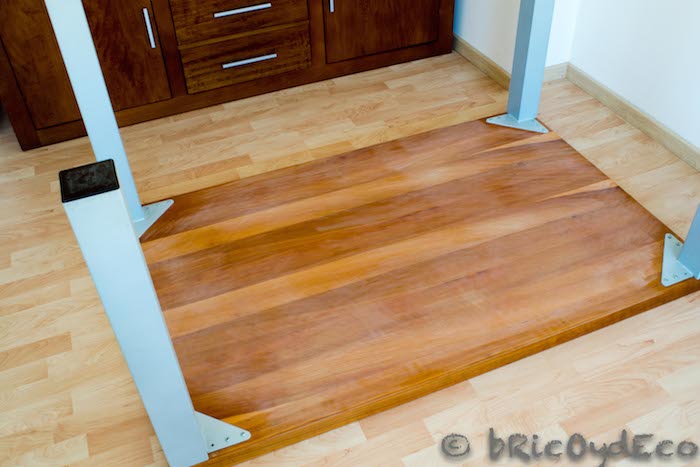
In this photo you can see what the table looks like:
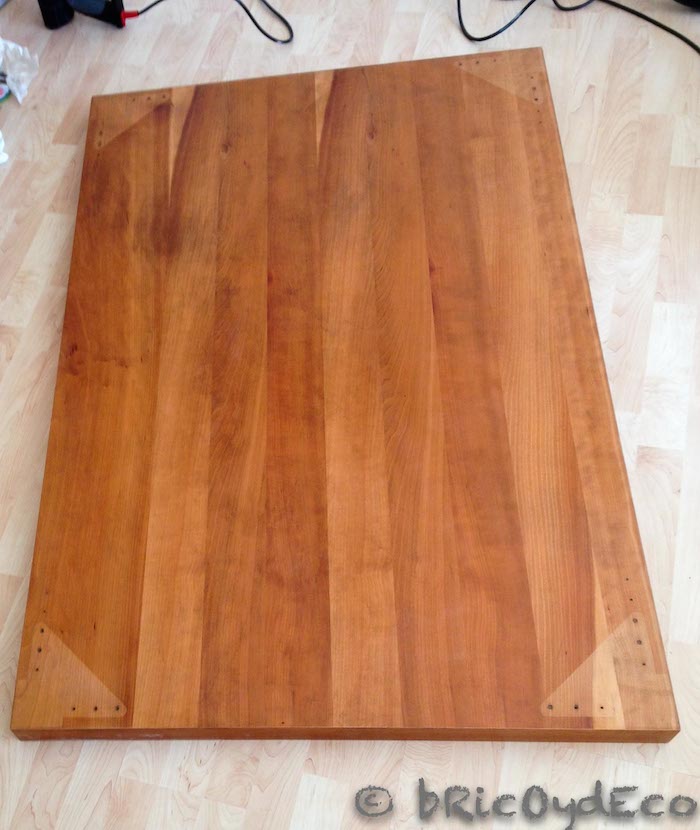
And in the following images you can see details of the damage:

But as I always tell you, We learn from mistakes and a lot! So now that I have some DIY experience, I decided to restore our dining room table myself. I didn’t know for sure if it was going to turn out well or not, but I wasn’t going to be left with the doubt of not having tried it, after all there is always a rip for a ripped and if it went wrong I could find another remedy to recover it (paint it, cover it with vinyl…).
Advice: always highly recommended do a test on an inconspicuous part of the furniture you want to restore, it will be the only way to avoid unpleasant surprises. In this case, being a table, it is very simple because we only have to turn it over to do the test.
In the following image you can see how I tried different methods to strip the wood at the bottom of the table and thus find out which was the most convenient:
The steps I took to restore a wooden table They were the following ones:
pickle
When stripping a piece of furniture we remove the layer of varnish or wax that protects it. In my case I also needed to smooth the surface to repair the scratches, for all this I chose sanding as a method to strip the table. In this way he killed two birds with one stone: on the one hand he removed the layer of varnish in order to unify the color of the wood, and on the other he smoothed out the scratches.
Advice: When stripping wood, the method that is least aggressive and that minimizes stress on the material must be chosen. In this specific case, if a chemical stripper or heat stripping is applied and then the surface is sanded, we will subject the wood to two treatments, so when the layer of varnish is thin, I recommend stripping by sanding directly.
To sand we can do it manually with a sanding block or using an electric sander which is faster. I used a mouse type sander which is easy for me to handle since I have a small hand.

Advice: If you are thinking of buying an electric sander, I recommend that you opt for sanders that have the possibility to attach the vacuum cleaner tube, In this way, the dust generated by sanding (which is a lot!) is minimized to the maximum.
Stain and protect wood
Once we have stripped the wood, the next step will be to dye it and apply a protection (varnish or wax).
In my case, I did not want to stain the table in another color, although I did want to darken it a bit and “kill” or turn off the characteristic reddish tone of cherry wood, so instead of staining the wood and subsequently protecting it, what I did was apply a walnut wax.
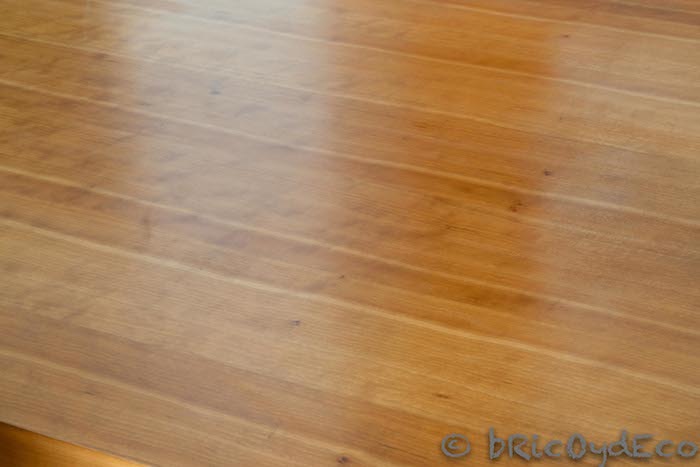
In the following image you can see how I first did the test at the bottom of the table:
To apply the wax I used the heat gun and the truth is that I was more than satisfied with the final result since, thanks to the heat, the wax penetrates better into the wood, with fewer layers being necessary to achieve a good result.
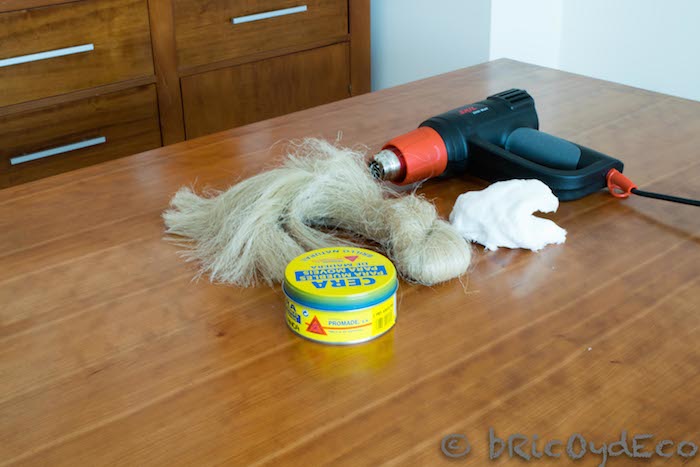
The steps to follow to apply the wax with the heat gun are the following:
1º.- Spread the wax on the wooden surface with a cotton cloth or wristband.
2º.- Pass the heat gun over the wax at a temperature of 250º C. When applying heat we will see how the wax changes from a matt tone to a shiny one, at that moment we will rub with a cotton cloth to remove excess wax. You have to be quick so that the wax does not harden again, so you have to work on small areas.
3º.- We repeat the process all over the wooden surface until we get two layers of wax.
4º.- With tow or a cotton cloth we will polish the wax (we will rub the entire wooden surface), in this way we will get the natural shine of the wax and protect the wood.
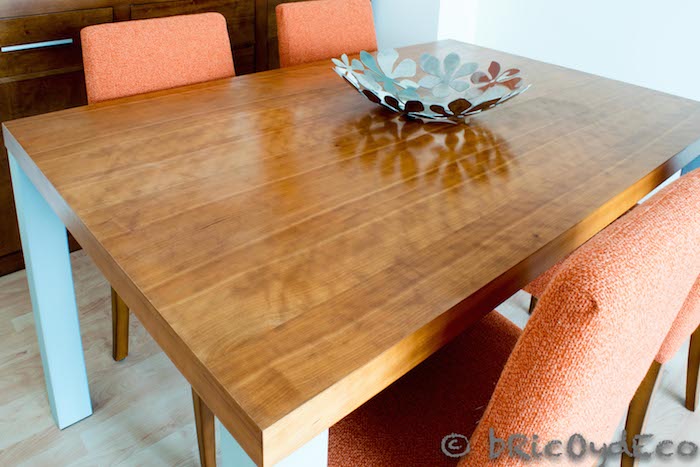
And after all these steps, this is the final result of how the wooden table turned out:
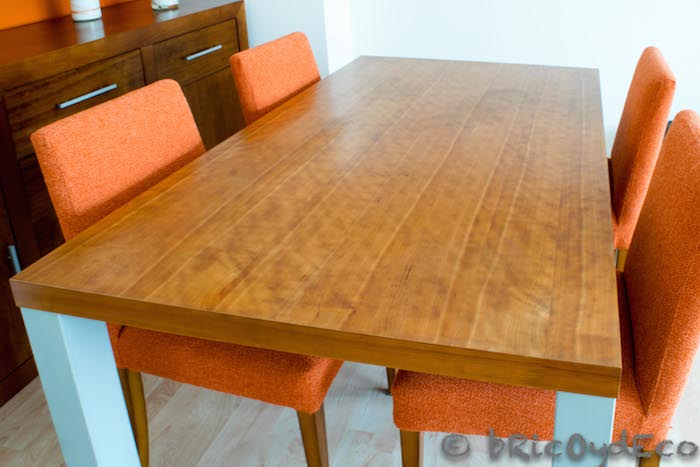
As you can see there is no longer any trace of the scratches, plus it now has an even tone and a nice satin sheen.
At last the table had the same shine as when we bought it.
The truth is that I like to err on the side of modesty but I have to admit that I felt great personal satisfaction when I finished restore a wooden table that I thought I would have to end up replacing with another, I had managed to make it like new and everything myself. I always encourage you to carry out your DIY projects precisely because no matter how small they are, they always represent a extra boost of self esteem once finished. Do you have damaged wooden furniture? Now that you know how to restore a dining table you can encourage yourself to try it.
If you liked this entry, I would appreciate it if you would share it on your social networks.


