

For this second installment of the Felt workshop from scratch I want to show you how can you get patterns of an image to make a flat, unfilled felt figure. In future installments I will also explain how to make flowers and shapes with filling, although it is very similar, each one has its own peculiarities. If you missed the first chapter you can watch it here and if you don’t want to miss any more you can subscribe here.
Can I make a pattern from any drawing or image?
Initially, to draw a pattern, we can use both a drawing and an image, although we must take into account the following:
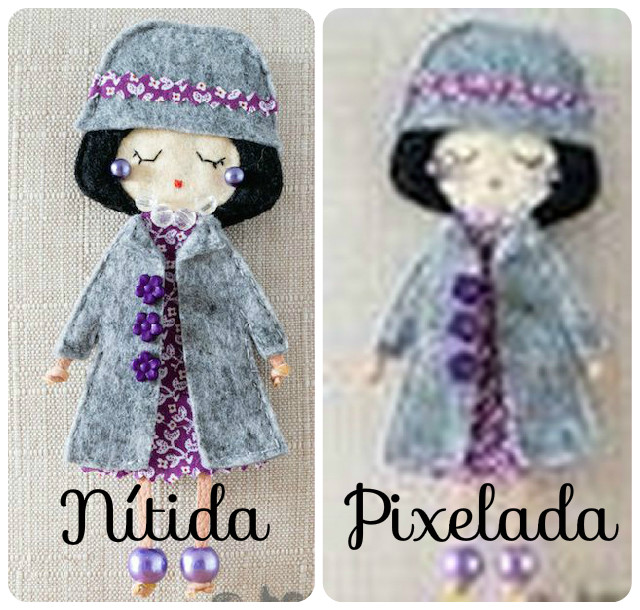
1st.- That the image or drawing is clearwith the silhouette of the figure well defined and without pixelation.
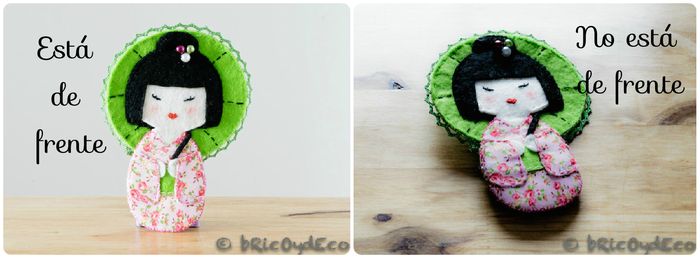
2nd.- That the image or drawing is in frontand I don’t mean that he is looking straight ahead, since the profile of a figure could perfectly be made, but rather that the perspective of the image is frontal.
I have a printer, what will be the next step?
Once we have found the appropriate image or drawing, the next step will consist of trace or print the outline of the different pieces that form it.
For you to understand better I will use the following drawing as an example.

if you have printing machinewe will create a text file, insert the drawing or image and adjust the size.
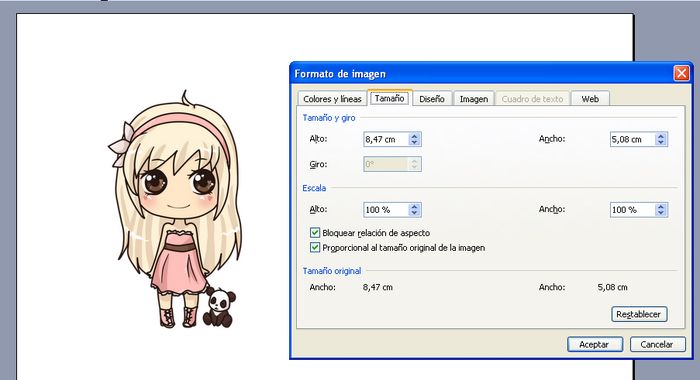
Once it is resized to the size we want, we will copy it several times.
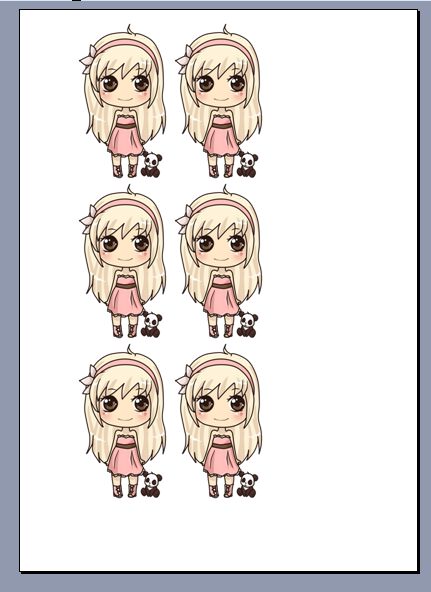
The reason for doing it this way is because we must bear in mind that each image or drawing will be like a puzzle, some pieces will form the front part and others the back part and we must cut them individually to fit them together. If we only copy the image once, we will be missing pieces to make up the entire pattern.
For example, the drawing of the girl would look like this after printing and cutting.
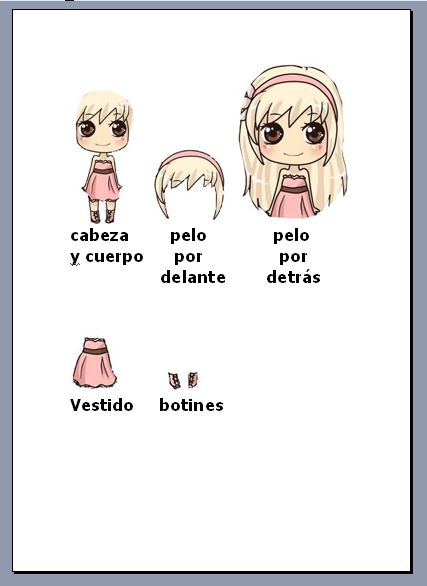
If we had only printed the image once, it would not have been possible to cut out the head and body and the back of the hair separately, for example.
When printing the drawing we can do it on a sheet of paper or on self-adhesive vinyl (you can see in this link how to do it). The advantage of printing on self-adhesive vinyl is that it is fixed on the felt and the pieces can be cut without fear of the pattern moving.
What if I don’t have a printer?
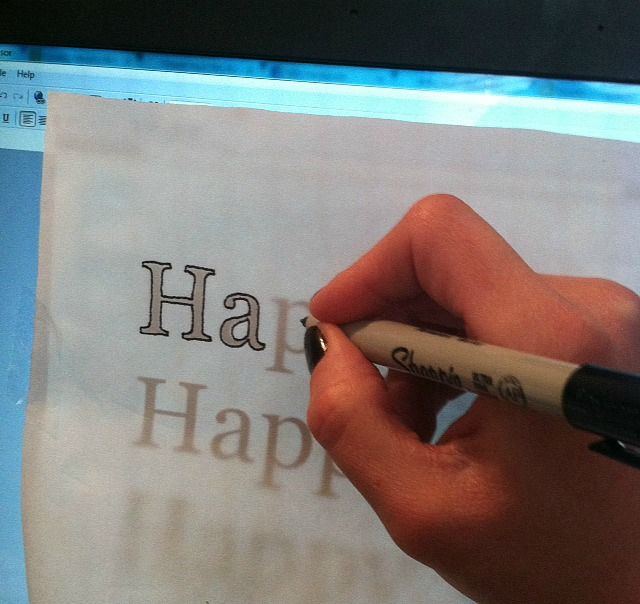
If you don’t have a printer you can trace the drawing directly on the computer screento do this you have to raise the brightness of the screen to the maximum, fix with zeal a piece of paper that is not very thick (vegetable paper or baking paper) and trace the outline of the figure.
In the following image you can see an example of how to trace some letters by placing a sheet of paper on the computer screen.
As in the printer option, before tracing the image or drawing it can be resized to the size we want.
With this option each part of the drawing has to be traced independently. In the following image you can see how the drawing would look once traced by pieces.
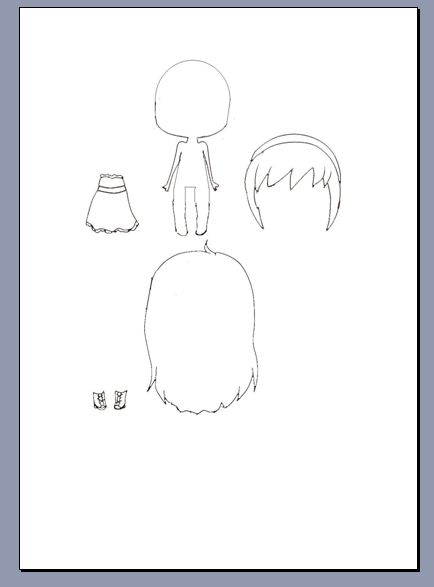
Sometimes you will have to invent the parts that are overlapped by other parts. For example, I have invented the area of the trunk of the doll because it was hidden under the dress.
I already have all the pieces, now what?
The next step will be cut out the different pieces that are part of the pattern and that will serve as a guide to cut the felt. If you have used paper you can fix it to the felt so that it does not move when you cut it with a little tape on the edges, if you have used self-adhesive vinyl it will be enough to stick it to the felt (when peeling it off it will not leave any type of residue)
To cut straight lines I recommend the use of normal scissors and scissors with a curved tip for rounded areas.
In the following image you can see the different parts that make up the drawing already cut in the felt.
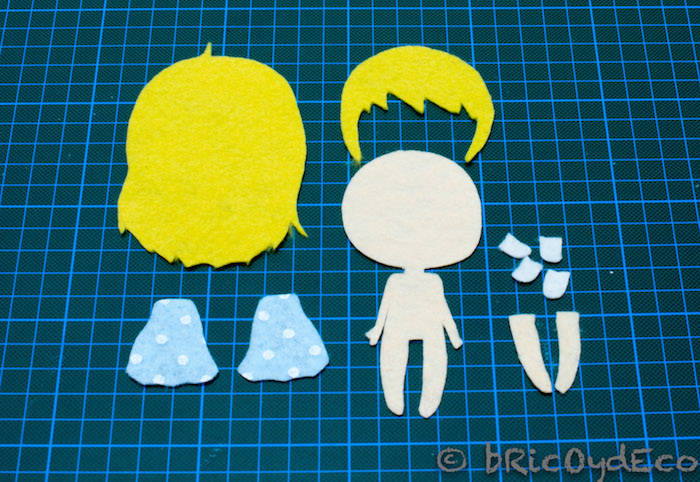
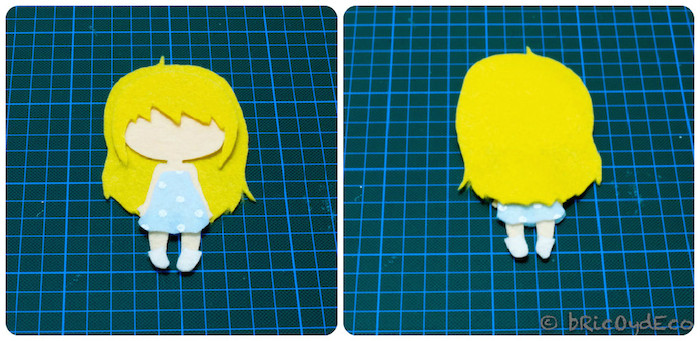
for a good finish We must bear in mind that although the piece we are going to make is flat and has no filling, it must have a front and one back.
In this specific case, the front part will be formed by the piece that forms the head and the body, the front part of the hair (the bangs), the dress and the ankle boots. In the back we will have the hair, again the dress and the boots (they are cut twice) and the part of the legs that is not hidden by the hair.
Finally, remember that in the case of flat figures I recommend using felt between 1 and 2 millimeters, although for small details (hairband, dress belt, etc.), you should use 1-millimeter felt or fabric.
I hope you liked this second installment of the Felt workshop from scratch, If something has not been clear or you have any questions, you already know that you only have to ask. For next week I will continue with the pattern but this time we will see how to make flat and 3D flowers.
If you found it interesting, I would appreciate it if you would share it on your social networks.


