

.
 homemade recycled paper
Have you ever wanted to make your own recycled paper? Have you ever wondered how to do it?
our friends from Unplug Your Kids they have done it and here they show us how we can do it too. For this project they have used a good amount of used printer paper and of old newspapers.
If you want to make your own recycled paperfollow these steps.
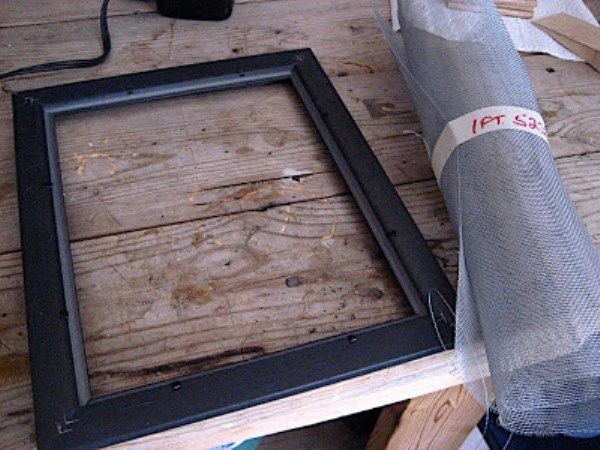
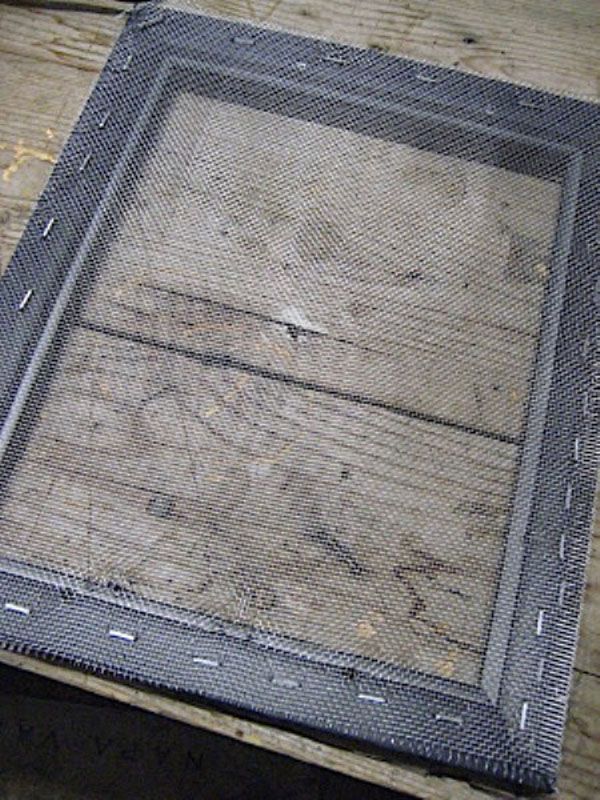
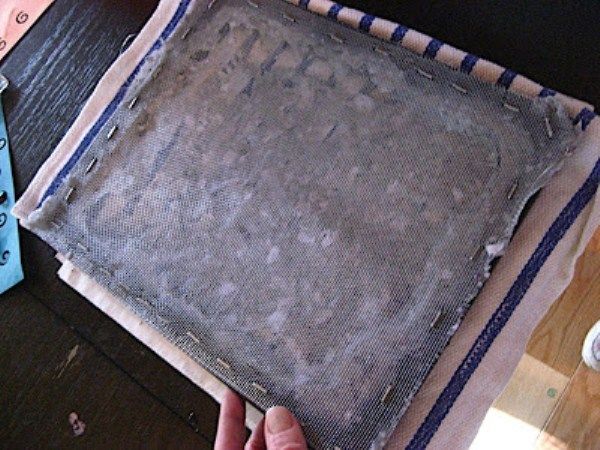
The first thing is to make yourself a sifter. You have two options, or buy it done, or make it with four wooden strips. However, these friends have gone further, they have made it themselves by recycling an old wooden frame.
Keep in mind that the paper you will get will be the same size as the sifter. You must take this into account before doing it.
In this case the size of the frame is about 20 x 25 cm, approximately the size of a sheet of paper.
You will also need mosquito netting, which you can also recycle or, if you don’t have it, you can also buy it at any hardware store.
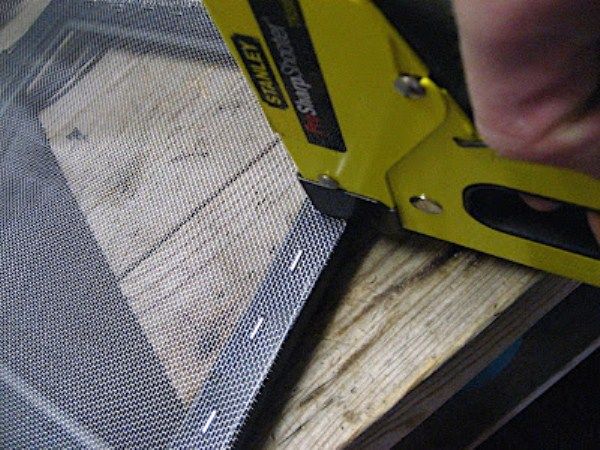
You must overlap the metal fabric on the back of the frame, aligning it on two of its sides and staple it with a stapler. diy.
Once this is done, you must tighten it to the maximum and staple it on the other two sides. Now cut off the excess hardware cloth. To do this, you can use simple kitchen scissors, which are more robust.
We will need the following materials:
1) Raw material. Paper:
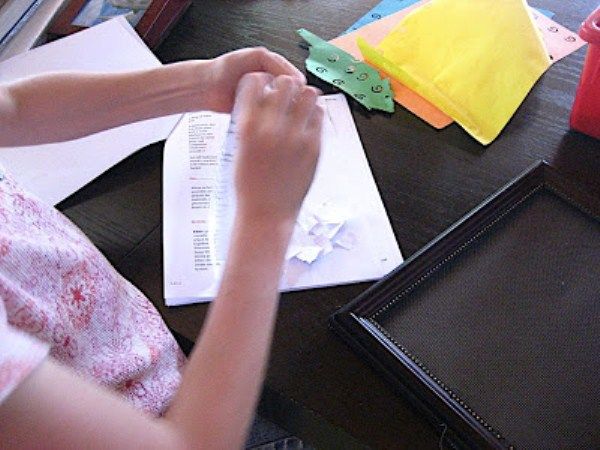
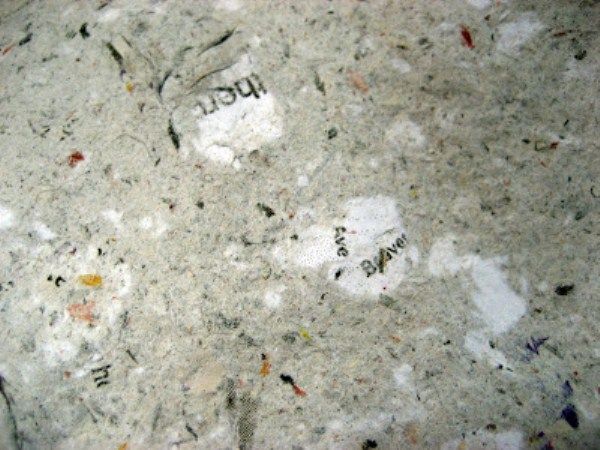
Now you must gather the raw material. Printer paper, newsprint, and the remains of a paper drill have been used in this work. But you can use any type of paper, such as wrapping paper, magazine paper, paper bags, or any other type.
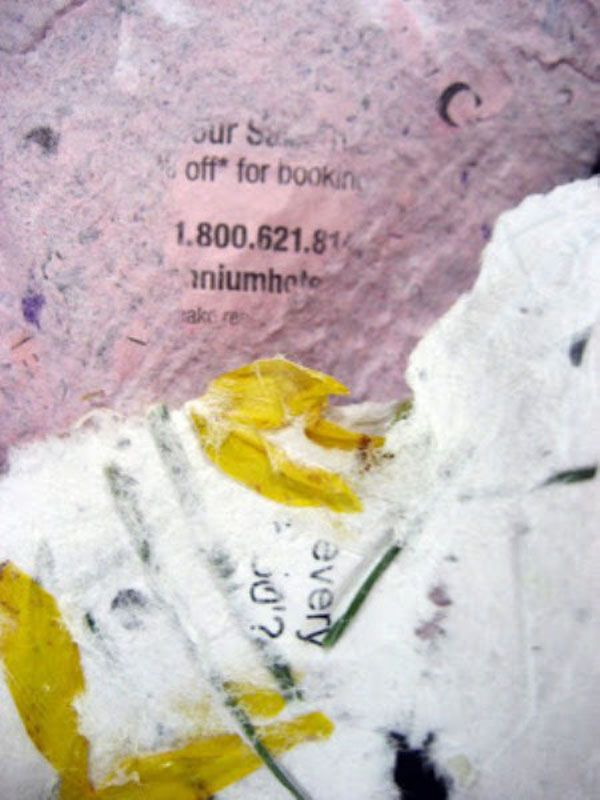
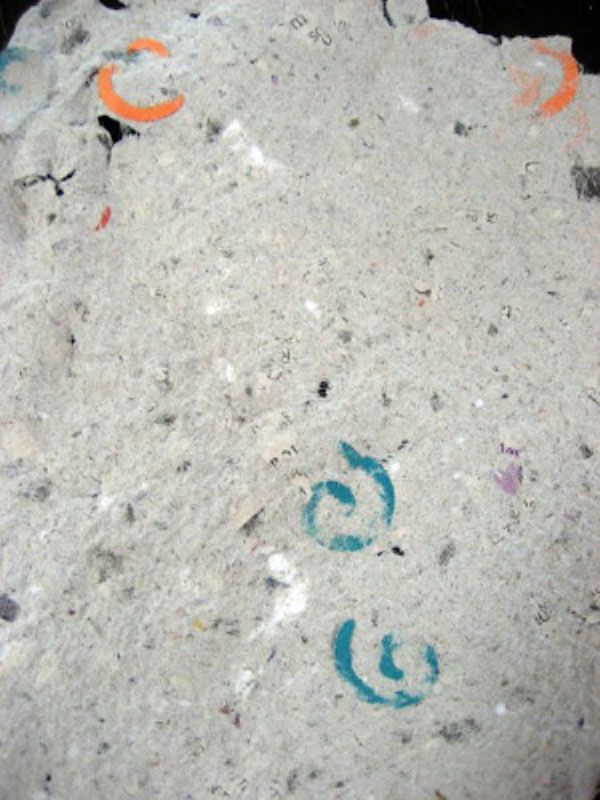
If you want to give your recycled paper a personal and colorful touch, you can include flower petals, leaves, thread scraps, aluminum foil scraps, for example. We used construction paper punched outs left over after using a fancy hole punch.
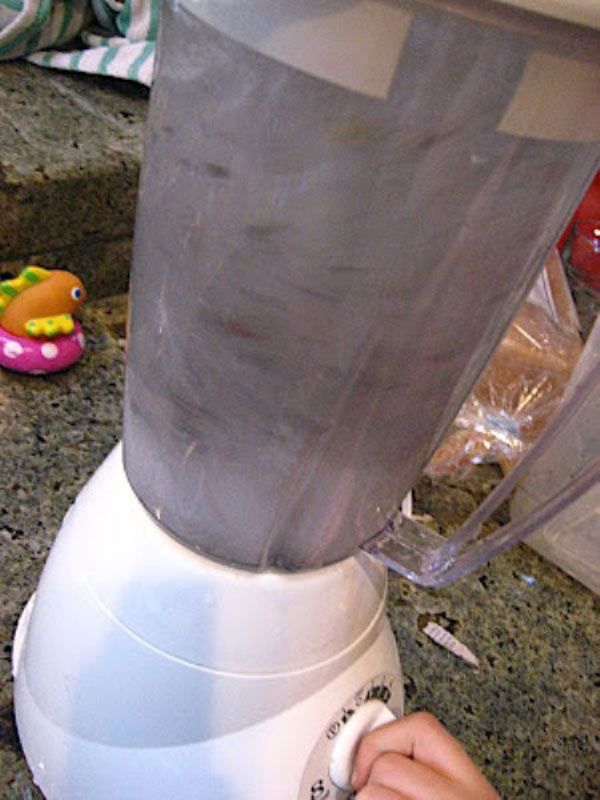
2) We will also need a food mixer.
3) Some clean kitchen towels, or a piece of felt.
4) And a roller.
Let’s make the dough:
The first thing we need to do is break the paper into small pieces. They do not need to be the same, since later we will grind them in the blender.
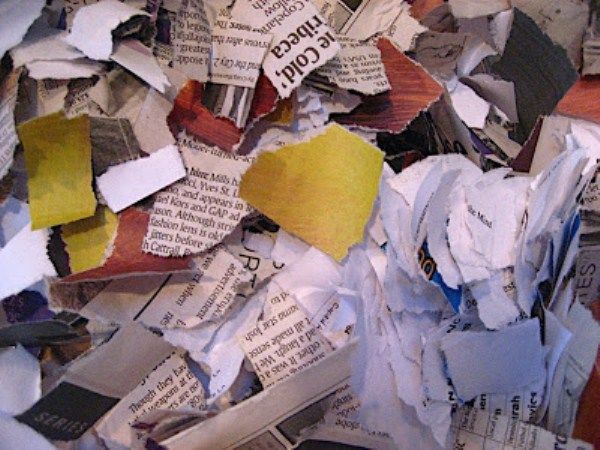
Leave the pieces of paper in water for a day or so. You can also add a few drops of bleach to the water.
Fill the blender no more than 3/4 full of water and add a handful of pieces of paper.
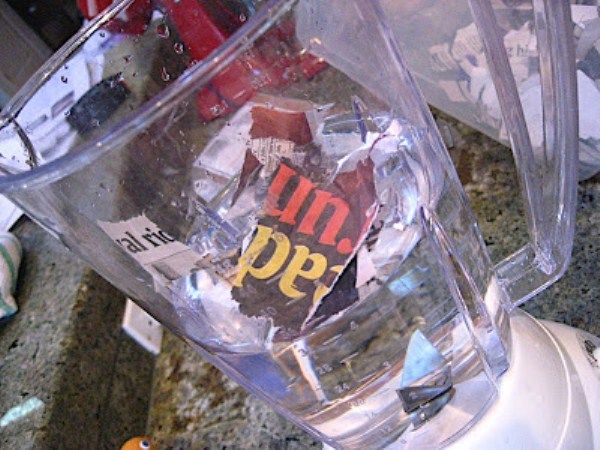
We mix vigorously until the remains of paper are shredded and a uniform paste is created.
Go adding small amounts of paper and continue beating.
Repeat these steps until you get a homogeneous paste that is neither too thick nor too watery.
You can do several tests until you get the right consistency.
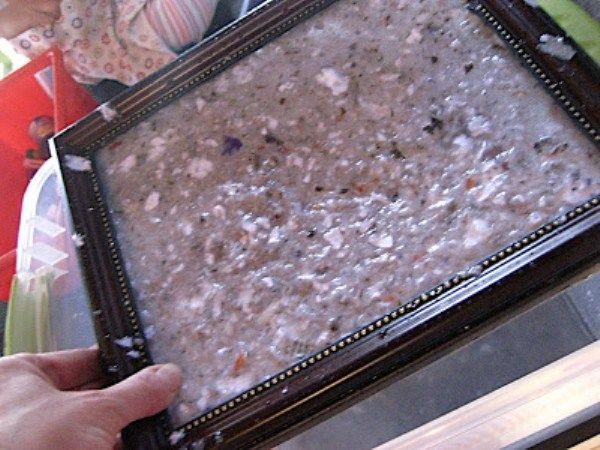
If you notice that you have run out of water or paper, you can put the dough back in the blender and add more water or paper, depending on the case, and beat again.
Finally, if you have decided to add decorations (petals, threads, etc.) to the paper pulp, you must mix them by hand, since if you put them in the blender, they will be destroyed and we will not obtain the expected effect.
Do not add too many decorative elements, since what they do is reduce the paste’s union.
However, in case you decide to include a good amount of these, you should add a little glue or cornstarch, to obtain a compact paste.
Make the paper :
Now pour the paper pulp mixture over the sieve. Do not add more than necessary, you must distribute the paste over its entire surface in a layer that is not excessively thick.
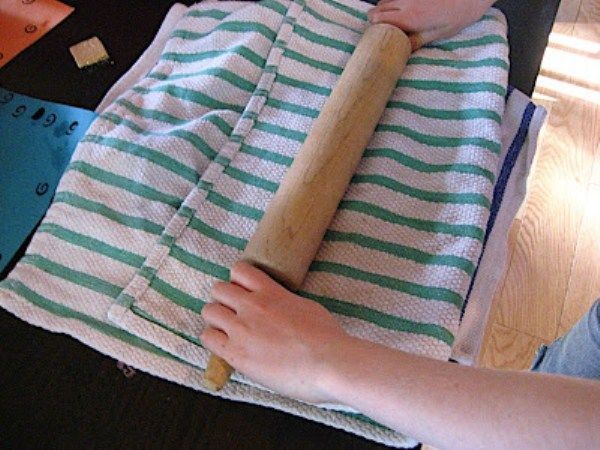
Let the water drain for several minutes. Meanwhile, prepare two kitchen towels or cloths.
Put some folded newspaper under the dish towel to help soak up the water.
When most of the water has drained and is just barely dripping, gently tilt the strainer and set it down on the towel or felt.
Gently tap the back of the chicken wire so that the paper falls onto the towel.
Cover the wet paper with another clean, dry, folded towel and roll over it until most of the water is removed.
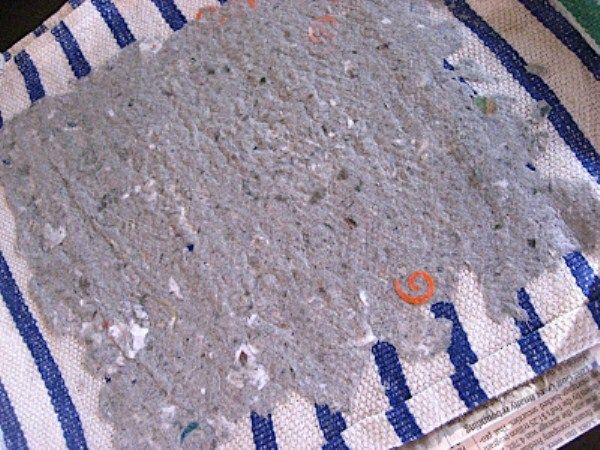
Now comes the most complicated. Carefully remove the upper towel, but do not pull upwards, but backwards (as if you were peeling off a sticker).
Do the same with the other towel.
you already have your recycled paper sheet!!
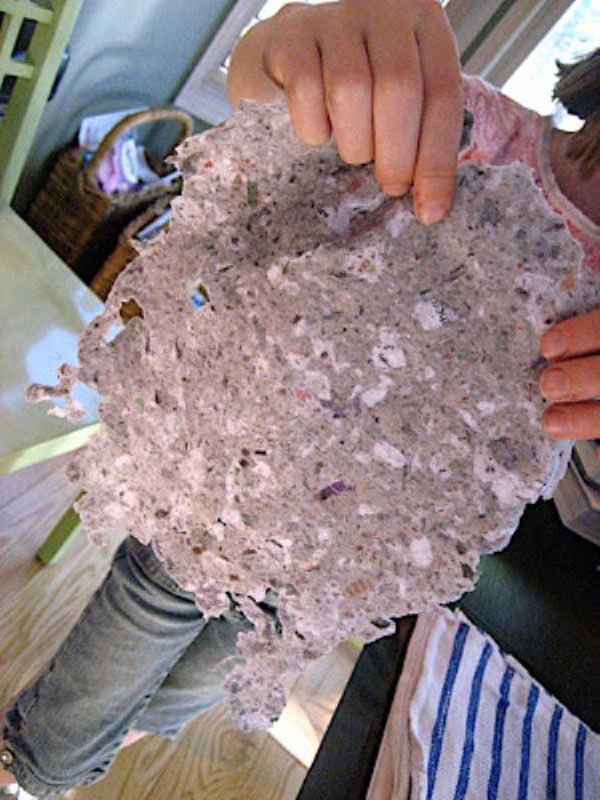
Hang it up with clothespins and let it dry.
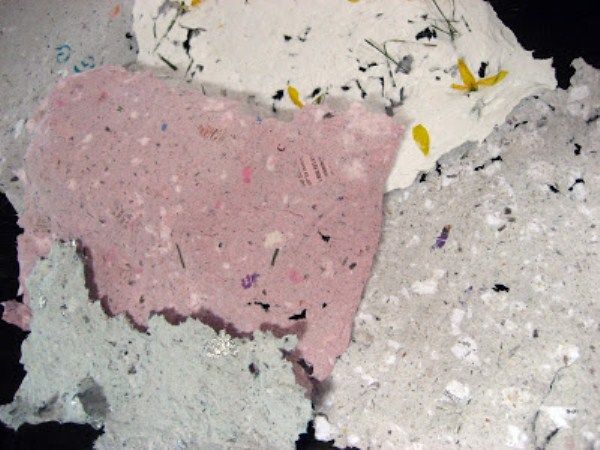
Recycled paper variants:
Newspaper and white waste paper
Newspaper and scraps of paper punch
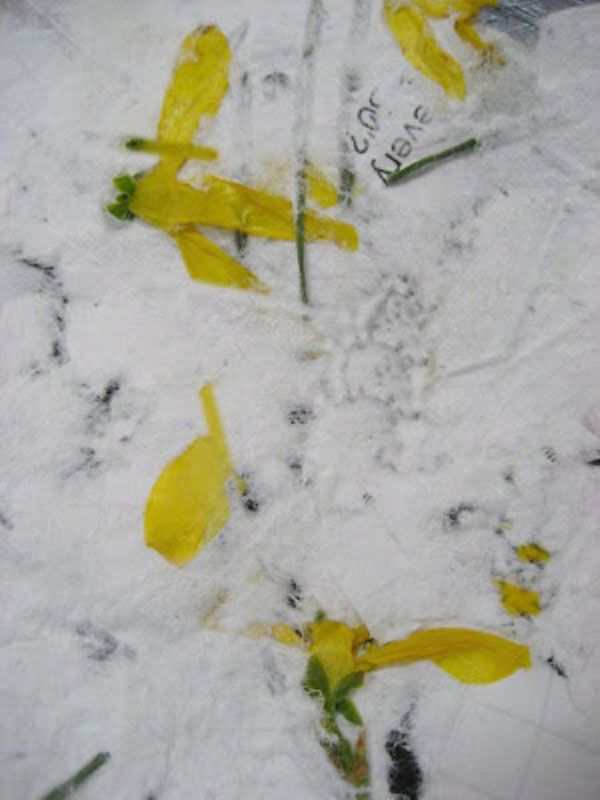
White used paper with grass and flower petals
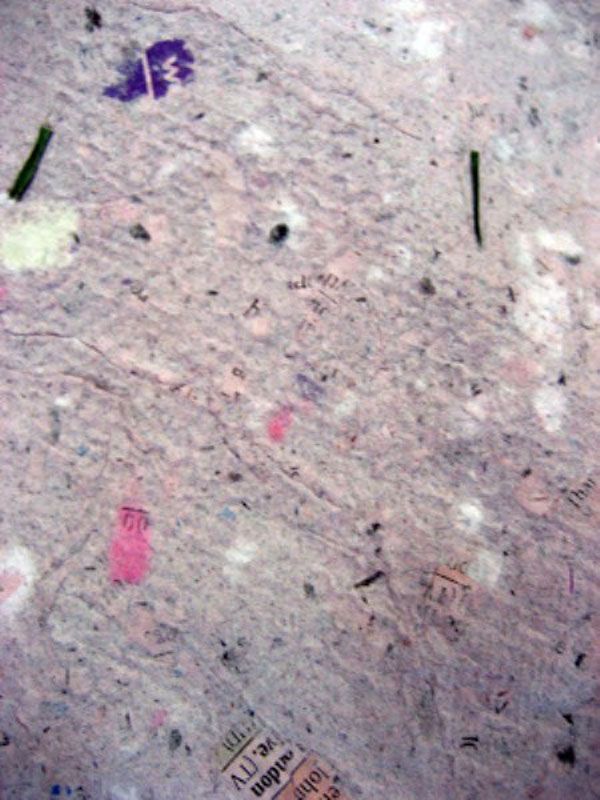
Newspaper and white scrap paper with red food coloring added to blender
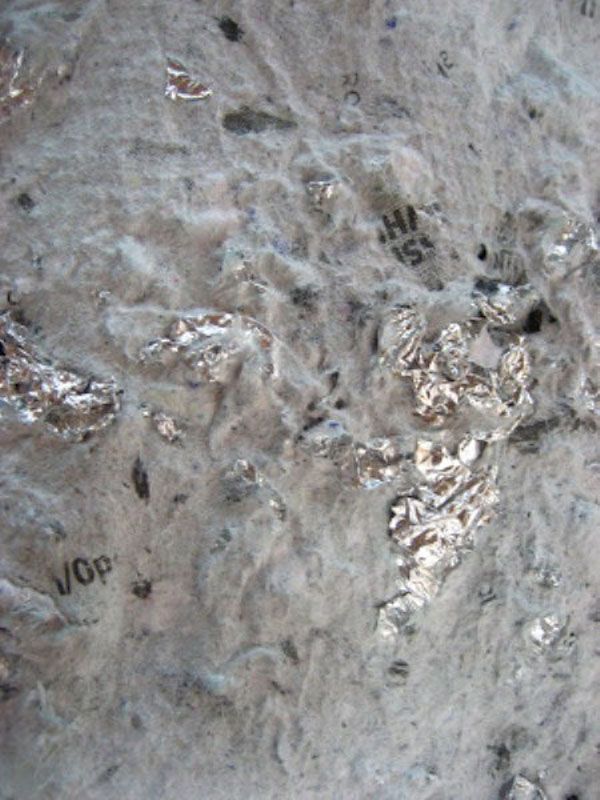
Newspaper and white scrap paper with blue food coloring and some aluminum foil
Tips and Notes:
- You can fix holes caused by dumping paper out of the sieve by making another small piece of paper in the sieve and placing it on top of the holes. And you proceed as we have indicated, put the upper towel and pass the roller.
- If the paper doesn’t turn out the way you wanted, just return it to the blender and mix again.
- The paper will take on a significantly lighter shade once dry.
- If you want to give a very original touch to your new paper, leave a piece with a random word, so that it forms part of the new document.
- For the best texture of the paper, leave the torn pieces of paper overnight in water. Or you can also put it in boiling water. See more information.
- It seems that the use of already recycled paper produces a more robust result. See more information.
- Like everything in this life, the learning and experimentation stage is also essential in this technique. It is normal that in the first attempts you obtain fewer successes than in later attempts. Keep trying! Keep experimenting!
Source: Unplug Your Kids
.


