

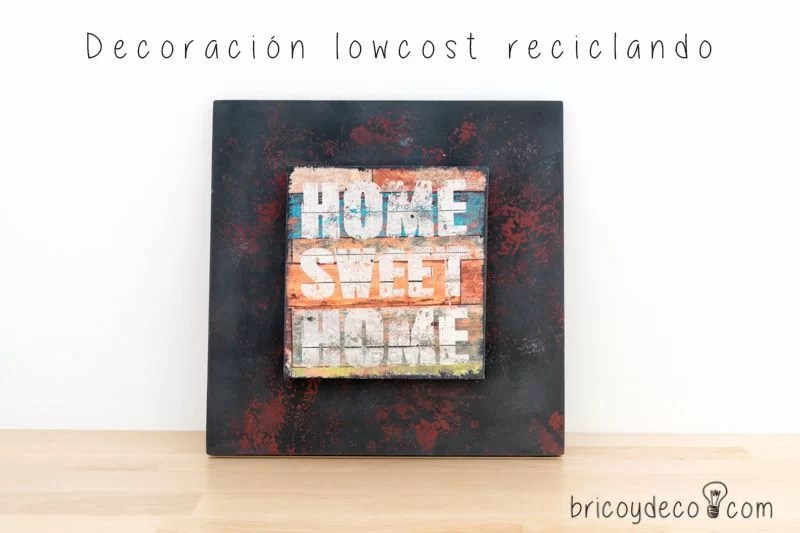
Learn how to recycle to decorate and make yourself an original, low-cost, personalized industrial-style painting.
Do you have any leftover or surplus wood at home? Do not throw it away! In fact, I have a drawer at home where I keep the surplus wood from my DIY projects. As small as they are, I like to keep them because I like recycle to decorate and I take advantage of them both to create new objects and to test paints, colors and techniques.
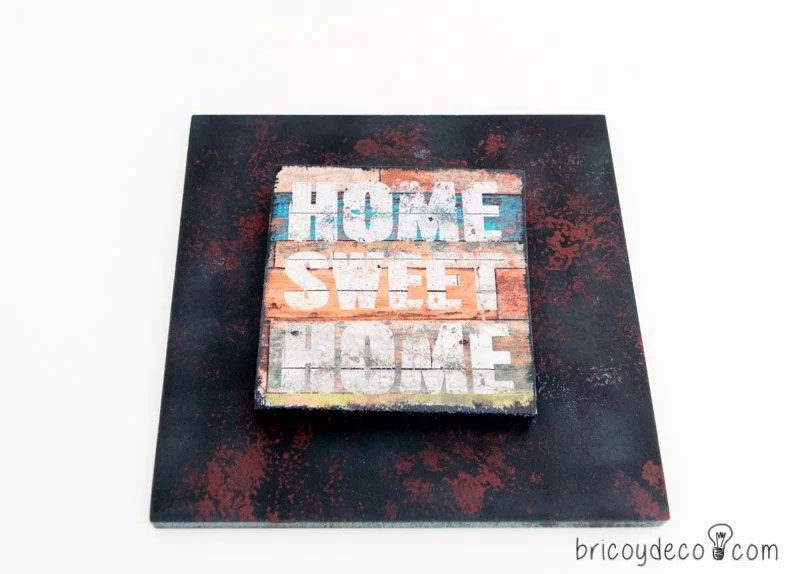
Some time ago I had a thick pine board that split into two pieces due to a crack. One of the pieces was quite square and the perfect size to decorate with a paper napkin that she had bought months ago. In addition, it also had a DM frame that I got on sale for only €0.50.
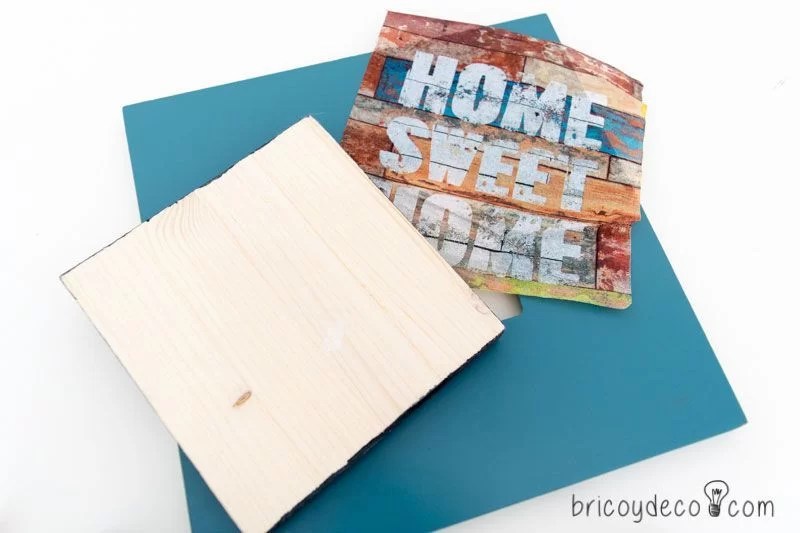
Taking into account the reason for the napkin, I was clear from the first moment that I was going to give the painting that industrial touch that I like so much. The first thing I did was peel off the layers of the napkin that are not decorated and center the phrase of the printed motif on the wood, in this way I had an overview of how it was going to look.
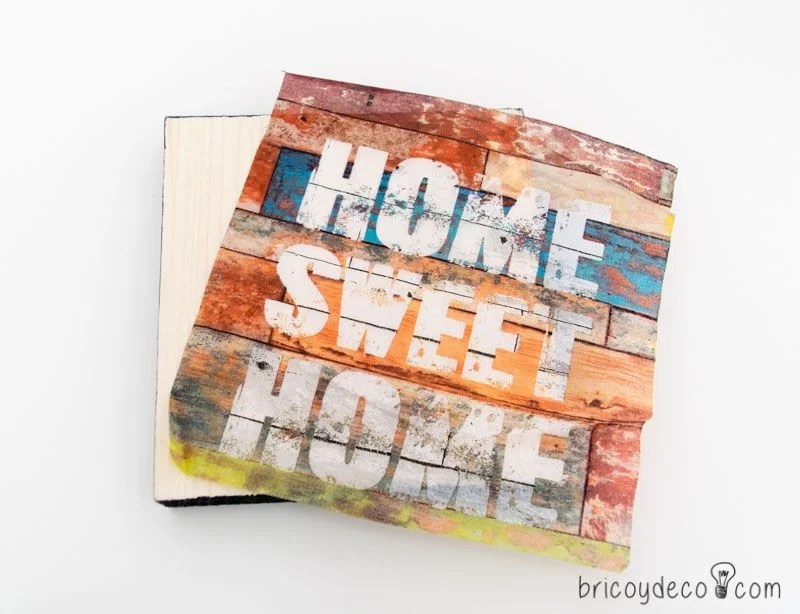
I then sprayed the back of the napkin with spray adhesive. The paper of the napkins is very thin and delicate, it is particularly my favorite when decorating with the decoupage technique because it is like a second skin, but the liquid adhesives can get too wet and damage it when placed. For this reason I usually opt for spray adhesive when fixing this type of paper.
If you don’t have spray adhesive you can watch this video tutorial in which I show how to do decoupage on wood with decoupage glue.
To correctly fix the napkin we can help ourselves with a spatula but it should not be passed directly over it, but it should be placed on top parchment paper or plastic sheet so as not to tear it with the spatula.
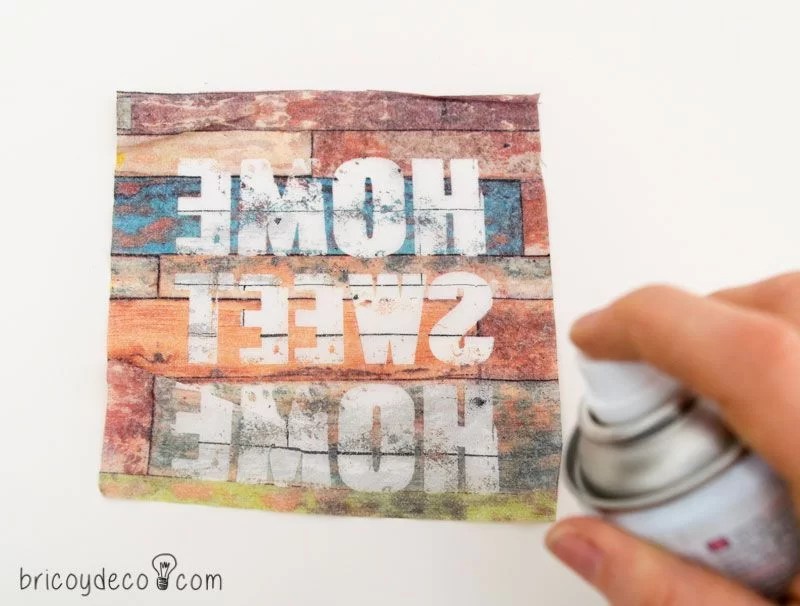
After placing the napkin and letting the adhesive dry, I smeared the entire perimeter with black acrylic paint, giving small brushstrokes, in this way simulating a stripping of the edges. Then I protected the result with spray varnish.
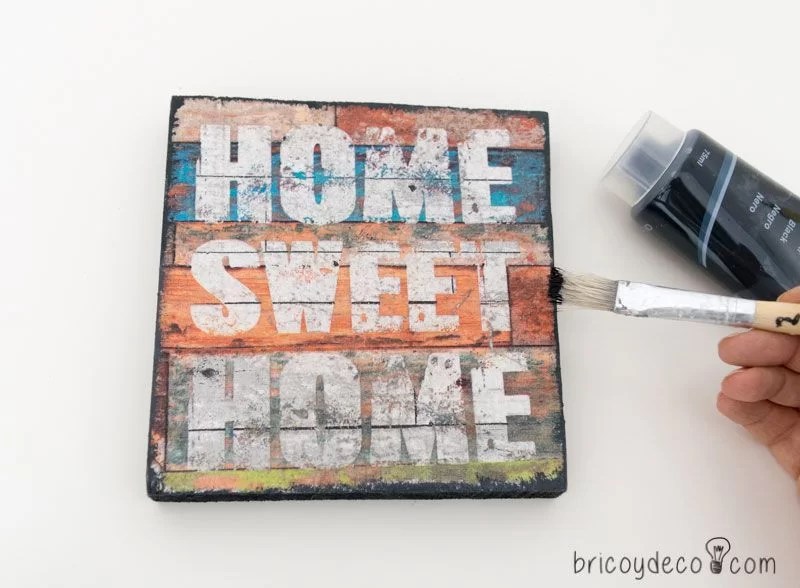
In the same way as the spray adhesive, the varnish in this format prevents the napkin from getting too wet and wrinkling, although it can also be varnished with glue for decoupage. On the other hand, it must be taken into account that if a liquid varnish is used, the napkin must be allowed to dry well so that it does not wrinkle when placed (approximately 12 hours).
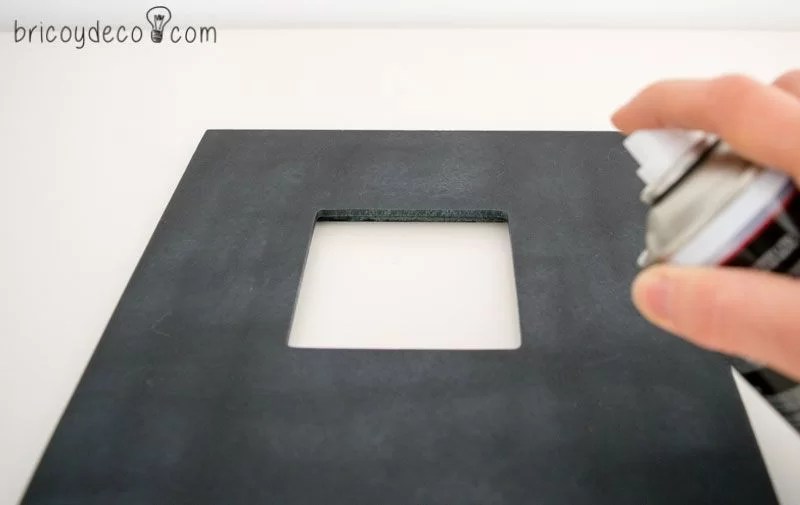
The next step was to create a rust effect in the DM frame to give it a more industrial look. To do this, I first painted it with black forging spray that gives it an appearance similar to that of iron.
After that I let the paint dry for an hour and stained the surface with dark red paint.
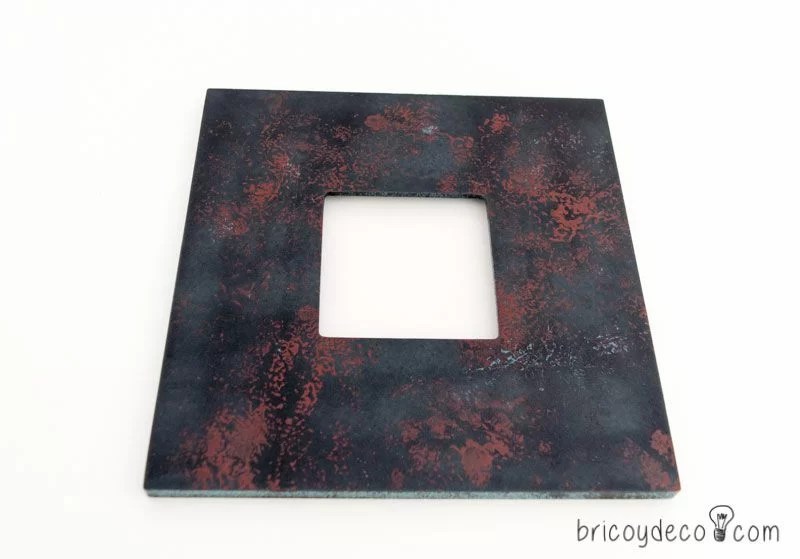
to get this spotted appearance you have to put some paint on aluminum foil, crumple it up and then transfer it to the surface of the frame. Soon I will make a video tutorial so you can see better how to create this rusty effect with foil. 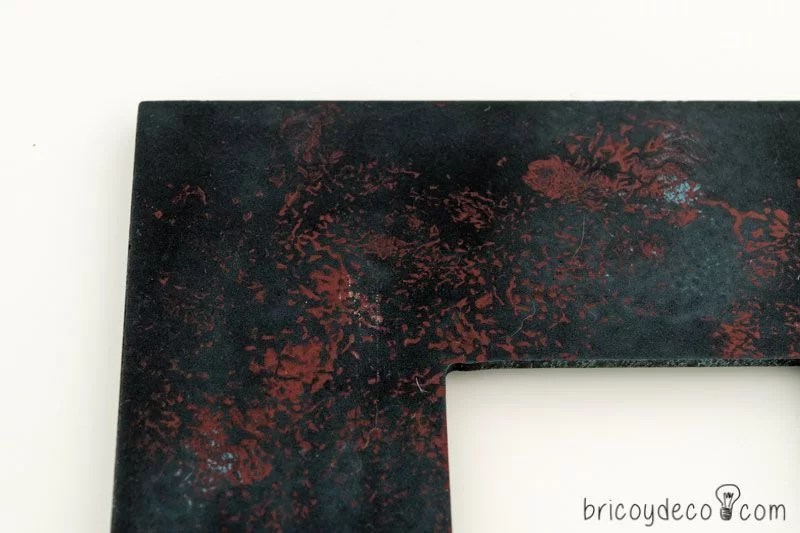
Finally, it only remains to fix the wooden square to the frame with mounting adhesiveand.
do you dare to recycle to decorate? Using different techniques and effects you can transform remains and balances into a low-cost and personalized painting in an industrial style to decorate that small corner or wall, surely it will not leave your friends and visitors indifferent.
If you liked this post, you can see many more DIY projects and low-cost decoration ideas at .


