There are home repairs in which, by inertia, we turn to professionals. However, in many cases, due to its extreme simplicity, we can solve them ourselves without any complications. Specifically, on this occasion I am referring to the change of toilet cistern mechanism. With the help of the millions of tutorials that many youtubers have published on the net, the task is even easier if possible.
In this article we show you how to replace the mechanism of a cistern, with another that incorporates SAR technology.
What is SAR technology?
SAR stands for Automatic Regulation System. Therefore, it is a system that greatly facilitates the installation of the mechanism. It is aimed not only at the amateur, but mainly at the professional. The enormous simplicity at the time of assembly translates into speed and time savings and, therefore, costs.
In BricoBlog we have been able to verify how an amateur of average level, without having knowledge of plumbing, takes between one and two minutes to assemble this mechanism.
On the other hand, apart from the simplicity and speed of assembly, it also has the advantage of its universality. By this we mean that this mechanism is compatible with the vast majority of current systems.
This mechanism is designed to be compatible with the vast majority of bases and hoods that currently exist, regardless of their brand.
In the diagram that we include below, you can see all the possible adaptations that it is capable of contemplating. Covering practically completely any scenario that we can find.
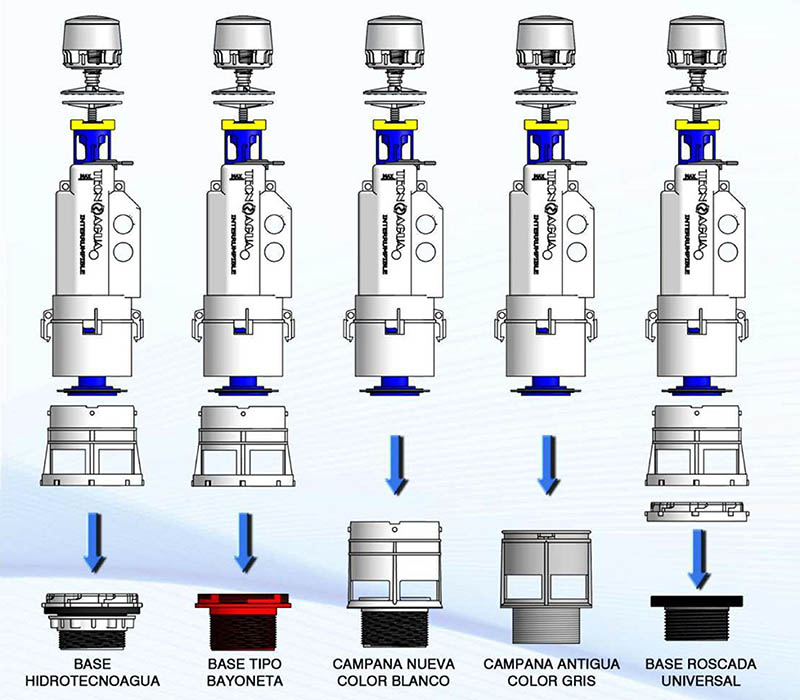
Possible scenarios with which we can find ourselves in which the installation of this mechanism is completed without any inconvenience.
Therefore, in this tutorial we will see what this innovative system consists of, patented by TecnoAgua, the advantages it provides over the traditional one, and the simplicity of its assembly.
But before getting into the matter, let’s unpack it from its box to see what parts it comes with, and what it consists of.
Components of this toilet cistern mechanism
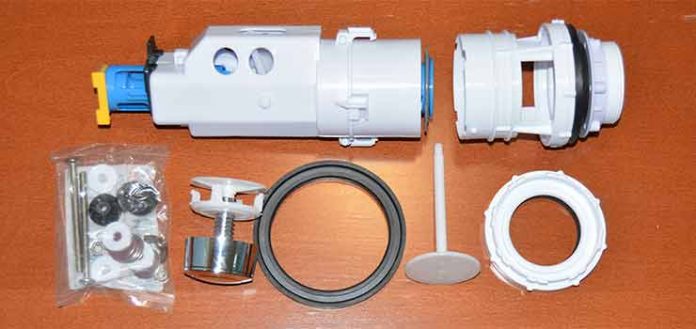
The toilet cistern mechanism universal consists of the following parts:
- The push button. Later we will see the different parts that compose it.
- The regulation plate. Which is a plastic threaded rod with a base, which establishes the connection between the button and the body of the cistern.
- The body of the tank.
- A rubber gasket and a series of adapters.
- And finally, various components. Such as screws, brackets, plastic and metal washers, and two small rubber cones that ensure the tightness of the joint between the tank and the toilet bowl.
If it is compatible with the mechanism that we had previously assembled, half of the pieces will be left over. Don’t be scared, it’s correct. But, if this were not the case, and we had to assemble the complete mechanism, in this kit we have everything necessary for it.
Well, at this point we will stop to see in greater detail both the body and the adapters.
Although, as you read me, it seems that the system is very complex, nothing is further from the truth.
When you see how it is assembled, in the video tutorial that we include a little further down, you will see how extremely simple it is.
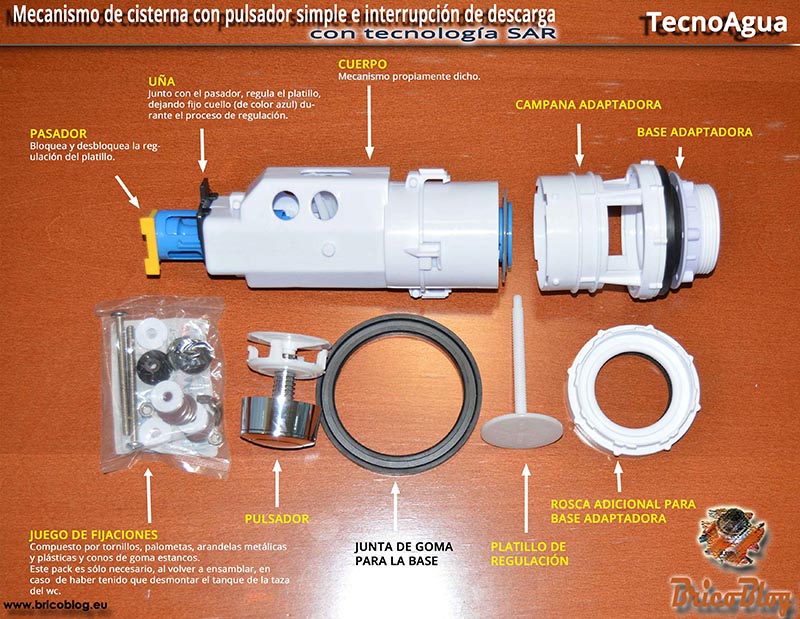
Exploded infographic of the TecnoAgua universal toilet cistern mechanism.
Main body parts of the tanker
Having said that, we will focus on the body, which is the mechanism itself. Specifically, this is a simple button with discharge interruption, and consists of the following parts. We’ll start from the top down:
- We have the yellow pin that what it does is, allow the adjustment of the regulation plate when it is fully inserted. Or leave it fixed, if it’s in the locked position, which is out.
- In order to carry out the regulation operation, the blue collar must be fixed. This, precisely, is the mission of the black nail.
- Here we have marked overflow level.
- And, finally, it has mounted a adapter, Y a bell adapter. Which may or may not be necessary, depending on the mechanism that we have previously assembled.
Assembly of the toilet cistern mechanism
After everything explained, which was necessary to understand how this system works, we will proceed to mount it.
1st Step – Previous actions
The first thing we have to do, as in all plumbing jobs, is to turn off the water. Therefore, we close the stopcock.
We empty the tank, and remove the lid, for which we have to disassemble the button.

Disassembling the button of the previous mechanism.
2nd Step – Replacement of the mechanism
Now that we have access to mechanismwe remove it, and carefully compare it with the new one, in order to see if we need to use any of the adapters and which one.
In this case, it seems that we will be able to mount it directly on the previous hood, without having to use any of the adapters.
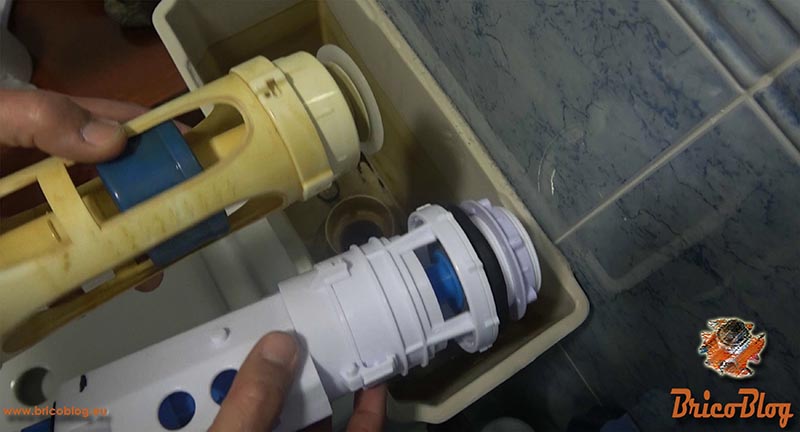
Comparing the similarity of the anchoring of both mechanisms.
Therefore, we have eliminated the bell that it comes with and, when trying to install it, we have verified that it is 100% compatible.
Installation is quite simple. It is placed in its location, and is turned to the left just a little, until you hear a “click”.
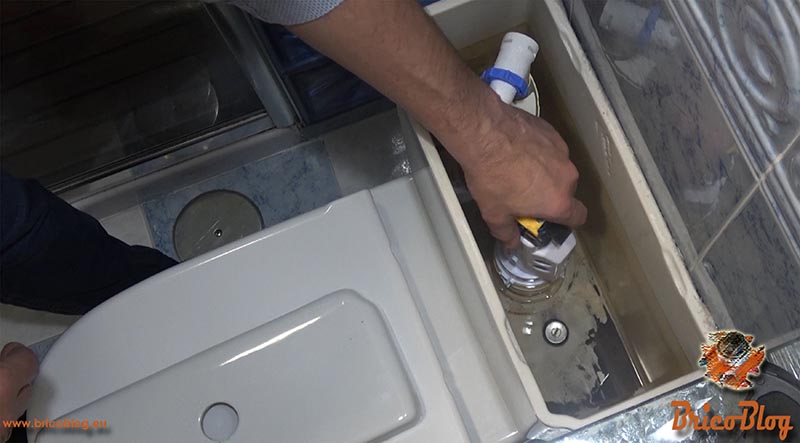
Anchoring the new toilet cistern mechanism.
3rd Step – Regulating the new download installation
Now we open the stopcock again, so that the tank is filled.
Keep in mind that the water level cannot exceed the overflow. Since, if this happens, the cistern will be continuously draining, and therefore water will continue to enter, with the consequent expense.
This is precisely what has happened to us during the tests carried out. The water wouldn’t stop coming out.
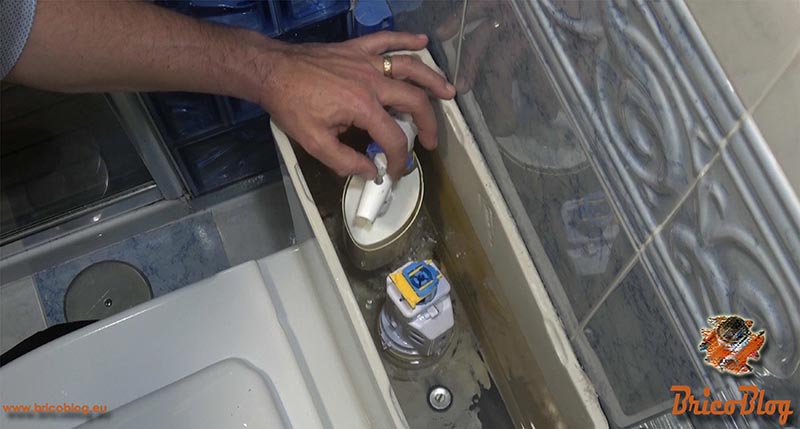
Regulation of the filling buoy.
To solve this, we proceeded to regulate the buoy.
How? As simple as turning the threaded rod. Turning it to the left, we decrease the water level. The more turns to the left we make, the lower the water level will be. Therefore, we regulate it in this very simple way, leaving the level below the overflow.
4th Step – Assembly of the new button
Well, now we proceed to assemble the new button.
First of all, we disassemble the saucer and the adapter thread.
We place the button in its place, on the upper part of the cover, and fix it with the thread.
Once fixed, we put the saucer back.
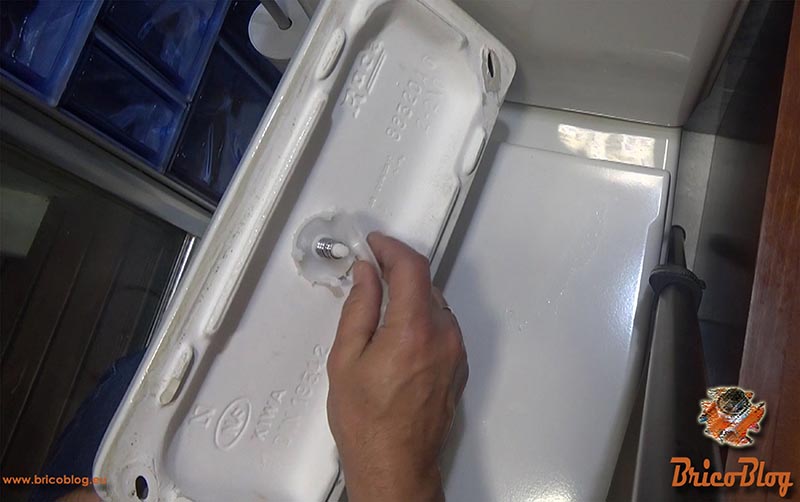
Assembling the new button.
5th Step – Connection of the button with the mechanism
To make the connection, we have to make sure that the yellow pin is completely removed, that is, in the “open” position.
We insert, pushing only a little downwards, the rod of the regulation plate.
Once this is done, we put the tank lid on top, and let it fall slowly, until it reaches its final position.
Only with this, the connection between the button and the mechanism is achieved.
We raise the lid again and, to fix the adjustment plate, we have to fully insert the yellow pin, that is, putting it in the locking position.
And, finally, we remove the black tab.
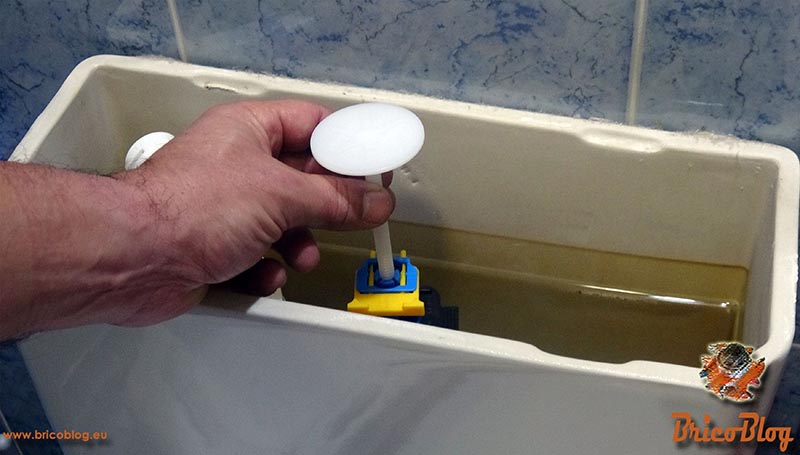
Inserting the regulation plate.
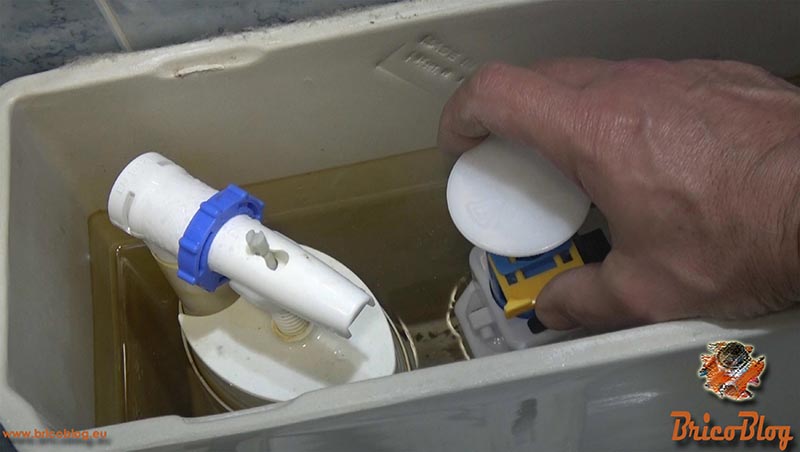
Blocking the regulation plate, by blocking it with the pin.
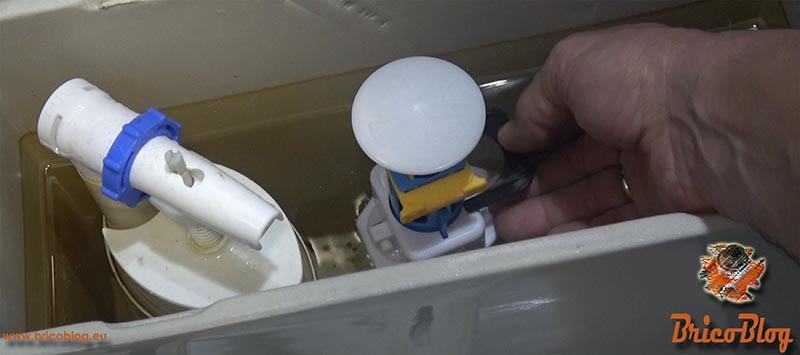
Release of the drive collar (blue), by removing the tab.
We replace the lid, and test that it works correctly.
Installation finished. As we have said before, no more than two minutes.
6th Step – Tuning the button (optional)
This last step is optional, basically because it does not influence the functionality of the mechanism, but rather it is a purely aesthetic aspect.
Instead of making the button so prominent, we have preferred to make it much more discreet. To achieve this, we had to disassemble the button again.
We have left only the upper part, removing the lower decorative ring. And we’ve put it back together.
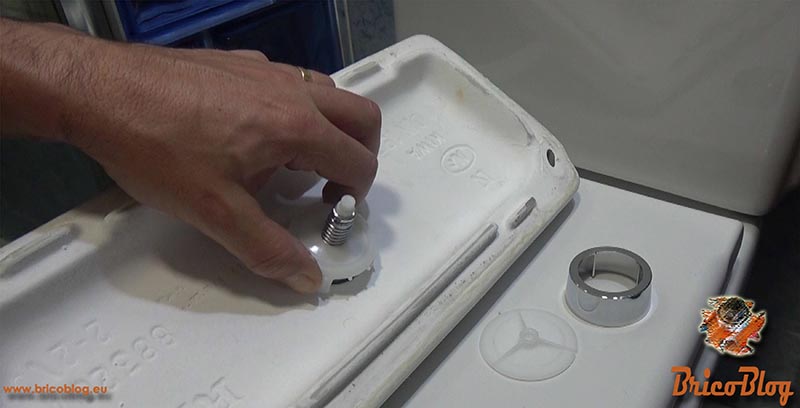
Disassembly, modification, and new assembly of the button.
What we have done with the piece that we have removed is to lower the button. Therefore, the position of the regulation plate is no longer correct, so we have to carry out a new regulation in the same way as before:
We take out the pin, put on the tab, put on the cap. We lift the lid again, insert the pin and remove the tab. That easy.

Comparison of the two ways to install the button.
As you have seen, the installation does not have any complications.
Video of how to install a toilet cistern mechanism
Although we always try to be as explicit as possible, on many occasions it is difficult to explain oneself clearly through writing. For this reason, we have included the video tutorial of the entire process below.
However, if you need any clarification, you can leave us your questions in the comments, and we will respond as soon as possible.
We hope you liked this article on how to replace a toilet cistern mechanismand has been of your interest.
If you don’t want to miss any of our articles, subscribe to the blog and you will receive an email notification with each publication we make.
.


