

.
 Screen printing and design your t-shirts
Step-by-step tutorial on the technique of screen printing t-shirts.
Chapter 8 – Stamping: first steps
We have reached the end of the home screen printing workshop… printing our first t-shirt!
First of all, we protect the screen with bodybuilder’s tape to prevent the passage of paint where the drawing is not, as we see in the video.
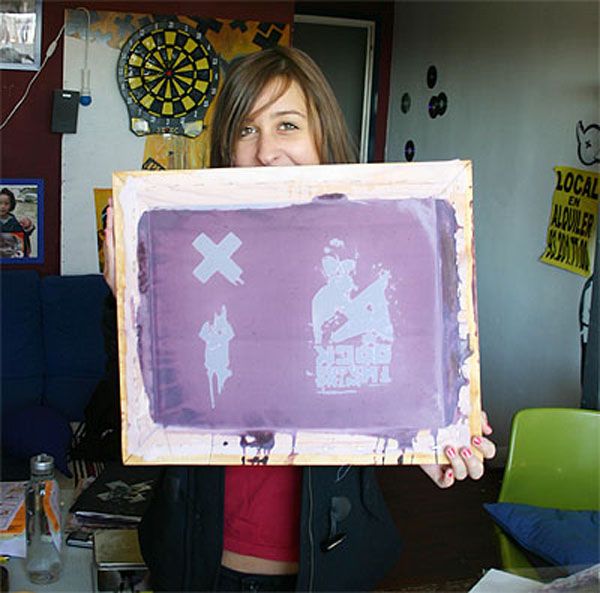
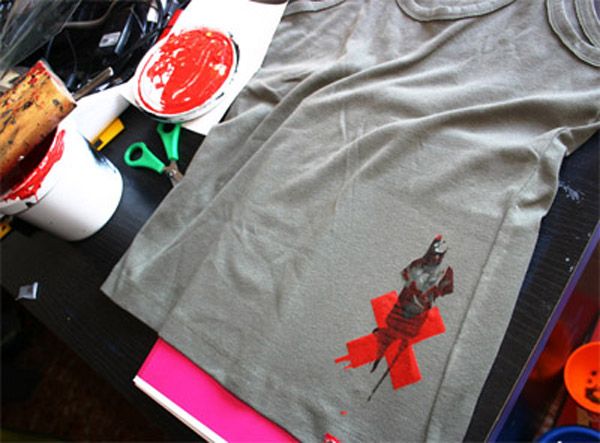
First we have to prepare the shirt and think about the colors that we are going to use. In this case the shirt is green, and we have prepared the screen with several drawings, so we can make a print of several inks.
On one side we have the X and below it the silhouette of Kloe, we are going to superimpose them and use red and black inks.
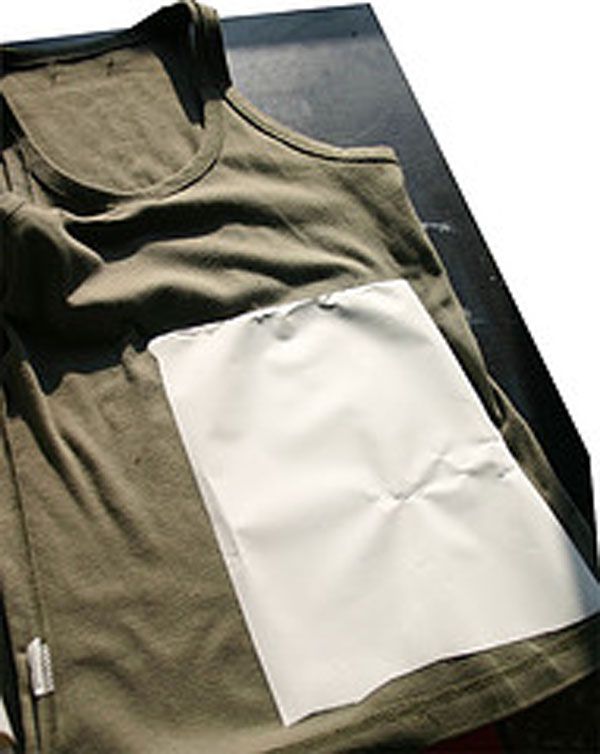
To prevent the ink from running, we are going to fix the fabric by means of an adhesive, vinyl type, book cover,…
We turn the t-shirt over and glue a piece slightly larger than the drawing, we put the t-shirt back on the right side, now we will have the flattest surface.
The adhesive must be on the inside of the shirt.
We put the screen and pour a little ink on the upper part of the drawing, holding the screen well, and pressing (you can put weight on the sides of the frame so that it does not move) we extend the paint downwards. One or two passes, this will make sure that the paint covers all the pores of the shirt.
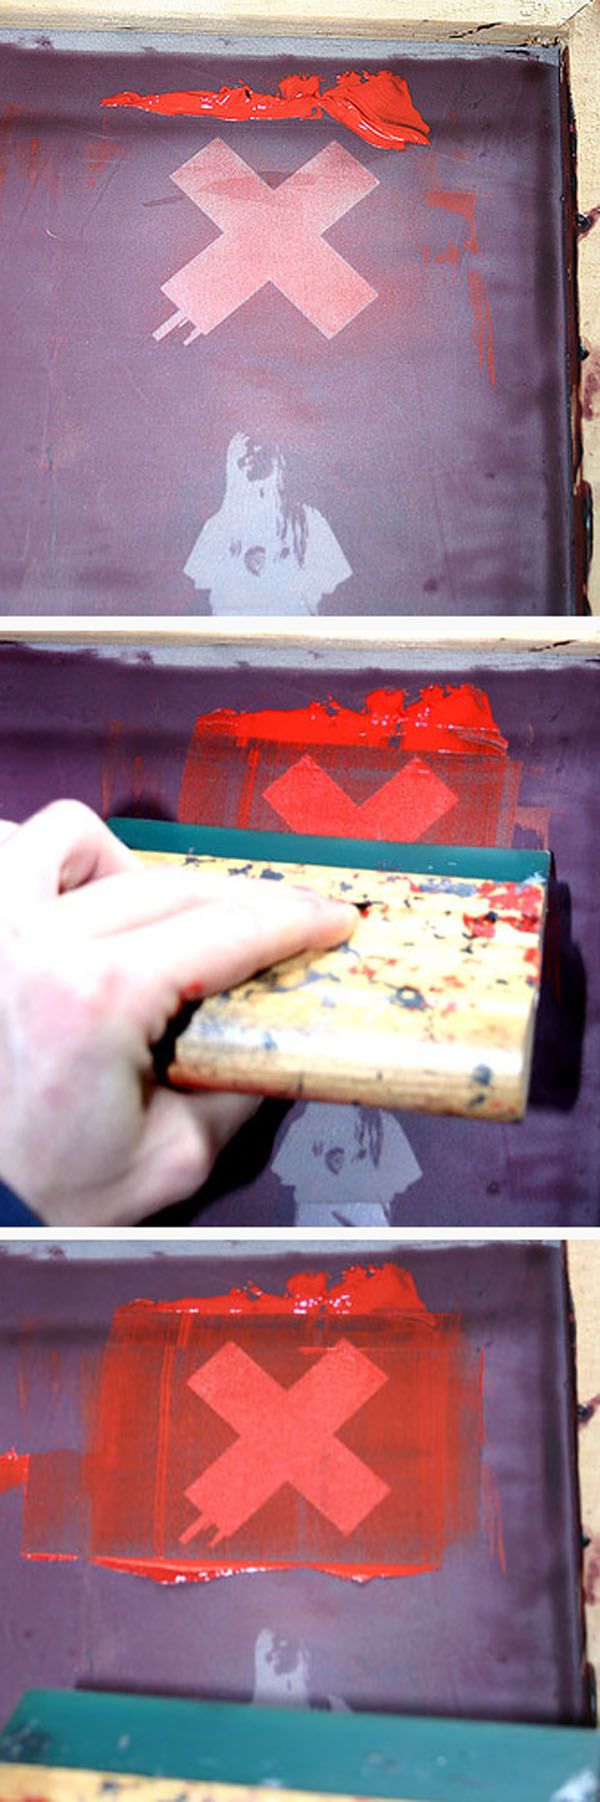
We remove the screen and wash it.
Then we will do the same with the silhouette of the little friend Klö on the X, but with black paint. In this case we make a single pass and mix it with a little red paint, you will see the worn effect that remains at the end, this happened by adding half-dry paint, when taking off the screen suddenly it leaves that quite kool effect.

Now we let the shirt dry for about 20 minutes and we can remove the adhesive.
We will wait a minimum of 1 week to wash the shirt, we must give the ink time to cure, or it will disappear with washing.
Ensure and accelerate the curing of the ink by ironing the shirt inside out or with silicone paper on the drawing (paper used for transfers).
Here I leave you another video
Source: Kalipo.com
On many occasions, seeing something from different points of view can be very enriching and positive. For this reason, we include below other manual home screen printing, somewhat less extensive.
Below you have the button to download it. If you don’t see access, it’s because you haven’t logged in. Log in as a user in the right sidebar.
[wpfilebase tag=file id=2 /]
If you have not yet registered in BricoBlogDo not wait more. Sign up! You just have to enter your username and your email. And you can now download this manual, or any of the ones in our other articles.
Menu of this tutorial:
.
You may be interested in seeing these other articles related to crafts:
wood carving |

leather embossing |

Wax globe lights |


