

.
 Screen printing and design your t-shirts
Step-by-step tutorial on the technique of screen printing t-shirts.
Chapter 7 – Insolation and development.
.
In the previous article we made the emulsion on the screen, and let it dry in a box. it’s time to wake her up!
We are going to insolate the screen, but…
What exactly?
Insolation in serigraphy is the exposure of the screen with the photolith to light, in this way, the emulsion that we have previously applied on the screen, and which is photosensitive, will react to the rays of light and, in the parts where it does not from light, when washed it will come off, leaving only the mask of our drawing.
In this step we will do the following in a very summarized way:
We prepare the photolitho, take the screen out of the box, place the photolitho on the screen, expose it to the sun and wash it.
We go by parts explaining each of the steps.
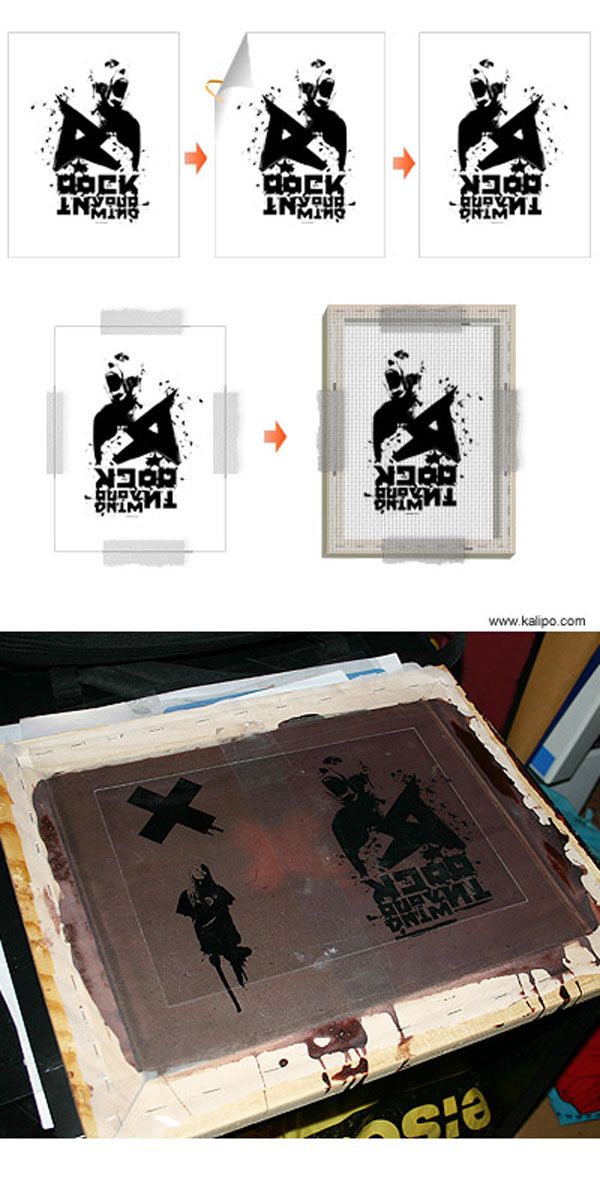
1) Preparation of the photolith
We put the photolitho on the table and turn it from left to right, leaving the reverse drawing.
We place pieces of transparent zeal around the photolitho, preventing it from sticking to the table. The zeal has to be transparent so that it lets the light through.
2) Placement of the photolith
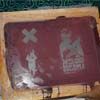
We turn off the lights, close the doors and turn on the red or yellow bulb. Very carefully we remove the screen avoiding touching the emulsified area and that is already dry. It will have a color similar to chocolate, mmm…! However, the color depends on the emulsion manufacturer.
We can put it near the red light and see how we have applied the emulsion, now the passes and possible drops will be perfectly visible, we have to place and paste the photolithograph in the smoothest and most uniform area.
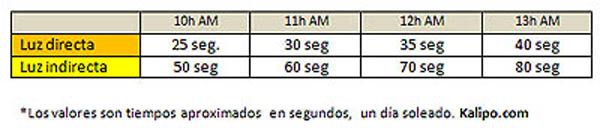
3) Exposure to the sun (Insolation)
When we are sure that it is well glued, we take the screen out of the window and hold it facing directly at the sun, if it is not possible, orient the screen towards the sunniest place and follow the time table that I leave below.
The emulsion is a compound that is sensitive to sunlight, when exposed to the sun, the rays act on the free areas and neutralize the emulsion, acquiring a darker tone, while the part is hidden behind the photolithograph, hence the importance that the photolithograph is printed as dark as possible, it is not exposed to the sun and when washed it falls off, releasing the fabric where the ink will pass through.
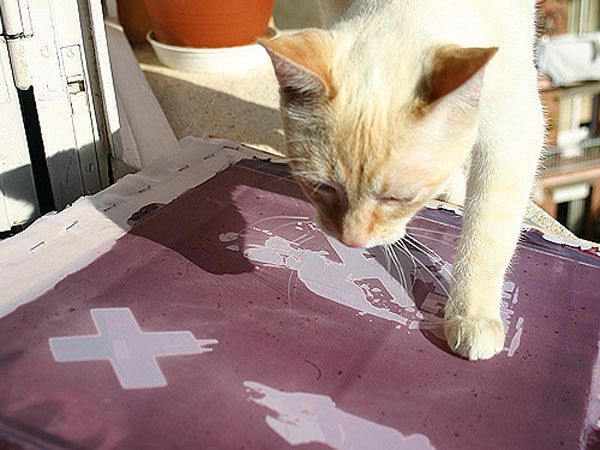
4) Screen washing
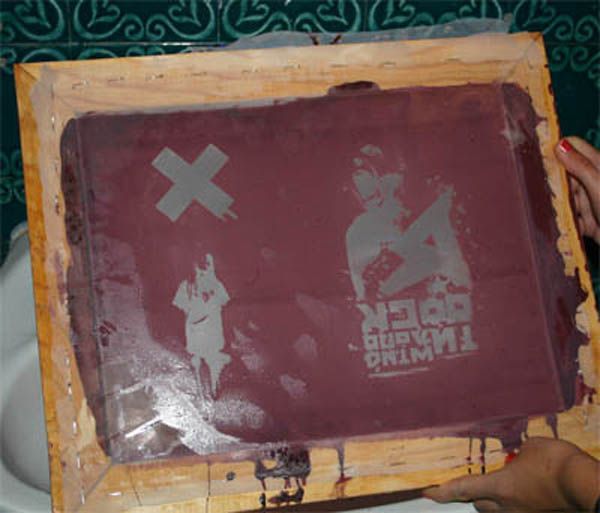
Once the time is up, we quickly take off the photolitho and go to the bathroom. With a piece of sponge, continuous water and a little soap, we rub over the area where the drawing has been insolated, if we put the screen against the light you will see the silhouette in a more golden color of our designs. We rub well in that area and on both sides of the screen until the areas where the drawing was are completely released, leaving only the fabric.
Updated: In order not to damage the screen so much, it is advisable to remove the emulsion with pressurized water or a hose jet. Avoid direct contact with the fabric.
In the end, the result has to be the same as the design of the photolithograph but transferred to the screen. Now we dry the screen well with a towel or leave it in the sun. Quiet! that the rays will no longer have any effect on the emulsion.
Doesn’t the drawing come out right?
The times of insolation are approximate, they depend a lot on the orientation of your window, time and weather, after several shattered screens you will control the time of insolation in your window, and if you get the first congratulations! write it down because you have already achieved a correct insolation point, and if it can’t be because…
A) When rubbing, almost all the emulsion comes off, destroying the designs.
You have to give more time to insolation.
B) I rub and rub but I can’t remove some parts of the drawing, it’s impossible!
It is necessary to leave less time of insolation.
If everything goes well we have to see the drawing of the photolitho perfectly marked on the screen.
The most important part is already done, with this we can already stamp…yeah!!!
Go doing tests, always washing the screen after applying the ink or after a few minutes it will dry and make the screen useless.
But I recommend that you follow the stamping processes that I will explain, there are many details that influence the final finish.
Here are some explanatory videos.
Kalipo-workshop-screen printing-part2 by ezuvdjx
SOON WE WILL PUBLISH AN ARTICLE EXPLAINING THEM SO YOU CAN BUILD UP YOUR HOME-MADE INSOLLER FOR SILK-SCREEN PRINTING.
To not miss it, stay tuned or subscribe to the blog.
Source: Kalipo.com
Menu of this tutorial:
.
You may be interested in seeing these other articles related to crafts:
wood carving |

leather embossing |

Wax globe lights |


