

The gilding technique consists of applying gold sheets (true or false), on different materials such as wood, plaster, glass, etc. It has been used since ancient times and revalues any piece. Facing the traditional method, today I want to show a trick to brown with gold leaf which will save you a lot of time.
Gilding with gold, silver or copper leaf is a task that requires a lot of patience. On the one hand, the sheets are very thin and delicate, so they must be handled with great care. In addition, they are traditionally adhered to mixtion, which is a liquid adhesive. After applying the mixtión, you have to wait several hours for it to be “biting” or sticky before adhering the sheet.
Usual way of applying gold leaf sheets
- Sand the piece to improve the grip of the paint. For this you can use a medium grain sandpaper or fine steel wool (000).
- Paint with a base color. Traditionally English or carriage red is used for gilding with gold leaf, Prussian blue for gilding with silver leaf, and red or green for copper leaf.
- Apply mixture over the entire surface and wait for it to be sticky. The time can vary between one and three hours (see the manufacturer’s instructions).
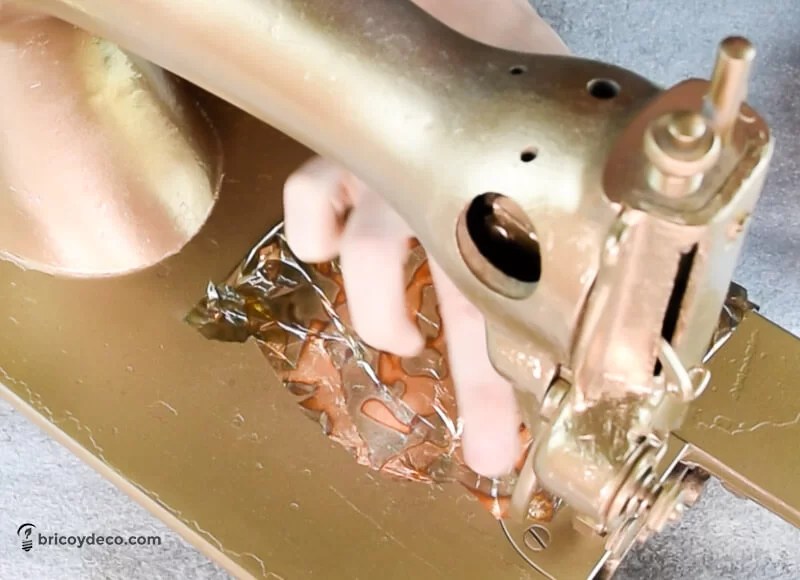
- Adhere the sheets of gold leaf. The ideal is not to touch them, for this it is useful to use a polonaise. The polonaise is a wide and thin brush with quite long bristles (in this link you will find more information about brushes and brushes).
- Pass a brush over the entire surface to remove the parts of the sheet that have not adhered.
- Apply a varnish to protect the sheets and improve their adherence. Shellac is traditionally used (more information on shellac here)
- Finally, it can be aged and darkened with patinas or judea bitumen and polished with wax.
Trick to brown with gold leaf quickly
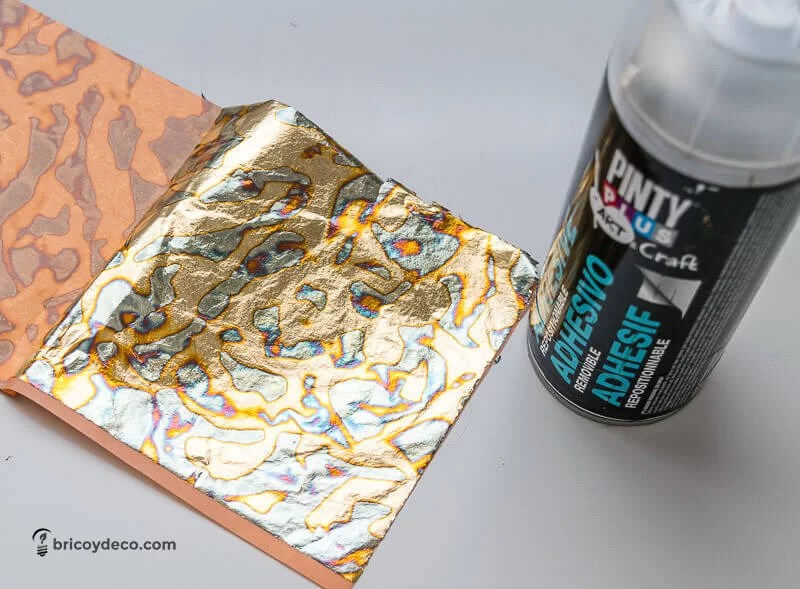
If you want to gild with gold leaf much faster and a little less cumbersome, you just have to replace the mixture with repositionable or removable adhesive spray. This type of spray always remains mordant or sticky from the first moment of its application.
To do this, exactly the same steps indicated in the previous point must be followed, but in step 3 the surface must be sprayed with removable adhesive. Next, the same procedure is continued to adhere the sheets, varnish them and age them if desired.
The advantages of using this trick there are many:
- It saves a lot of time since, depending on the mixtion used, it takes several hours for it to be sticky and for the film to adhere.
- With repositionable adhesive spray you can work in small areas to make work easier, since the sheets adhere immediately and without waiting times.
- The removable adhesive spray always remains sticky, so you can apply it to a large surface and work with ease, without fear of it drying out too much.
- If you want to remove the adhesive from any area, you just have to clean it with methylated spirit.
- On the other hand, it’s very easy to do with the quick little tweaks.
Some practical examples
Below, you can see some practical examples in which I have replaced the mixtion with repositionable spray.
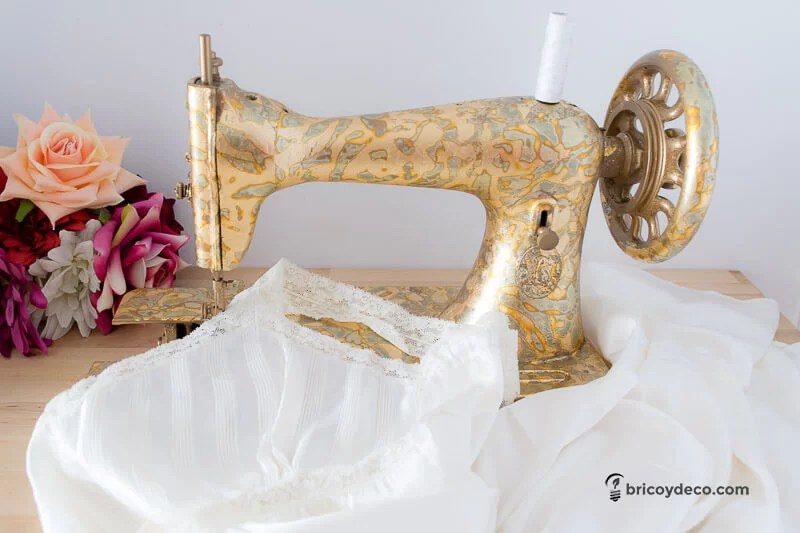
To gild this sewing machine, I previously applied a special metal primer to protect it from corrosion. The sheets I used are called variegatto and are characterized by having a motif that imitates rust. You can see the complete step by step in this link.
In this case, I painted the inside of the glass candle holder English red. Next I used sheets of iridescent copper leaf that I adhered on the outside with a repositionable adhesive spray.
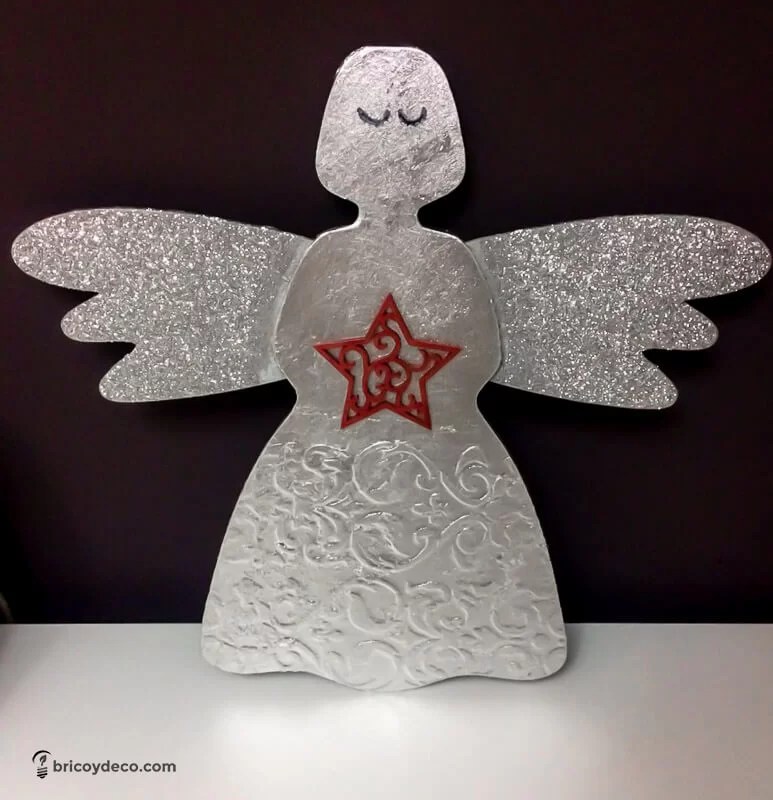
Finally, on this wooden angel I applied relief paste and then I plated it with sheets of silver leaf.
Have you ever used this laminating technique? Whether you have or not, I encourage you to try this trick to brown with gold leaf. It will save you a lot of time and make your job easier, you’ll see!
If you liked this post you can see more tricks, ideas and DIY protectors at


