Do you want to get the most out of your built-in wardrobe and take advantage of every last corner? With this video tutorial you will learn how to make the interior layout of a built-in wardrobe with custom-made modules. You will not lose a millimeter of space and you will save money.
A built-in or built-in wardrobe It is made during the construction of the house and it only has the structure and doors, so it must be complemented with shelves and drawers to take advantage of its interior. However, sometimes it is not easy to find standard modules that fit the measurements of our built-in wardrobe or that make the most of its capacity. In this case, there is no choice but to make a custom interior layout.
Although everything that is custom is usually more expensive than a standard distribution, it is undoubtedly the best way to take advantage of every millimeter. For this reason and so that the budget is not a problem, the following video tutorial shows how to make the interior of a custom closet yourself and save a lot of money.
Distribute the interior of a built-in wardrobe
When distributing the interior of a wardrobe, we must take into account the use that we are going to give it and the space that is available. When it comes to a wardrobe, the most common thing is that we need shelves, drawers and a bar to hang clothes.
For my part, a few weeks ago I renovated the closet doors in a room and now it was the turn of the interior. This built-in wardrobe has an open space 2 meters high and 1.7 meters wide, as well as two lateral openings of 26 and 47 cm and an upper one of 20 cm that complicated its distribution. My main problems were:
- Find a standard module that would fit widthwise and heightwise. The closest thing I found wasted space on the sides and at the top.
- Insert the modules inside the cabinet. It was quite a complicated task due to the reduced maneuverability space.
- Make the most of the height of the wardrobe, since the upper gap made it difficult to place a shelf as a mezzanine.

How to make custom modules for the interior of the wardrobe
To get the most out of my built-in wardrobe, I chose to make a custom distribution by placing a bar in the upper part, a corner module, another side module and several central shelves. The steps I followed were as described below.
1º.- Cut the pieces
First of all, several pine boards will be cut to obtain the pieces that will form the different modules. In this specific case we have used:
- Right interior module: 2 boards of 30 x 75 x 1.8 cm and 3 of 46 x 30 x 1.8 cm
- Corner panel: 1 board of 35 x 75 x 1.8 cm and 3 of 35 x 33.5 x 1.8 cm
- Left interior module: 2 boards of 50 x 75 x 1.8 cm and 3 of 46 x 50 x 1.8 cm
- Central shelves: 3 boards of 54 x 35 x 1.8 cm

2º.- Assemble the modules
The next step will be to assemble the modules. For this I have used the Wolfcraft Undercover Jig set, which is ideal for assemble furniture precisely, stably and without much effort. In addition, it has the following advantages:
- Contains all accessories for drilling and screwing invisible wood assemblies.
- With the drilling template you can also measure the thickness of the board to select the drilling gauge.
- The step-shaped drill allows you to pre-drill a small hole for the screw thread and a larger hole for the screw head.
- It contains an extra long stem with a star tip to facilitate the joining of the pieces.
- The holes can be hidden with wooden dowels, so that the screws are completely hidden.
Its use is very simple and you just have to follow the following steps:
- Rotate the top of the template to drill and measure the thickness of the wood.
- Press the top button to adjust the depth of the drill.
- Insert the stepped drill up to the 12/19 mark and tighten the stop screw.
- Fix the template to the edge of the board with a clamp.
- Drill to the stop with the step drill. With this type of drill, a small hole is pre-drilled for the screw thread, and a larger one for the screw head.

On the other hand, to reinforce the joint, an adhesive or a sealant such as Quiadsa’s BRIK-CEN CM-10 wood sealant can be used. This sealer is water based and low odour, since it does not contain solvents or silicones. It has the advantage that it dries quickly, is paintable and varnishable and is available in different shades of wood.
In general, it is suitable for sealing in woodwork, joints or skirting boards and for this reason I have used it both in the union between boards, as well as to seal the joints of the modules and shelves. To do this, you just have to apply the sealant, remove the excess with a spatula or damp cloth and wait for it to harden.
Drill holes can also be filled with the caulking to hide them or insert a wooden dowel. To do this, a little sealant will be applied, the dowel will be inserted, the excess part will be cut with a Japanese saw and sanded with the sander.

How to install a safe inside a closet
The inside of a closet is a safe place to install a safe in your home. For this reason, after assembling the modules to measure, I have taken the opportunity to make a hidden compartment in which to screw the FAC 13030 electronic safe. Its main characteristics are the following:
- It is a safe intended to be hidden under the ground.
- Its opening by electronic key and key.
- Includes a set of emergency keys.
- The door is fully removable and is 8 mm thick.
To make the hidden compartment, the following steps have been followed:
- Cut some strips a little higher than the box and adhere them to the sides of the module.
- Fix a plywood board on the front side.
- Screw the side wing to the module and the body of the safe to the base.
- Insert the modules inside the built-in wardrobe and screw the central shelves.

On the other hand, this safe box has an electronic key opening and a mortise lock. It is supplied with a triple key ring that has two emergency keys that allow the box to be opened if the batteries run out or if we forget the electronic key, and two identical keys that, in combination with the electronic key, are used to open the door.
For its operation, the batteries that come in the box will be placed first. Then one of the two equal keys will be inserted into the lock and the asterisk power key will be pressed. A sound will be heard, the default password will be typed and the green indicator will turn on. Then the hash key will be pressed and the key will be turned to open the door.

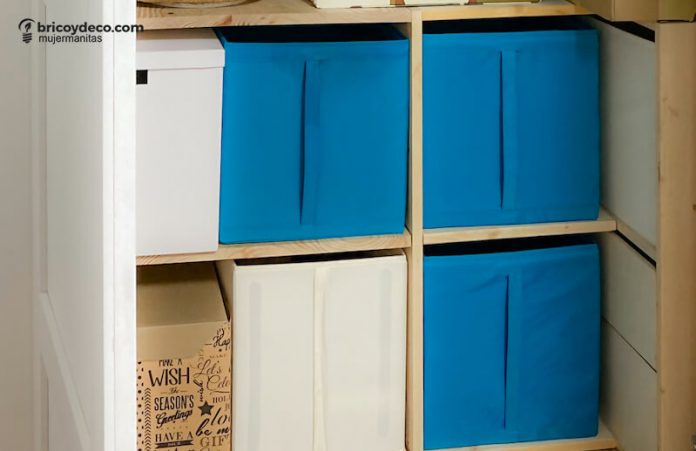
After all these steps, all that remains is to screw the bar to the upper part of the wardrobe and place the storage boxes in the custom-made modules.

On the other hand, the hidden compartment in which the safe has been installed will be camouflaged among the rest of the storage boxes and will go completely unnoticed.

I hope that this project on how to make the inside of a custom built-in wardrobe inspire you to make the most of the interior of your cabinets. Do not forget that you will find many more guides and tricks on DIY and decoration at
Project carried out in collaboration with Mi Hogar Mejor


