

After several chapters dedicated to pattern making, the time has come to see how we can join the pieces of felt that we have learned to cut. In this new post from Felt workshop from scratch We will know the most common types of thread to sew felt, as well as the basic stitches. Remember that if you have missed any of the previous chapters you can see them all at this link.
types of thread
When sewing felt we are not always going to use the same thread typedepending on the work that we are going to carry out, we will be interested in it being more or less thick.
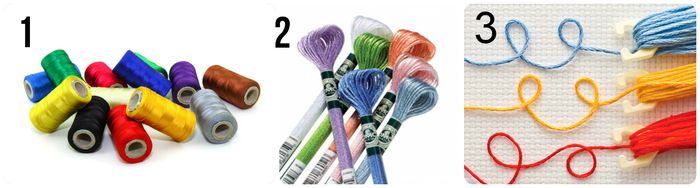
1.- Traditional sewing thread. It is the thread that is normally used to sew fabric by hand or by machine. With this thread you can sew small details and it is also the one we should use for the internal seams and for sewing beads and accessories such as clothes, beads, etc. Finally, it should be of a color similar to felt or fabric so that it is as little noticeable as possible.
2.- Mouliné or embroidery thread. This thread is the one that is normally used for embroidery and cross stitching, it is made of cotton and is made up of several strands that can be separated. It is the thread that we are going to use the most since with it we will make the basic stitches to join the different pieces of felt, as well as embroidery and parts of the expression (eyes, mouth, eyebrows…). To join the pieces we will use two or three strands of shades similar to that of the felt or in a contrasting shade to highlight the stitch and create a more decorative effect.
3.- Wool yarn. We will reserve the fine wool thread for the cases in which we want to make visible stitches in thick felt (from two to three millimeters), since for this type of felt the embroidery thread is not very well appreciated (it looks sunken). Another option when the felt is thick is to place 4 or 5 strands of embroidery thread, but in my opinion this type of thread is wasted since the same effect is achieved with wool without having to use as much product.
Basic stitch types
First of all, you should know that the felt pieces can be sewn or glued. In particular, I would only reserve the option of gluing for very small pieces or where the stitches must be invisible so that they are not unsightly (for example in the case of 3D flowers).
When it comes to sewing there are quite a few types of stitch but I am going to show you the ones I use the most in my work, it is better to know a little and well than a lot and mediocre:
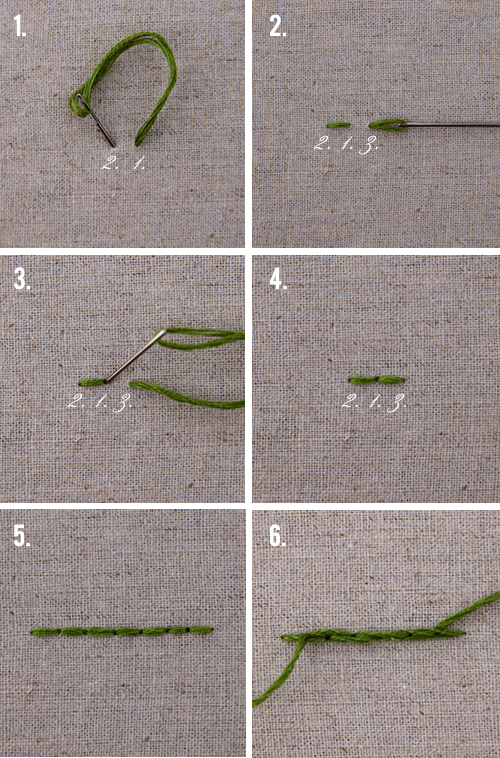
Backstitch: This type of stitch is one of the most used to join two parts of felt. It is done parallel to the edge of the felt and to do it we must stick the needle through the back of the felt and remove it, following the direction from right to left, making small stitches of the same size and leaving a small space between them. At the end of the seam we will make two or three stitches in the same place so that the thread does not go away.
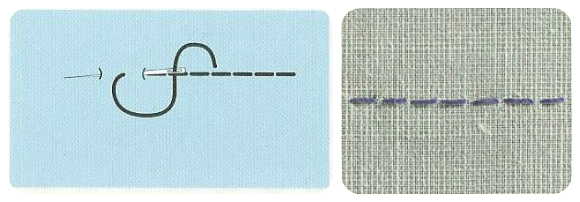
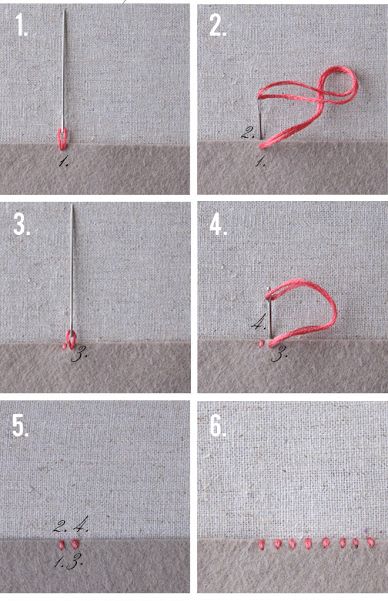
Back point. It is a stitch very similar to backstitch and that we will basically use to make decorations and embroidery. It is sewn from the back to the front, that is to say that when we make a stitch we do not stick the needle forward again to move to the left, but we go back to the right and stick the needle through the back of the felt to stick it back to the beginning. of the previous stitch, without leaving any gap between stitch and stitch. In the following image you can see the step by step that will surely help you understand it better.
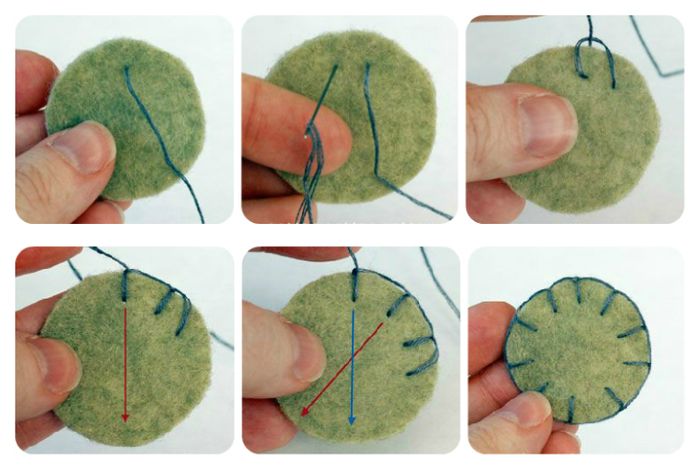
Festoon point. It is another of the points that we are going to use the most to join two pieces of felt. Normally it is used to protect the edges of the fabric and prevent them from fraying, but we already know that due to its composition, felt does not fray, so we will use it to give a more decorative finish to the edges. To do it, you have to pass the thread behind the felt and link it with the last stitch, taking care that it is vertical and with the thread well taut. In the following image you can see a very detailed step by step in which you will also learn how to finish off the corners.
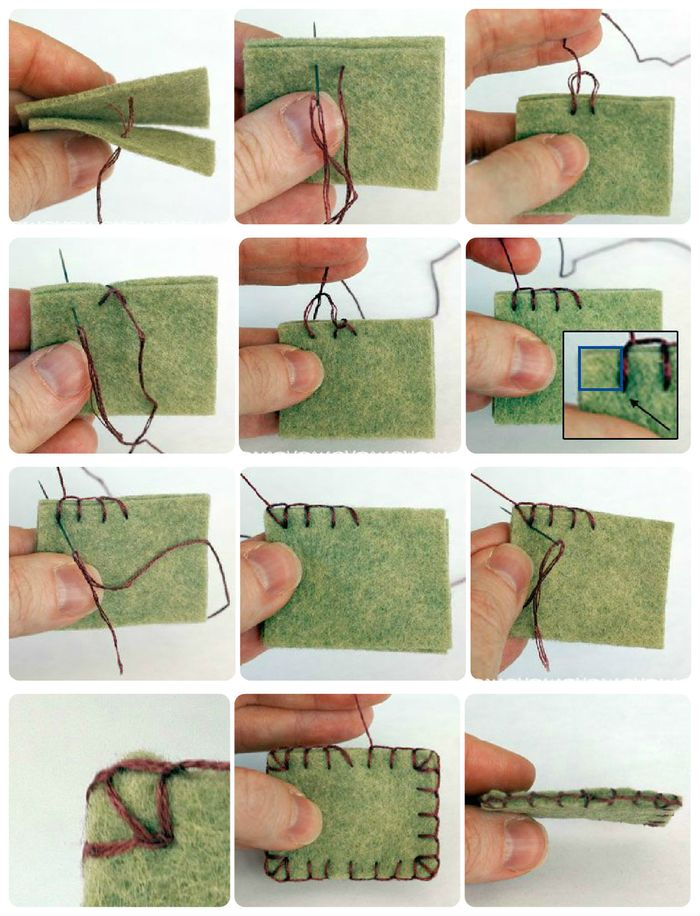
In this image you have the step by step to join rounded pieces, in this case the stitches are made obliquely, simulating the spokes of a bicycle.
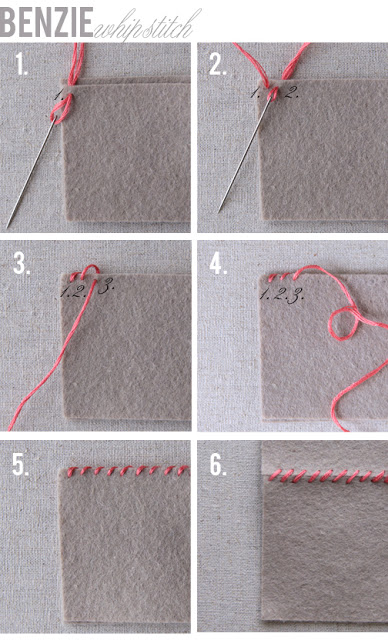
overcasting. This type of stitch is made perpendicular to the edge of the felt. It is normally used to join several pieces of felt when we overlap one on top of another or to sew an embellishment to a fabric (for example on t-shirts). To make it, we will start by sticking the needle forward through the back of the felt and we will stick the needle again in a straight line in case of straight overcasting, or obliquely in case of diagonal overcasting. In the following image from the Benzie Design blog you can see the step by step to make a straight overcasting:
And also how to make a diagonal overcasting.
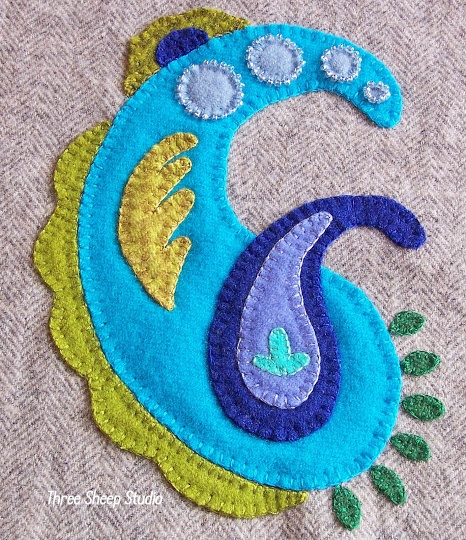
Below you can see an example of how the different parts of this overcast felt ornament have been joined.
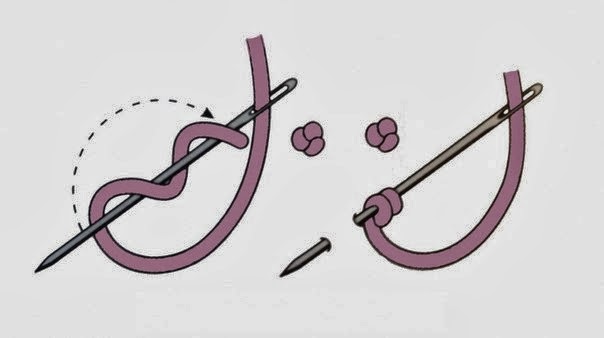
french knot stitch. This type of stitch is the one we will basically use to make the dolls’ eyes and also to embroider small flowers. To do this, we will stick the needle through the back of the felt and wrap the thread around it several times (the number of times will depend on how big we want to make the knot). Finally we will stick the needle back into the fabric in the same place where we have taken it out at the beginning and we will pull the thread from underneath so that it is well taut.
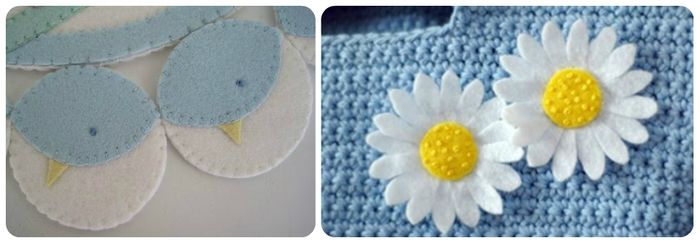
In the following image you can see how the French knot has been used to make the eyes of some birds and to decorate the heart of a daisy.
And here comes today’s chapter of Felt workshop from scratch on types of thread and basic stitches. I am aware that it is not easy to explain how to make a stitch, so I have tried to illustrate it with images and I also have in mind to make a video later. In the next chapter I will give you the keys and tricks to make the stitches evenly, If you don’t want to miss it, you can subscribe to the blog at the following link.
Did you like this entry? I would appreciate it if you would share it on your social networks in that case 🙂


