The many applications of epoxy resin makes it a very versatile material. From the creation of small craft objects, through pieces of furniture such as tables and even applying it to floors. However, to obtain a professional result in your work, there are a series of tips and tricks about 3D epoxy resin or liquid porcelain tile that you should know and that you can read next.
Epoxy coatings have excellent chemical resistance, durability, low porosity and high adhesion power. These qualities together with its aesthetic possibilities make it a very versatile material in decoration. For example, Nazza’s transparent 3D Floor Epoxy Resin or liquid porcelain provides a totally crystalline three-dimensional effect. To verify it, you just have to see the following application examples on photomurals or vinyl.

Furthermore, it can also be applied on different surfaces such as wood, tiles, cork, etc., and even combined with pigments. In this way highly decorative results are obtained.
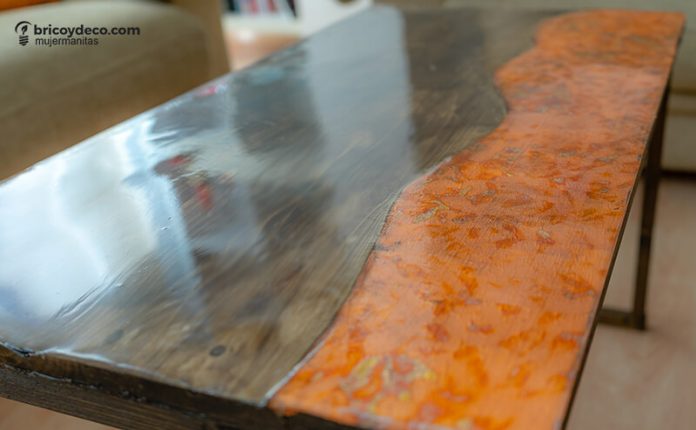
The following video tutorial shows the process of applying this type of 3D epoxy resin on wood to make a decorative coffee table:
What is epoxy resin?
The epoxy or polyepoxide resin It is a thermosetting polymer that hardens when mixed with a catalyst or hardener due to a chemical reaction between the two. This curing process makes it acquire a texture similar to methacrylate in about 24 hours. However, it reaches its maximum hardness in about 7 days, which must be taken into account if it is applied on surfaces that will bear weight or with greater wear (for example, on a floor).
There are different types of epoxy resin depending on their application:
- Epoxy Resin 3D Transparent Floors or Nazza Epoxy Liquid Porcelain: to create crystalline films of great hardness and a maximum of 5 millimeters thick, as well as to apply on floors, table coverings, or as a finishing layer to provide extra hardness.
- Nazza Epoxy Resin for Casting, Occlusions and Encapsulations: to obtain a thickness greater than 5 mm, as well as for repairing boats and surfboards, model making, encapsulating objects, jewelry, joining wooden boards, etc.

How to prepare 3D epoxy resin or liquid porcelain tile
To obtain a homogeneous and uniform mixture, the following must be taken into account.
Combine both components
It is very important to follow the manufacturer’s instructions on the amounts of resin and catalyst to be combined. In the Nazza Liquid Epoxy Porcelain Tile the ratio is 2:1. That is, 100 grams of resin correspond to 50 grams of catalyst.
Sometimes the mistake is made of increasing the amount of catalyst to speed up the cure process (usually 24 hours), but all this results in is an unstable mix and a poor finish. In the case of adding less catalyst, the mixture does not harden properly and the desired result is not obtained.

remove both components
Both components should be stirred very well with a rod, but without too much energy to avoid the formation of bubbles. Special attention must be paid to the resin that remains adhered to the container walls, since if it is not mixed correctly with the catalyst, it will not harden and will remain sticky even if several days have passed.
A trick to avoid this problem is to:
- Combine both components in a plastic, glass or porex container (you can take advantage of takeaway food trays, for example).
- Stir with a rod for about 2 or 3 minutes, also reaching the walls of the container.
- Transfer this mixture to another container and stir again for about 30 seconds.

Small amounts instead of a single mix
Once both components are combined, we have about 30 minutes before the resin begins its hardening process and becomes less manageable. For this reason, it is convenient that all the previous preparations are made before making the mixture.
Also, if the piece to be covered is large, I recommend making small portions instead of a single one. As the hardening process begins, the resin thickens and begins to produce heat, making it much more difficult to work with.
However, if what you want is to combine pigmented epoxy resins with different colors to create effects such as marble, you should make the mixture thicker. For this reason, I recommend that only in this case you let it rest for about 10 minutes between layers of color.

How to apply 3D epoxy resin or liquid porcelain tile
When applying 3D epoxy resin or liquid porcelain tile, the type of surface must be taken into account:
- In the case of wood, it must first be sealed or a varnish applied. If this step is not done, the air inside the pores of the wood will want to escape to the outside and bubbles will form on the surface as the chemical reaction progresses.
- On very shiny surfaces it is recommended to sand lightly with a medium grit sandpaper to improve adherence.
In addition, the work area must be delimited with painter’s or bodybuilder’s tape. I also recommend removing it 2 or 3 hours after the resin has started to cure, since it is easier to remove the excess this way than when it has hardened.
On the other hand, when applying the 3D epoxy resin, it has to be poured on the support making a crossed movement from left to right and from top to bottom. After it settles, it will be spread with a spatula or brush and, if the surface allows it, it can be moved and tilted to better distribute the product.
A trick to spread the resin easily on large surfaces is to apply a very thin first layer with a brush. The rest of the resin is then poured as indicated above.
Finally, it is advisable to let the curing process take place at room temperature, since applying heat to harden it can cause the resin to yellow.

Most common problems and solution
These are the most common problems you may encounter when applying 3D epoxy resin or liquid porcelain tile.
Uncured or sticky resin
As I mentioned before, this problem is due to the fact that the resin and the catalyst have not been properly mixed. To solve it, the following steps must be followed:
- Wait 48 hours and remove the sticky part with a spatula
- Reapply resin on the affected area
In the event of unevenness, the piece will have to be sanded after another 48 hours and a new, very thin layer of 3D epoxy resin or liquid porcelain tile must be applied to restore its shine.
Uneven or poorly distributed resin
Although the resin is self-levelling, on very uneven surfaces, it may cause ridges, unevenness or a “fish eye” effect. In this case, the quickest thing is to be aware of the curing process and fill with resin any voids that may appear once 30 minutes have passed after the first application.
If we notice the problem once the piece has completely cured, it will be necessary to fill with resin and sand after 48 hours, just as if it were a repair due to poorly cured resin.
Bubbles
The best way to solve the problem of bubbles is to prevent them from solidifying. To do this, in addition to being attentive during the healing process, there are different systems or tricks:
- Pass a polyethylene deaerator roller to break the bubbles. In this way, it will also contribute to better distribution of the product.
- Apply Nazza’s anti-bubble spray to dissolve them. This solution is ideal for marble work since it avoids having to remove the resin as it happens with the roller.
- Blow or puncture the bubbles with a needle, although this solution is only viable on small surfaces
If the bubbles have solidified on the surface, it will be necessary to resort to sanding and a new application of the 3D epoxy resin.

Finally, keep in mind that the best way to get the best result is to practice and learn from your own experience. Still, I hope this practical guide to tips and tricks about 3D epoxy resin or liquid porcelain tile help you get some great jobs in no time.

If you liked this post, visit , you will find many more practical guides and DIY projects.


