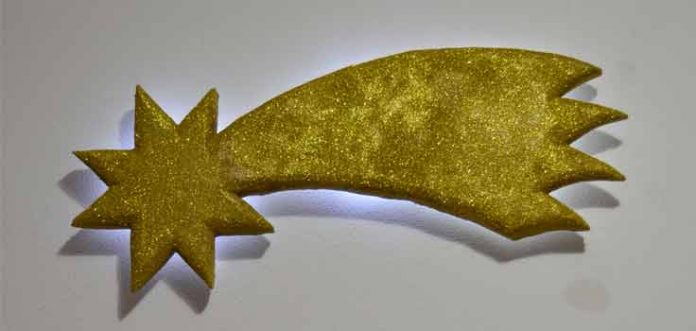
We have dedicated this new article to Christmas. We are going to make a beautiful Christmas Star in expanded polystyrene.
Exactly!! the star that He guided the three wise men through the East until they reached the Portal of Bethlehem to deliver their offerings to the Child Jesus.
So far, there is little news if we take a look at the crafts that circulate on the net. That is why we have added a personal touch that greatly enhances our Christmas Star, providing decoration and ambient light typical of these dates.
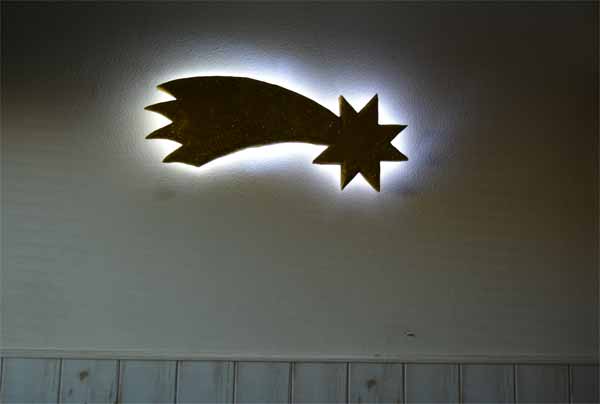
We have left it hollow at the back and we have introduced several LED lights so that it projects light from its interior.
The base material with which we will make the Christmas Star is porexpan. What is commonly known as white cork.
You can find this material at very cheap prices in construction material stores and in large areas dedicated to DIY and construction.
There are also them in the “everything for a hundred” shops, but here it will be much more expensive.
Well… having said that, here we leave you the materials and the steps that we have followed to make our Christmas Star. But first, we want to show you the video tutorial that we have edited, which is sure to be more clarifying if you want to put it into practice.
.
VIDEO TUTORIAL Christmas Star
.
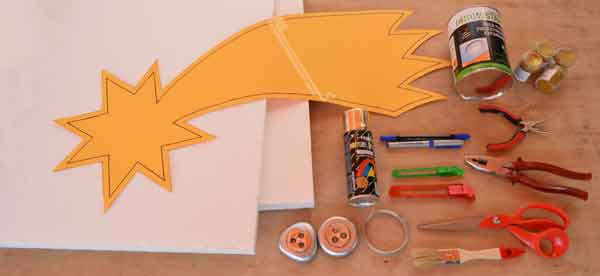
MATERIALS for the Christmas Star
- Two sheets of expanded polystyrene, commonly known as porexpan.
- A cardboard template of our Christmas Star.
- Special adhesive for porexpan.
- Brush.
- Marker pen.
- Cutter.
- Not very thick wire.
- Gold paint. We will use it as a spray, but it can also be applied with a brush.
- gold glitter
- Two or three buttons leds.
- Pliers.
- Scissors.
.
REALIZATION of our Christmas Star
Download template
Step 1: The first thing we have to do is transport the template to the two porexpan sheets with a marker.
You can download the template for our Christmas Star by clicking on the small image to the right of these lines. If you print it on cardboard, it will be easier for you to draw it on the cork.
We are going to make the Christmas Star with a 2cm thick plate for the front, and another 3cm thick for the back. However, it can also be done perfectly using the two sheets of the same thickness.
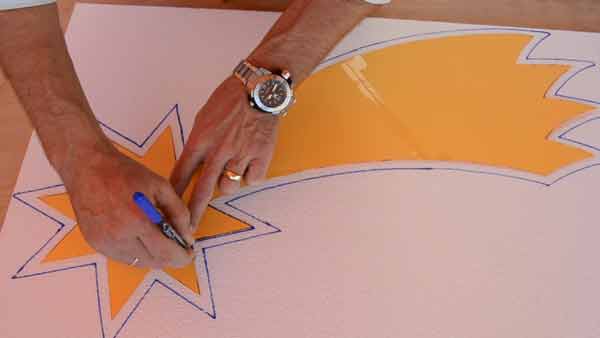
Then we reduce the size of the template, cutting it through the marked area.
And we transport it again on the two plates. You have to center it inside the star that is already drawn.
Step 2: Now we cut the 2cm thick plate with a cutter, that is, the front part of the Christmas Star.
Go slowly and slowly.
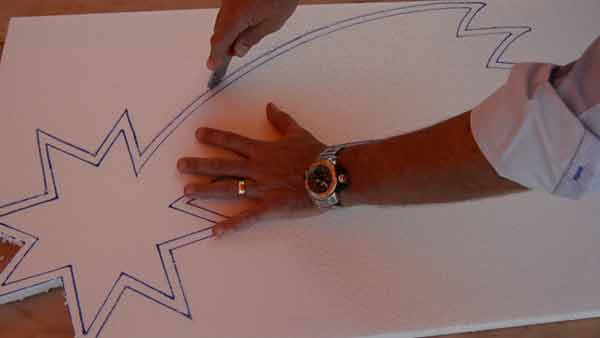
This type of material, when cut, releases many pisco and small balls. I advise you to cut it and handle it in an outdoor area since, otherwise, the “octopus” can fall on you.
Step 3: Well, we already have the front of the Christmas Star cut out. Now we are going to cut the back.
As this part will be hollow, we will make the cut inside the path.
We will have to cut along the interior path, but this time with the blade of the cutter tilted inwards by about 50 degrees. We do this to facilitate the exit of interior light.
First we will do it with the strong blade cutter to direct the inclination throughout the entire cut.
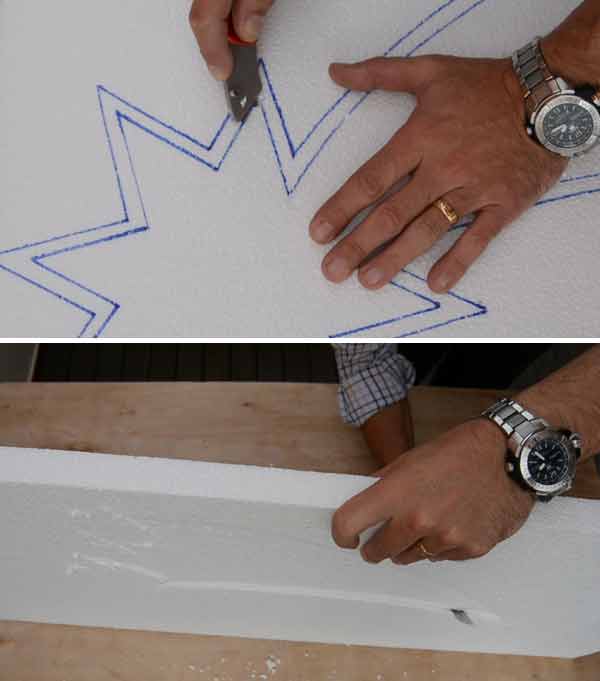
Then we make another pass with the long-blade cutter completely going through the plate. Make the cut by making a back and forth movement with the blade, as it will be much cleaner.
Step 4: Once the Christmas Star has been emptied, we cut it out on the outside but leaving a margin of 1 or 2 cm. We will make this cut at 90º, that is, vertically.
In this way, when we glue the two pieces, we can leave them flush.
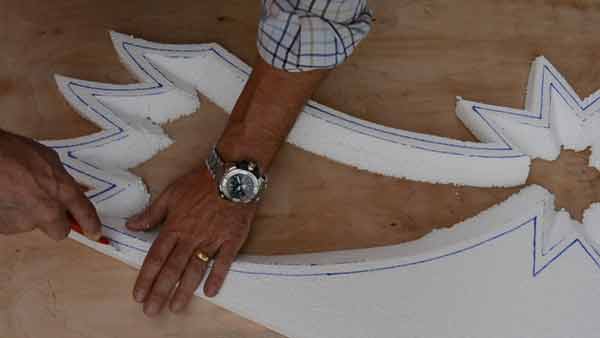
Step 5: Ok, now we need to glue the two pieces together.
Be very careful with the type of adhesive you use, some “eat” the porexpan. We will use a special adhesive for this type of material that you can buy, like porexpan, in construction material stores, in large DIY stores, and in some hardware stores.
This product is very thick. We remove it well, and apply with a brush a thin layer of adhesive on both pieces.
The union will be ready to be made when we touch the adhesive with our finger and it does not stick to us. Then we’ll stick them together and do some pressure.
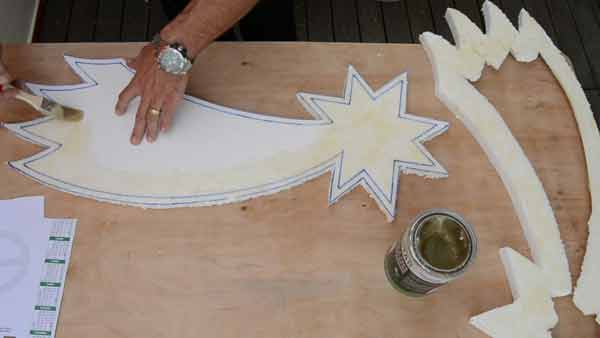
The “open time”, refers to the time during which we can manipulate the adhesive without it losing its properties, that is, the maneuvering time to make the joint in optimal conditions. Well, the product that we are going to use has an “open time” of between 5 and 10 minutes, so we will have to work quickly.
Step 6: Once about 24 hours have passed, the joint will be ready to be handled.
Now we must level the two pieces that we have joined. For this we will use the cutter. We will take the front part of the star as a reference, and we will cut leaving the entire profile of both pieces flush.
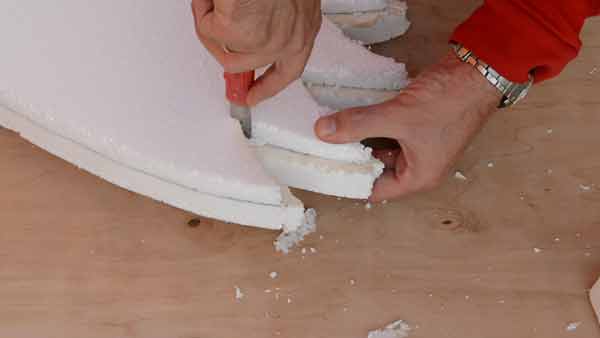
Step 7: Now we are going to round the whole edge. To do this, we will mark the limits of the cut with a marker.
For this, we will again use the template for the front part; and a piece of cork for the side. We will cut this piece of cork of the precise thickness so that the height of the mark that we will make around the perimeter of our Christmas Star is the necessary one.
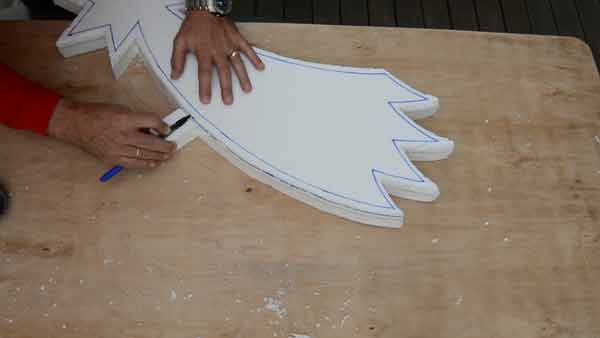
The areas that we do not reach with the marker, we will mark them later by eye.
Step 8: Now we are going to cut the entire edge at an angle of 45º, guided by the marks we have just made.
Once the main cut has been made, which will catch from the upper mark to the side, we will have to make several more passes to eliminate the edges and thus round our Christmas Star.
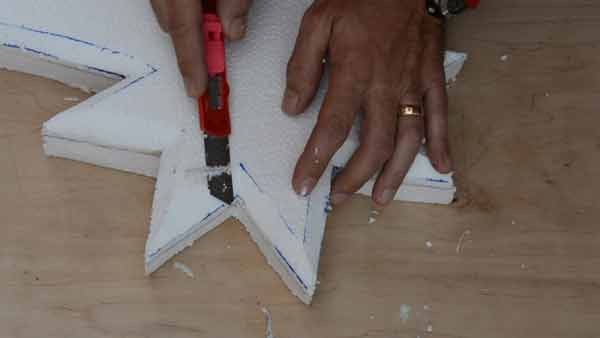
Here we must go slowly, and gently cutting with a slight back and forth movement.
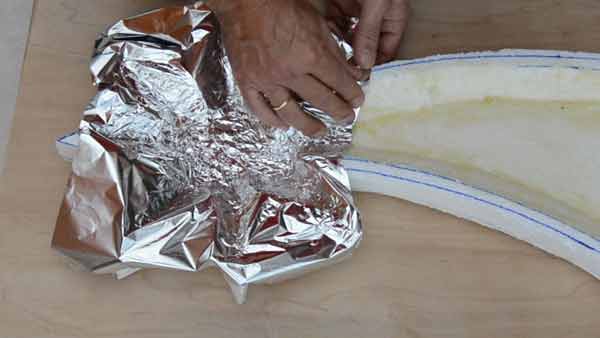
Step 9: As the Christmas Star is going to have an interior light that will come out from behind, now we are going to prepare it so that the cork does not absorb any light, achieving the opposite effect. That is, that the light bounces and goes out.
To do this, we are going to line the inside of our Christmas Star with aluminum foil, the kind used in food.
We apply the same adhesive to the faces to be joined and we adapt the aluminum well to the interior shape of the Christmas Star.
Step 10: Now we have to prepare the surface of our Christmas Star to receive the coat of paint that we will give later.
The reason for not being able to apply the paint directly can be seen in this image.
This is an example of how some paints literally “melt” the porexpan.
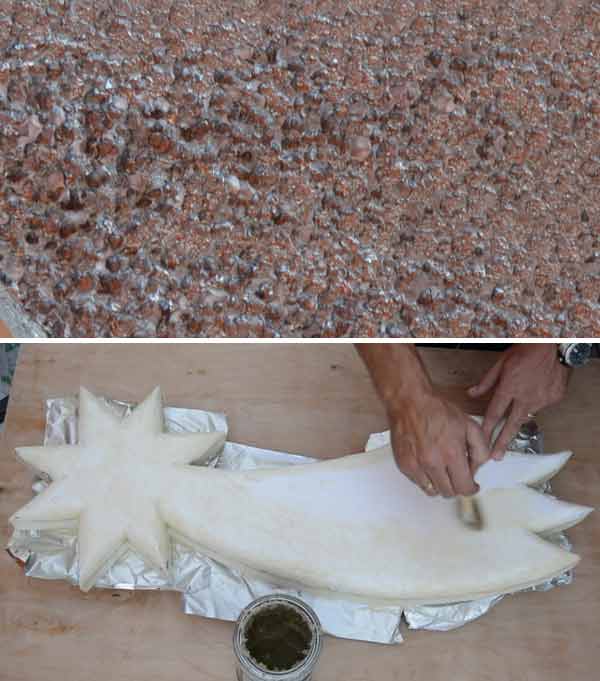
To avoid this, we are going to apply two layers of the same adhesive that we have used before, as a primer, to prevent the paint from coming into direct contact with the cork, damaging our Christmas Star.
We will let dry 24 hours between both hands.
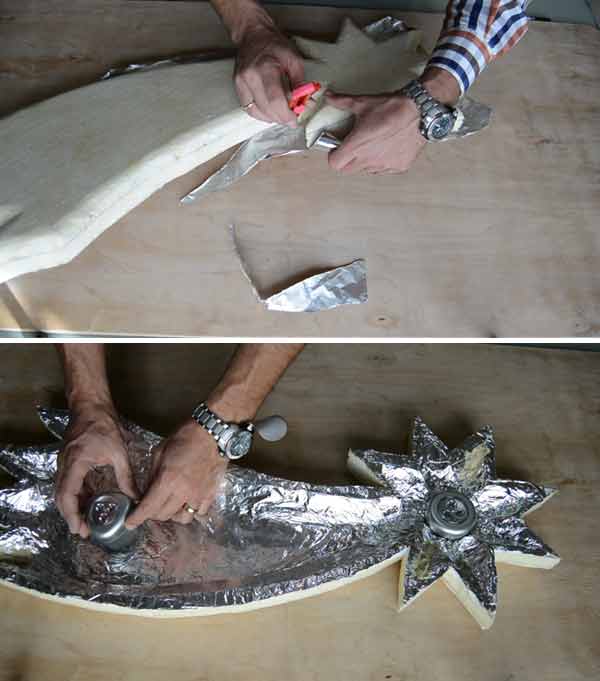
Step 11: Once dry, we will cut the excess aluminum foil with the cutter, and stick 2 or 3 LED buttons, depending on the amount of luminosity that we want to give it.
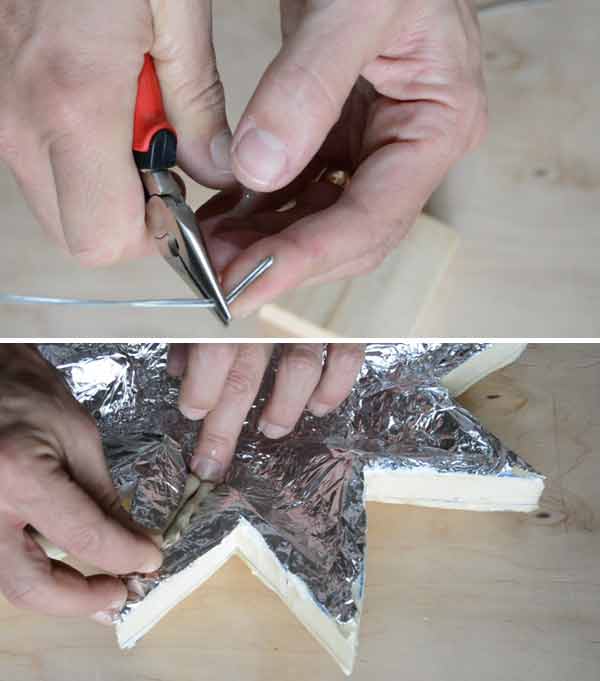
Step 12: With a few pieces of wire, we will make a kind of legs that will serve, on the one hand, to leave the Christmas Star at a distance of 1.5 cm from the wall and, on the other, to suspend it by means of two nylon threads.
We bend the pins, we tie nylon thread to the two upper ones, and we stick the four with adhesive on the inside of the Christmas Star to the aluminum foil. Here we can use any adhesive, since it will not come into contact with the cork.
Step 13: We are already finishing. Now we are going to apply the paint and the gold glitter.
We will apply the paint and, immediately so that it adheres, we will sprinkle the glitter.
The leftover glitter, we will collect it and reuse it. So we’ll put a lot.
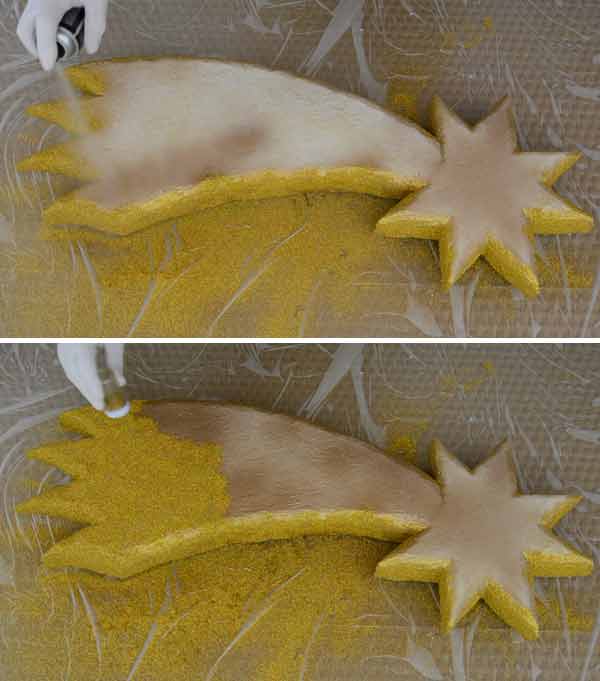
In case of using spray paint, for safety and health reasons, we must apply it in a well-ventilated area and, if possible, outdoors.
But even if we applied it with a brush, I advise you to do it outside since, otherwise, you will be collecting glitter until you move house.
In order for the paint to reach the most difficult areas of the Christmas Star, it is possible that some drips. So we must have a brush at hand to remove excess paint.
Once the entire Christmas Star has been painted and sprinkled, we will let it dry for 24 hours.
Step 14: Once the paint is dry, gently shake the Christmas Star to remove any excess glitter that has not adhered to the paint.
And now we just have to hang it.
We will take advantage of the plaster molding so that the thumbtacks are invisible.
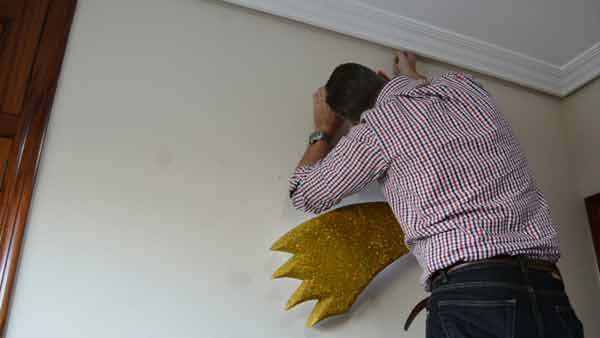
We already have our spectacular Christmas Star!!

Did you like it? Then share it with your friends.


