

How about making roses by recycling paper from old and damaged books?
Books, regardless of their genre and subject matter, are an inexhaustible source of wisdom and knowledge. This is indubitable.
For this reason, it is one of the few material goods that we must take care of at all costs and make them resist the passage of time.
However, unfortunately, sooner or later, many of them, those of more daily use, end up breaking down, even becoming unusable.
At this point, we can give them a second chance. For this, it is necessary to combine creativity and some dexterity with the hands.
We are going to make beautiful roses by recycling paper from already unusable books. Transforming its inner pages into original petals full of stories, stories and… charm.

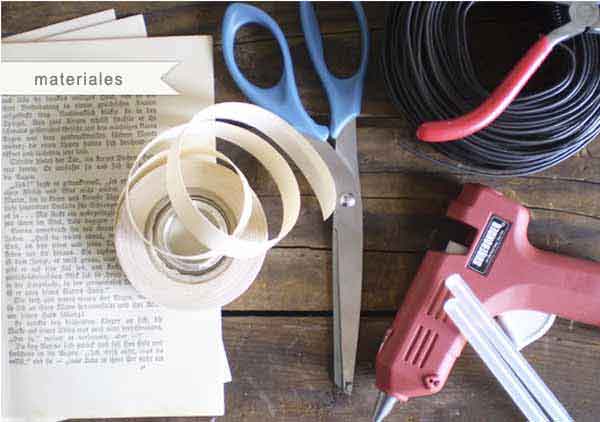
Necessary materials:
- A damaged and unusable book.
- Wire.
- Hot melt adhesive gun.
- Tiejars.
- Pliers.
- fabric tape
Steps to follow:
The first thing is to gather all the necessary materials. Choose a book whose pages are more or less rigid so that, in this way, the roses are full-bodied and with a certain resistance; but at the same time that they are flexible enough to comfortably shape the petals.
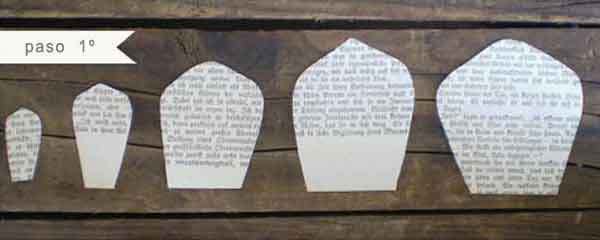
Step 1: Now we will have to cut the petals. It can be done in two different ways:
You can make some templates with cardboard; or you can draw them freehand. With this last method it will be much more natural, since there will be no petal equal to another. You choose.
We will have to make a minimum of five different sizes, and we will have to cut at least four petals of each size.
The measurements of the petals should be between 2 and 7.5 cm.
You can make some finishes in rounded shapes, and others a bit more pointed.
Don’t just make the petals, make a few more. It is very likely that you need them.
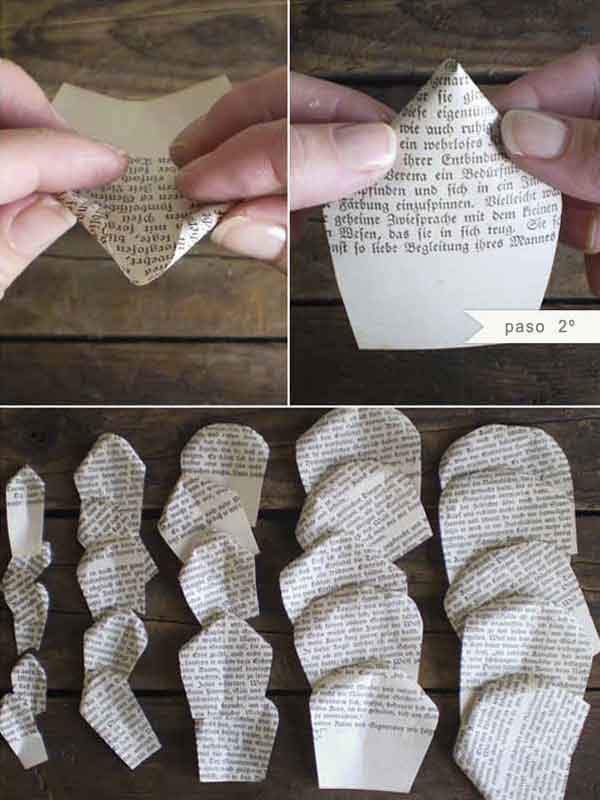
Step 2: Once all the petals have been cut, roll the ends a little so that, once the flower is assembled, it looks much more natural.
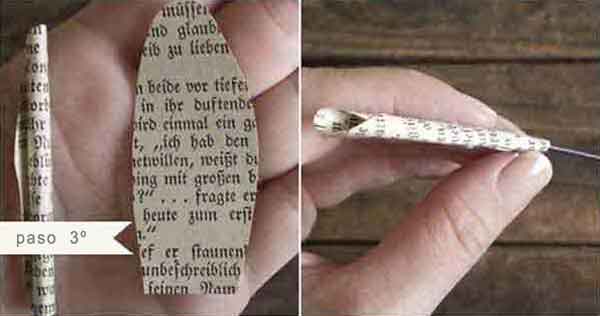
Step 3: Now it’s time to start mounting the rose using the adhesive. We have chosen hot melt adhesive, since it has a lot of adhesion as well as a super fast setting. In a matter of a few seconds, the time it takes to cool down, it acquires its maximum resistance. It is ideal for this type of work.
Cut a piece of wire and wrap one of the petals around it in a spiral. Press to keep the shape.
Remove it, apply glue to the inside of the petal, and roll it back over the wire. On the last lap, so that it doesn’t open, put a drop of glue. Hold it in position for a couple of seconds.
Step 4: We already have the base of the flower, now we just have to place the different petals.
Start by placing the smaller ones, from the tip of the wire down.
Put a dab of adhesive on the lower end of the petal and stick it around the wire.
Partially overlap another petal and glue from it. Continue twisting the wire and overlapping petals of the same size until it completely surrounds the stem.
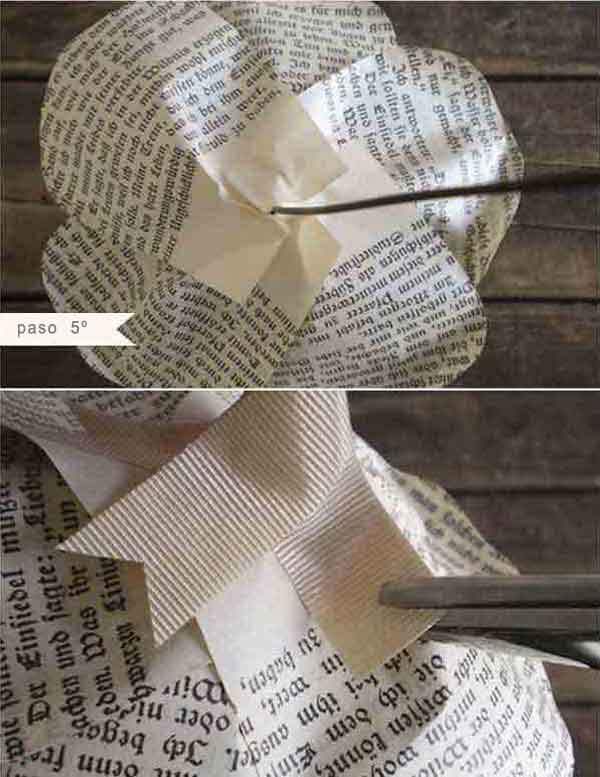
Now fold outwards and pinch the top ends of the petals a bit.
Proceed in the same way with the next level of petals, which will be slightly larger in size.
Continue in the same way until you have placed the five levels of petals (the five sizes of petals that we have cut in step 1) completing, in this way, the flower.
In this step you have to have a little skill and grace to give realism to the rose.

Step 5: To finish the lower part of the flower, we will use a fabric tape that is not very wide.
Cut two pieces of about 10 cm, and stick them in a spiral on the wire upwards, until you reach the bottom of the flower. In this way, we will cover the unions of the lower petals.
The tip of both tapes, cut them in V.
You have already finished the first rose. Now you just have to repeat the previous steps, until the bouquet is formed.
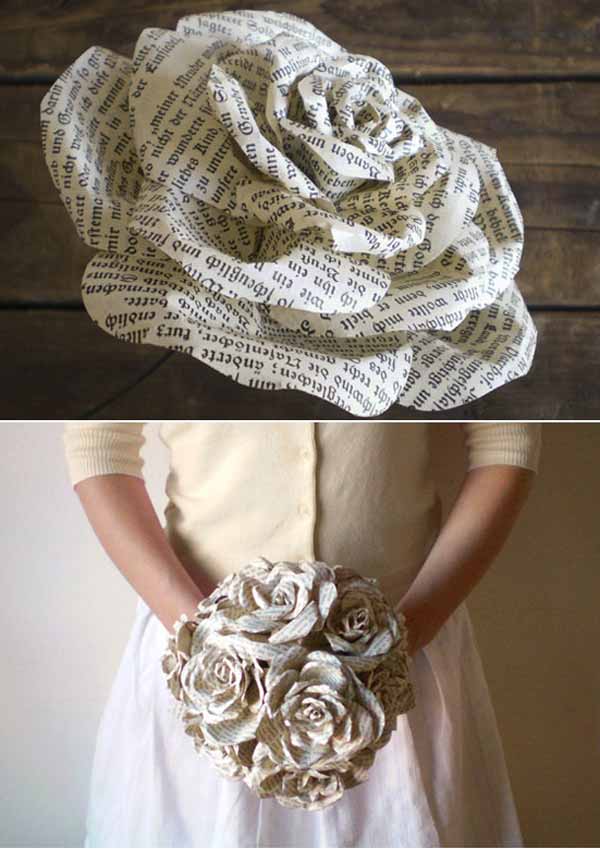
Source: David and Kendrick of Our Labor of Love, Valerie Lloyd Y 100 layer cake
The bouquet has turned out great, isn’t it?
If you liked it, share this article with your family and friends.


