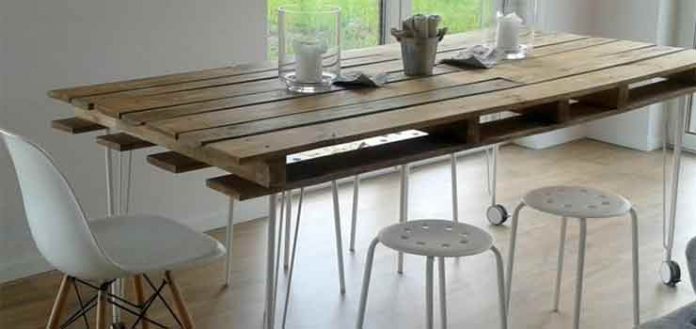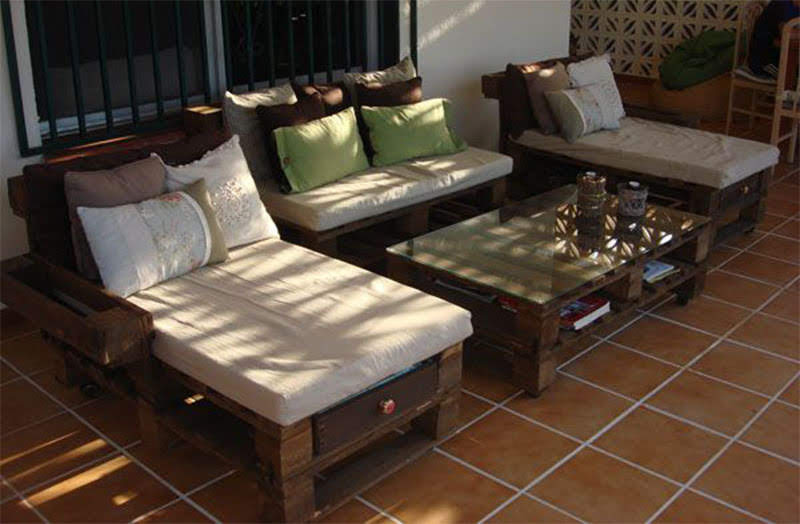
Chill out, consisting of a table, a two-seater sofa and two chess-style armchairs, made entirely from recycled wooden pallets.
Who would not like to have their own chill out area to relax whenever they feel like it? This is a rhetorical question since, I am quite sure that not a single person would answer in the negative.
There is a lot of super cool furniture, the latest trend, of different styles, and they are not expensive at all. Without going any further, an example of this is this website with cheap furniture. Here you can also find cheap furniture, furniture ideas, advice and more.
But if what you like is DIY and making your own furniture, then I am going to show you the main steps so that you can make your own chill out with recycled pallets. To do this, you just have to have a certain skill, since it is not too complicated.
I present my chill out area, made by recycling wooden pallets whose useful life had already ended. This is where I relax after a hard day’s work.
As you can see, cheap furniture and DIY decoration are not at odds with good taste.
Trick
A trick to make the most of the discount coupons that are available in many online stores, for furniture or any other item, is simply to install a chrome extension called Honey, which translated means “honey”. You may download it from here.
Once installed, every time you enter an online store that has discount coupons available, the icon of this extension will light up. And when you go to pay, these coupons will be applied automatically.
Cool!! TRUE?
Gallery of furniture ideas with recycled pallets
Next we will see how to make a chill out area with wooden pallets. But, in case you are not convinced or you are looking for another type of project, here is a video of furniture brainstorming made with wooden pallets.
How to make a chill out with pallets
I will tell you, in general terms, how to do it.
1st step – Planning
The first thing to do is to know exactly what we want. Once we have it clear, we must make a small sketch that will help us, in addition to carrying out the construction, to know the amount of material that we will need.
2nd step – The preparation of the material
As they are used pallets, we must select those that are in the best condition.
The pallets that have a broken board, we will have to repair them by replacing it with another.
Once this is done, the first thing will be to give a good sanding, to get the new wood out again, in addition, to leave it soft to the touch.
3rd step – The design
Before moving on to the construction, we must design in detail the project that we are going to undertake. To do this, we will make an exploded plan with all the measurements.
Only in this way, we will avoid errors and inconveniences in its construction.
4th step – the construction of the chill out
With the plan in hand, from time to time we start with the actual construction.
Regarding power tools, you will only need a jigsaw and a drill.
We will have to transfer the measurements of the plan to the wooden pallets, cutting the different pieces, numbering them so that later the assembly is easier, faster and more accurate.
Once all the pieces have been cut, we join them according to our plan, using lag screws.
Once all the modules are assembled, it is very useful to be able to move our chill out site, install some wheels, especially to the table and the two cheslong.
Wheels must be chosen taking into account the weight they must support, so it will not be necessary for those of the table to be as resistant as those of the rest of the elements.
The wheels will simply be screwed on.

5th step – The finish
Now we will have to apply one or two coats of varnish or lasur for exteriors. In this way, even if they are not directly exposed to the elements, they will remain in perfect condition for a long time.
If you want to see the properties and advantages of lasur for exteriors, as well as how it is applied, you can visit this other article on how to protect an outdoor deck with lasur.
6th step – The accessories
Finally, we will make mattresses and cushions to measure, upholstered with the fabric that we like the most and that best fits with the decoration of the environment.
We put a crystal on the table. It should have beveled edges to prevent accidental cuts.
And to enjoy the relaxation that our chill out area brings us !!
Can you think of any other cool, functional furniture item that we can make for little money?
Tell us!!
You may be interested in seeing these other related articles:

Transformation of an old shutter |

Design lamp with plastic bottles |

Creative ideas to recycle pallets |

Creative ideas to recycle CDs and DVDs |
.


