

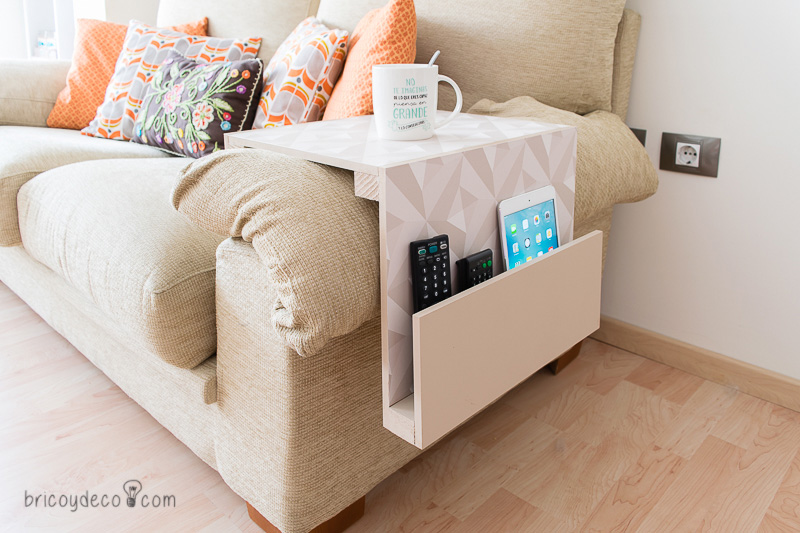
Are you looking for a table for your living room but can’t find the one that fits in size, decoration or price? Do you never know where you leave the controls of the TV, phone or tablet? With this DIY side table for the sofa You are going to kill several birds with one stone. Do not miss this step by step to make it yourself and in just one morning!
When I’m in the living room I’m always looking for the remote control for the TV or the mobile phone since I usually leave it on the sofa and it slips between the cushions. For this reason and tired of calling myself to find the phone, I have made a DIY side table that can be adjusted to the arm of the sofa or armchair, as well as placed next to it.
Making your own table is more simple and cheap what it seems like. You are only going to invest one morning or one afternoon and you will not need a single nail.
Materials to make a DIY side table
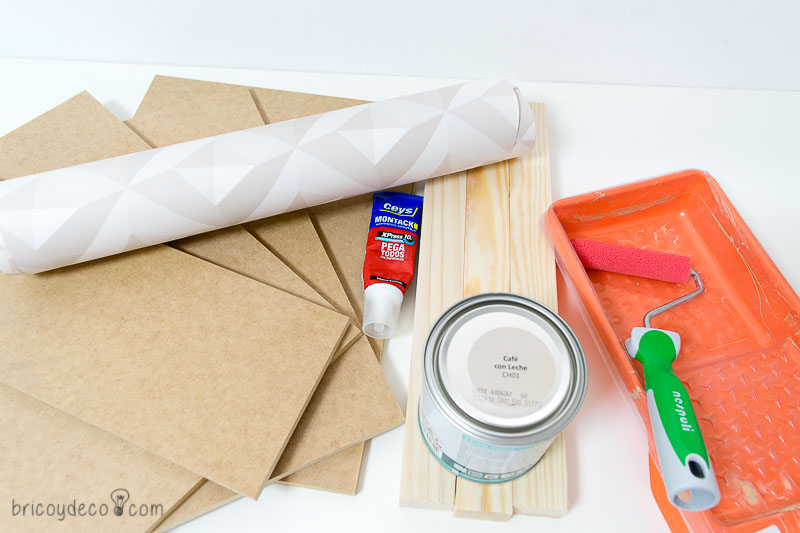
The materials you can easily find them in any DIY store. Below I will list the ones I have used, although you have to keep in mind that you must adjust the measurements to those of the arm of your sofa.
- 3 MDF boards 30×40 cm and 1 cm thick
- 1 MDF board 15×40 cm and 1 cm thick
- 3 wooden strips 40 cm long x 3 cm wide and 3 cm high
- Paint, I have used coffee-with-milk chalk paint
- Wallpaper, in my case I have taken advantage of a catalog sample that a friend gave me
- Mounting adhesive and glue
- roller and tray
- spray varnish
DIY side table, step by step
There are two ways to make this side table, the first is to assemble it once its parts have been painted and decorated, and the second is to do it when it is already assembled. I have chosen the first because I usually get a better finish when I have disassembled the pieces of a piece of furniture before painting it, than if I paint it while it is assembled.
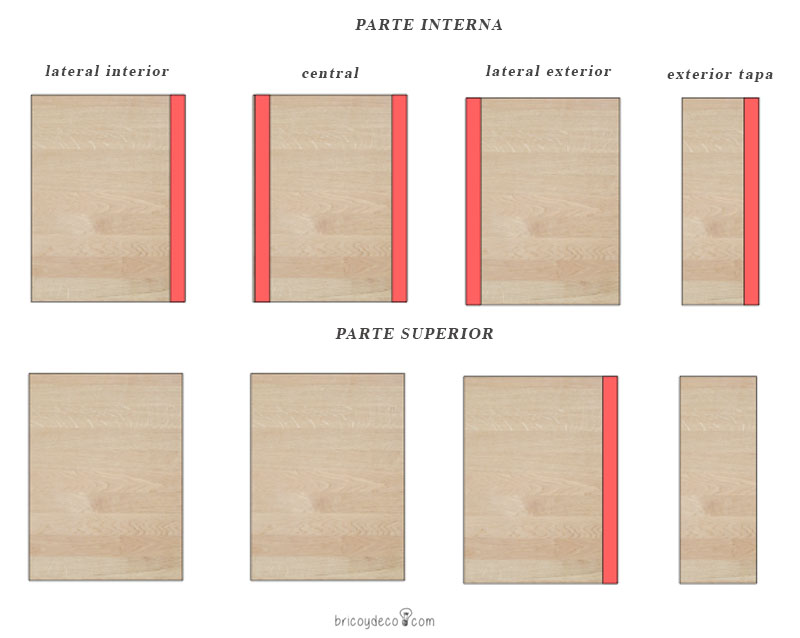
On the other hand, and given that we are going to join the pieces with assembly adhesive, we must bear in mind that this adhesion will be much stronger and more durable if it is done directly between the pieces of wood. Therefore, the first step will be mark the areas that are not going to be painted or wallpapered.
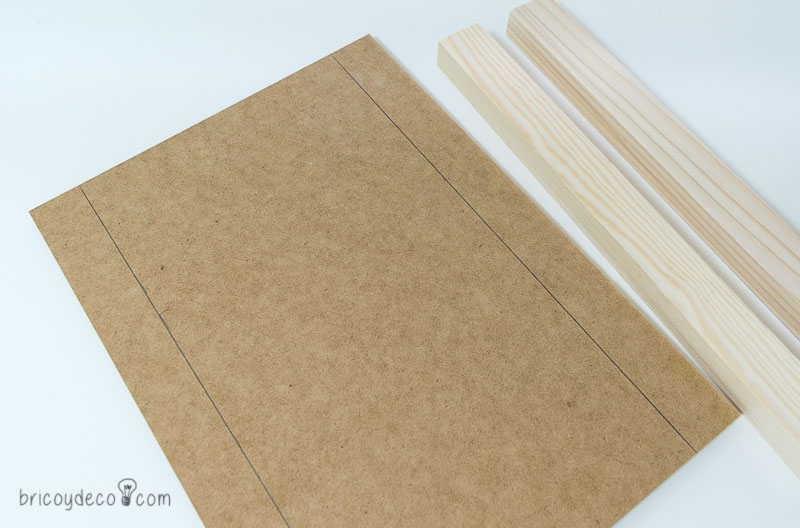
To do this, draw with a pencil the space that the slats will occupy.
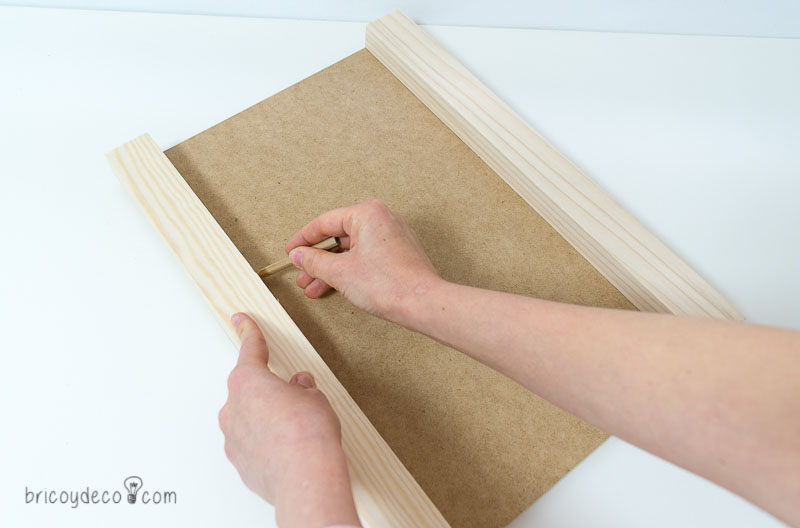
So that you can better see the part that should not be decorated, I have made a diagram in which they appear colored red.
Once all the zones have been marked, we will start painting. For this I have used a Teflon roller from the Nespoli company that I was given at the last Pyma Group workshop I attended.
This type of roller is special for painting iron and metal, providing a very fine finish. They also save paint as they absorb less quantity and distribute it better. I wanted to try it with chalk paint and on MDF (I really wanted to try it for the first time), and the truth is that it has surprised me since I have obtained a smooth and uniform finish.
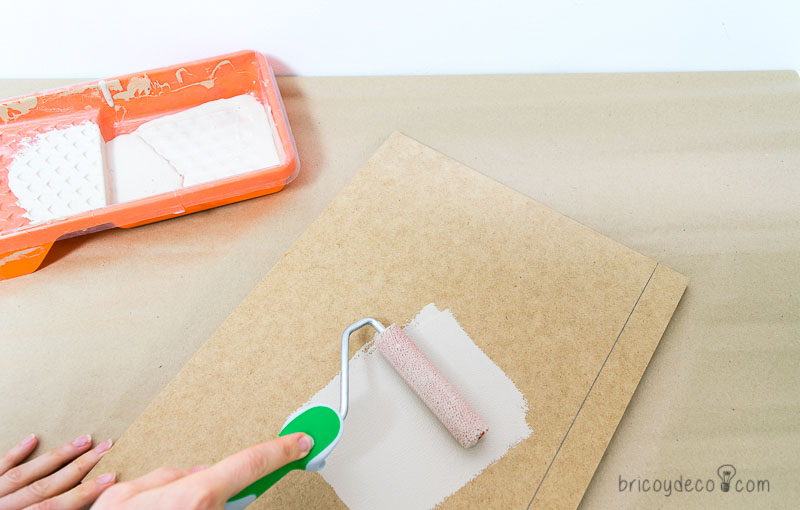
Depending on the decoration you choose, you will paint some pieces or others of the table, but here are the ones that I have painted:
- The inner side table on both sides
- The central board on the underside
- The outer board on the underside
- The cover table on both sides
- The wooden slats on the visible faces (those that were not going to adhere to any board)
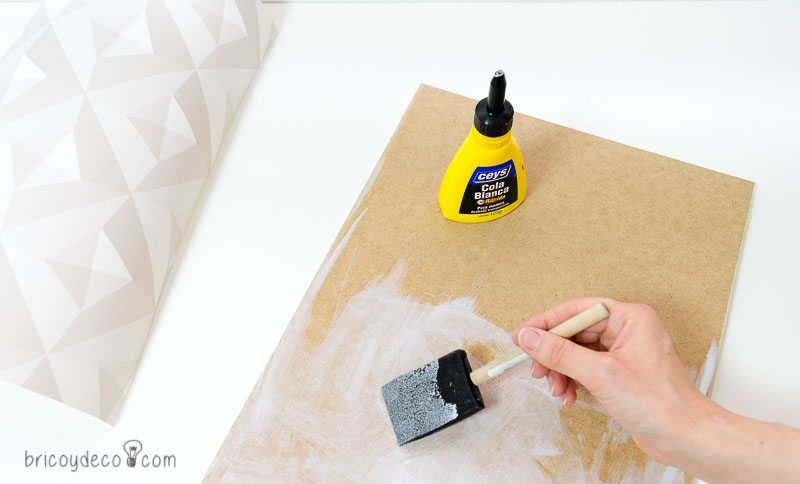
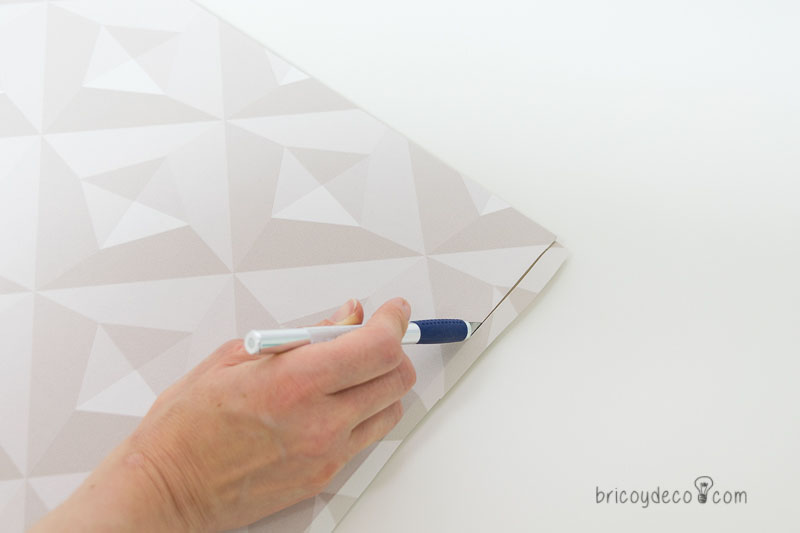
The next step consists of cover with wallpaper the upper central table and the outer side of the table. To do this, you can use glue or, failing that, carpenter’s glue, which I usually always have on hand.
With the help of a spatula, the wallpaper will be fixed, making movements from the center to the outside to eliminate possible air bubbles.
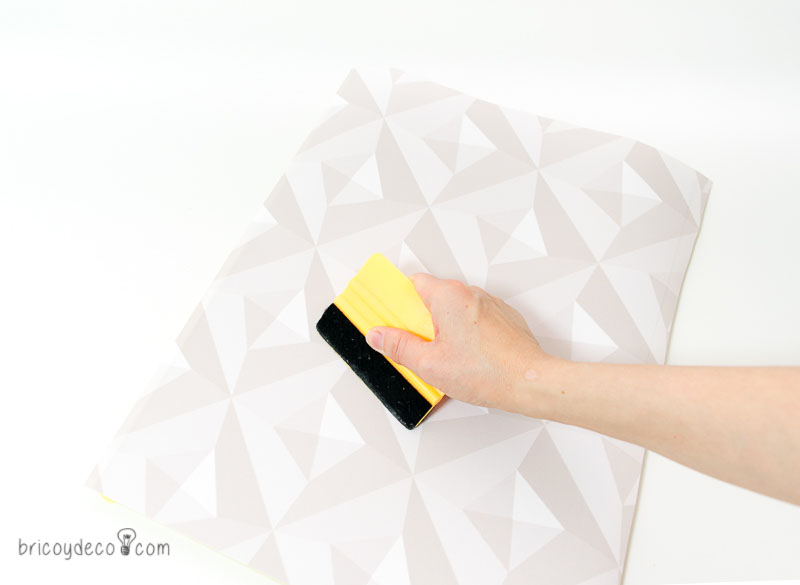
Finally, with the help of a cutter, the excess part will be cut flush with the board.
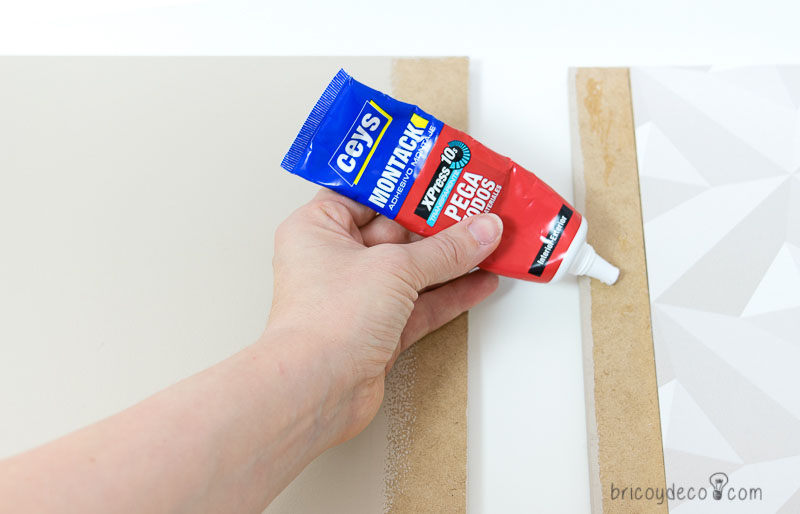
Once the boards have been painted and lined according to the chosen decoration, the table can be assembled. For this I have used Montack Xpress from Ceys which is a mounting adhesive very quickly that I had used to make a DIY painting (you can see it in this link). It is also transparent, which is an important fact considering that the pieces that make up the table are painted and decorated, so we are not interested in staining them.
In a few minutes we will have achieved a fairly firm adhesion, although we must bear in mind that maximum fixation is reached after 24 hours.
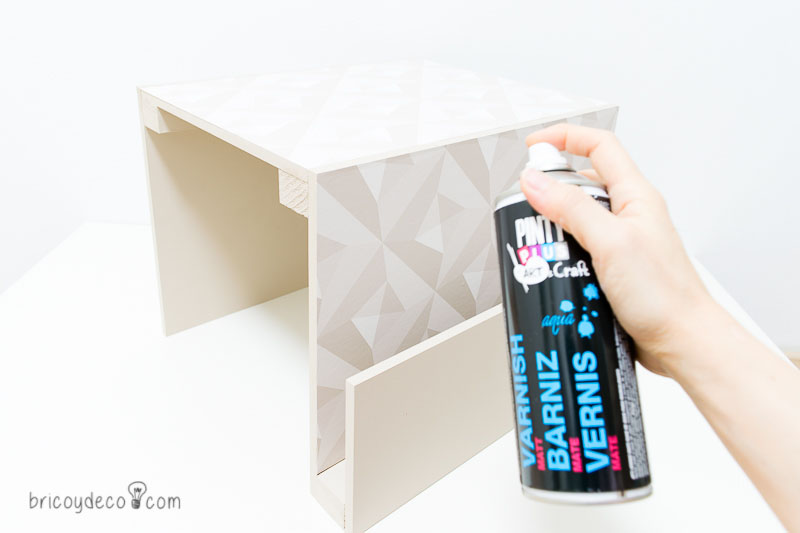
If the wallpaper we have used is washable or the paint is a water-based enamel, it will not be necessary to varnish. But since it was not my case, to finish I had to protect the result with varnish. I have used a matte spray varnish, which allows a smooth finish and in just a few minutes.
After all these steps, all that remains is to fit the table on the arm of the sofa and place everything you want to have close at hand on it.
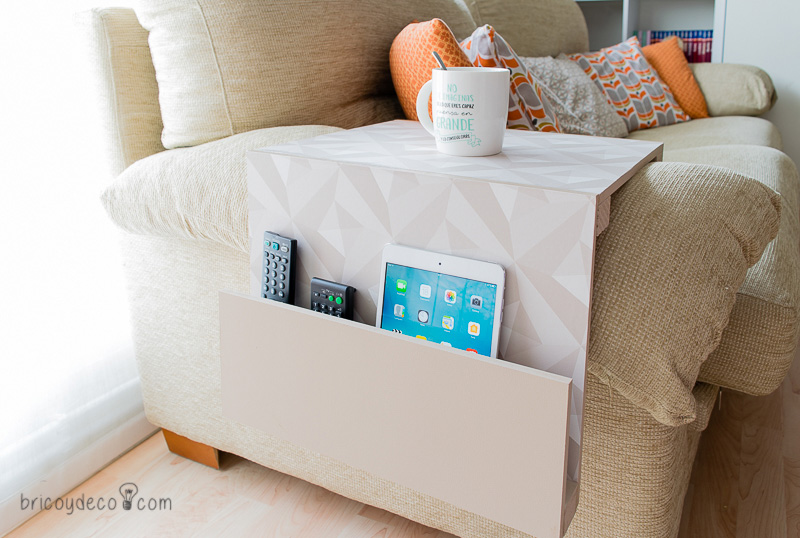
You can also change it from side to side since just turning it will serve you for the opposite arm.
And if instead of placing it on the sofa you want to leave it on the floor, it will also be perfect! You can even use it as a magazine rack.
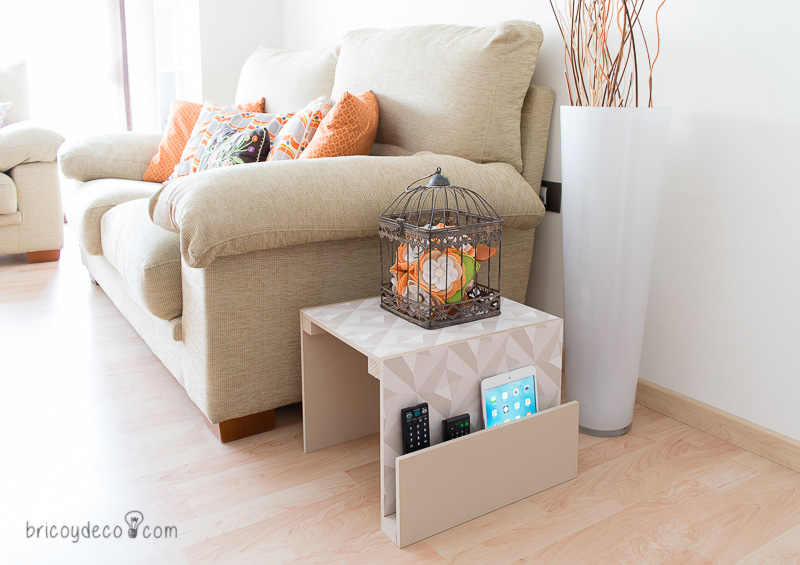
What do you think of this DIY side table for your favorite sofa or armchair? With it you will be able to have everything at hand in a practical and decorative way. You can also fully customize it to your liking, combining it with the colors of your living room or bedroom.
If you liked this post, you can see many more inspiring ideas and DIY projects at .


